How To Calibrate Nintendo Switch Controllers | NEW in 2026
Like its major rivals (PlayStation and Xbox), the Nintendo Switch controller has proven to be a great bundle of sensors that has stood the test of time. Although smaller in comparison to PlayStation or Xbox controllers, the Joy-Con controllers is a complete package of input mechanisms and sensors such as a gyroscope, accelerometer, control sticks, buttons, and infrared detector. At times though, such a complex ecosystem may encounter errors so may have to manually calibrate your Nintendo Switch controllers to get it back to its good working order.
In this article, we’ll explain to you why a calibration may be required and how to do it.
Why calibrate your Nintendo Switch controllers?
The Nintendo Switch Joy-Con controllers don’t typically require recalibration as they already have all the right settings after leaving the factory. However, over time, wear and tear as well as unexpected software changes may result to some control sticks becoming less responsive. In some cases, motion controls may be affected as well as part of a general hardware deterioration.
Keep in mind that a manual recalibration won’t fix any hardware issues. If the control sticks have become less responsive due to severe wear and tear, any software tweaks that may happen after a calibration may not be effective.
If you want to calibrate your controllers, you are simply changing the current settings and that may or may not help improve the current state of the controller itself.
For those whose controllers have lost tiny sensitivity, like when inputs are not registered all the time, you may calibrate control sticks or motion controls as a solution.
Known Nintendo Switch Joy-Con controller issues
The Nintendo Switch Joy-Con controllers have two known major issues. One is the general loss of responsiveness even after short use and the other is controller drift problem.
Like other controllers for gaming consoles, the Nintendo control stick may become unresponsive due to hardware depreciation. Repeated presses may cause the control stick to be damaged over time. Some unlucky few have ever reported to have suffered unresponsiveness on their control stick just months after buying their Switch.
The other major issue and the one that has grabbed headlines around the world is the Nintendo Switch controller drift problem. Basically, what’s happening for some users is that their controller’s control stick will move at random when there’s no user input at all. Based on many stories all over the web, the most affected controller is the left Joy-Con although there are also claims of both controllers suffering from the same drift issue.
How to calibrate Nintendo Switch controllers?
There are three main sections in a Joy-Con controller calibration process: calibration of Control Sticks, calibration Motion Controls, and calibration of Test Input Devices.
How to calibrate the Control Sticks
If you’re having an issue with the control stick, follow these steps to calibrate the affected controller:
- Go to your Nintendo Switch Home menu.
- Select System Settings.
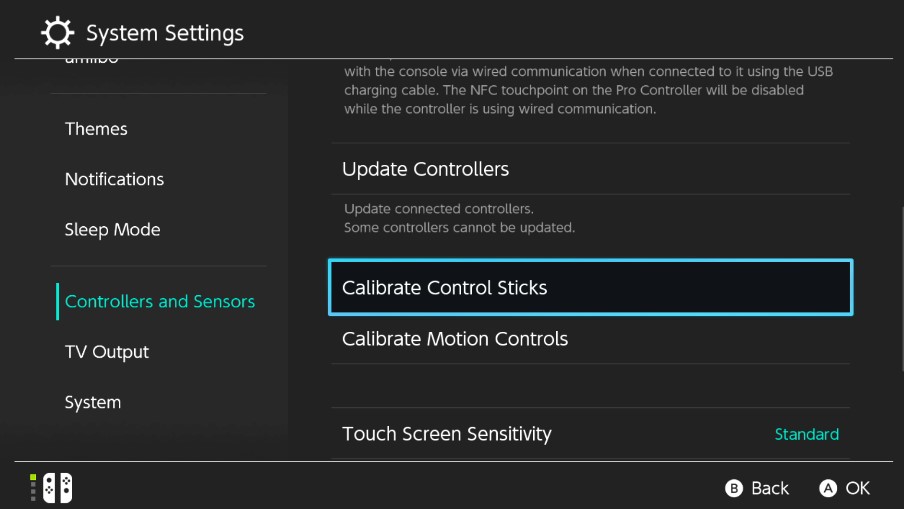
- On the left panel, scroll down to Controllers and Sensors and select it.
- On the right panel, go to Calibrate Control Sticks and select it.
- Click the control stick you wish to calibrate.
- The Calibrate Control Sticks screen will show a circle with cross hair on it. If your controller movement does not work correctly and you want to fix it, press the X button to recalibrate it. Bear in mind that calibrating your controller, even if it does not have any problem at all, may cause problems. However, if you’re positive that the control stick is misbehaving then go ahead with the calibration by selecting Calibrate.
- Follow the instructions on the screen to calibrate.
How to calibrate Motion Controls
- Go to your Nintendo Switch Home menu.
- Select System Settings.
- On the left panel, scroll down to Controllers and Sensors and select it.
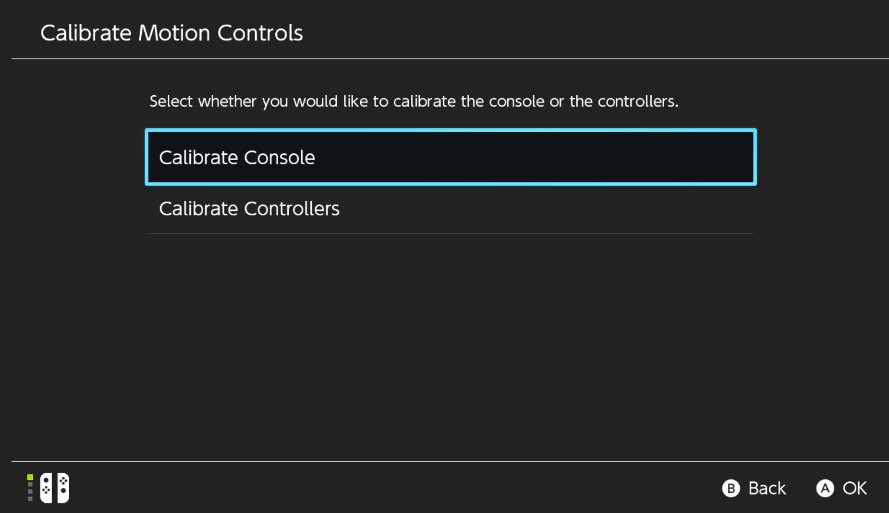
- On the right panel, go to Calibrate Motion Controls and select it.
- In the Calibrate Motion Controls screen, you should have two options: Calibrate Console and Calibrate Controllers.
- If you want to calibrate the console first, select Calibrate Console option. Make sure that the console is not put in the dock and is placed on a flat surface.
- If you want to calibrate the controllers, press and hold the – Button or + Button of the controller that you want to calibrate. In order to do this process, the controller must be detached from the console.
How to do the Test Input Devices
If you wish to check if each button is working, or if the touch screen has an issue, you can follow the steps below.
- Go to your Nintendo Switch Home menu.
- Select System Settings.
- On the left panel, scroll down to Controllers and Sensors and select it.
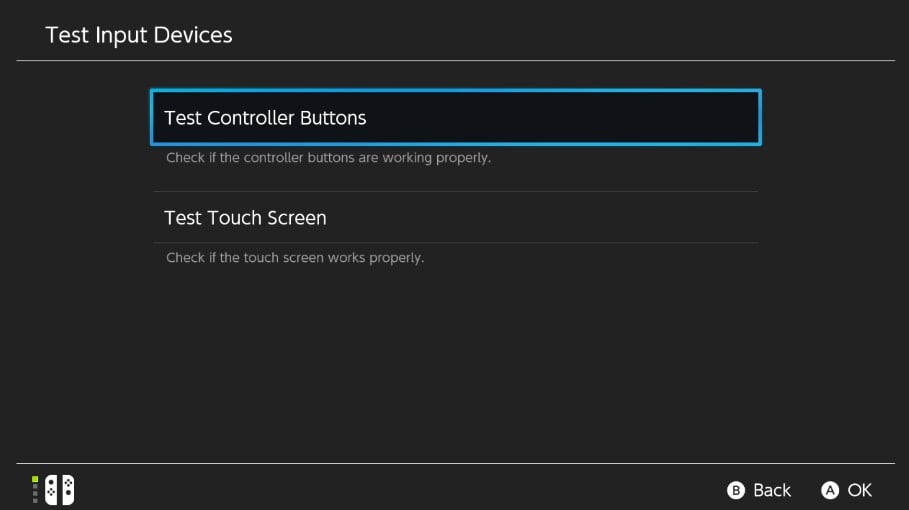
- On the right panel, go to Test Input Devices and select it.
- Select Test Controller Buttons.
- The following screen will tell you if the button you press is working as the symbol of that button should be displayed.
- Press the button you want to check.
- To go back to the previous screen, tap the End button on the screen.
If you want to check the touch screen on your console, follow the steps below:
- Go to your Nintendo Switch Home menu.
- Select System Settings.
- On the left panel, scroll down to Controllers and Sensors and select it.
- On the right panel, go to Test Input Devices and select it.
- Select Test Touch Screen.
- Tap anywhere on the screen to see if your input is registered correctly. If you tap the screen but there’s no dot or line in that area, you may have a broken touch screen.
Other interesting articles:
- How To Redeem PS4 Code (For DLCs, PS Membership, Etc.) | NEW 2021
- How To Fix Nintendo Switch Bluetooth Not Working in 2026
- How To Use Nintendo Switch Zoom Feature | NEW 2021!
- How To Install And Play Fortnite On Nintendo Switch in 2026
Visit our TheDroidGuy Youtube Channel for more troubleshooting videos and tutorials.