How To Fix COD Warzone 2.0 Page File Error | Out Of Memory Error [Updated 2023]
Are you getting the “Page File” error when playing Call Of Duty Warzone 2.0? This issue can have software or hardware causes so you need to do a series of troubleshooting steps to fix.
This guide will show you what to do exactly to fix this problem.
How to fix Call of Duty Warzone 2.0 Page File error?
If you’re having trouble launching the new Call Of Duty Warzone 2.0 because you’re getting the paging file error here are the fixes that you can try:
Solution #1: Restart your PC.
The paging file size of your computer may balloon unexpectedly sometimes, especially if your machine has been running for some time, or if there’s a glitch in the system.
To check if the paging file error you’re getting is due to a minor bug, make sure to do a restart of your computer first. If that won’t work, proceed to the next solution.
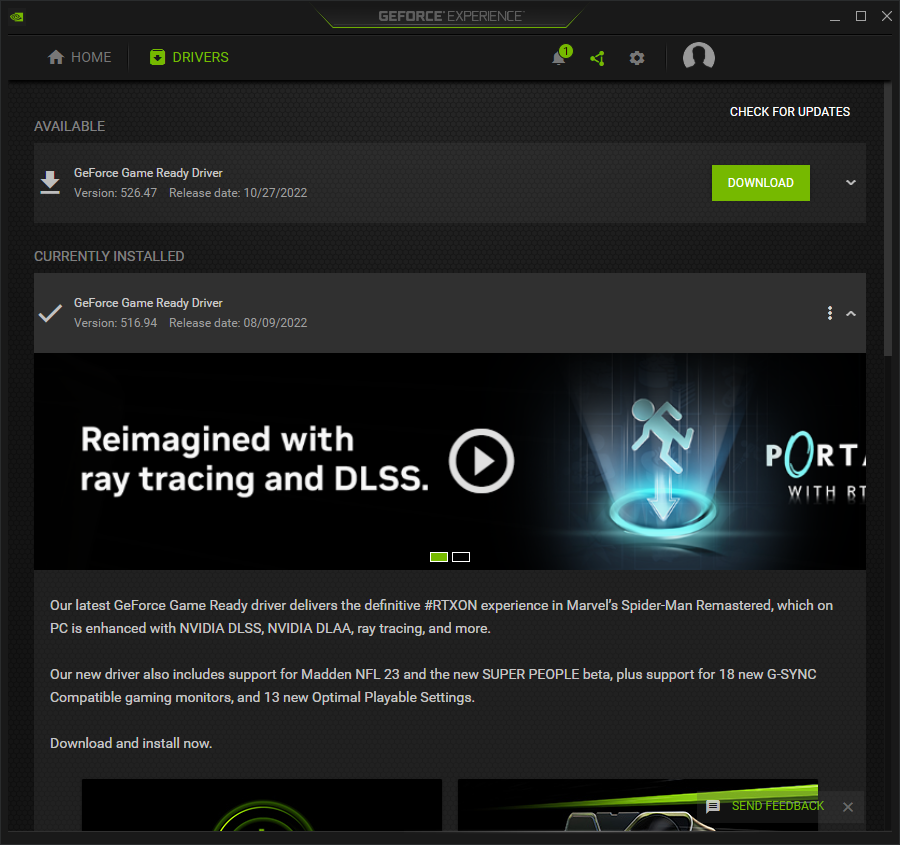
Solution #2: Check for the latest version of your graphics card drivers.
Along with some graphical problems, issues like Paging File error may surface if your computer’s graphics drivers are outdated or corrupted.
Many issues with new games can be traced back to outdated GPU drivers.
Before you can start playing, you need to update your drivers and restart your computer.
To see if there are newer drivers available, utilize the bundled software for your GPU, such as NVIDIA GeForce Experience or AMD Radeon Software/Adrenaline.
Alternatively, you can access the Device Manager to check for and install any necessary graphics driver updates. This is what you have to do:
- Press the Windows key + X buttons on your keyboard.
- Open the Device Manager from there.
- Expand the Display adapters category.
- Right-click on the graphics card that you’re using and select Update Driver.
- Select Search automatically for drivers.
- Once you’ve updated the graphics drivers to their latest version, check to see if it helps to fix Call of Duty Warzone 2.0 crashing issue.
Solution #3: Check the virtual memory.
It’s possible that the system may be running out of page file due to a glitch. WIndows uses the page file system in order to create a backup memory in the event that RAM or Random Access Memory is depleted. If Windows is not working properly, or if the page file has been decreased to a smaller size in the past, the Call Of Duty Warzone 2.0 Page File error may occur.
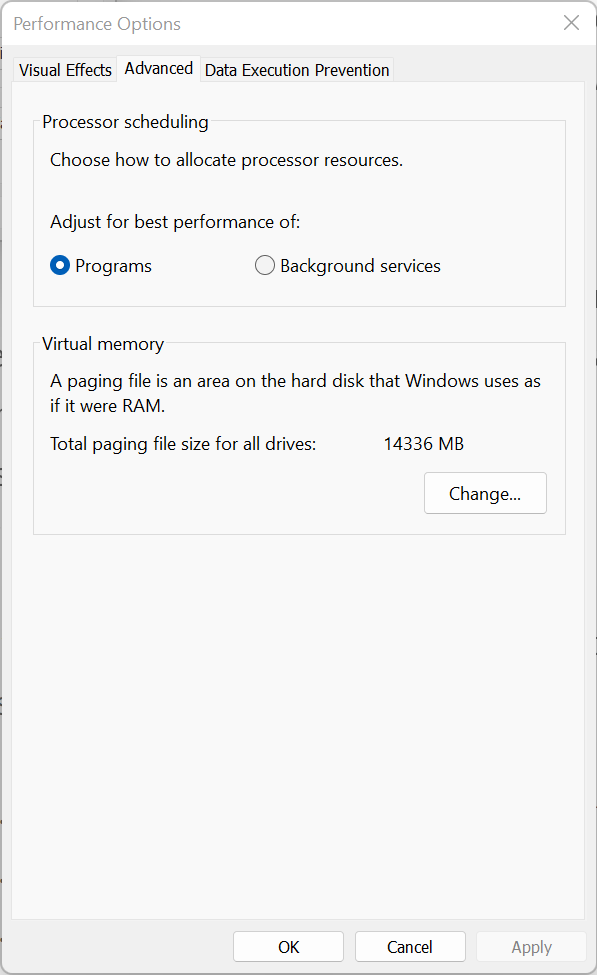
To fix the paging file error, make sure that you set the system to automatically manage this memory. Here’s how it’s done:
- On your keyboard, press the Start button and type control panel.
- Click on Control Panel.
- Click System and Security.
- Click on System option.
- Click the Advanced system settings option.
- Switch to the Advanced tab in the System properties window.
- Click the Settings button under the performance tab.
- Go to the Virtual Memory window and select the Advanced tab..
- Go to the Virtual Memory section and click the Change button.
- Make sure that the Automatically manage paging file size for all drives box is checked.
- Click on OK.
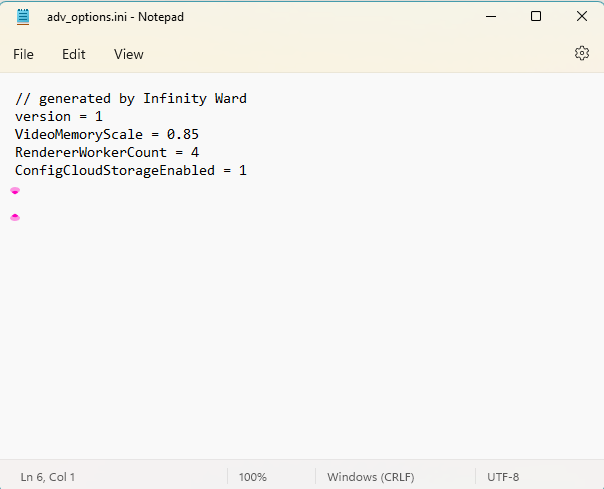
Solution #4: Update the default memory scale value.
You can also modify the default memory scale value of the game itself in order to fix this error.
One way to fix the paging file error in Call of Duty Warzone 2.0 is to give the game access to more video Memory. This is because increasing the amount of VRAM helps get rid of many graphic problems that could cause it.
Keep in mind though that increasing the amount of video memory to the game is not unlimited. The value that you can increase depends on the VRAM of your graphics card. For example, if you have an RTX 2060 card with a 6GB VRAM, you can’t increase the memory scale value higher than what your GPU can take.
To make sure you get it right, slowly raise the value and test your game to see if it runs well.
Heres’ what you need to do:
- Open File Explorer and open the Documents folder.
- Select Call Of Duty Warzone or Call Of Duty Modern Warfare.
- Click on the Players option.
- Open the adv_options.ini file with Notepad.
- Increase the value of VideoMemoryScale.
The default VideoMemoryScale is 0.85 so try to increase that value slowly until you noticed that the paging file issue has been fixed.
Solution #5: Reseat the RAM.
Sometimes, the RAM cards may become loose in the motherboard, which can lead to all sorts of memory errors including the page file issue.
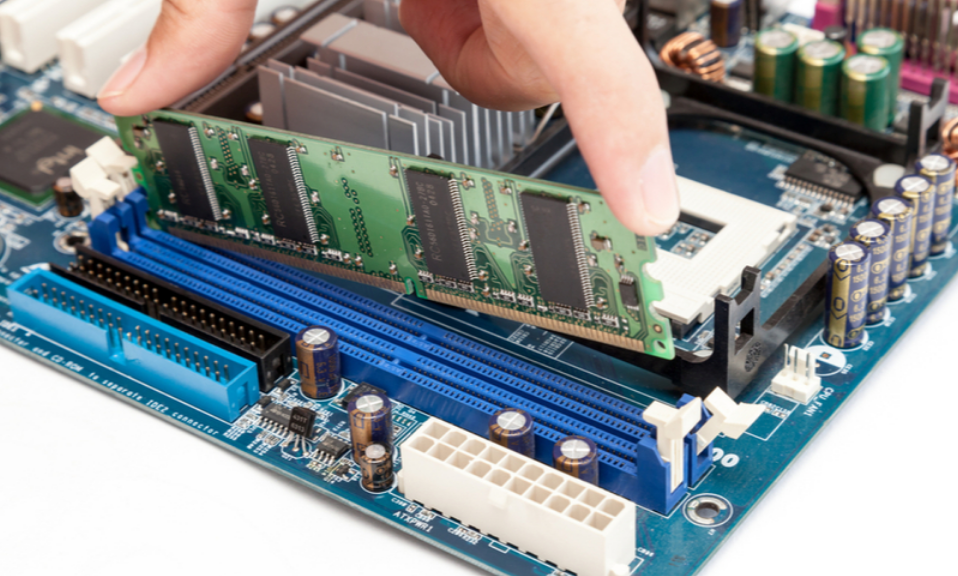
First, make sure that you turn off your computer and unplug it from the power outlet. Then, make sure that you check your RAM by opening your CPU and removing the RAM chips one by one. Finally, reconnect the RAM and see if that fixes the issue.
If you don’t think you can open your computer and do this solution, consider getting help from a professional.
Solution #5: Close unnecessary apps.
Interference from other apps might cause your computer’s memory to run out faster than normal. If you’re running any other applications while Call Of Duty is playing, try to close them and see if that will fix the issue.
If needed, try to use the Task Manager to close your apps.
Solution #6: Repair game files.
Some games may encounter the page file issue because of broken game files. You can fix the crashes by using the “Verify integrity of game files” option on Steam or a similar option on other launchers.
How you repair game files on your computer depends on the launcher you use. Here are the steps you need to take:
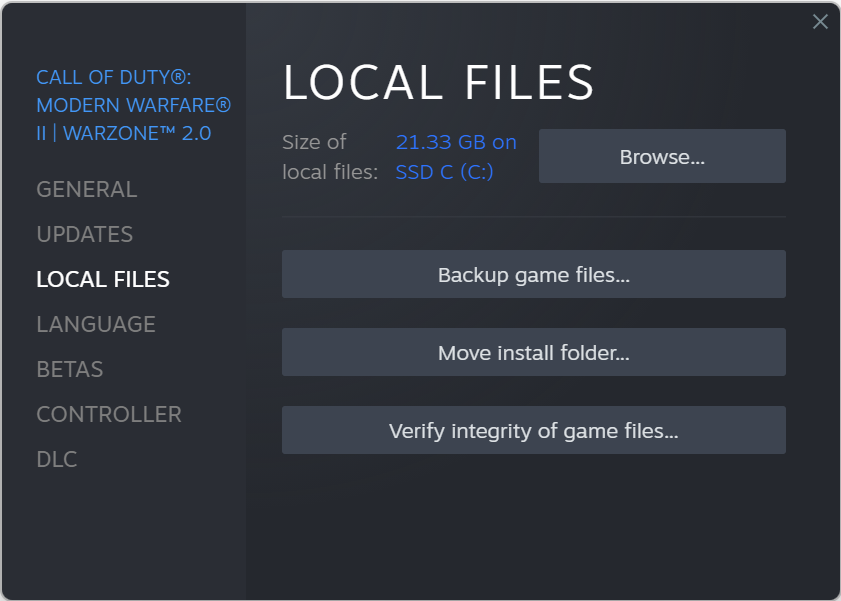
If you’re playing COD Warzone 2.0 via Steam, here’s what you must do:
- Open Steam.
- Go to your Steam library and right click on Call of Duty Warzone 2.0.
- Select Properties.
- Go to Local Files tab.
- Click on Verify Integrity of Game Files.
- After you verify integrity of game files, restart Steam and launch Call of Duty Warzone 2.0 again.
For those playing via the Battle.net launcher, here’s how to repair the game’s files:
- Open the Battle.net app.
- Find the Call of Duty Warzone 2.0 icon and open the game.
- Select Options.
- Select Scan and Repair.
- Click Start Scan.
If you bought the Warzone 2.0 game from the Xbox app in Windows or Microsoft Store, here’s what you need to do:
- Open the Xbox app.
- In the left panel, check the Installed games and click on the three dots beside Call of Duty Warzone 2.0.
- Click on Manage.
- Go to the FILES tab.
- At the bottom, click on the VERIFY AND REPAIR button.
Solution #7: Check for updates.
Running an outdated Windows version may lead to gaming errors and problems. Make sure that you check if there’s any pending updates you are yet to install at this time. Keeping your Windows software up to date not only fixes issues but also bring new changes, security patches, improvements, and under-the-hood fixes to known bugs.
To check for new Windows updates, follow these steps:
- Tap the Start button located at the bottom-left corner of the screen.
- Select the Settings cog.
- Select Update & Security.
- Choose Windows Update from the options.
- Select Check for updates. The system will automatically install the updates if there are any.
- Restart the PC to finish the updates.