Easy Steps To Decrease Valorant CPU Usage [Complete Guide]
Many Valorant players have noticed that the game seems to be using high memory or CPU usage when it’s running on their Windows PC. If you’re experiencing the same problem and have no clue what to do, this guide should help.
Causes of Valorant high CPU usage
There are a number of possible reasons for Valorant high CPU usage issue. These are some of the known reasons for the problem:
- minor, temporary bug
- outdated graphics card drivers
- Windows Defender scheduled scan running
- interference from third party app
How to decrease Valorant CPU Usage?
These are the solutions that you can do to fix high CPU usage issue when playing Valorant.
Fix #1: Try playing Valorant in fullscreen.
Although I can personally confirm that Valorant works normally when playing in both full screen and windowed mode, some users were able to fix the high CPU usage issue when playing the game in full screen mode only.

If you haven’t tried this trick yet, here’s what you need to do:
- Run Valorant.
- On your keyboard, press ALT + Enter keys at the same time.
- Check the CPU consumption in Task Manager.
Fix #2: Restart the game.
If playing Valorant in full screen mode won’t help, the next thing that you want to do is to close and restart Valorant. When doing this, make sure that you also restart the Riot Client before launching them.
In order to close both the Valorant software and the Riot Client, you can go to Task Manager, find the processes for each one, and hit the End Task button.
Fix #3: Install updates.
Even when Valorant game is running fine, updating it is an important thing to do. Temporary or minor bugs may sometimes occur and these may only be fixed by installing updates.
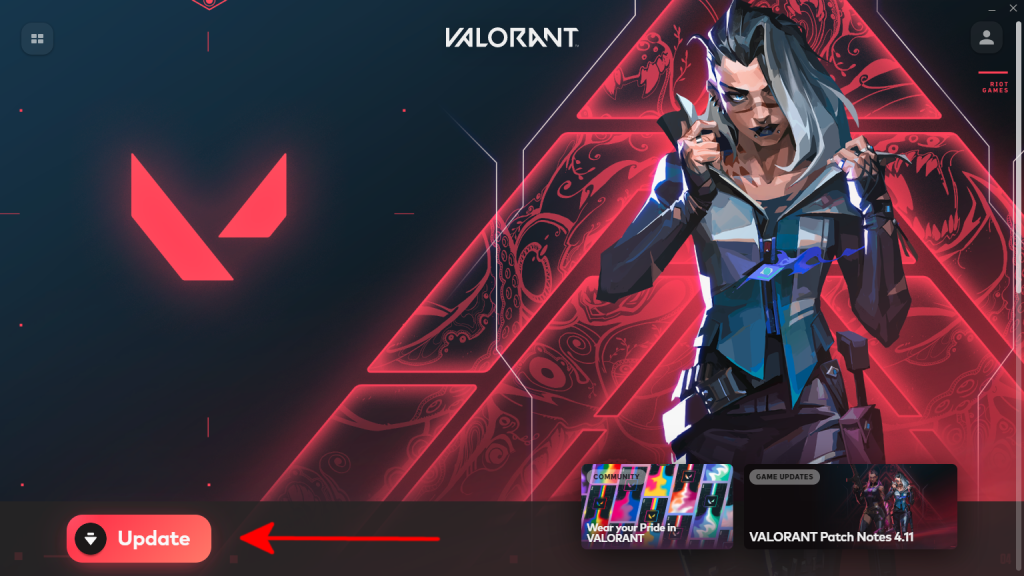
Although the game won’t run when it’s outdated, you should make it a point to manually check for updates when you haven’t played it for some time.
Some people may find it hard to update Valorant game, especially if there’s an issue with Riot Vanguard client. If you can’t seem to update Valorant, here are the steps that you need to do:
- Open Task Manager and make sure to close all Valorant and Riot processes from there.
- Launch Riot Client as administrator.
- Check for updates for Valorant game.
Fix #3: Keep your graphics card drivers updated.
Another important thing to update when playing on a Windows PC is your graphics card drivers. Having outdated graphics card drivers can lead to all sorts of issues including random crashes, games failing to load, or, in our case here, high CPU usage.
If you’re an avid gamer and you’re getting high CPU consumption when playing Valorant, one of the basic things that you can do is to ensure that you’re running the latest graphics card drivers.
Here’s are the steps to update your GPU drivers:
- Press the Windows key on the keyboard.
- Type in “control panel” and select Control Panel.
- Change the View by dropdown to Small icons and click on Device Manager.
- Once the Device Manager is opened, click the dropdown for Display adapters.
- Find your display adapter and right-click on it.
- Select Update driver.
- Select Search automatically for drivers.
If Windows indicates that your display adapters have been updated, there may be new drivers available from the GPU manufacturer. NVIDIA and AMD routinely release driver updates, so if you can’t update your GPU via Device Manager, you need manually download the newest drivers from NVIDIA, AMD, or Intel.
You can use any these links depending on the GPU you’re using:
After installing graphics driver updates, restart the game to see whether the black screen issue has been repaired.
Once the graphics card drivers have been updated, try to check for Valorant high memory usage issue again.
Fix #4: Make sure that Windows Defender or Windows Security is not running
For some people, the Valorant high memory issue they’re experiencing may be caused by Windows Defender scheduled scan. In other words, your built-in Windows antivirus software may be scanning your drives for threats at the same time that you’re running Valorant.
If you’re having Valorant high CPU usage issue at around the same time every day or in regular intervals, try to check Windows Defender scheduled scan and change it accordingly so it won’t interfere with Valorant.
If you did not set your Windows Defender or WIndows Security app before, follow these steps to check:
- On your keyboard, press the Windows button + R to open the Run dialog box.
- In the Run command box, type taskschd.msc.
- Once the Task Scheduler window opens, expand the Task Scheduler Library from the left pane.
- Then, go to Microsoft > Windows > Windows Defender.
- In the right pane, check to see if there’s a Windows Defender Scheduled Scan.
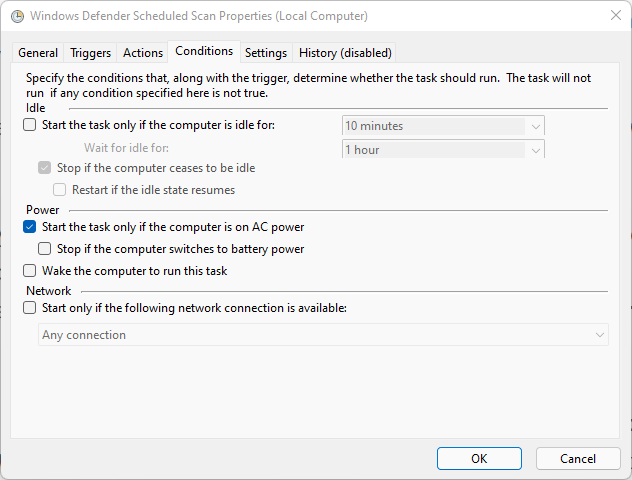
- If there’s a Windows Defender Scheduled Scan, double click on it and go to the General tab.
- Uncheck Run with highest privileges checkbox.
- Go to the Conditions tab and make sure that you deselect all options.
- Click OK.
Check for Valorant high CPU usage issue again.
Fix #5: Turn off High Precision Event Timer.
High Precision Event Timer or HPET is a hardware timer in your computer that can potentially affects system performance and cause issues with gaming when not working properly. You can try to disable it if you’re still getting the Valorant high CPU usage issue at this point.
Here’s how to do that:
- On your keyboard, press the Windows button + R to open the Run dialog box.
- In the Run command box, type devmgmt.msc and click OK.
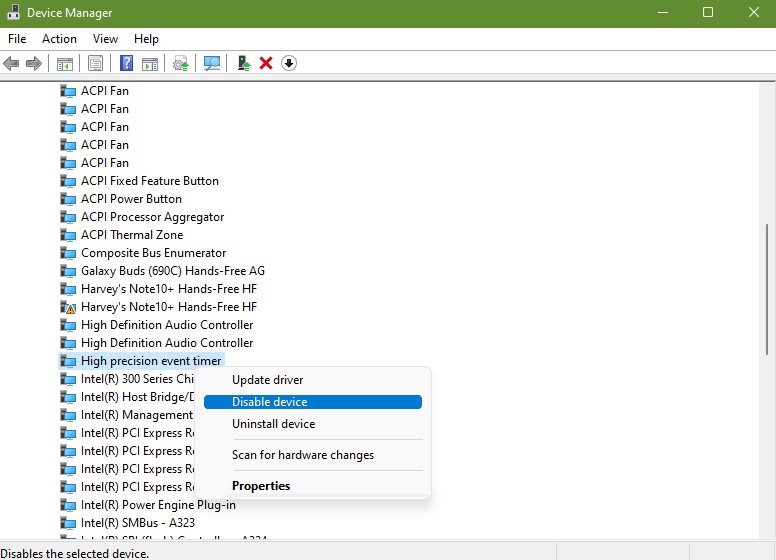
- Once the Device Manager is opened, expand System devices.
- Find High precision event timer and right click on it.
- Select Disable device.
- Reboot your PC and check if you’re still having Valorant high CPU consumption issue.
Fix #6: Run Valorant on Clean Boot.
Another possible approach at this stage is to check your Valorant game when the PC is in Clean Boot mode. Clean boot will start Windows with only the necessary drivers and programs, which can assist in determining whether the problem is caused by software or whether there is a clash with another app someplace.
What you must do is as follows:
- Hold the Windows Key and press R.
- Type msconfig and click OK in the Run dialog box.
- Choose the Services Tab, then put a check on Hide All Microsoft Services and select Disable All.
- Click Apply, and Click OK. This prompts you to restart; choose Restart Later.
- Hold the Windows Key and Press R.
- Type msconfig and click OK.
- Choose Start Up and select Open Task Manager.
- At the last field called Start-Up Impact disable all the ones with High Impact.
- Reboot your system and it will start up in the clean boot mode.
After completing the preceding procedures, activate the game launcher and relaunch Valorant. To check if that will fix Valorant high memory issue, make sure that you run the game for some time.
If the problem stops when your PC is on clean boot, there might be a problem with a specific program, service, or process in the system.
Begin by activating one service at a time in the same way, then stop when the problem reappears. Remove the service or program that is causing the issue.
FAQs
OTHER INTERESTING ARTICLES YOU MAY LIKE: