How To Fix Screen Burn-In On Nintendo Switch
The Nintendo Switch OLED is the most recent version of the hybrid game system, with new and improved features over its predecessor. Apart from its broad adjustable stand, which makes it easier to position the portable device when in Tabletop mode, its stunning 7-inch wide OLED screen gives a vibrant screen with enhanced contrast. However, due to a potential burn-in issue with the OLED panel, some players are hesitant to purchase the latest Nintendo product. If you have already owned one and are also concerned about the same issue as these players, keep reading to learn about the possible solutions in case you encounter the problem on your console.
How to fix screen burn-in on Nintendo Switch OLED
The finest techniques for dealing with screen burn-in on your portable gaming console are listed below. If you haven’t noticed any picture retention or static visuals on your Nintendo Switch OLED screen yet, these measures can still be used to prevent the problem from occurring.
Fix #1: Auto Brightness function must be turned on.
Simply setting the Automatic brightness function on the console is one of the preventative measures to avoid or solve the burn-in issue. It’s vital to avoid using the maximum brightness unless you’re playing outside to avoid image retention and a shorter console display life. Here are two ways for adjusting the automatic brightness on your Nintendo Switch OLED model.
Using the Nintendo Switch Systems
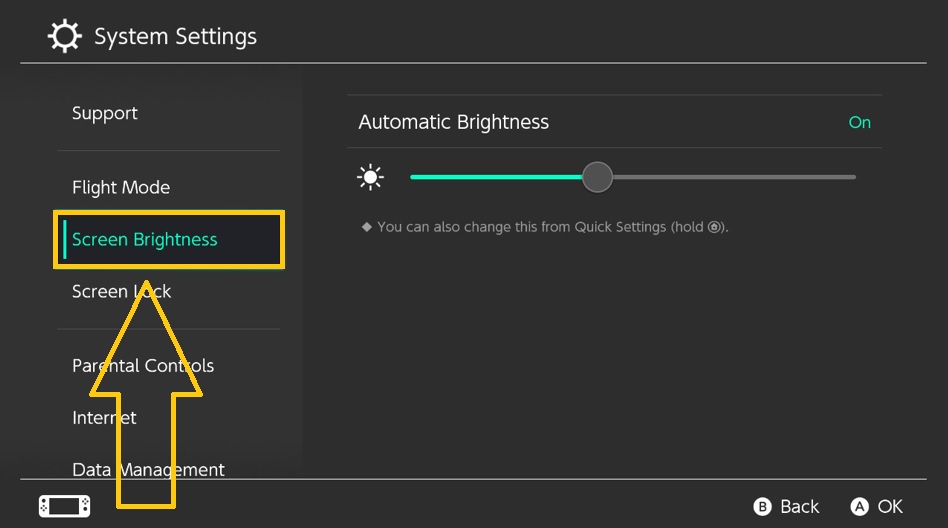
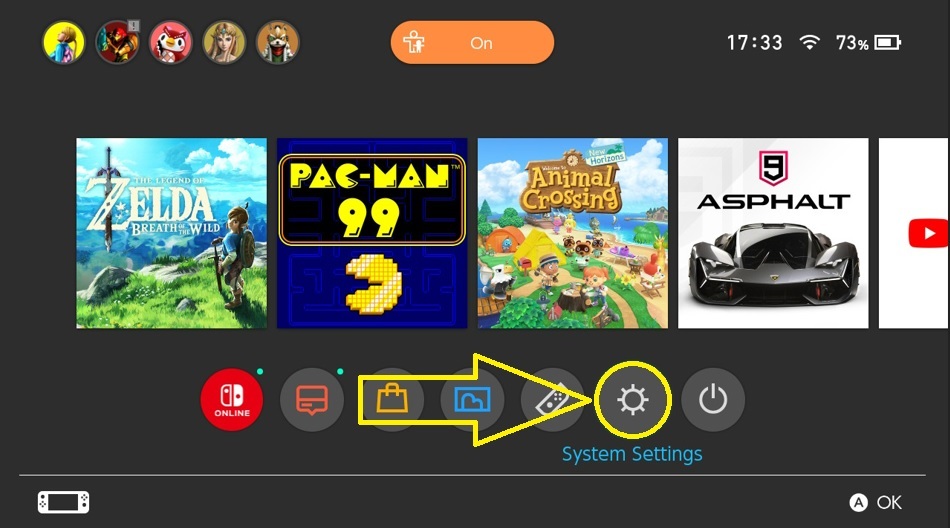
- Select System Settings from the Home Menu.
- Select Screen Brightness.

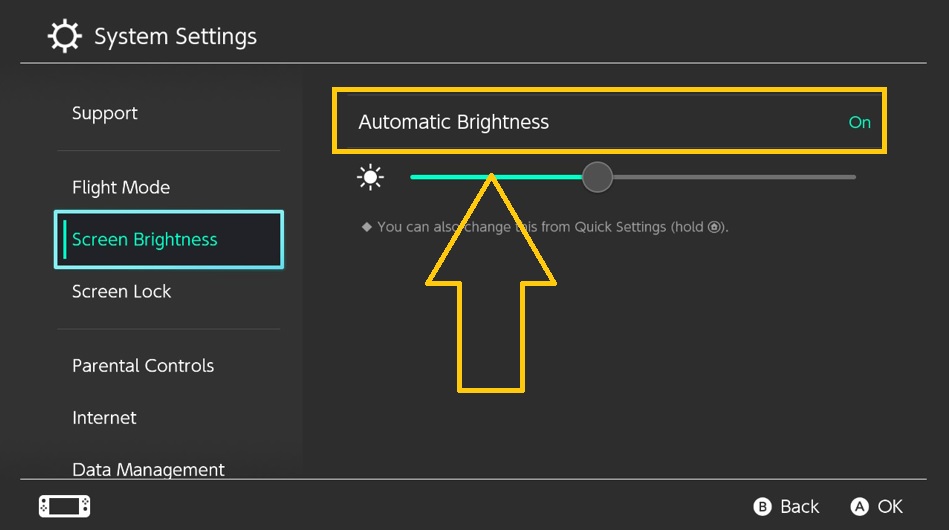
- On the right pane, click ON to enable Auto-Brightness Adjustment.

- Click OK to complete the process.
Activate through Quick Settings Menu
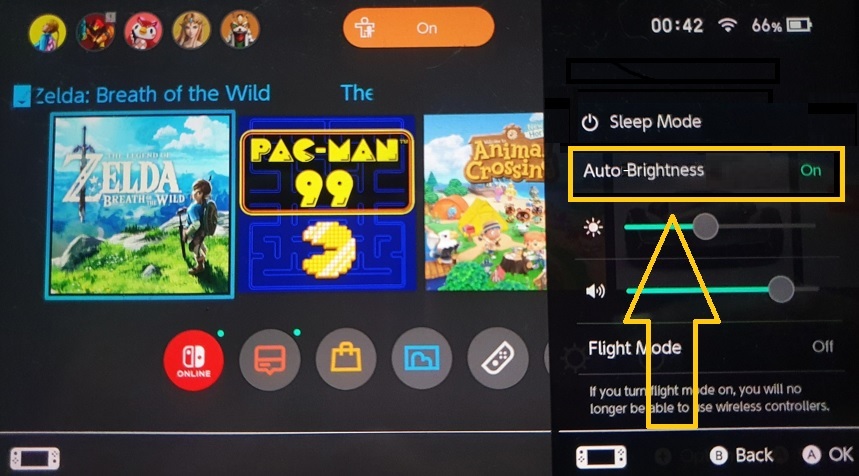
- Press and hold the Home Menu button for a few seconds until the Quick Settings Menu is reflected on the screen.
- Click Auto-Brightness to enable the function.

- Select OK to save the changes.
Fix #2: Turn off the Nintendo Switch OLED when not in use.
When not in use, the Nintendo Switch OLED model, like other devices with OLED screens, should be turned off. When OLED panels are utilized for extended periods of time, screen burn-in is observed to occur.
Fix #3: Give your Nintendo Switch OLED model a break.
Switch OLED owners must make it a habit to rest the portable device from time to time when playing video games like the popular Breath of the Wild and other games. This is another basic solution for screen burn-in occurring on the gaming console.
Fix #4: Activate screen burn-in reduction on Nintendo Switch.
Since OLED technology is prone to burn-in issues when used for longer periods of time, developers advise users to take use of features like the screen burn-in mitigation function available on Nintendo Switch devices. When activated, this reduces the likelihood of Switch owners to experience image retention on the console. Refer to the instructions below to learn how to accomplish it.
- Navigate to your console’s Home Menu.
- Select System Settings.
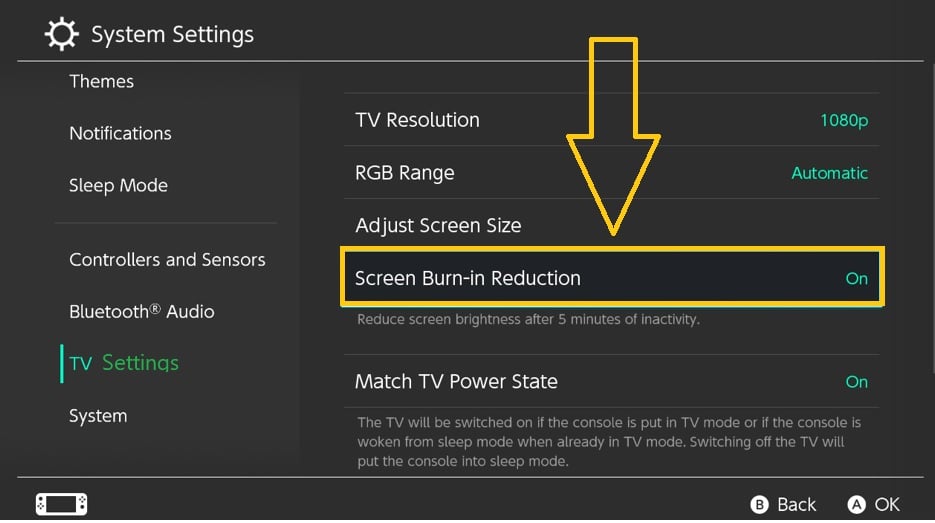
- Scroll down and select TV Settings.
- On the right pane, select Screen Burn-In Reduction to enable it.

- Click OK to save the changes.
Fix #5: Turn on the Auto-Sleep function on your gaming console.
Enabling the Auto-Sleep function on your portable console can also help fix the screen burn-in issue. This feature is convenient as the Switch turns off by itself after certain minutes of inactivity. To activate the said feature, you may follow the instructions:
- In the Home Menu, select System Settings.
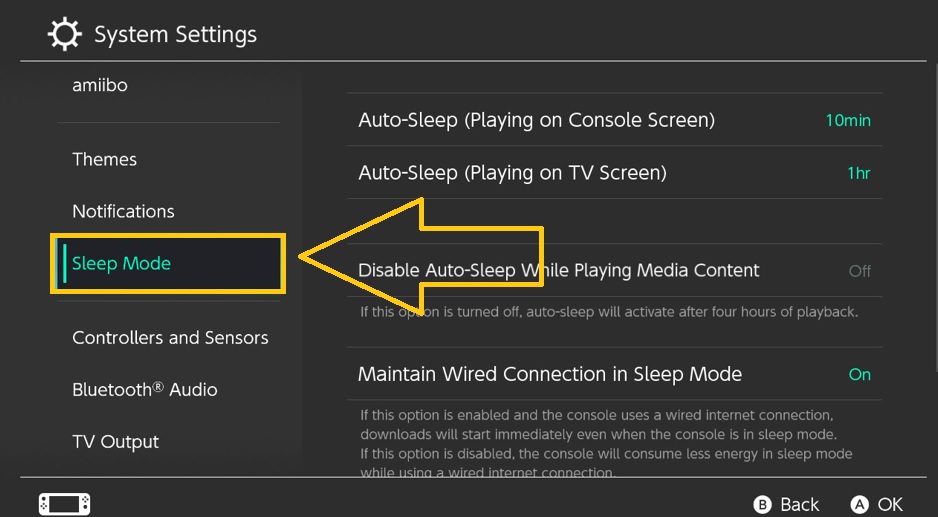
- Scroll down and select Sleep Mode.

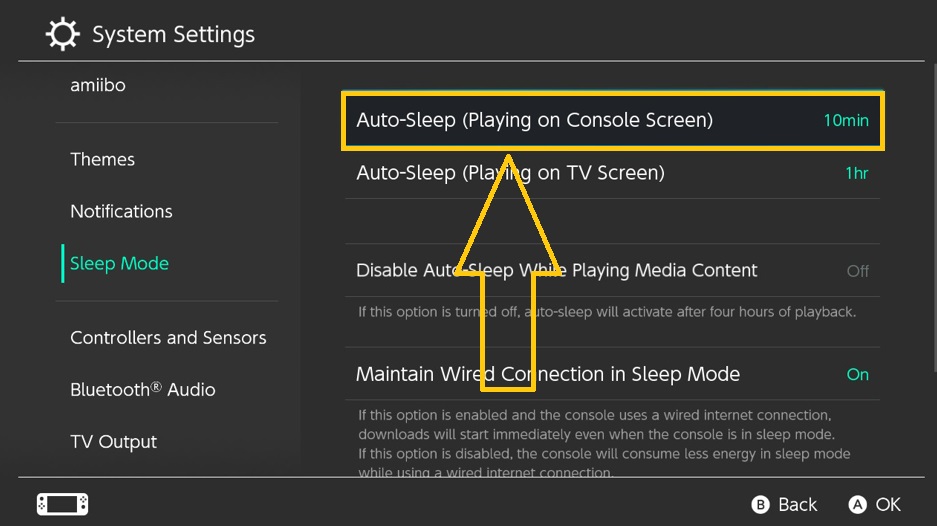
- Go to the Auto-Sleep (Playing on Console Screen) option found on the right panel and choose the amount of time you prefer before the console goes in sleep mode. In order to prevent burn-in issues, we suggest you select the shortest time from the options.

- Select OK.
OTHER INTERESTING ARTICLES YOU MAY LIKE:
- How To Fix Nintendo Switch Unable To Connect With Others Error
- How To Fix OLED Switch Won’t Turn On | Easy Solutions
- How To Fix Nintendo Switch Won’t Connect To The Internet
- How To Fix Halo Infinite Multiplayer Not Working | Won’t Load
