How To Fix Halo Infinite Lagging Or Stuttering On PC
Several factors can cause Halo Infinite game to lag or stutter on your computer. The cause could be a bad internet connection, software conflicts, outdated GPU drivers or even a hardware issue. You will need to perform a series of troubleshooting steps to fix this issue.
Halo Infinite is a first-person shooter developed by 343 Industries and published by Xbox Game Studios. It is available on Steam. On the Forerunner ringworld Zeta Halo, commonly known as Installation 07, Master Chief battles the enemy Banished. The multiplayer mode in this game is free to play, unlike past installments in the series. Players can choose from a wide range of Halo weaponry and vehicles. Several DLCs have already been released for the game, new skills are introduced such as the Grapple Shot, which allows the player to drag himself towards foes or grab objects. Halo Infinite is the best Halo experience on PC to date, with advanced graphics options, ultrawide/super ultrawide compatibility, triple-key binds, as well as dynamic scaling, and configurable framerates.
Halo Infinite game lagging problem, Halo Infinite stuttering, or Halo Infinite FPS drop? Here’s how to fix the issue
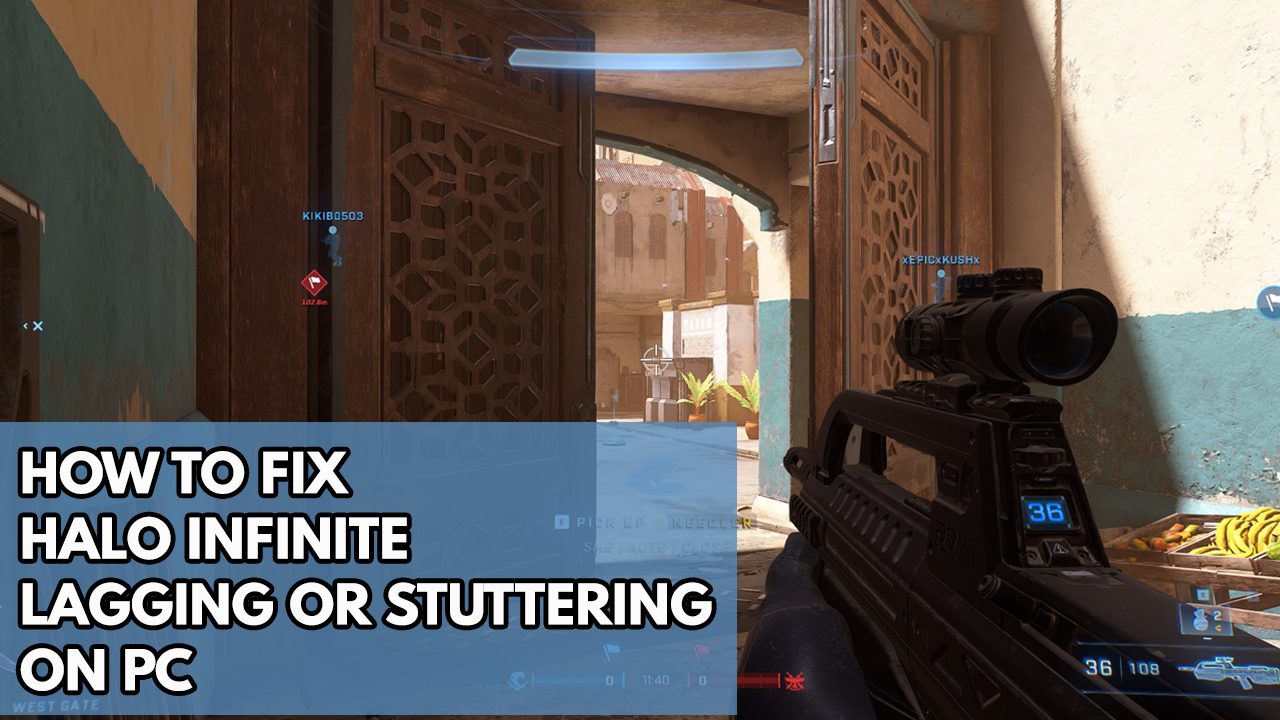
When playing Halo infinite, one of the problems you could have is lag. This can occur at any time or when there are a large number of opponents on the screen. A lag is a time difference between the user’s action and the server’s or computer’s response. If you’re playing online games, this is usually caused by your internet connection; if you’re playing locally, it’s usually caused by your computer hardware or software.
Here’s how to resolve the lagging issue in Halo Infinite.
Solution #1 Check minimum system requirement
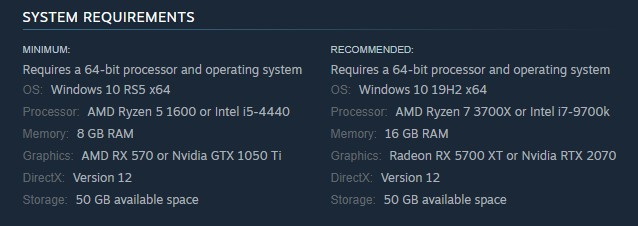
To avoid Halo Infinite stuttering issues or lagging issues, make sure your computer’s hardware is capable of running the game. This is especially important if you’re playing on high settings. Because Halo Infinite is a graphics-intensive game, Steam has provided both the minimum and recommended system requirements for playing it on your computer.
Minimum system requirements
Requires a 64-bit processor and operating system
OS: Windows 10 RS5 x64
Processor: AMD Ryzen 5 1600 or Intel i5-4440
Memory: 8 GB RAM
Graphics: AMD RX 570 or Nvidia GTX 1050 Ti
DirectX: Version 12
Storage: 50 GB available space
Recommended system requirements
Requires a 64-bit processor and operating system
OS: Windows 10 19H2 x64
Processor: AMD Ryzen 7 3700X or Intel i7-9700k
Memory: 16 GB RAM
Graphics: Radeon RX 5700 XT or Nvidia RTX 2070
DirectX: Version 12
Storage: 50 GB available space
Solution #2 Check Internet connection
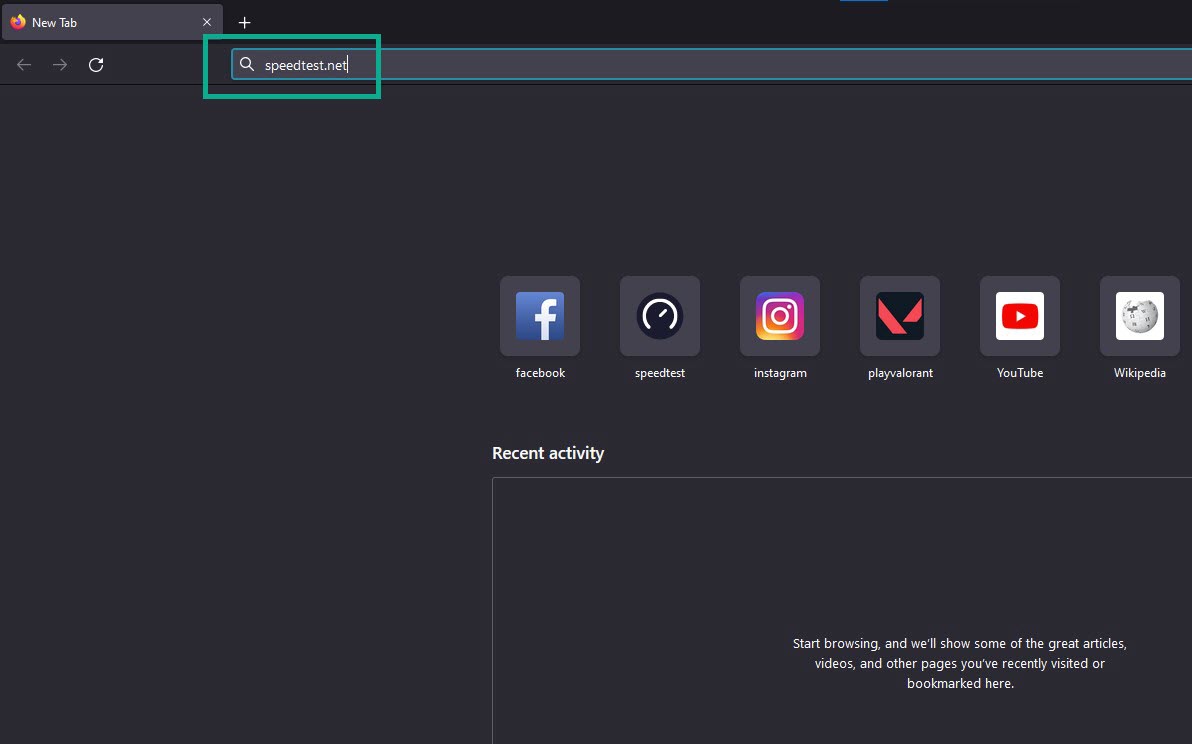
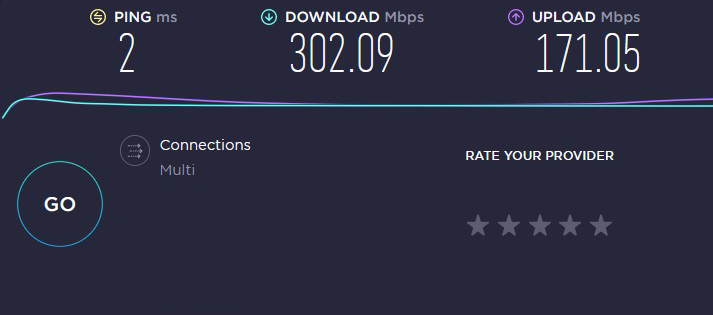
If the problem arises while playing the game’s online multiplayer mode, it may be due to a problem with your internet connection. You must ensure that your connection’s ping, download, and upload results are acceptable. You may check this with speedtest.net or other popular online web tools speed test programs.
Time needed: 3 minutes.
Checking Internet connection
- Open a browser.
Use any browser you want.
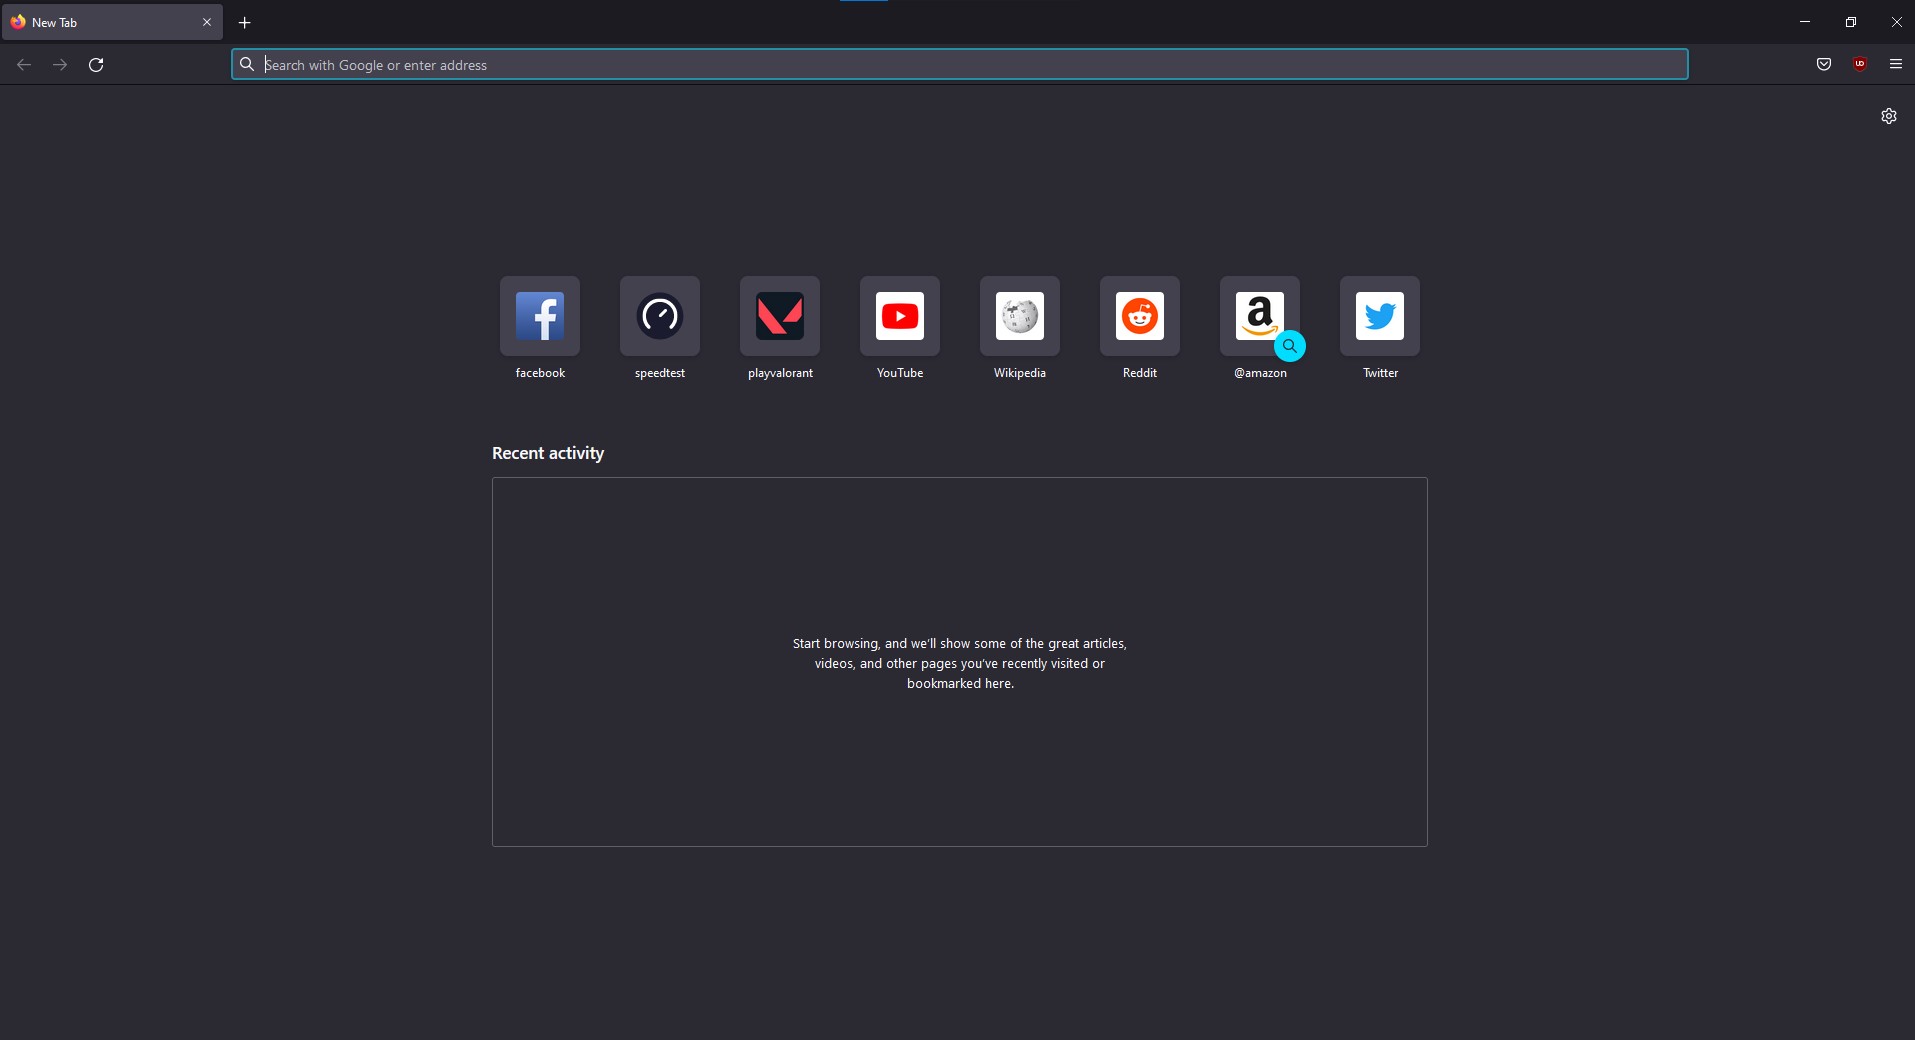
- On your browser, open speedtest by typing speedtest.net.
This will lead you to the speedtest site.

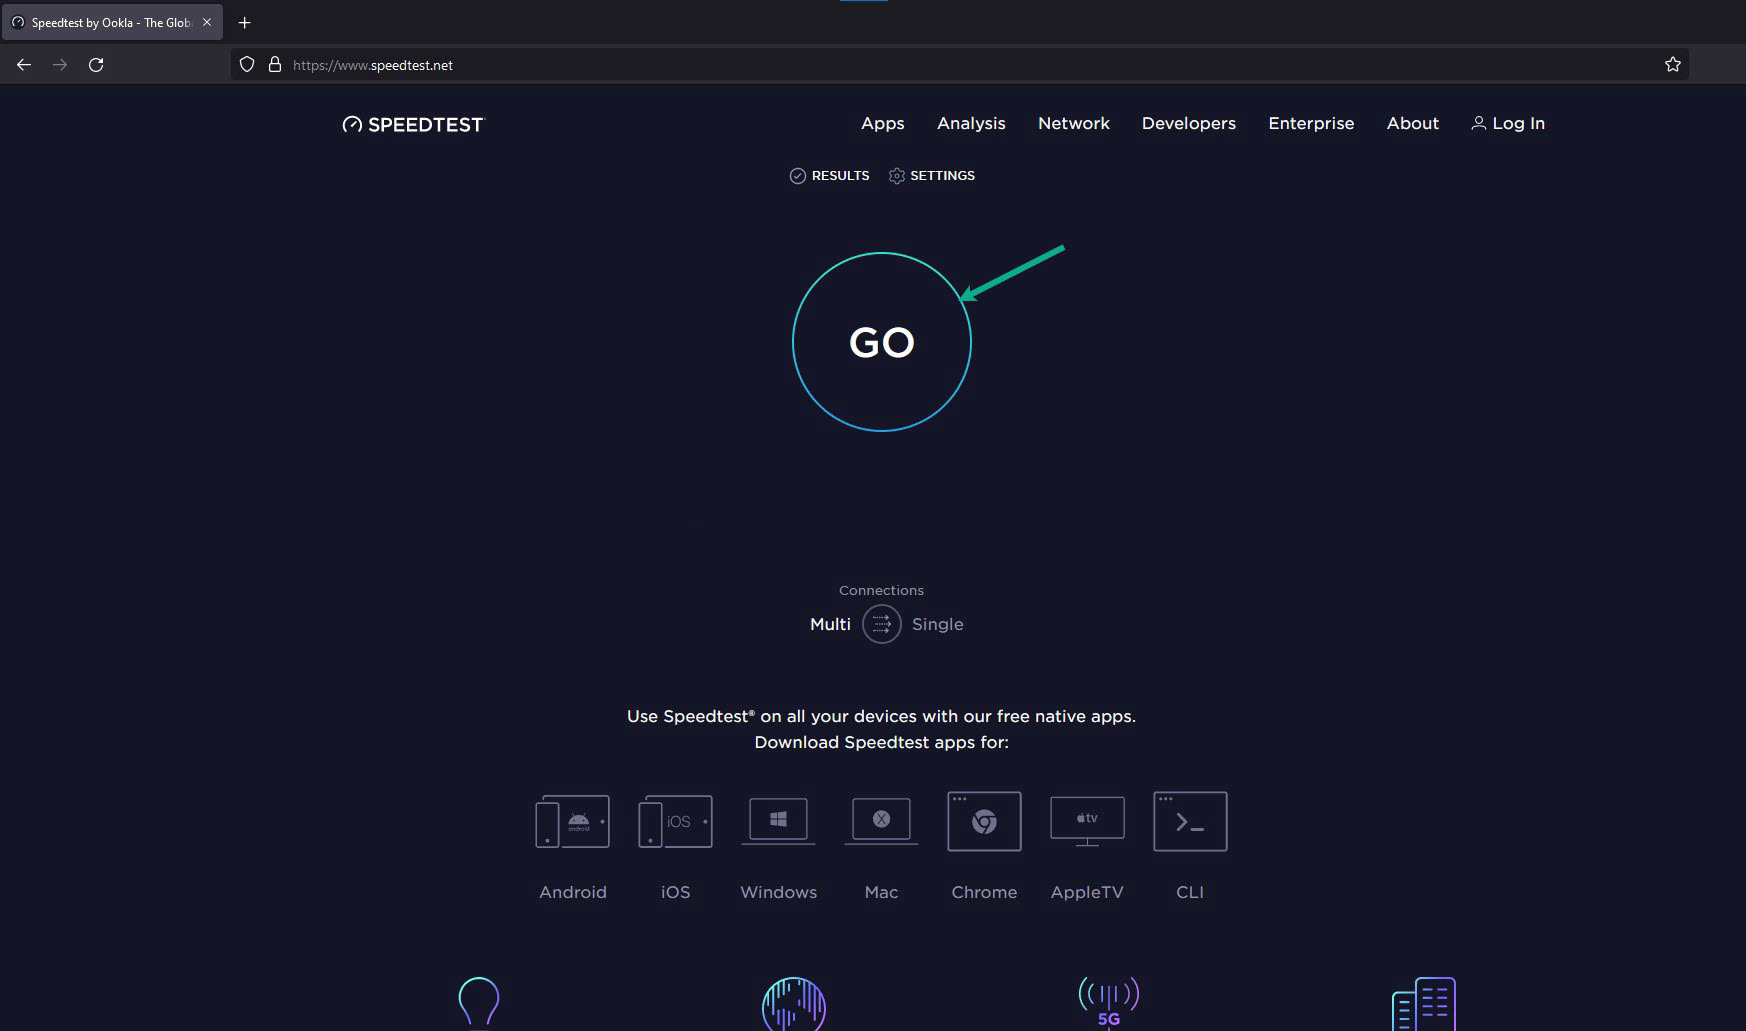
- Press the Go button.
This will start the speed test

- Check Internet speed result.
This will show internet speed.

If you have a bad internet connection, you will experience Halo infinite fps drop or lagging issues.
Your connection speed issues can be caused by temporary issues with your internet service or your router. You can quickly address this issue by simply restarting your network devices.
Restarting network devices
Step 1: Turn off your computer.
Step 2: Unplug your modem and router from the power source.
Step 3: Wait for a few minutes then plug your modem and router back into the power source.
Step 4: Wait until the light indicators on your devices are turn back on.
Step 5: Turn on your computer.
Step 6: Connect your computer to the modem or router.
Try to check if these fix Halo infinite game lagging or Halo infinite stuttering issue.
Solution #3 Update graphics driver
If your computer’s graphics drivers are out of date, this may be what’s causing the lagging issue in Halo Infinite. Make sure you have the latest graphics drivers updated on your dedicated graphics card because they will include several important performance improvements and bug patches that may help you fix Halo Infinite game lagging problem.
Updating graphics driver
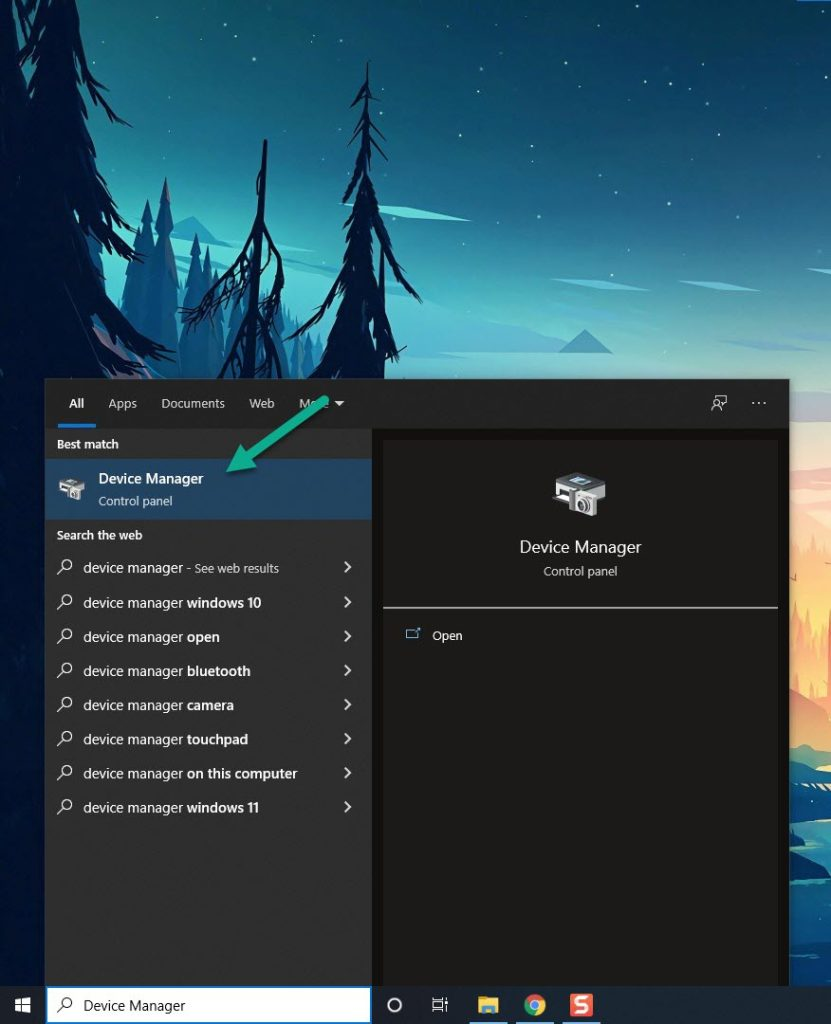
Step 1: Simply type Device Manager in the search bar on your desktop and then click the icon that appears in the results. This will open the device manager.
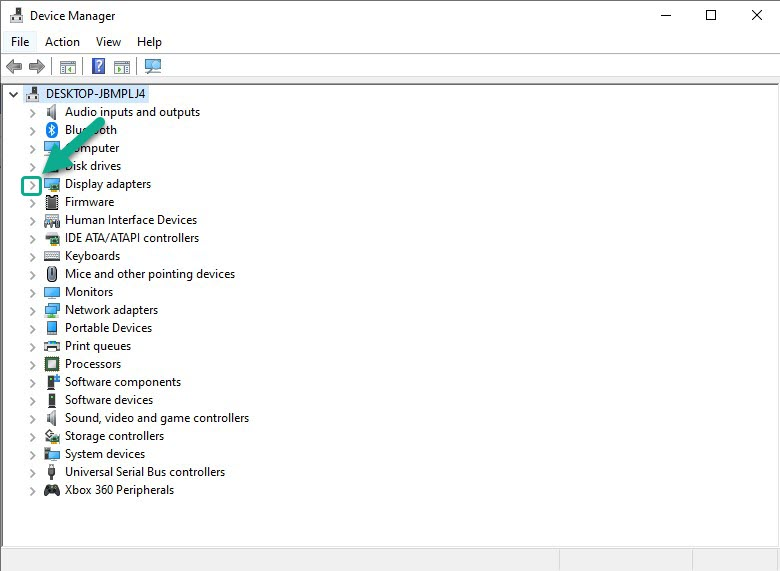
Step 2: Click the Display adapters icon. The list of display adapters will be expanded.
Step 3: Right-click the dedicated graphics card you are using to play the game and then select Update driver. This will allow you to update your driver.
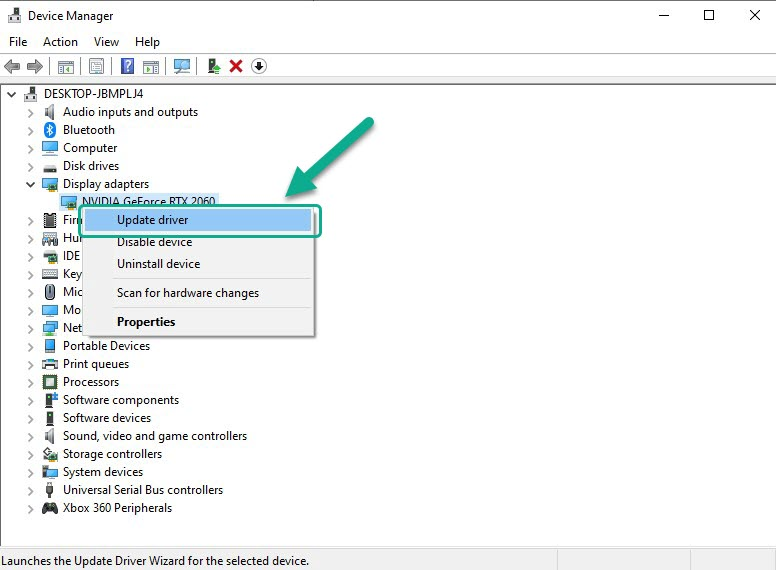
Step 4: Choose Search automatically for drivers. This will search online for any new drivers and install it on your computer.
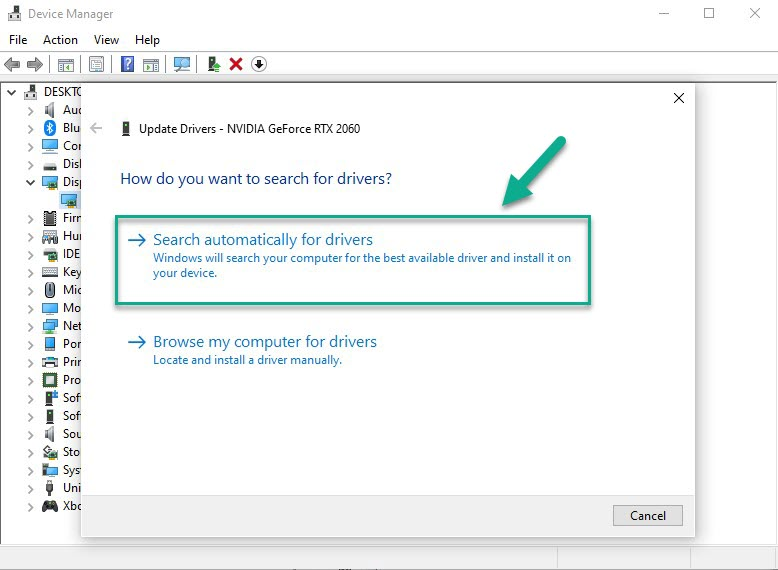
The graphics driver update will be automatically download by Windows. After you’ve updated your graphics driver, open Steam and play the game and see if it fix Halo Infinite stuttering or lagging issue.
Solution #4 Adjust in-game graphics settings
It’s possible that the problem is happening because your PC is having issues rendering the game’s high graphics resolution You should try reducing these settings and seeing if that fix the Halo infinite stuttering issue or lagging issue.
Adjusting in game graphics settings
Step 1: On the main menu press F1 or click the gear menu on the right pane to go to control panel.
Step 2: Click Settings.
Step 3: Click Video tab.
Step 4: Set Graphics quality preset: low or medium. This will select a quality preset for all graphics settings.
Manually adjusting in game graphics setting
Step 1: On the main menu press F1 or click the gear menu on the right pane to go to control panel.
Step 2: Click Settings.
Step 3: Click Video tab.
Step 4: Anti-Aliasing: Low. This select the quality of temporal anti-aliasing to reduced jagged artifacts.
Step 5: Texture Filtering: Low or Medium. This select the quality of anisotropic filtering.
Step 6: Texture Quality: Low or Medium. This select the quality of textures.
Step 7: Geometry Quality: Low or Medium. This select the quality of detail for geometry.
Step 8: Reflections: Off or Low. This select the quality of reflections.
Step 9: Shadow Quality: Low. This select the resolution and filtering quality of sun shadows.
Step 10: Lighting Quality: Low or Medium. This select the quality of light fixtures and their shadows.
Step 11: Volumetric Fog Quality: Off or Low. This select the resolution and definition of midrange volumetric fog.
Step 12: Cloud quality: Low or Medium. This select the resolution of the volumetric clouds, which affects their shape and lighting.
Step 13: Effects Quality: Low or Medium. This select the quality and effects such as explosion and dynamic lights.
Step 14: Terrain Quality: Low or Medium. This select the quality of the terrain.
If you have a NVIDIA GPU, you can adjust also the in game graphics settings thru the NVIDIA control panel.
Solution #5 Verify integrity game files
If there are corrupted or missing files in your Halo Infinite game, you may experience lagging. Check the integrity of the game local files using the Steam client. Any files that are missing or corrupted will be replaced with new ones acquired from the servers.
Verifying game files
Step 1: Open Steam client.
Step 2: In your Steam launcher, click Library. This will open your Library tab.
Step 3: Right-click Halo Infinite in your Library and select Properties. This will let you go to the General tab.
Step 4: Choose the Local Files tab and Select the Verify integrity of game files. This will let you verify Halo Infinite game files.
After Steam has verify the game file, Try to play the game and see if it fix Halo Infinite crashing issue and performance issues.
Solution #6 Close background apps
If the game is lagging, close any background programs. This might be the source of the problem. This will free up a lot of CPU and memory resources, improving overall gameplay and improving overall system performance. This can be done by opening the Task Manager and clicking end task for any background apps that are currently running but are not in use and stop any background downloads that take up bandwidth.
Closing background programs
Step 1: Open Task Manager by pressing Ctrl + Shift + Esc keys.
Step 2: Choose the Processes tab and select tasks that are unnecessarily running in the background and consuming high system resources.
Step 3: Click End Task to close it.
Solution #7 Performance mode
Check the power choices on your computer to determine if it’s in balanced mode or high-performance mode. Select the High-performance option to boost performance and eliminate lagging or stuttering in the game and also fix poor performance.
Setting Performance mode
Step 1: On the search bar on your desktop, type Power & Sleep Settings and click it from the search result. Alternatively you can type control panel and click power options.
Step 2: Click Additional Power Setting.
Step 3: Choose High Performance.
Check if the you can play the game smoothly.
Solution #8 Disable antivirus software and Windows defender firewall program
If your computer’s anti-virus and firewall software, such as Windows security and Windows firewall, flag or block the game as a security risk, the game will have problems. For a few minutes, turn off your antivirus software and firewall to see if the problem goes away. If this resolves the issue, add the game to the exceptions list.
Turning off Windows Security
Step 1: Press Window logo.
Step 2: Click Settings.
Step 3: Click update & security.
Step 4: Click Window Security.
Step 5: Click Virus & Threat protection.
Step 6: Click Manage settings.
Step 7: Turn off real-time protection.
Turning off Avast
Step 1: On the taskbar, look for the Avast icon.
Step 2: Right-click Avast icon.
Step 3: Select Settings.
Step 4: Select disable option from Avast Shields.
Turning off AVG
Step 1: Right-click the AVG symbol in the system tray.
Step 2: Select Disable AVG Protection temporarily.
Turning off McAfee
Step 1: In the system tray, double-click the McAfee antivirus icon.
Step 2: In the upper right corner, click the Navigation link.
Step 3: Select Real-Time Scanning and then turn it off
Adding the games to the exception list
Step 1: Click the Start Menu button.
Step 2: Click Settings.
Step 3: Click Update & Security.
Step 4: Click Window Security.
Step 5: Click Virus & threat protection.
Step 6: Click Manage settings.
Step 7: Click Add or remove exclusions.
Step 8: Click Add an exclusion.
Step 9: Click Folder.
Step 10: Locate and select the game folder.
Adding as an Exception through Windows Firewall
Step 1: Type Windows Firewall in the search bar on your desktop and then click the icon that appears in the results.
Step 2: Choose Allow an app or feature through Windows Defender Firewall.
Step 3: Scroll down until you find the game, then check all boxes.
Step 4: Click the OK button.
Solution #9 Opt-out of beta build game update
Beta testing allows beta testers to test the game update before they are officially released, allowing them to provide feedback and reviews to creators. There may have been lagging issues with some of the beta program releases. To fix the problem, turn off the beta build game update.
Opting out
Step 1: Run Steam client.
Step 2: On your launcher, click Steam, then click Settings.
Step 3: In your Account tab, click Change.
Step 4: Click the list box below Beta participation, Select NONE – Opt out of all beta programs, then click OK.
Solution #10 Reinstall the game data
The game data may be corrupted if the problem remains after attempting all of the above solutions. To resolve the issue, the game must be uninstalled and then reinstalled.
Uninstalling
Step 1: Run Steam.
Step 2: Go to the library tab.
Step 3: Right-click on game then click on manage then uninstall.
Step 4: Click uninstall again to uninstall the game.
Installing
Step 1: Run Steam.
Step 2: Go to the Library tab.
Step 3: Right-click on the game then click on install.
Step 4: Click next to proceed with the installation.
Feel free to visit our YouTube channel for additional troubleshooting guides, discussion and support on various devices and gadgets.
