How To Change Nintendo Switch Wifi Password | NEW in 2026
If you are having problems connecting to your wireless network due to incorrect password or wanted to change the Nintendo Switch wifi password but don’t know where to begin, then you are on the right page. In this article, you will learn how to manage your wireless settings as we will provide the detailed steps below.
Two ways to connect Nintendo Switch to the Internet
In order to enjoy the online features and multiplayer games offered by Nintendo, users must connect their consoles to the internet. A Nintendo Switch console can be either wired directly to the modem using a LAN cable when it’s docked or connected through a wifi. Though wired devices get more stable connection, most users prefer to connect the console wirelessly in order to carry the portable device anywhere they go.
Verify the Wireless Network Settings on your Router
Before making any changes on the Internet Settings on your console, ensure that you have already identified the SSID or commonly called as network name and the wireless password needed from your home network. The default network name and password are normally located at the back of the router. For wireless network settings that have already been customized, you need to access the router’s gateway using a web browser to get the information.
How to Change the Nintendo Switch Wifi Password
It is easy to change the wifi password as the Nintendo Switch console is designed to be simple to use for both kids and adults. Move closer to the router and complete these steps below to change the wifi password.
- Go to the Home Screen of your Nintendo Switch.
- Select System Settings icon.
- In the System Settings menu, scroll down and select Internet.
- Select Internet Settings found on the right pane. A list of visible WiFi networks will show on the screen of your device.
- Select the SSID that you want to be connected to.
- Select Change Settings.
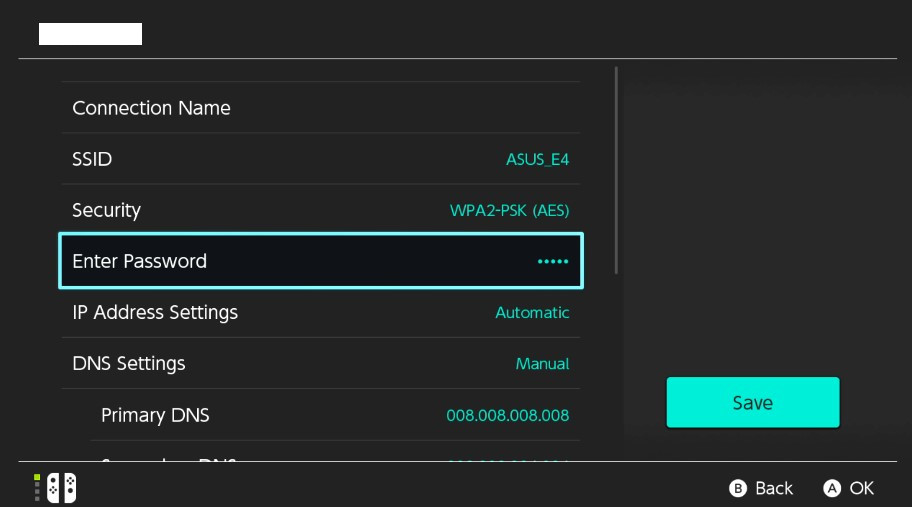
- Tap Enter Password and type the password.
- Select OK.
- Click Save to store the changes. A check mark beside the SSID that you have selected should now be visible indicating that the console is now connected to the network.
- Press the Home button to close the System Settings.
Other interesting articles:
- How To Download Nintendo Switch Save Files From Cloud | NEW 2021
- How To Fix Nintendo Switch No Sound | Sound Not Working | NEW 2021!
- How To Fix FIFA 21 Account Suspension Or Ban | NEW 2021!
- How To Fix FIFA 21 “Unable To Process Request” Error | NEW 2021
Visit our TheDroidGuy Youtube Channel for more troubleshooting videos and tutorials.