How To Fix Zoom Crashing on Windows 11 Quick & Easy Fix
In this article, we will explain the reason why Zoom keeps crashing on your Windows 11 computer, point out the possibilities, and rule them out one after another until you can figure out what the problem is and fix it.
There are a few solutions we cited in this post and we know can be helpful in troubleshooting both the app and your computer. So continue reading as this troubleshooting guide can help yo
First solution: Force stop Zoom app and reopen it
It is possible that Zoom crashes due to a minor issue or glitch. So what you have to do first is to see if that’s really the case.
Restart the desktop client to see if the problem can get fixed that way. It’s better to force quit as it will make the job easier. Here’s how it’s done:
Step 1: Press Shift + CTRL + Esc keys at the same time to pull up the Task manager.
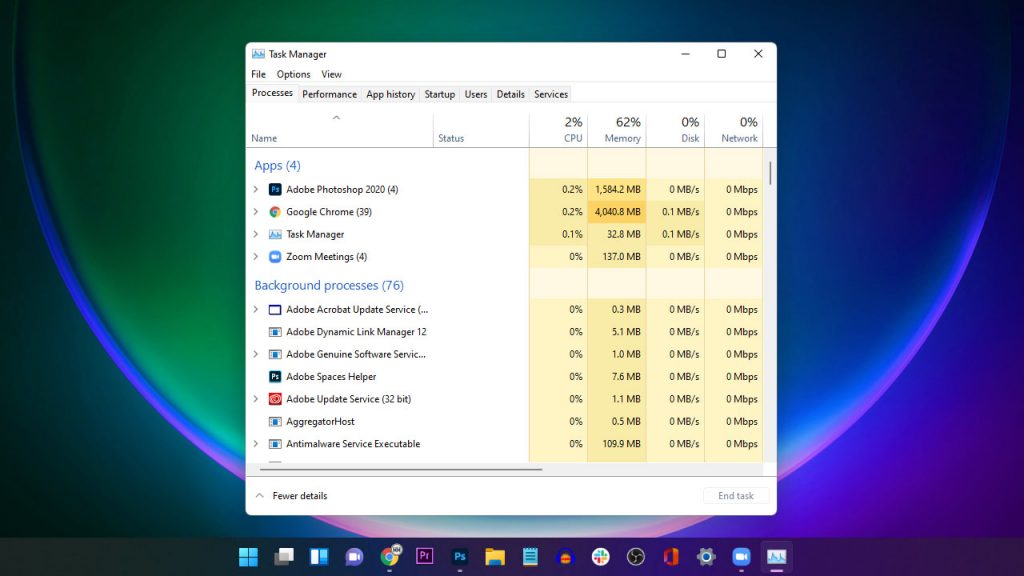
Step 2: Look for Zoom Meetings in the list and right-click it.
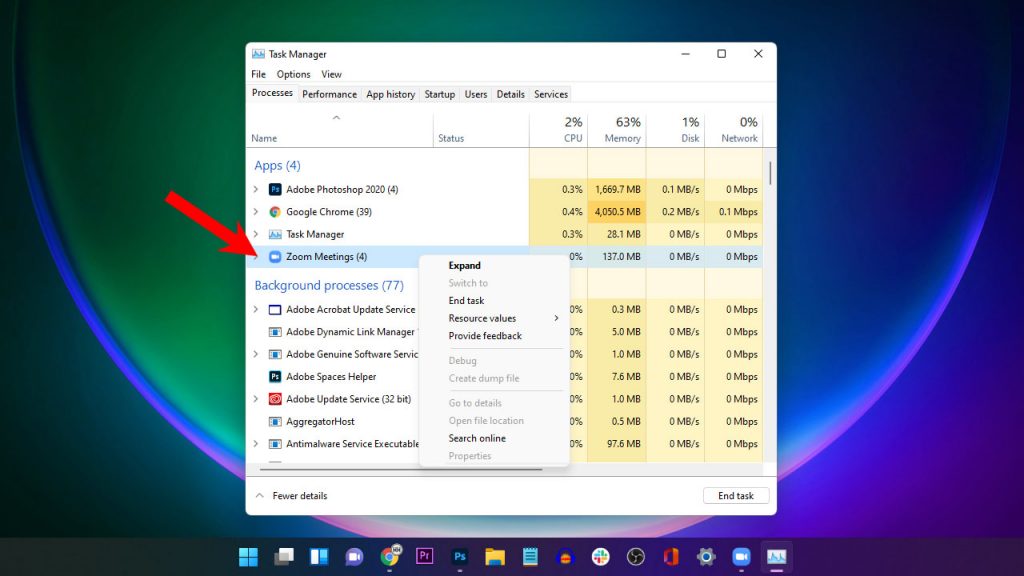
Step 3: Click End Task to force quit the app.
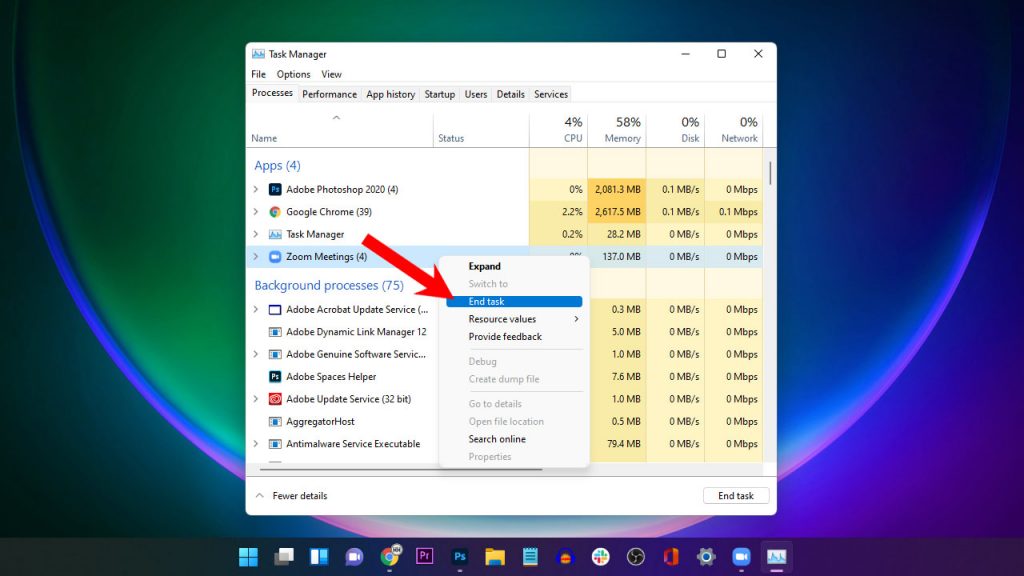
Once you’ve successfully closed the app, launch Zoom again to see if it still crashes at some point. It it still does, then move on to the next solution.
Second solution: Restart your computer
Another way to fix minor app and system glitches is to refresh the memory of your machine. Most of the time, a reboot can fix a lot of problems including app crashes.
Aside from that, it will also release the RAM and CPU resources that your apps have been using.
Step 1: To restart your computer, right-click the Windows key.
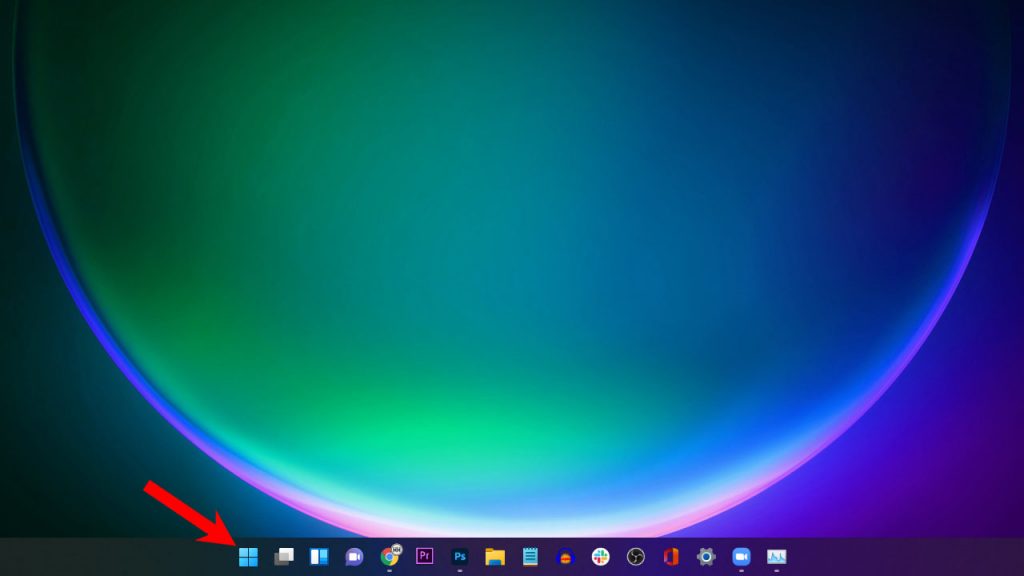
Step 2: Hover the cursor over Shut down or sign out, and then click Restart.
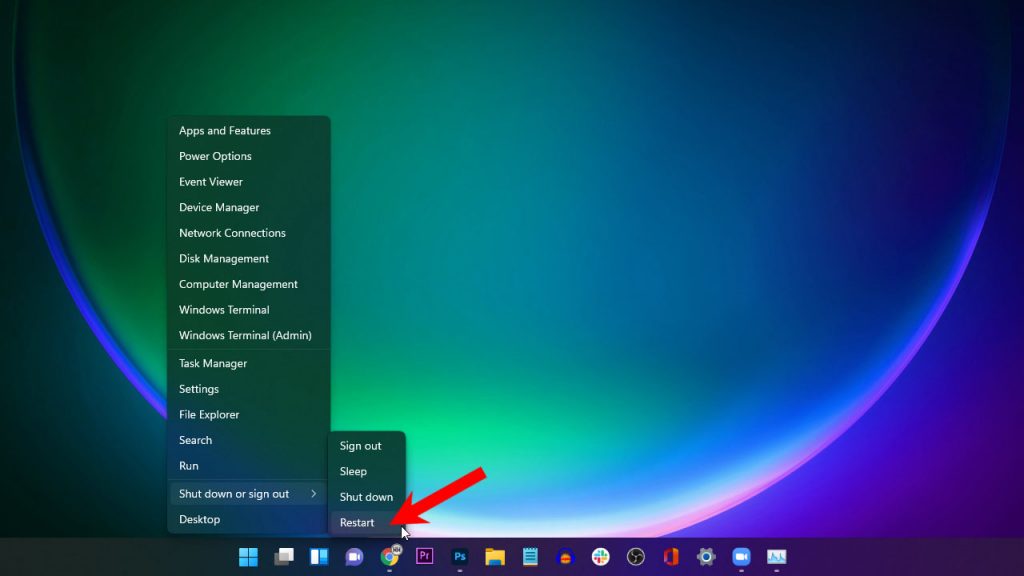
Wait until your Windows 11 finishes the reboot and then launch Zoom again to see if the problem is fixed.
Third solution: Update your camera driver
The Zoom client is used for video communications, which requires your PC to have a camera attached for the feature to work. However, if your camera drivers are outdated, then that might be the reason why the Zoom desktop client keeps crashing on your computer.
Follow these steps to check and update your camera drivers:
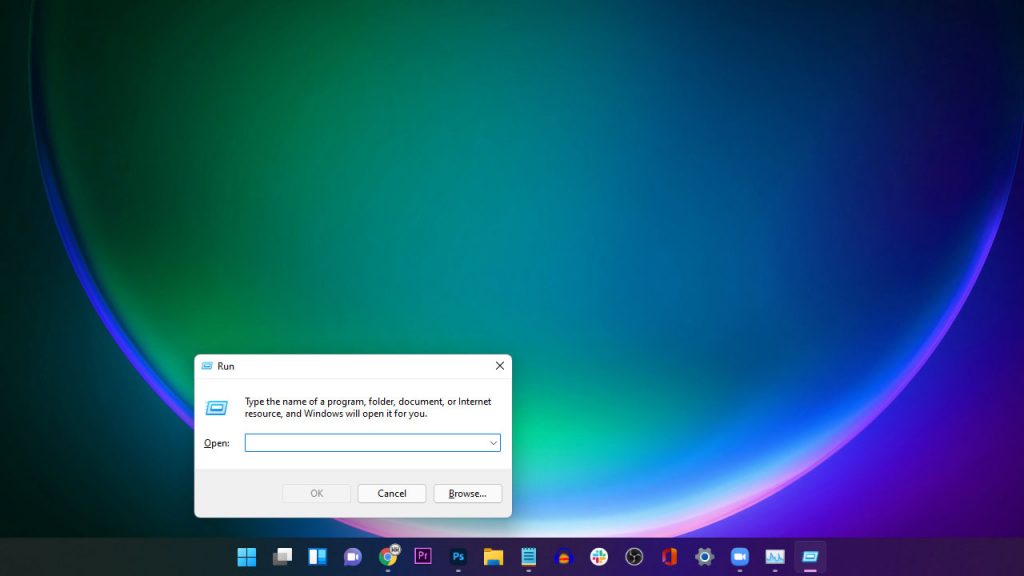
Step 1: Press the Windows key + R to pull up the Run service.
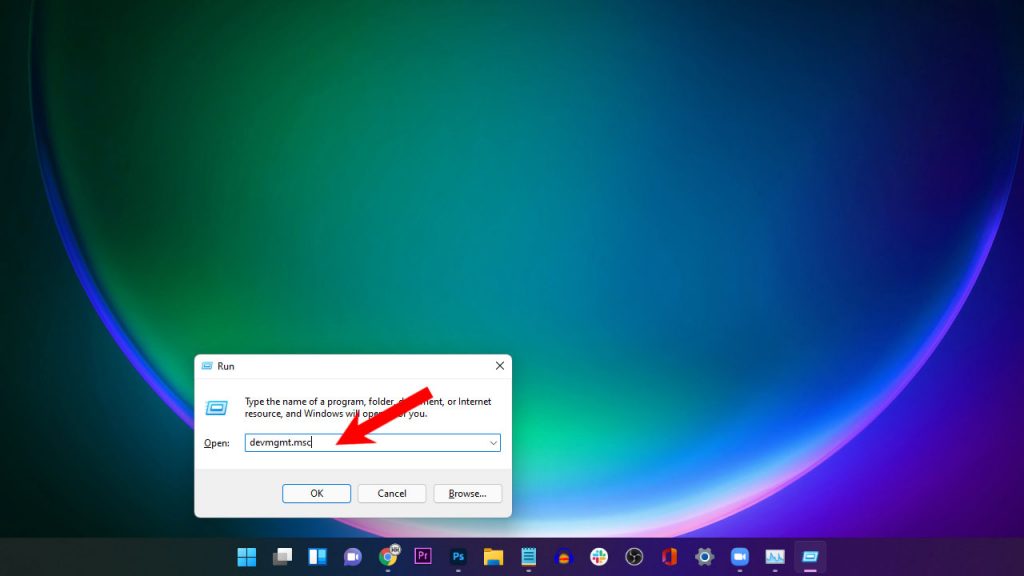
Step 2: In the Open field, type in “devmgmt.msc” and then click OK to pull up the Device Manager window.
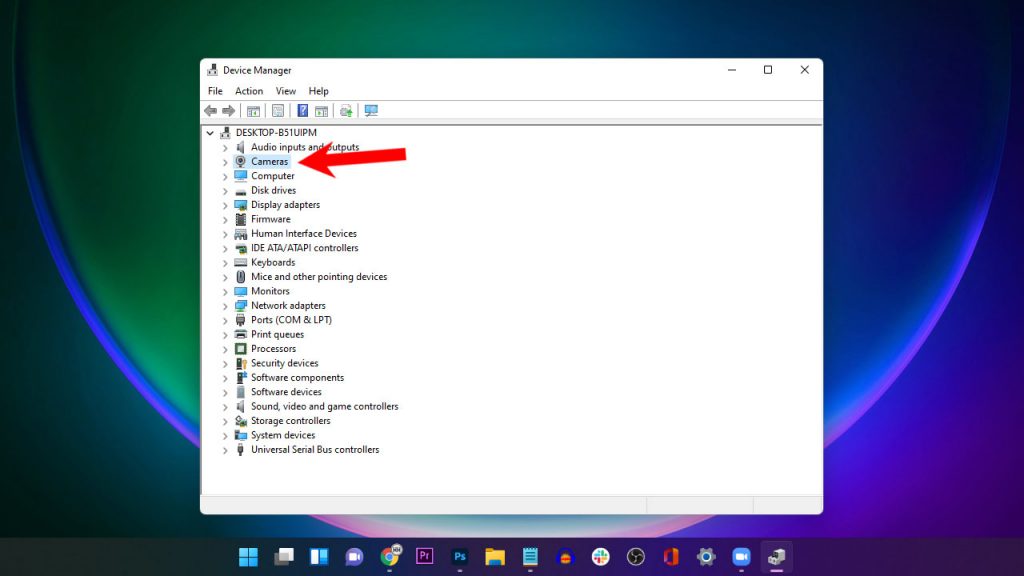
Step 3: Double-click Cameras to expand it.
Step 4: Right-click on the camera attached to your computer, and click Update driver.
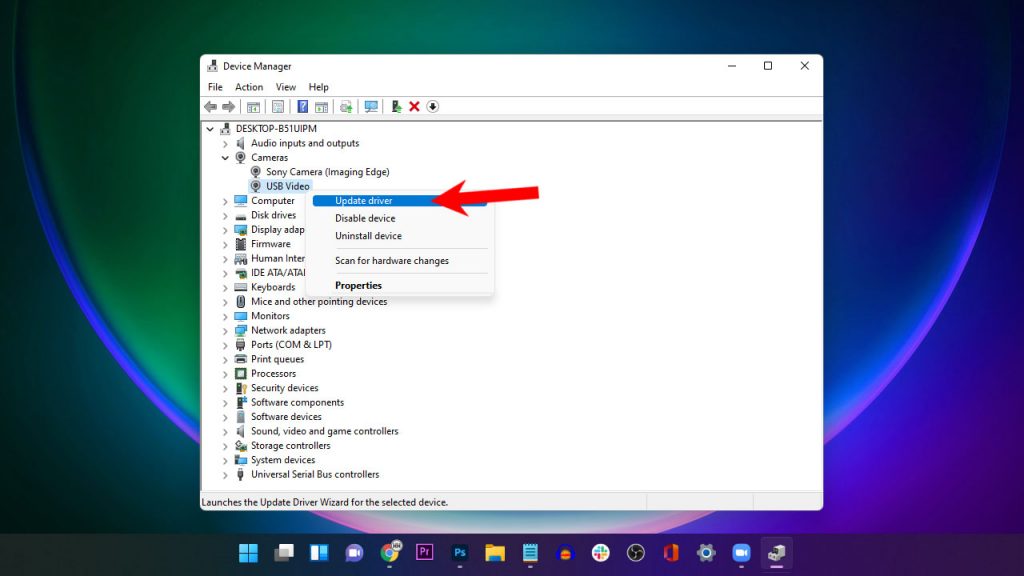
Step 5: Click “Search automatically for drivers” and allow your computer to update the driver for your camera.
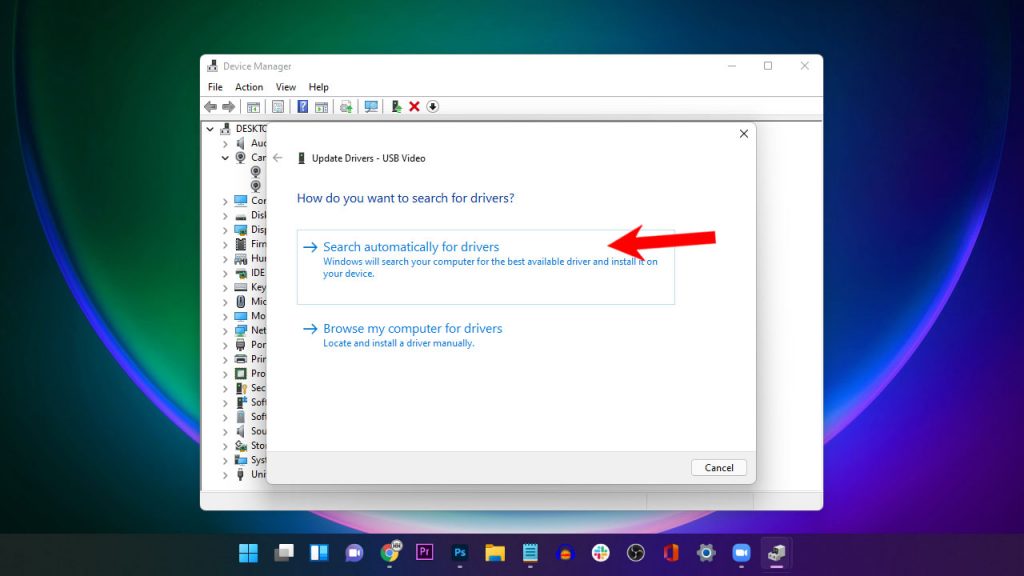
Once the process is finished, launch zoom again to see if it can do its video processing without crashing.
However, assuming that you’ve recently updated the camera driver on your PC and the problem started after that, then you have to rollback the driver. Here’s how you do that:
Step 1: Press the Windows key + R to pull up the Run service.
Step 2: In the Open field, type in “devmgmt.msc” and then click OK to pull up the Device Manager window. You can also use other methods in open device manager.
Step 3: Double-click Cameras to expand it.
Step 4: Right-click your camera and click Properties.
Step 5: Click the Driver tab.
Step 6: Click Roll Back Driver and wait until it’s finished.
If this is just an issue with the driver, then the problem should be fixed after doing this or the previous procedure.
Also, make sure that your audio devices including your headset, microphone or speakers are working properly, especially if you’re on a Zoom call. Sometimes, they can also mess up the app’s normal operation.
Fourth solution: Modify Zoom settings
The app’s default configuration varies on every computer, and while those configurations are often enough to make your Zoom meeting smooth and seamless, there are times when you have to change some settings.
There are some video settings you may want to change to make the app work properly. So try this…
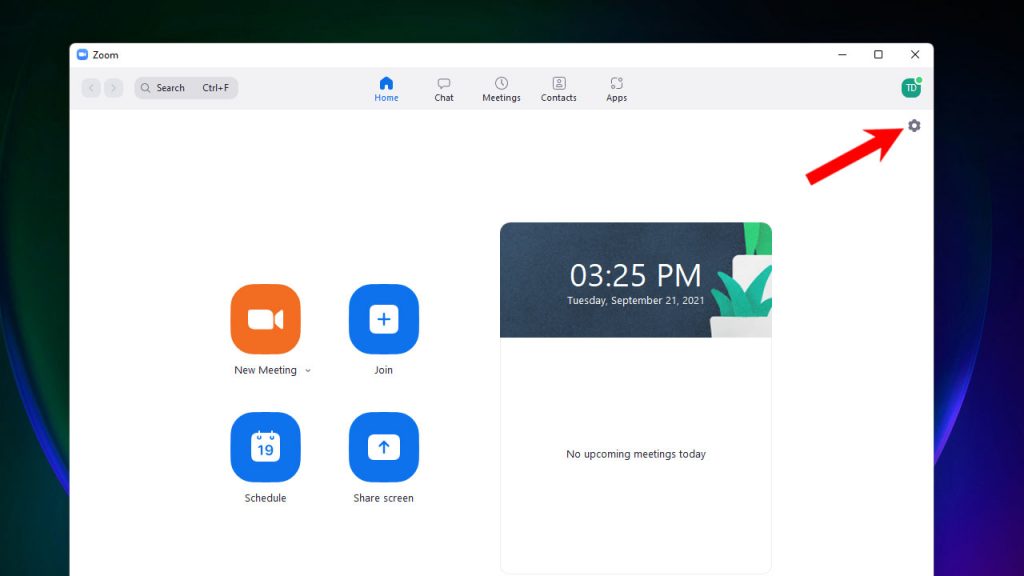
Step 1: Launch Zoom and click the gear icon at the upper right corner.
Step 2: Select the Video tab and click Advanced.
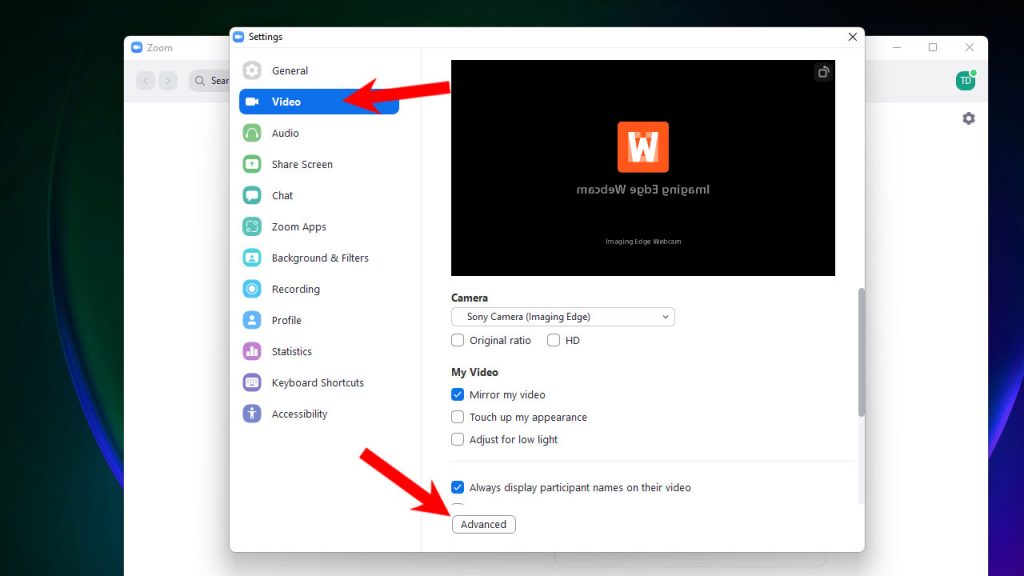
Step 3: Under Video Rendering Method section, choose Direct3D11 from the drop-down menu.
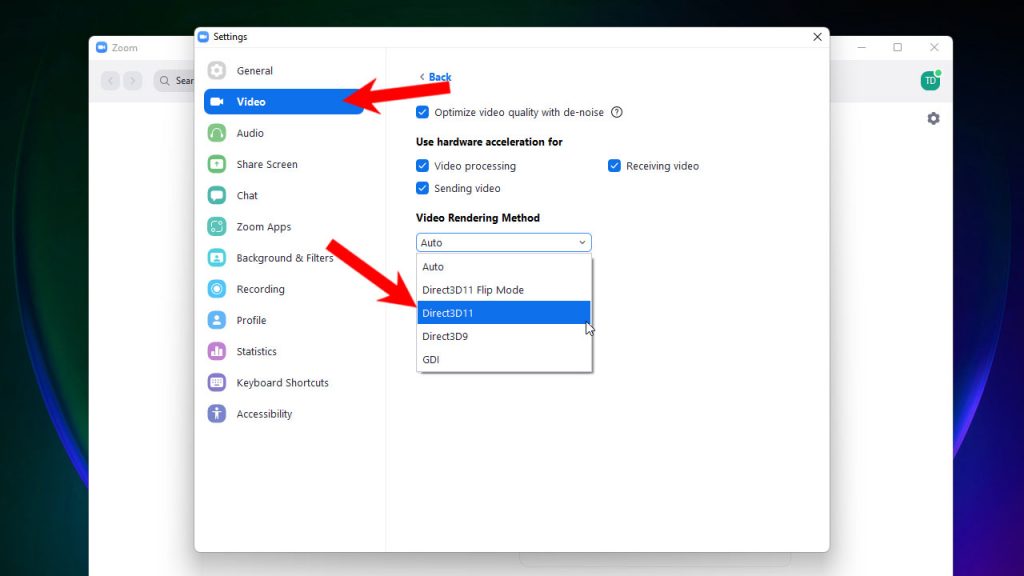
Step 4: Restart Zoom desktop client for the changes to take effect.
When the reboot is finished, try doing a Zoom meeting using the attached or integrated camera and see if that fixes the Zoom crashing issue, if not, feel free to try the next solution.
Fifth solution: Run Zoom on dedicated graphics card
If the Zoom client on your computer continues to crash even after doing the previous solutions, then there’s another thing you should try, especially if the hardware acceleration isn’t enabled by default.
What you have to do next is to make the Zoom run on a dedicated graphics as it will greatly improve the app’s video rendering and processing. Here’s how you do that:
Step 1: Right-click an empty space on the desktop and click Nvidia Control Panel.
Step 2: Select Manage 3D settings from the left pane.
Step 3: Click Program Settings and click the Add button below.
Step 4: Select Zoom Meetings from the list and click Add Selected Program.
Step 5: Under Select the preferred graphics processor for this program, choose High-performance NVIDIA processor.
Step 6: Click Apply at the bottom right corner to save the changes.
After this, launch the Zoom client again and try using it. You may try using other features like screen sharing, schedules and other things to see if it still crashes or not.
Sixth solution: Uninstall and reinstall Zoom app
Just like any other Zoom apps, there are times when you just need to uninstall the problematic one and reinstall it.
Uninstalling an app will delete all possible corrupt cache and installation files, and reinstalling it will make sure you’re using the latest version, although we also suggest you click your profile picture thumbnail and click Check for updates to see if there’s a new version of the Zoom app.
But if you simply want to uninstall it and then download a new copy, then here’s how you do it:
Step 1: Press the Windows key, look for the Settings icon and click on it.
Step 2: In the left pane, look for and click Apps.
Step 3: In the right pane, click Apps & features and wait until the list of apps is loaded.
Step 4: Look for Zoom and click the More icon to the right (three dots stacked vertically).
Step 5: Click Uninstall and then click the Uninstall button to confirm. Wait until the app is successfully uninstalled.
Step 6: Open a web browser and type Zoom.us/download at the address bar.
Step 7: Choose the correct version for your Windows 11 PC and Download it.
Step 8: Once the download is finished, run the installer to reinstall Zoom.
As long as your computer is working properly, reinstalling Zoom will always fix the crashing issues.
So we hope that this simple troubleshooting guide can help you one way or the other.