How to Open Nvidia Control Panel & GeForce Experience on Windows 11
- Understand the difference between Nvidia Control Panel and GeForce Experience.
- Learn how to open Nvidia Control Panel, GeForce Experience and record your screen or gameplay.
In this article, we will show you how to open both the Nvidia Control Panel and Nvidia GeForce Experience (GFE).
These things are totally different from each other, although they’re present on your computer if you’re using an Nvidia graphics processing unit (GPU).
You will learn the differences between these two, as well as learn how to open them to do certain tasks.
What is Nvidia Control Panel?
The Nvidia Control Panel is installed alongside Nvidia drivers. Since it’s a control panel, it’s primarily used to adjust system-wide settings such as the following:
- Adjust image settings
- Manage 3D settings
- Configure surround, PhysX
- Change resolution
- Adjust desktop color settings
- Rotate display
- View HDCP status
- Set up digital audio
- Adjust desktop size and position
- Set up multiple displays
- Adjust video color settings
- Adjust video image settings
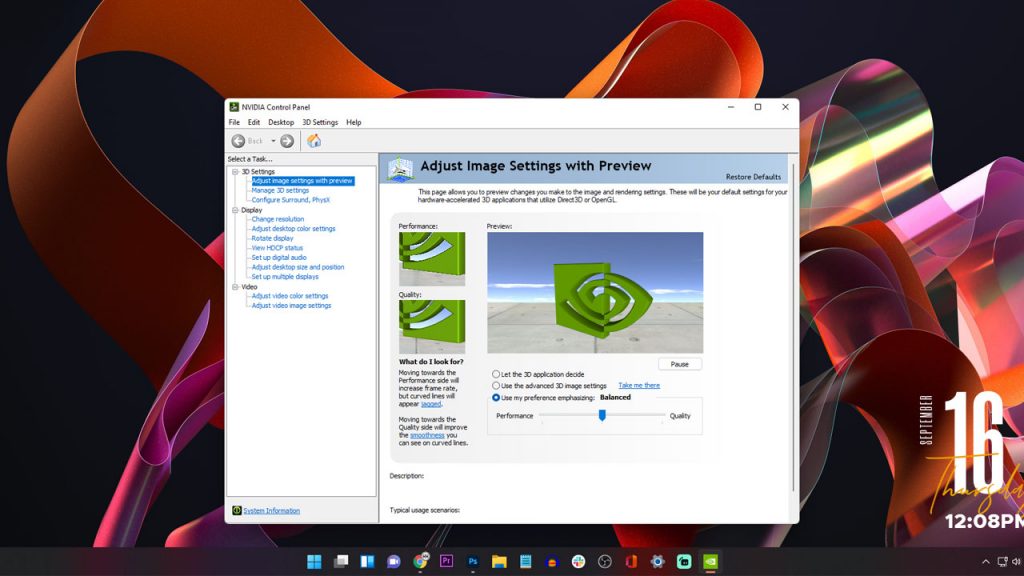
Some of the things that the Nvidia Control Panel does can also be changed in Windows Control Panel like the resolution and setting up of multiple displays. Anyhow, having the Nvidia Control Panel lets you change some settings in one place.
What is Nvidia GeForce Experience?
While the Nvidia Control Panel allows you to change system-wide settings, it doesn’t give you an option to update your graphics driver. That’s something Nvidia GeForce Experience can do.
It also has an extension that allows you to summon an overlay even when gaming. Such an overlay lets you record your gameplays. Among the things the GeForce Experience offers are the following:
- Download and update graphics driver.
- Allows you to see the Nvidia graphics card settings for each game.
- Game library with optimized settings
- Multi-frame Sampled Anti-aliasing
- Nvidia Ansel
- Nvidia Gamestream
- Nvidia Freestyle
- Performance monitor
- Other Nvidia services
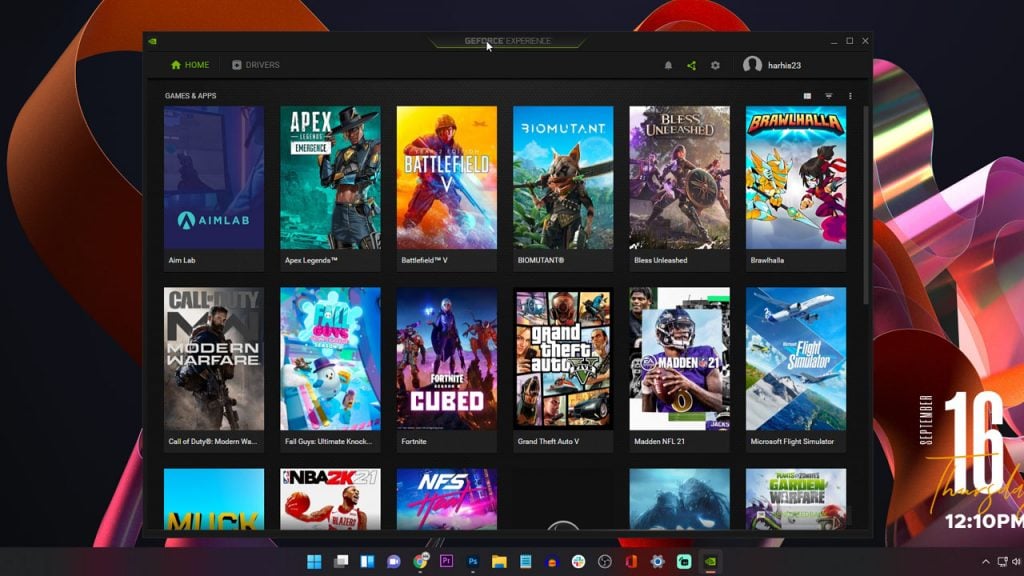
While the Nvidia Control Panel allow you to fine tune system-wide settings, the Nvidia GFE allows you to optimize game settings and update Nvidia drivers.
When you install Nvidia graphics card drivers, it will automatically install these things on your computer as well.
How to Open Nvidia Control Panel on Windows 11?
There are several ways to open Nvidia Control Panel app on your Windows 11 computer. But in this post, we will show you a couple of practical ways. These are the only things you need to do without a hassle.
Open Nvidia Control Panel from Windows Desktop
The easiest way you can open Nvidia Control Panel is right from your desktop. In Windows 10, you can just right-click the Windows desktop and it will immediately give you an option to open it.
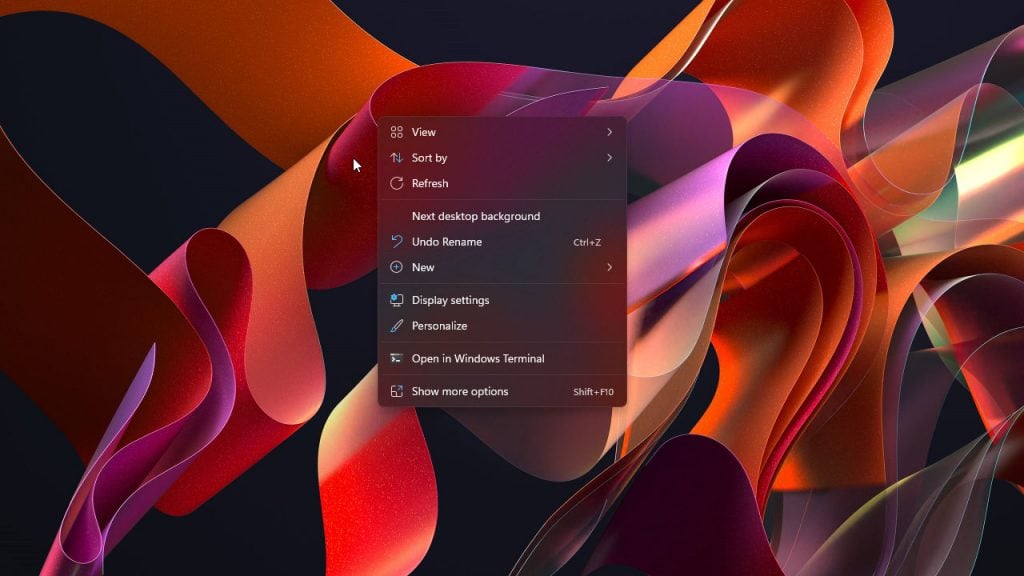
However, in Windows 11, you need to click one more option to view the Nvidia Control Panel icon. Now, here’s how you do it:
Step 1: Right-click on a free space on your Desktop.
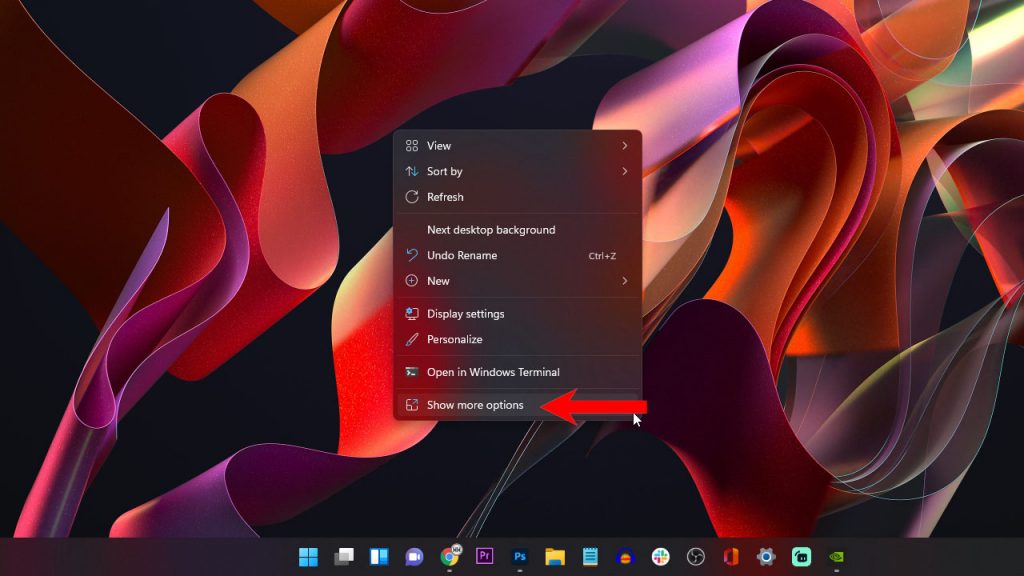
Step 2: Click Show more options.
Step 3: Now, click Nvidia Control Panel.
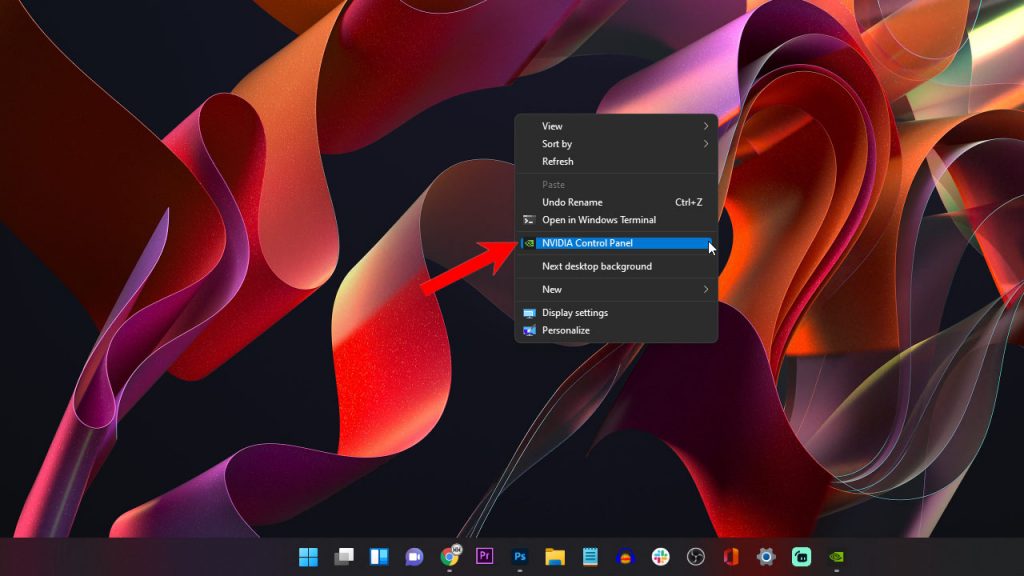
The Nvidia Control Panel window will now pop up.
Find Nvidia Control Panel from the System Tray
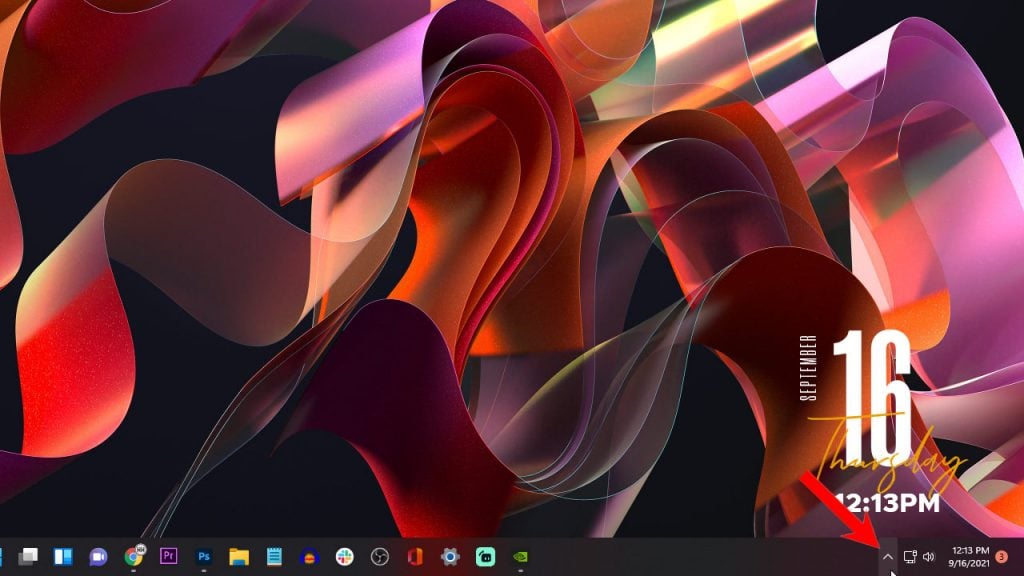
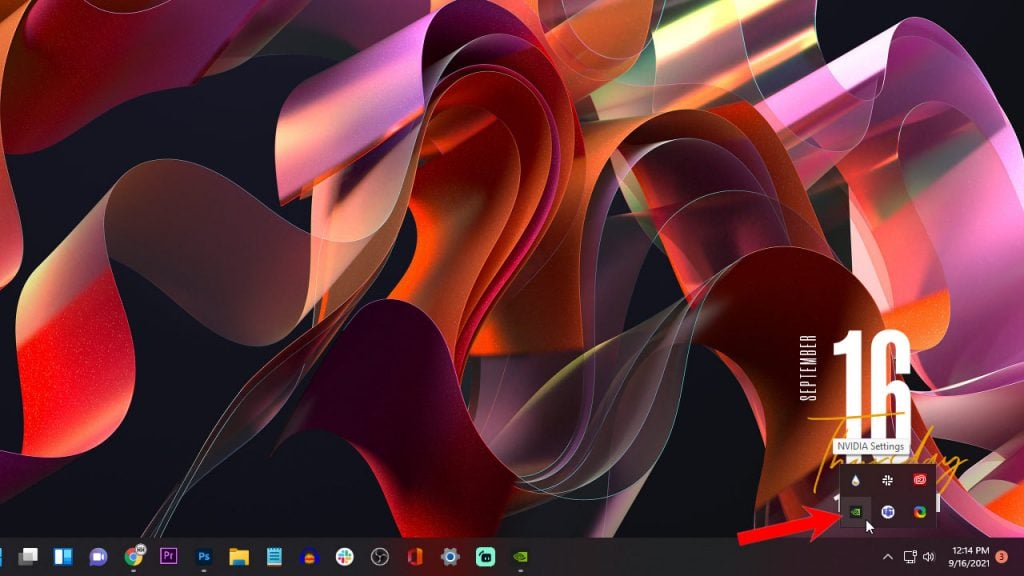
Another way to open it is to select Nvidia Control Panel from the system tray. When you install the Nvidia graphics card driver, both the Control Panel and GeForce Experience will be installed as well and the Nvidia Settings icon will be added to the System Tray by default.
Here’s how you open the Nvidia Control Panel from the system tray:
Step 1: Click on the small arrow pointing upwards on the system tray.
Step 2: Right-click the Nvidia Settings icon.
Step 3: Click Nvidia Control Panel to open it.
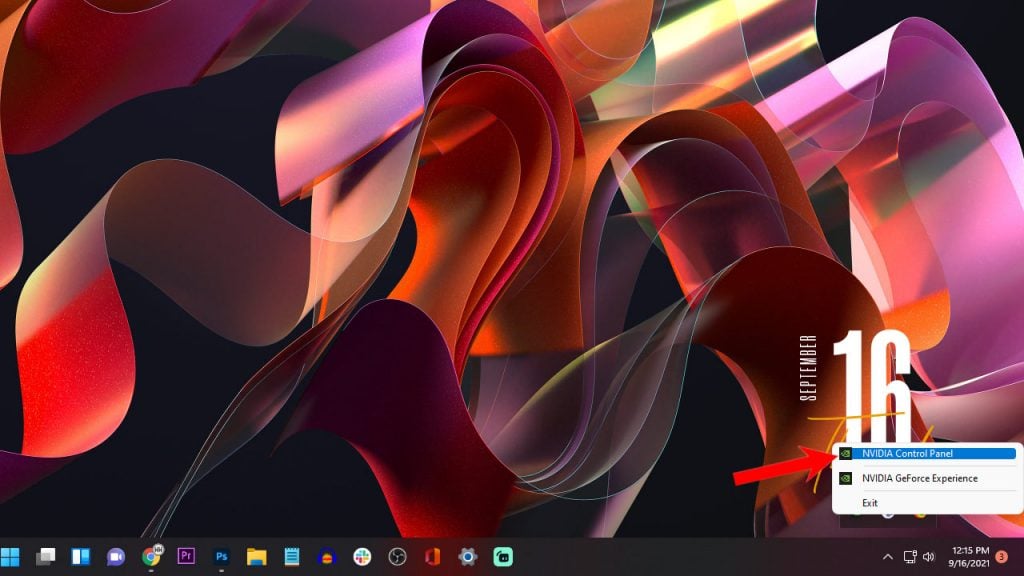
The Control Panel window will then pop up after a few seconds. Don’t worry if it doesn’t show immediately because it will take a few seconds before the user interface shows up. It’s not a case of Nvidia Control Panel missing.
Alternatively, you can just click on the Nvidia Settings icon and the Nvidia Control Panel will still open.
How to Open Nvidia GeForce Experience on Windows 11?
If you’re looking to update the Nvidia Display Driver, then you can use the Nvidia GFE instead of going into the Windows control panel and manually searching for latest driver for your graphics card.
Here’s how you open the GeForce Experience on your Windows 11:
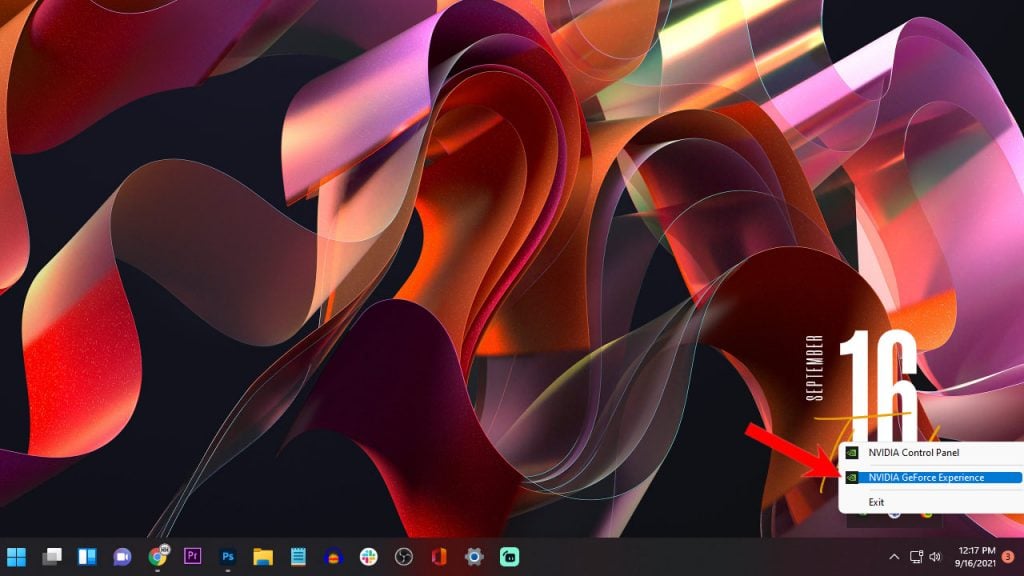
Step 1: Click on the small arrow pointing upwards on the system tray.

Step 2: Right-click the Nvidia Settings icon.

Step 3: Click Nvidia GeForce Experience to open it.
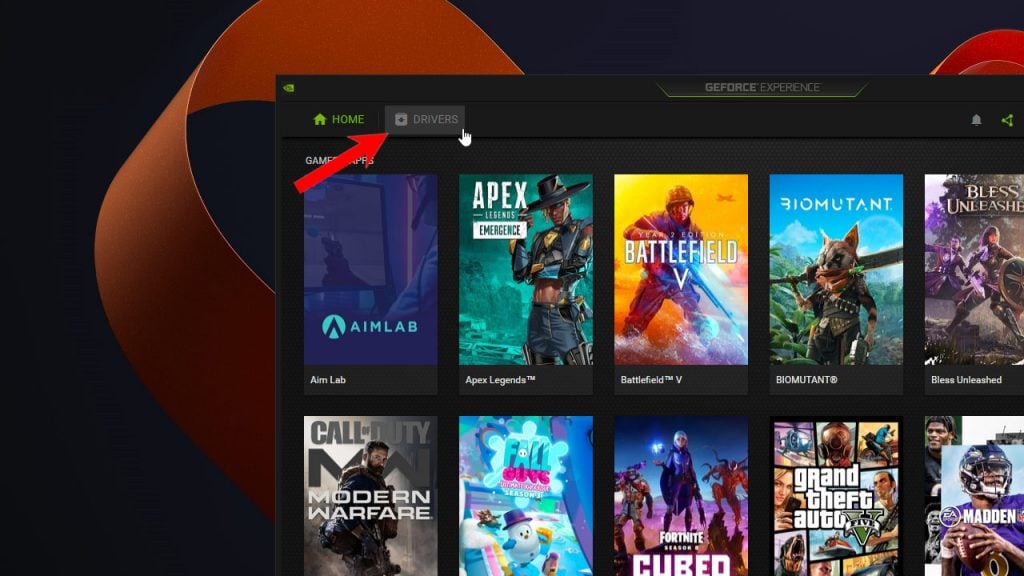
Step 4: If you want to check for Graphics card driver, click Drivers.
Step 5: Now click Check For Updates to try and download Nvidia driver for your PC.
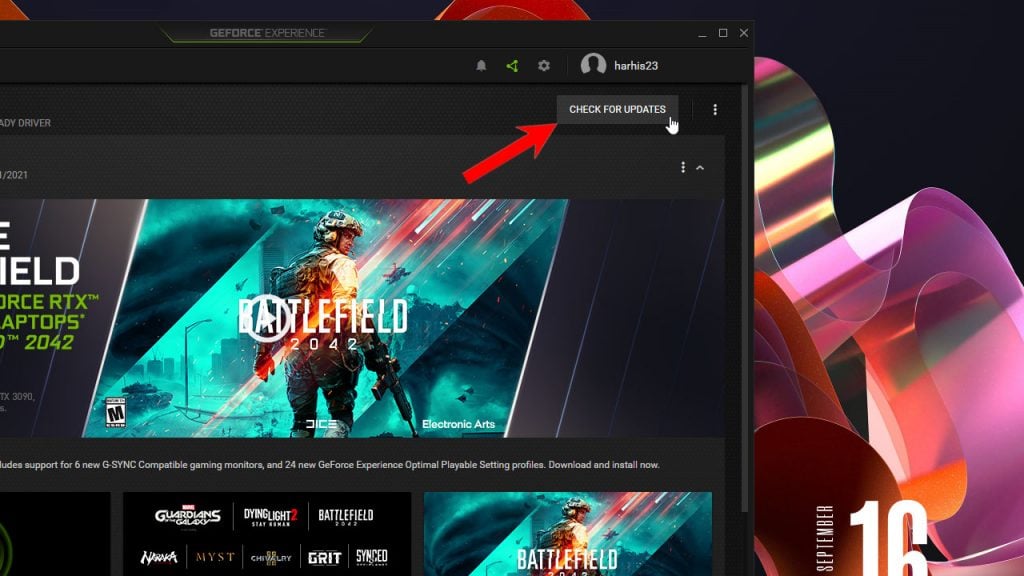
When the download is finished, you can click on Express Installation to install the latest graphics card driver for your GPU.
How to Open Nvidia GeForce Experience Overlay?
GeForce Experience in-game overlay enables you to access GPU-accelerated video recording, screen-shot capture, broadcasting, and cooperative gameplay capabilities. All Nvidia Graphics cards come packed with this feature.
To access it, you simply have to press Alt + Z. This will allow you to customize the settings in case you want to record the screen or your gameplays.
However, if you’ve already set everything up and wanted to just record the screen immediately, then press Alt + F9 and the recording will begin. You have to press the same key combination to stop the recording.
Nvidia regularly updates its software and drivers. You will be notified in the System Tray if there are updates available.
We hope that this post can help you one way or the other.