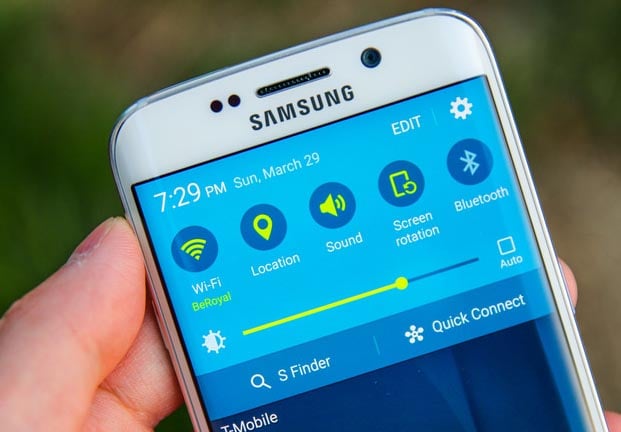
How to fix a Samsung Galaxy S7 Edge with greyed out Wi-Fi switch [Troubleshooting Guide]
Disabled or greyed out Wi-Fi switch on #Samsung #Galaxy S7 Edge (#S7Edge). For many users, this is a bizarre issue but we’ve seen a lot of issues like this since Galaxy S4. When the S5 was released, Samsung rolled out a security patch a few days later and it was then when some of our readers contacted us regarding disabled switches. The S6 and its variants weren’t exempted as well.
The point is any Android user may experience this kind of problem as it is clearly not exclusive to Galaxy devices. Clearly, it is a firmware-related issue, although there were cases wherein third-party apps caused similar problems due to constant freezing and crashing the affected the firmware. The key to fixing this problem is by thorough troubleshooting. Finding out what the culprit is is one step closer to finding a solution.
Just before anything else, if you have other concerns with your device, then make sure you visit our S7 Edge troubleshooting page for we have already addressed a lot of issues with this phone since its release. Find problems that are similar to yours and use the solutions we suggested. If they don’t work or if you need further assistance, then you can always contact us by completing our Android issues questionnaire. We are not asking you for anything but information about your problem so that we can help you better.
Troubleshooting disabled Wi-Fi switch on Galaxy S7 Edge
What we’re trying to accomplish here is to rule out one possibility after another so that we can find the culprit and eventually fix the real issue. That being said, here’s what you need to do…
Step 1: Boot your Galaxy S7 Edge in safe mode
Third-party apps may cause this problem and so it is necessary you boot your device in diagnostic state to temporarily disable all third-party apps and services that might be causing the problem. If our suspicion is right, then the Wi-Fi switch will be enabled in safe mode.
Based on reports we previously received that are related to this problem, booting in safe mode enables the switch back but booting in normal mode without doing anything is futile as the switch would still be disabled. So, first, here’s how you boot your phone in safe mode…
- Press and hold the Power key.
- As soon as you can see the ‘Samsung Galaxy S7 EDGE’ on the screen, release the Power key and immediately hold the Volume Down key.
- Continue holding the Volume Down button until the device finishes rebooting.
- You may release it when you can see ‘Safe mode’ in the bottom left corner of the screen.
Verify that the Wi-Fi switch is enabled and if it is, toggle it a couple of times and if it was off in normal mode, turn it on before you reboot.
After rebooting in normal mode, check if the switch is still set to On and if it’s enabled now. If it’s still greyed out, then the problem might be with the firmware and not with the apps.
Step 2: Reboot your device in recovery mode and delete the system cache
If booting in safe mode didn’t yield any good result, then it is safe to assume the problem is not with the apps but with the firmware. While it is expected to do the reset to rule out the possibility that some data got corrupted that cause this issue, there’s one procedure you don’t need to skip as it might save you from all the hassles of backing up your data and files–wipe the cache partition.
Before I give you the step-by-step instructions, let me explain briefly why this is important. System caches are files created by the system itself. It makes your phone and apps run smoothly. However, these files can easily get corrupted or if in the case of an update, they will become incompatible with the new firmware. Therefore, it is imperative you clear old caches so the new firmware will replace them with new ones and this is how you do it…
- Press and then hold the Home and Volume UP keys, then press and hold the Power key.
- When the Samsung Galaxy S7 Edge shows on the screen, release the Power key but continue holding the Home and Volume Up keys.
- When the Android logo shows, you may release both keys and leave the phone be for about 30 to 60 seconds.
- Using the Volume Down key, navigate through the options and highlight ‘wipe cache partition.’
- Once highlighted, you may press the Power key to select it.
- Now highlight the option ‘Yes’ using the Volume Down key and press the Power button to select it.
- Wait until your phone is finished wiping the cache partition. Once completed, highlight ‘Reboot system now’ and press the Power key.
- The phone will now reboot longer than usual.
Once the phone has rebooted, check the Wi-Fi switch immediately and if it’s still disabled, boot your device in safe mode again and try to see if it gets enabled and stay like that once booted normally. If the problem remains, however, then next step is a sure fire fix.
Step 3: Perform the Master Reset on your Galaxy S7 Edge
After wiping the cache partition and the Wi-Fi switch is still disabled, then you need to reset your phone to bring it back to its default settings and see if the problem gets fixed, which I believe it will. But before the reset, make sure you backup all your files and data as they’ll all be deleted and here’s the reset I want you to do…
- Turn off your Samsung Galaxy S7 Edge.
- Press and then hold the Home and Volume UP keys, then press and hold the Power key. NOTE: It doesn’t matter how long you press and hold the Home and Volume Up keys, it won’t affect the phone but by the time you press and hold the Power key, that’s when the phone starts to respond.
- When the Samsung Galaxy S7 Edge shows on the screen, release the Power key but continue holding the Home and Volume Up keys.
- When the Android logo shows, you may release both keys and leave the phone be for about 30 to 60 seconds. NOTE: The “Installing system update” message may show on the screen for several seconds before displaying the Android system recovery menu. This is just the first phase of the entire process.
- Using the Volume Down key, navigate through the options and highlight ‘wipe data / factory reset.’
- Once highlighted, you may press the Power key to select it.
- Now highlight the option ‘Yes , delete all user data’ using the Volume Down key and press the Power button to select it.
- Wait until your phone is finished doing the Master Reset. Once completed, highlight ‘Reboot system now’ and press the Power key.
- The phone will now reboot longer than usual.
I hope that this simple troubleshooting guide can help you.
CONNECT WITH US
We are always open to your problems, questions and suggestions, so feel free to contact us by filling up this form. This is a free service we offer and we won’t charge you a penny for it. But please note that we receive hundreds of emails every day and it’s impossible for us to respond to every single one of them. But rest assured we read every message we receive. For those whom we’ve helped, please spread the word by sharing our posts to your friends or by simply liking our Facebook and Google+ page or follow us on Twitter.
Good Solutions. I tried all of the above but the WiFi does not turn on. My Phone is hardly 3 month old. One day suddenly the WiFi could not be connected. I suspect Manufacturing Defect
It is a US made phone used in India. Samsung local Service Centre only on physical inspection indicated that the mother board needs replacement. The phone is in absolutely good condition.
The problems could be Antanea getting dislodged, Antena going bad, WiFi chip going bad, etc. Software update, It needs to be opened by technical person to understand what is the problem. But Local Samsung refuses to answer anything other than replace the motherboard which is costing 60% of Brand new phone cost.
Any solution to this Problem?