How to Enable Show Caller ID Feature on Galaxy Note 20
This video will show you how to enable the Show Caller ID feature on the Galaxy Note 20. Feel free to refer to this quick tutorial if you need help showing your caller ID in all outgoing calls you make on your new Note device.
How Caller ID Works
One of the ways to prevent anyone from tagging your calls as scam or potential fraud is to show your caller identification or Caller ID on your outgoing calls. With your caller ID, your family, friends and business contacts would be able to know that it is you calling them. The caller ID information that appears on their device may vary depending on what information is saved in their contacts list.
If you’re wondering how to make your caller ID information show up in all your outgoing calls on the new Note 20, I’ve outlined a simple guide depicting the standard steps carried out through the built-in phone app settings. Feel free to make this a personal reference.
Steps to Enable Show Caller ID Feature on the Galaxy Note 20
The following steps can also be used to activate the caller ID feature on other Samsung Galaxy devices that are running on the same Android version with that of the new Note. Slight variations on the actual screens and menu items are likely to be perceived between device models and service providers.
1. To get started, tap the Phone app icon from the Home screen. It’s usually lined up among other default icons at the bottom of the Home screen.
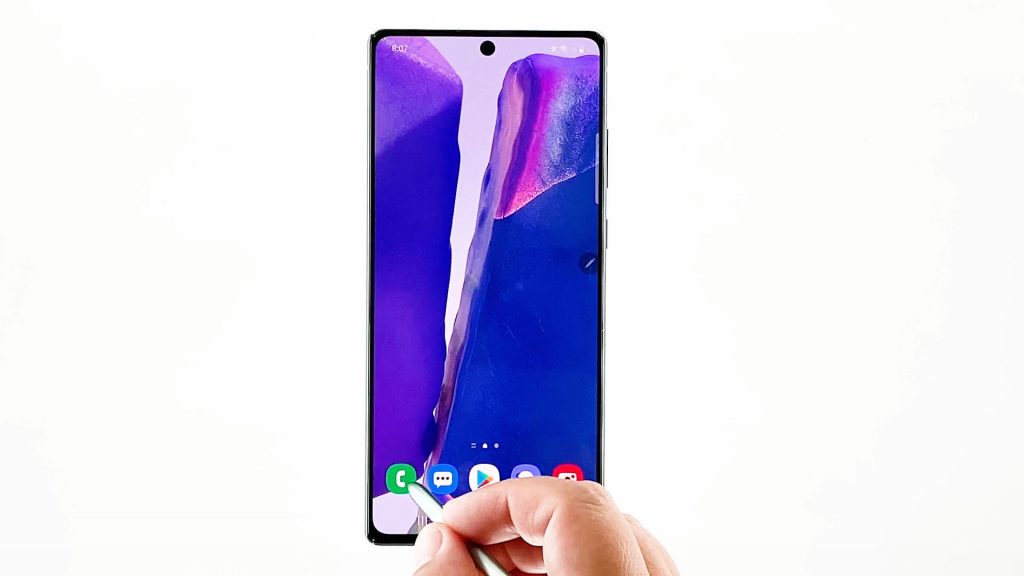
The Phone app icon can also be accessed through the Apps viewer.
Either way will route you to the same Phone app screen.
2. While on the Phone app main screen, tap the quick menu icon represented by a triple-dot figure located on the upper-rightmost corner of the screen.
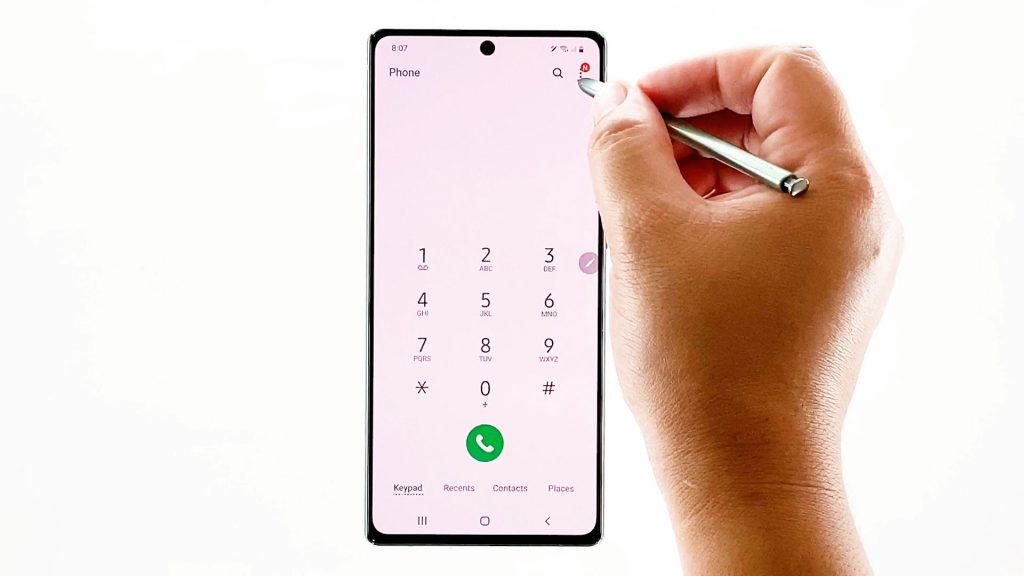
A pop-up menu will launch with the phone app features and relevant information.
3. Tap Settings to continue.
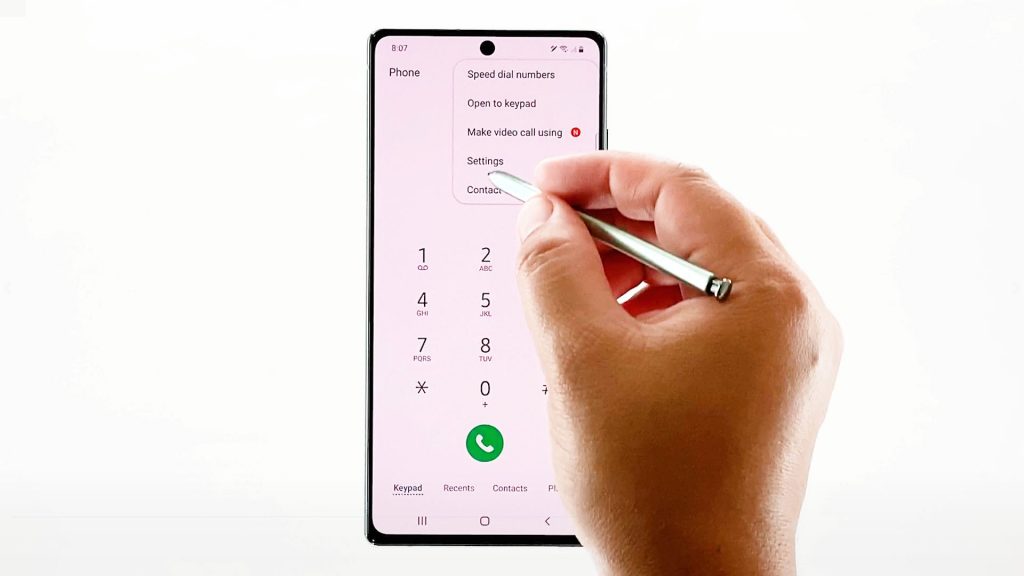
The Phone app settings or call settings menu will load up on the next display.
Listed on this menu are basically the phone’s smart call features.
4. Tap Supplementary services to proceed.
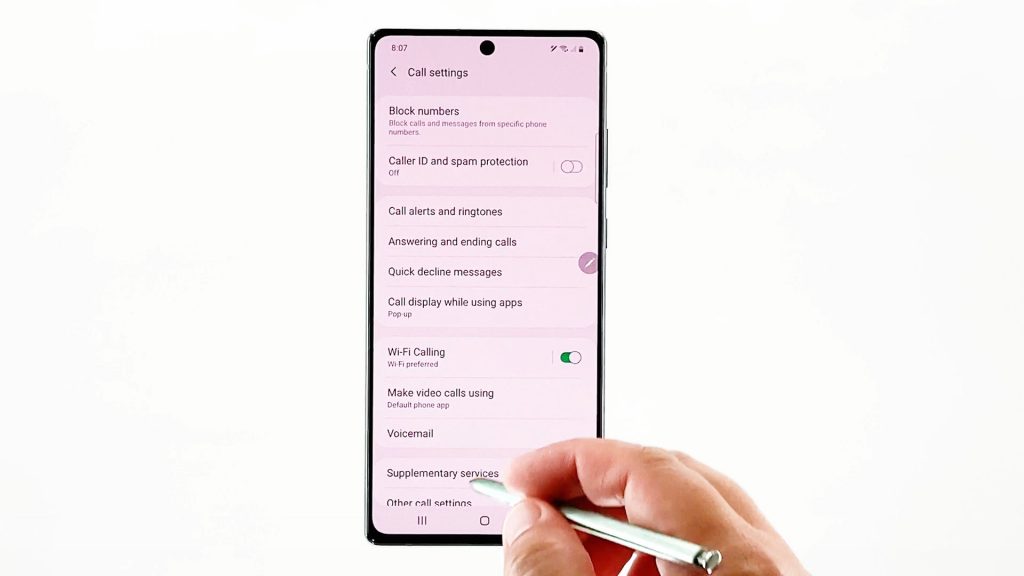
Additional services will load up next.
5. Select the option to Show caller ID.
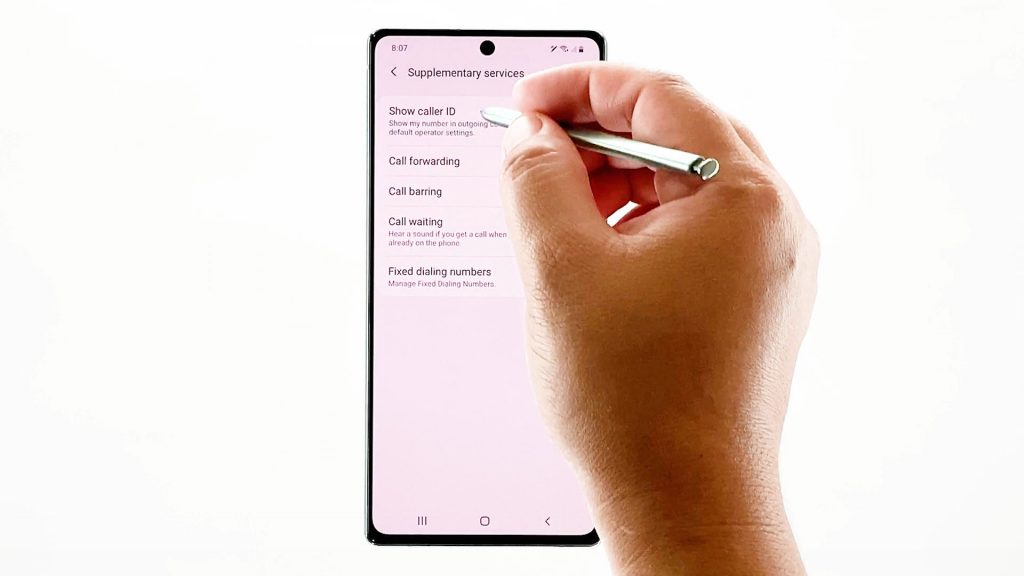
Doing so will prompt your device to show your number in outgoing calls according to the default operator settings.
6. Tap to mark the option to Show number from the pop-up menu.
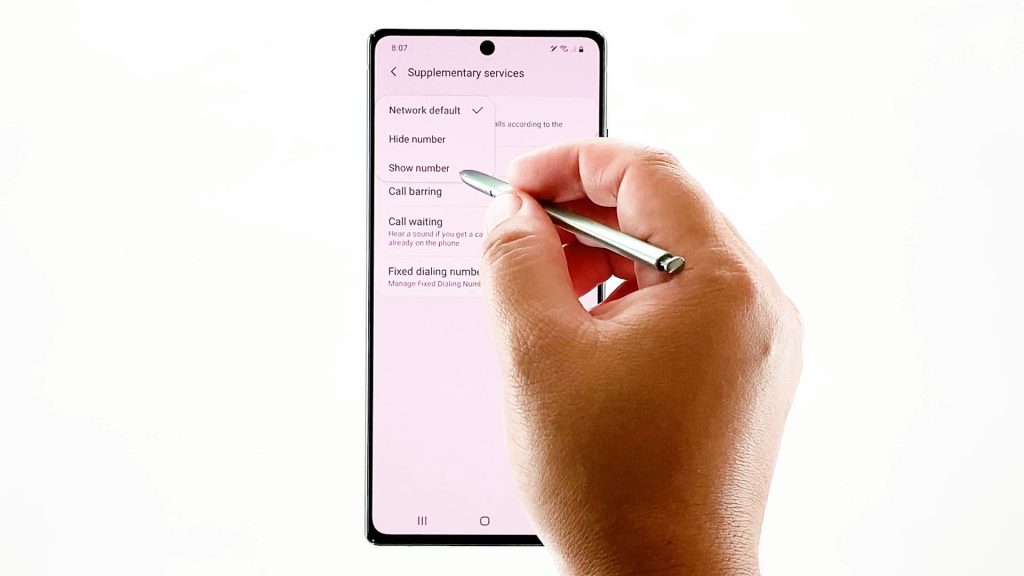
Wait for the phone to apply the recent changes to the caller ID settings.
When finished, the Show caller ID status will state that your phone number will be displayed in outgoing calls.
This denotes that your caller ID information is already made visible on all your outgoing calls.
Filtering Calls with Caller ID
Samsung devices do embed a number of smart call functions that allow users to know who’s calling even when the number is not on the contact list. With this feature, you can easily legit call from spam and scam calls.
That said, be sure to make use of all these features for ultimate smartphone experience, especially in terms of privacy and security welfare.
Alternative Tools
Aside from the built-in caller ID feature, there are also a number of relevant features that you can use to show or hide caller ID information on your Android smartphone. You can download any of these tools from the Play Store in case you’d like to give third-party apps a shot and compare it with the built-in smart call features of your device.
Hope this helps!
More Video Tutorials
To view more comprehensive tutorials and troubleshooting clips on different mobile phones and tablets, feel free to visit The Droid Guy channel on YouTube anytime.
You might also want to read: