How To Restore (Reset) Google Chrome To Defaults In Windows 11 | Updated 2023
Google Chrome is a massively popular web browser with billions of internet users relying on it for their browsing needs every day. While Chrome is known for its reliability and convenience, some users may find it problematic from time to time due to many different factors.
Fortunately, there’s one quick way to deal with all sorts of issues on Google Chrome — by resetting it to its original defaults. In this guide, we’ll show you the easy steps to restore Google Chrome to defaults in Windows 11.
What happens when you restore Google Chrome settings to its original defaults?
If you’re experiencing issues with Chrome browser and doing the usual basic troubleshooting did not help, you may come across the suggestion to perform a factory reset. As the name suggests, this procedure will return your browser to its defaults by resetting Chrome settings and shortcuts, disabling installed extensions, and deleting cookies and other temporary website data.
Resetting Chrome won’t affect your browsing history, bookmarks, and passwords you’ve saved though. There are several changes that will occur after a reset though. For example, if you’ve set Chrome to use a different default search browser other than Google before, this will be reverted back to Google search engine. The Homepage and tabs will change as well as the pinned tabs you’ve set before the reset.
If you change certain content settings like audio settings, they will be returned to defaults as well so you’ll have to go into Chrome settings afterwards to modify them.
Extensions and themes will be disabled after the reset as well so you’ll need to re-enable them after a reset.
How to factory reset Google Chrome in Windows 11?
To reset Google Chrome to its original settings, follow these steps:
- Open Chrome.
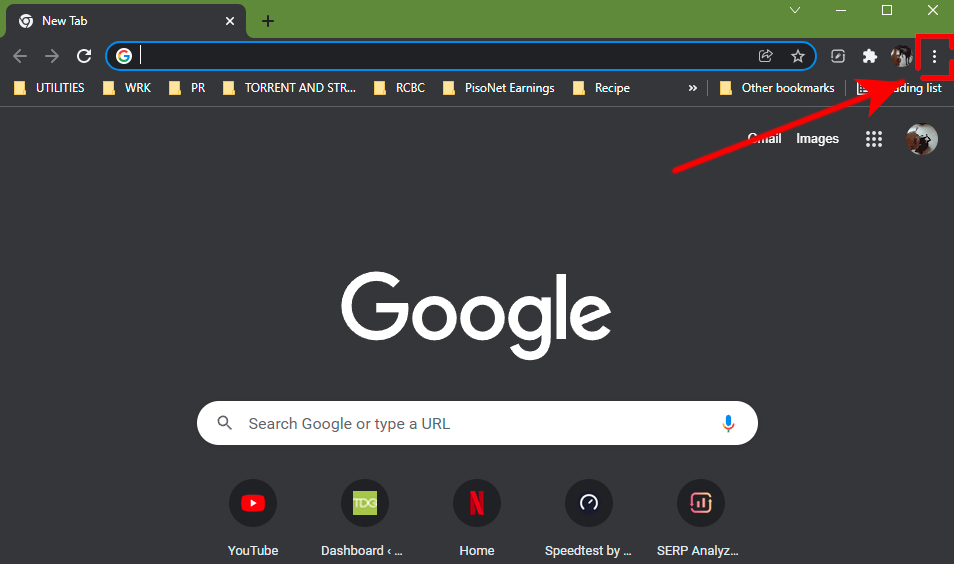
- Go to Chrome Settings by clicking on the three dots at the upper right and clicking on Settings.
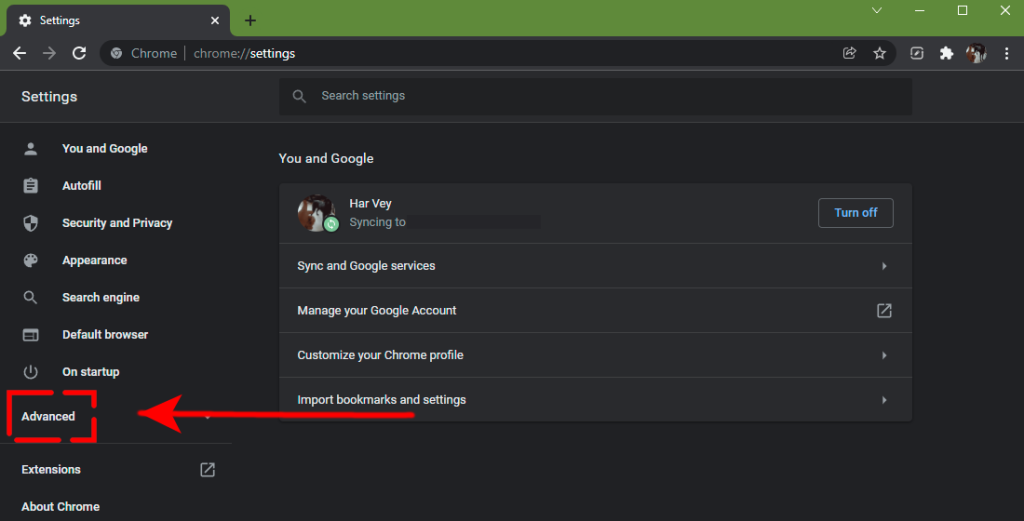
- Click on Advanced in the left panel.

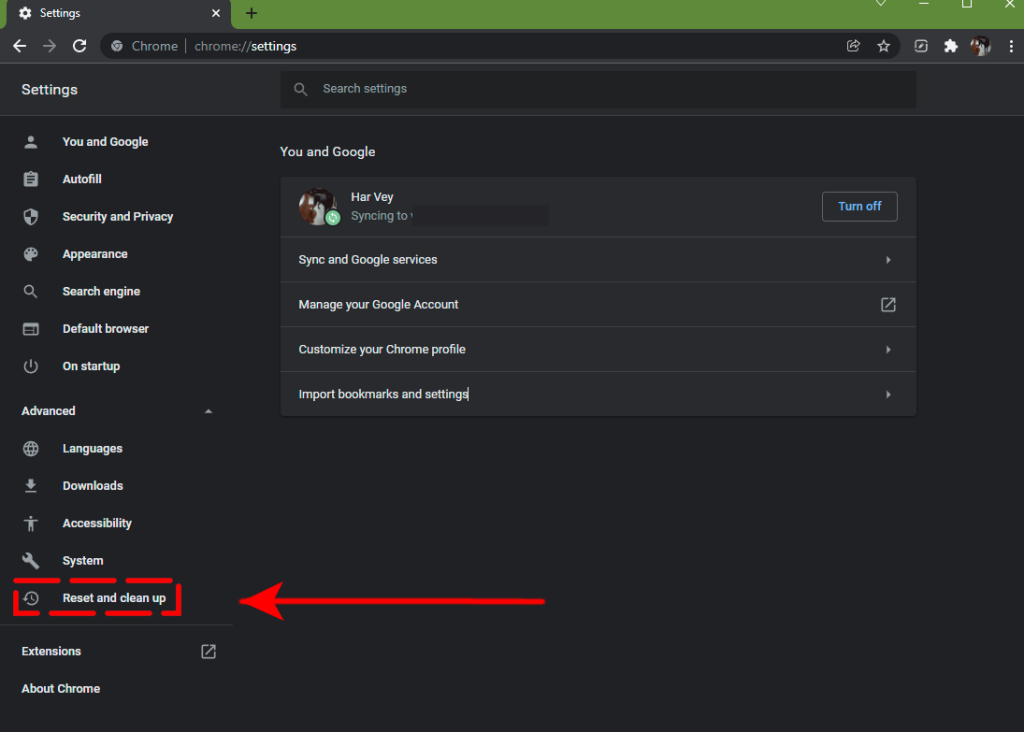
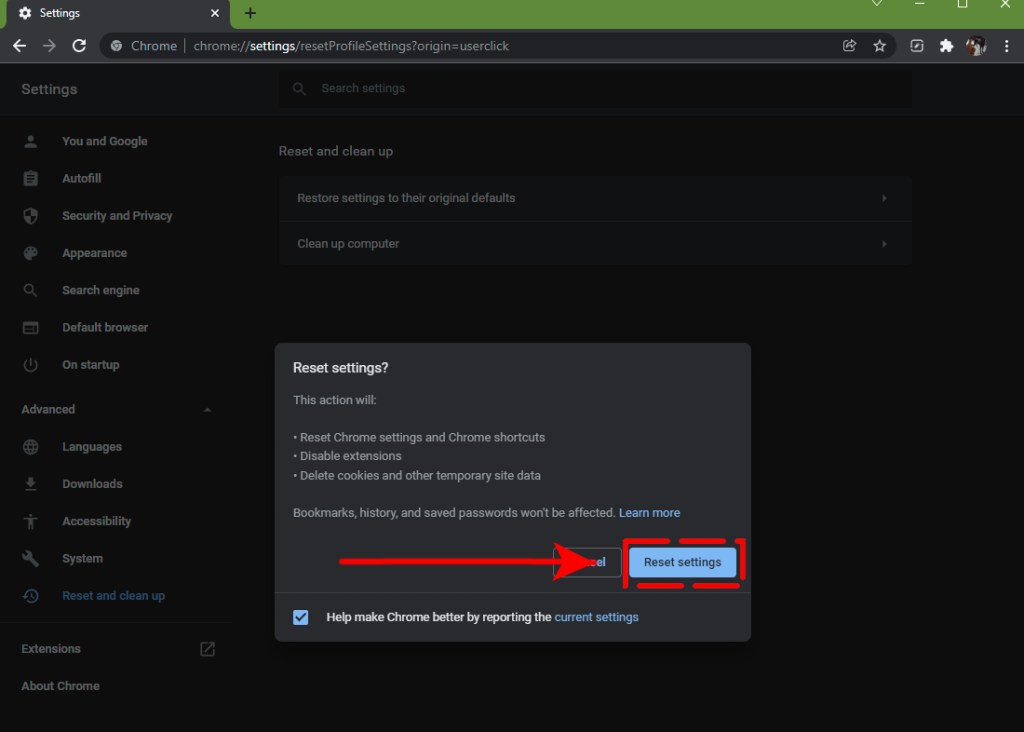
- Click on Reset and clean up.

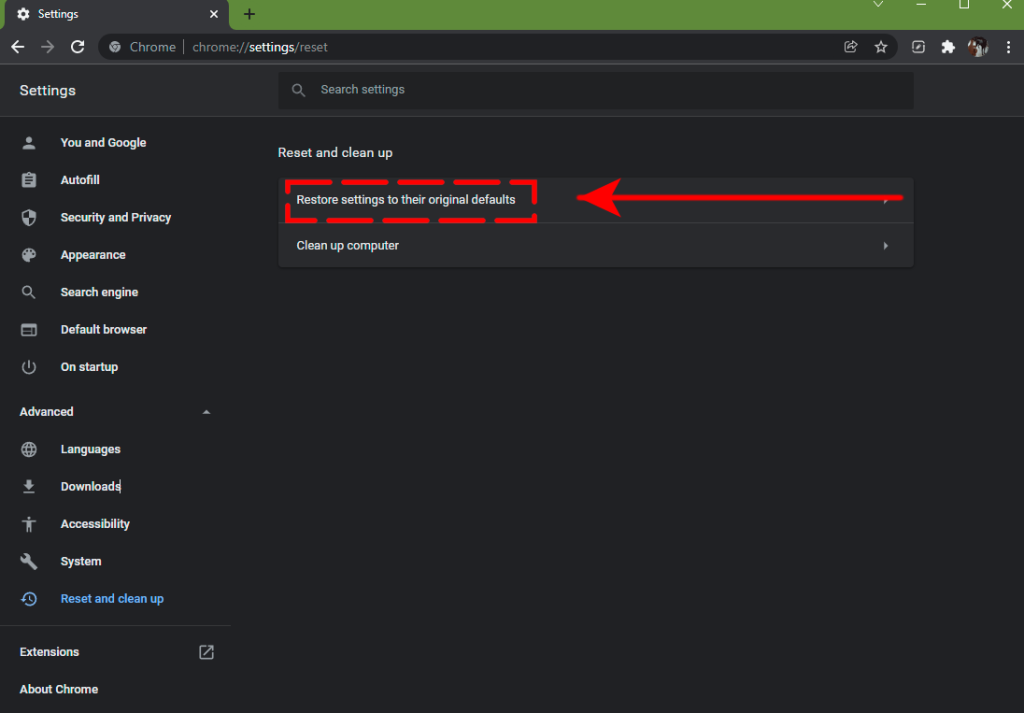
- Select Restore settings to their original defaults.

- Click the Reset settings button.
After the reset, start Chrome again and check if the problem you’re experiencing has been fixed. If needed, open Chrome again and restore settings that you’ve previously set.
How to troubleshoot Chrome that won’t reset?
Some Windows users may encounter the rare issue of having no option to reset their Google Chrome browser. Others have also reported that their Settings menu fails to open or load. In any of these cases, Chrome might have a problem that a factory reset cannot fix. You’ll have to delete Google Chrome from your Windows PC and redownload it.
Here’s how to do that:
- Make sure to close all Chrome windows.
- Click the Start menu or press the Windows key on your keyboard.
- Click on Settings.
- Click Apps.
- Go to Apps & features.
- Scroll through the list and find Google Chrome and click the More icon (three dots).
- Click Uninstall.
- Click Uninstall.
- To allow this app to make changes to your device, click Yes.
How to fix it if Google Chrome won’t open or start?
If Google Chrome fails to open or start, which will also prevent you from going into the SEttings menu as well, it may be caused by malfunctioning extensions. You can disable your extensions by forcing Google Chrome to run in Safe Mode. This way, you can then disable the extensions afterwards.
To run Google Chrome in Safe Mode:
- On your keyboard, press the Window key + R.
- Type “chrome.exe –disable-extensions” (without the quotes) and press Enter.
- Once Google Chrome is running, go to Settings and disable the extensions from there.
OTHER INTERESTING ARTICLES YOU MAY LIKE:
- How To Fix Google Chrome STATUS_ACCESS_VIOLATION Error in 2026
- How To Fix Nintendo Switch Controller Won’t Connect To PC | 2022
- How To Fix Call of Duty Vanguard Error Code DUHOK – LESTER | [2022]
- How To Fix Battlefield 2042 Error Code 15 – 7A | Updated Solutions [2022]
Visit our TheDroidGuy Youtube Channel for more troubleshooting videos and tutorials.