Skip to content

The Droid Guy

  • Android
    • Samsung
      • Samsung Galaxy S Series Smartphone
      • Samsung Galaxy A53 5G
    • Tablet
    • Smartwatch
      • Fitbit
    • Tutorials
      • How To
    • Smartphone Manuals
  • Gaming
    • Valorant
    • Call of Duty Warzone
    • Playstation
      • PS5
      • PS4
    • Xbox
    • Nintendo Switch
    • PC
  • Windows
    • Windows 11
    • Windows 10
  • Reviews
    • Rumors
    • VPN
  • About Us

How to Remove a Google Account on Redmi Note 8 Pro | Not Factory Reset

Last Updated on: January 7, 2023 by Grace

This post shows you how to remove a Google account on the Redmi Note 8 Pro smartphone. Read on if you need help deleting an unused or corrupted email account that might have caused email issues on your Redmi device.

Deleting Email Account

One of the effective solutions to email-related issues in mobile devices is removing and re-adding of the problematic account. Doing so will remove any erratic settings or corrupted data that triggered the occurrence of an error in sending or receiving emails on the device.

The process of removing an email account from an Android smartphone is fairly simple. But the methods vary between device models and carriers.

Depicted in this quick walkthrough is the actual process of removing a Gmail account on the Redmi Note 8 Pro without deleting any saved user data and downloaded application. And here’s how it’s done.

Easy Steps to Remove Gmail Account on Redmi Note 8 Pro

Removing a Gmail account will delete everything that’s tied to that account from your phone including contacts, emails and relevant settings.

Saved data on the internal storage as well as downloaded apps aren’t affected, so creating backups isn’t really that needed. But you still can back up relevant files for safekeeping. Then, follow these steps whenever you’re all set.

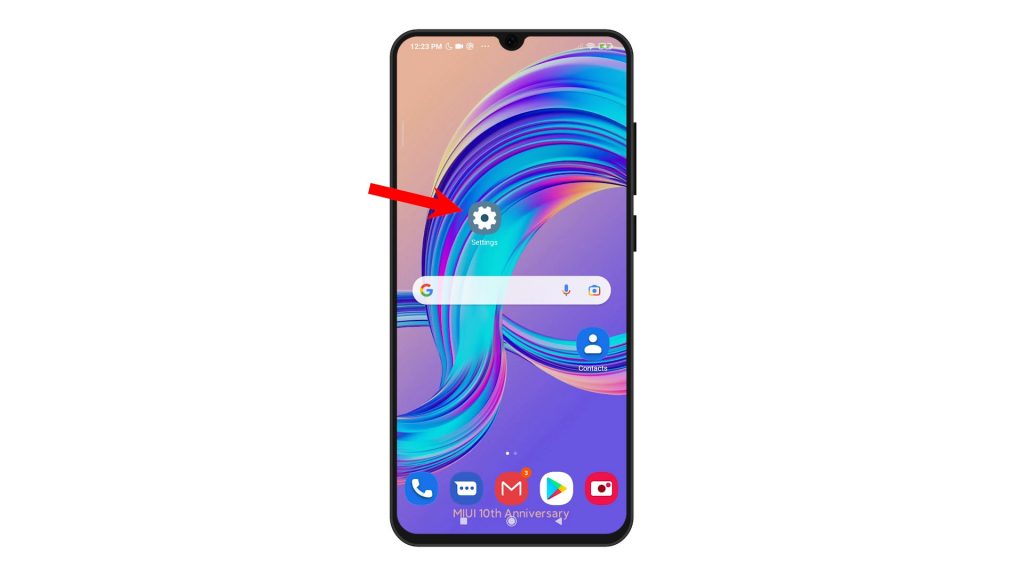
1. First, tap the Settings icon from the Home or Apps screen to access the main settings menu.

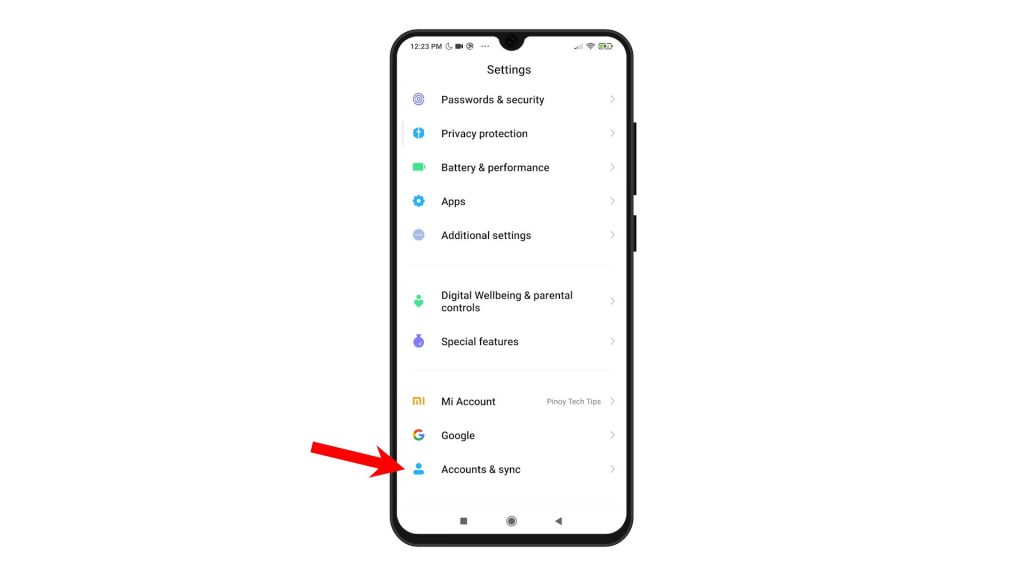
2. While on the settings menu, scroll to find and then tap Accounts and sync. 

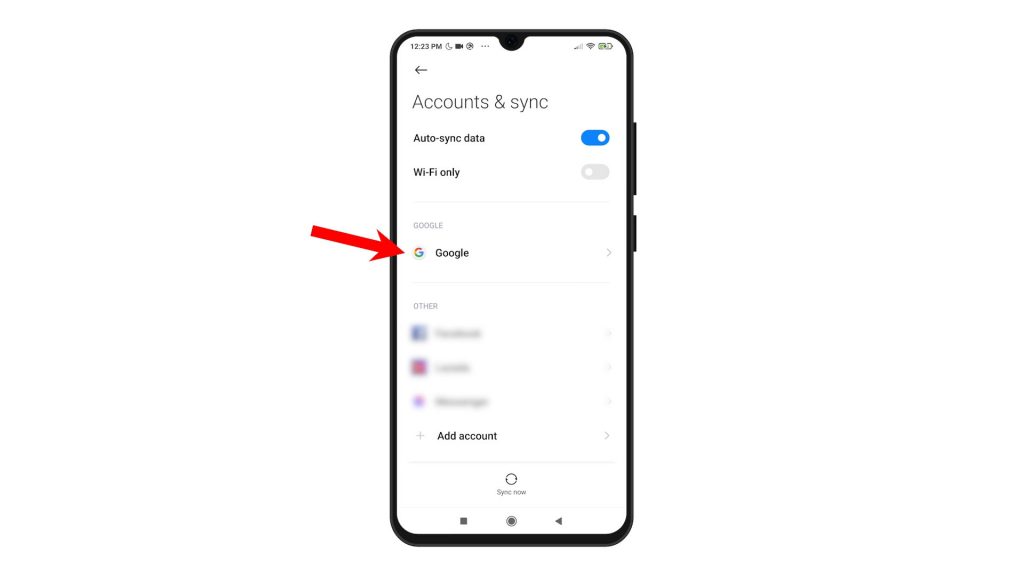
3. On the next screen, you will see a list of all saved accounts on the phone. Tap Google to proceed.

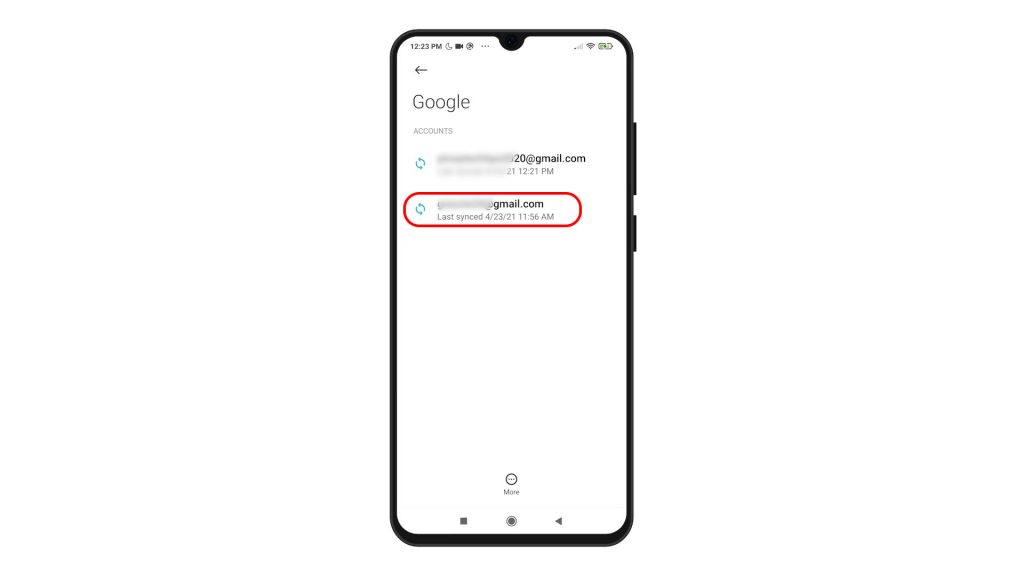
4. A list of Google accounts will show up next. Select the account that you’d like to remove by tapping on it.

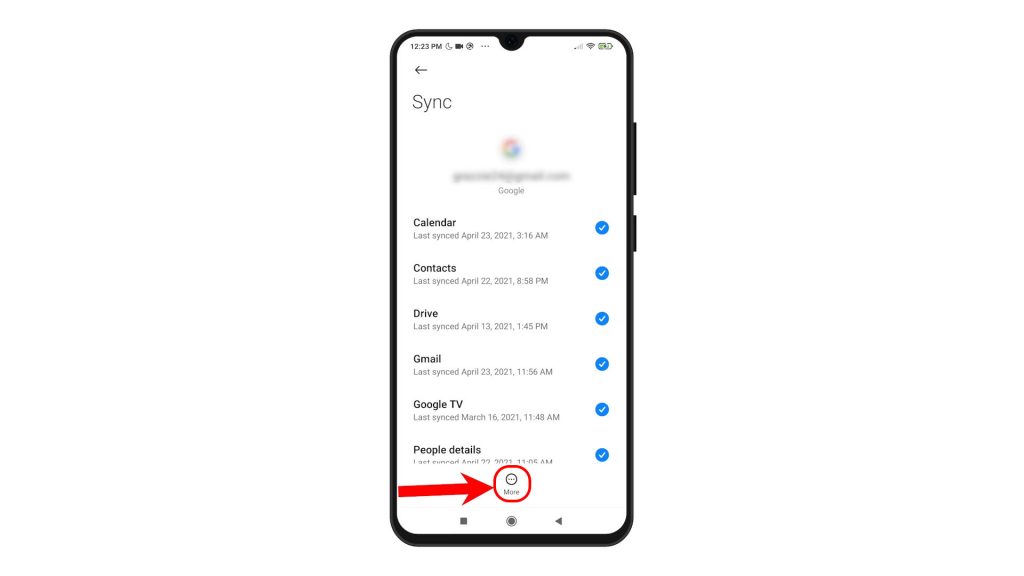
5. The sync menu will launch, prompting all apps and services that are linked to the account. Beneath the screen is the More icon. Tap on it to view more options.

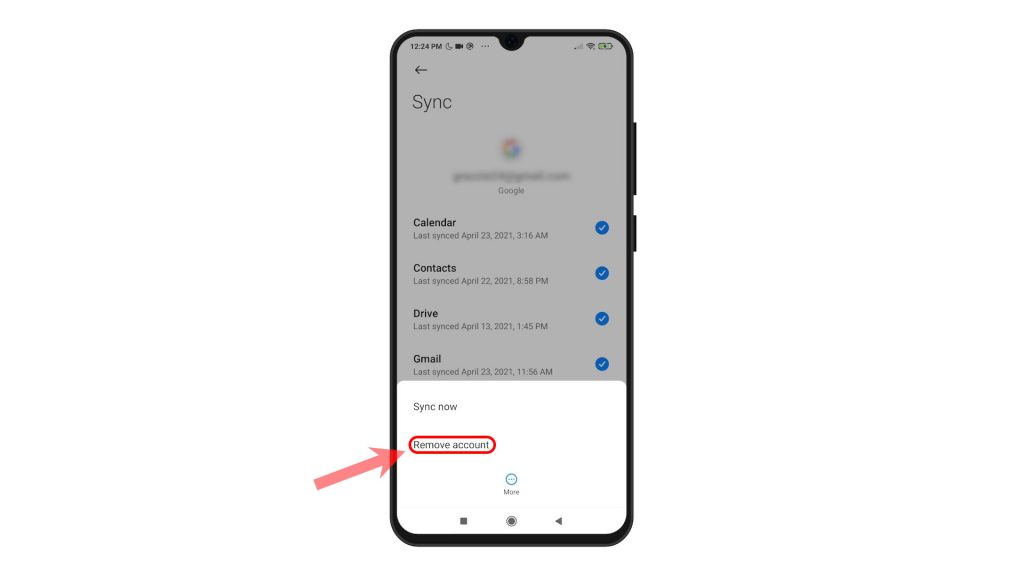
6. A pop-up menu opens, prompting additional options. Select the option to Remove account.

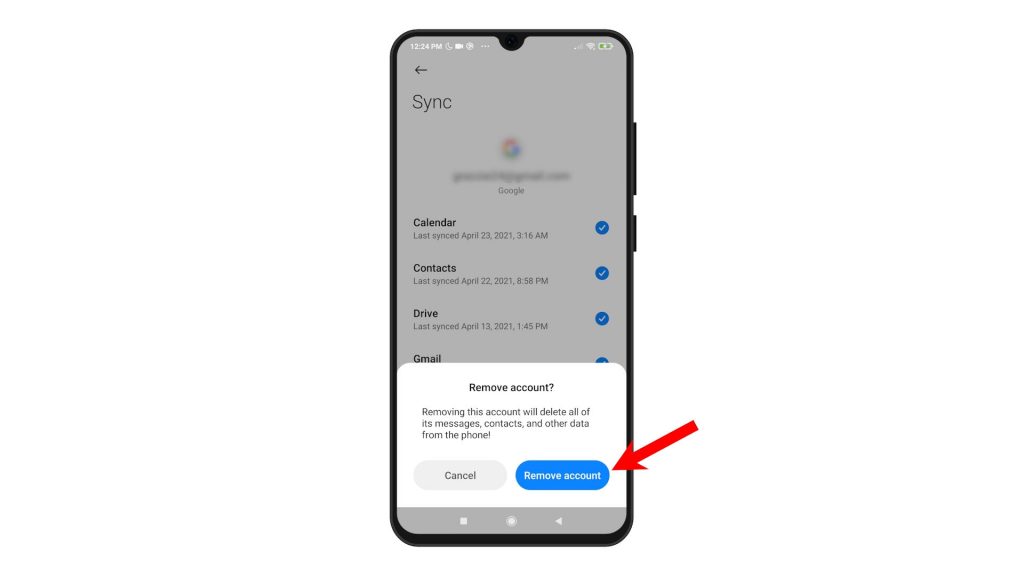
7. Next, read the final warning and then tap the Remove account button to confirm.

The account will then be removed from the Google Accounts list. Any information stored through that account on the phone will be lost. Access to the Google Play Store through that account will also be revoked.

To remove another account, just repeat the same steps. Any deleted account can be re-added and restored on the phone as new.

And that’s how to remove a Google account from the Redmi Note 8 Pro.

More Video Tutorials

To view more comprehensive tutorials and troubleshooting clips on different mobile phones and tablets, feel free to visit The Droid Guy channel on YouTube anytime. 

You might also want to read:

  • How to Remove Google Account on Samsung Galaxy A10
  • How to add or remove Google account on Galaxy S7 Edge
  • How To Remove Google Account From Samsung Galaxy A51
  • How To Remove Google Account From Samsung Galaxy A31
Photo of author

Grace

Grace was always fascinated by technology, and her passion for it led her to become an IT professional. She started off as a computer instructor and later moved on to the BPO industry, where she worked as an account specialist and a technical support specialist. She started her own blog, where she wrote about the latest advancements in technology, how-tos and troubleshooting guides. Her digital journey was a testament to her determination and passion. She had followed her heart and pursued her dream, and it had paid off in a big way. She was now able to work on something that she loved and make a difference in the world of technology. From a computer instructor to a technical support specialist to a virtual technical content creator, Grace had come a long way. And she was only just getting started.

Posts you might like
How to Create a New YouTube Playlist on Galaxy S20
How to Enable USB Debugging on Xiaomi Mi Note 10 Lite
How to Access and Manage Apps Permission on Samsung Galaxy Tab S6
How to Activate Redmi Note 8 Pro Power-Saving Features
How to Enable USB Debugging Mode on Samsung Galaxy M62 | USB File Transfer
How to Put Unused Apps to Sleep on Samsung Galaxy S21
How to Fix Poco M3 Pro That Keeps Freezing After An Update
How To Update Software on Redmi Note 8
How To Fix Poco M3 Pro Showing “System UI Stopped” Error
How to Manage Mozilla Maintenance Service on Firefox
How To Enable Portable Hotspot On Poco M3 Pro
How To Soft Reset Poco M3 Pro
How to Retrieve Deleted Facebook Messages on Galaxy S20
How to Block a Phone Number on Redmi Note 8 Pro
How To Find Who Unadded You On Snapchat
How to Force Amazon Echo Update Firmware
How to Enable Developer Options on Poco M3 Pro
How To Use Google For A Reverse Phone Lookup
How To Find Who Unfriended Me On Facebook
How to Rename or Change the Name of your Samsung Galaxy Tab S6
How to Sync Contacts on Galaxy Tab S6 with Samsung Cloud
How To Download SoundCloud Songs
How to Browse Internet Privately With Incognito Mode On Galaxy S8
How To Test Android Internet Speed

Tags remove google account, Xiaomi Redmi Note 8
How To Fix Error Connecting To FIFA 21 Ultimate Team | Xbox | New in 2023
How To Add Password on Samsung Galaxy A50

Legal

  • Advertising Policy
  • Affiliate Disclosure
  • Privacy Policy

About Us

  • Who We Are
  • Our Team
  • Editorial Guidelines
  • Contact Us
© 2023 The Droid Guy