7 Ways To Fix Microphone Not Working In Windows 11 | [Updated 2023]
Are you having microphone problems on your PC? In this troubleshooting guide, we’ll show you the effective ways to fix it if your microphone is not working on your Windows 11 PC.
How to fix microphone not working in Windows 11?
There’s a long list of possible reasons why your Windows 11 microphone is not working right now. You’ll have to go through several troubleshooting steps in order to figure out the solution for your particular case.
If you’re using a wired microphone, the most basic troubleshooting step that you want to do is to ensure that it’s properly connected to the PC. you don’t want to waste your time doing other steps when the only problem is loose connections.
Learn about the solutions that you can try in this guide..
Fix #1: Install Windows updates.
Fixing microphone not working issue starts with simple solutions. Make sure that before you tweak software settings, your Windows OS is running the latest version at this time.
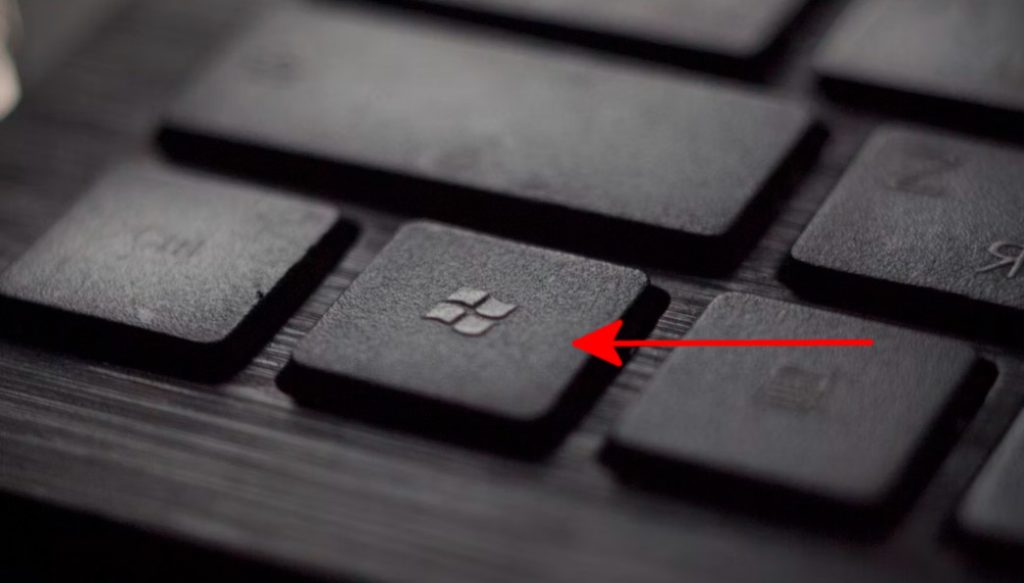
- Press the Windows key.
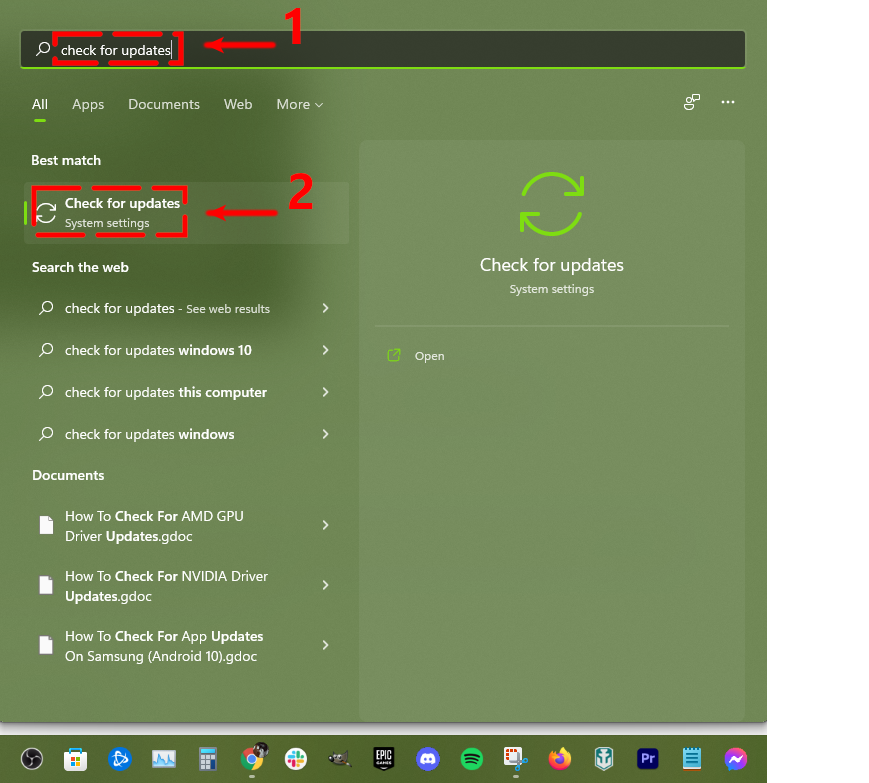
- Type the word “check for updates”.
- Select Check for updates.

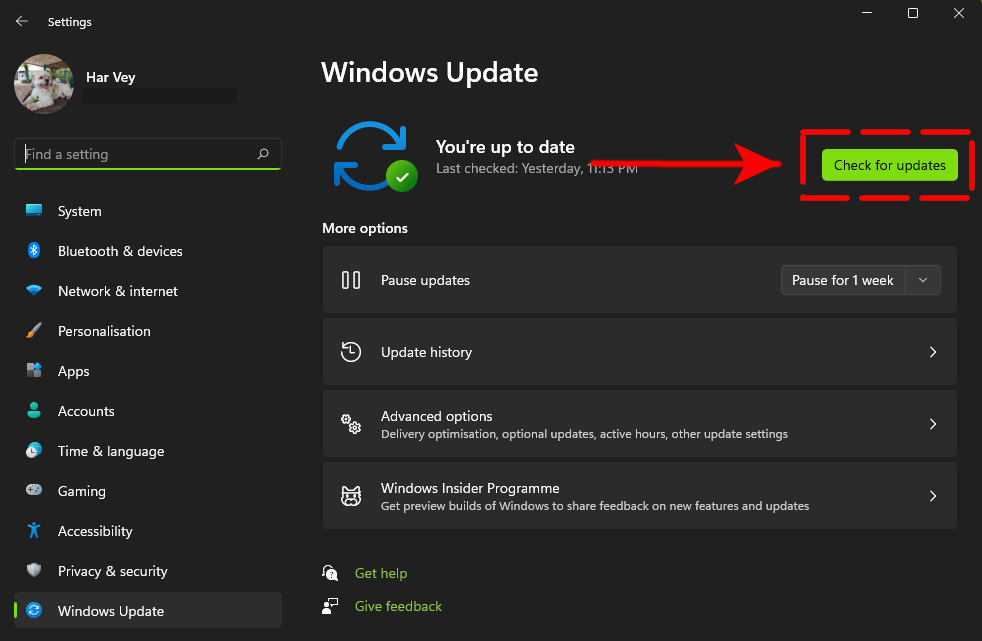
- Click Check for updates located on the right pane. The system will scan for available updates.

- Select Download and install if there are updates available.
- Restart your Windows 11 PC.
Fix #2: Install microphone drivers.
Having the latest microphone drivers is an important consideration in this case. You don’t want to be using outdated drivers, especially when you’re experiencing a microphone issue.
Here’s what you need to do:
- Press the Windows key on the keyboard.
- Type in “control panel” and select Control Panel.
- Change the View by dropdown to Small icons and click on Device Manager.
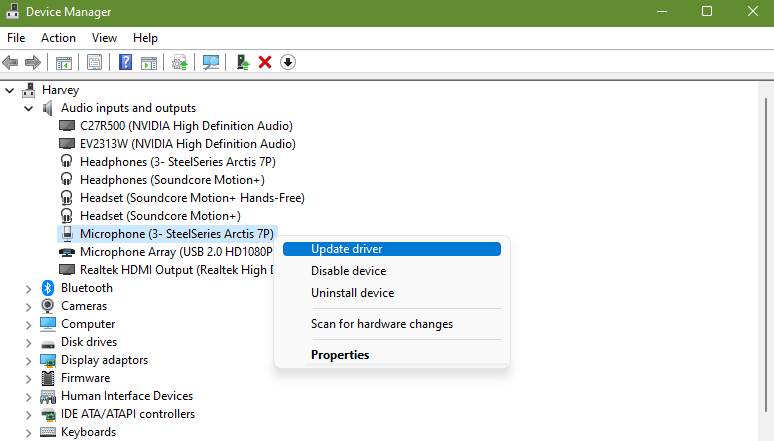
- Once the Device Manager is opened, click the dropdown for Audio inputs and outputs.
- Find your microphone and right-click on it.
- Select Update driver.
- Select Search automatically for drivers.
Alternatively, you can try to toggle your microphone by right clicking on the device and by selecting the Disable device option or Enable device (depending on the state of your microphone).
Fix #3: Ensure that you’re not using the wrong microphone.
Your Windows 11 microphone may not be working due to a simple reason — that you forget to turn it on. Make sure that you enable your microphone under Windows Settings.
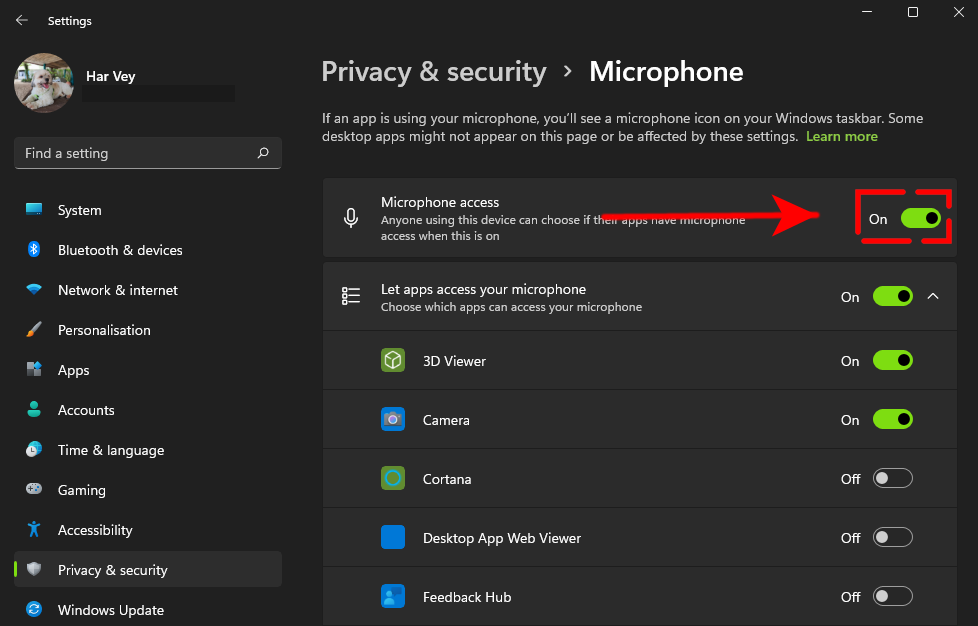
- Press the Windows key on the keyboard.
- Click on Settings.
- Select Privacy & security.
- Scroll down and look for Microphone under App permissions section.
- Make sure that you toggle on Microphone access.
If you’re using your Microphone when using a particular app only like Discord, be sure that the said app has permission to access your microphone in the microphone privacy settings screen.
Fix #4: Use the Windows 11 audio troubleshooter.
Windows 11, just like its previous iterations, has a built-in troubleshooter that can be quite effective in fixing certain issues. You can access the troubleshooter with these steps:
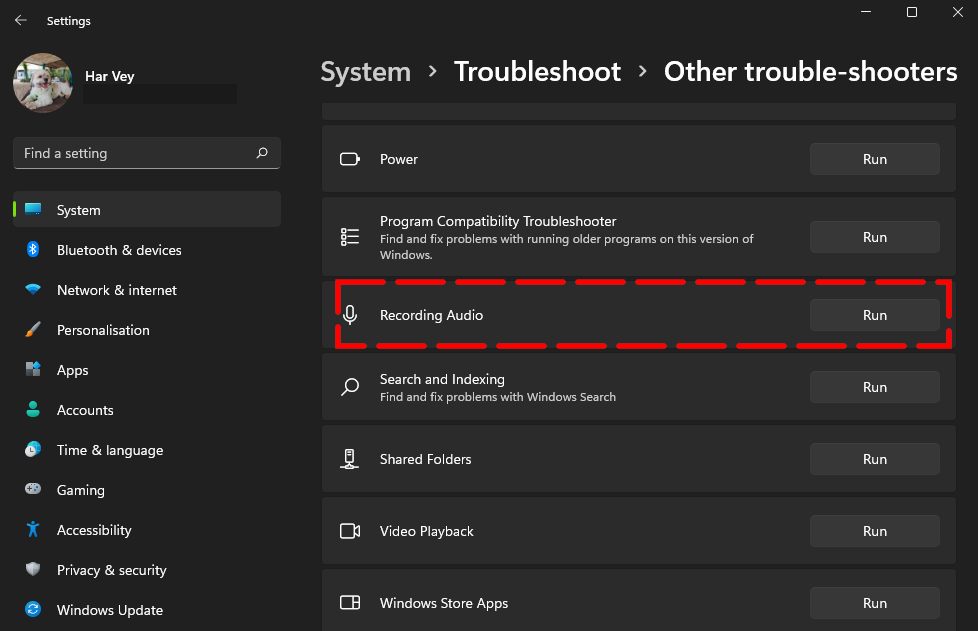
- Press the Windows key on the keyboard.
- Type in “troubleshoot” and select Troubleshoot settings.
- Select Other trouble-shooters.
- Look for Recording audio and select the Run button beside it.
- Follow the rest of the instructions to fix your microphone issues.
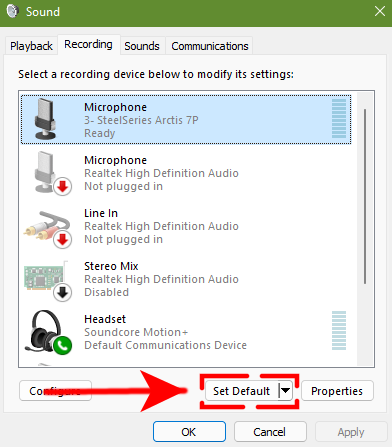
Fix #5: Set your microphone as the default device.
If you’re using more than microphone, like when you have an external microphone and a headset, the cause of the problem might be as simple as you forgetting to select your default microphone. Fortuantely, this process is easy. Check out how it’s done below:
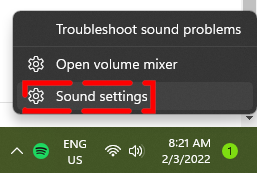
- Right-click on the speaker icon in your taskbar.

- Click on Sound Settings.

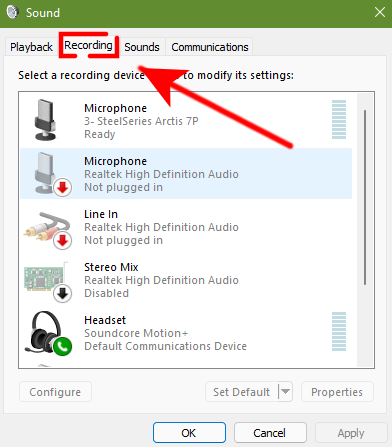
- Find More sound settings and click on it.

- Click the Recording tab.

- Select the microphone you wish to use and then click on Set Default button.
- Click OK.

Fix #6: Check if your Windows 11 microphone is not muted.
Some people may have simply lowered the volume of their microphone too low, or even muted their device. To check, follow these steps:
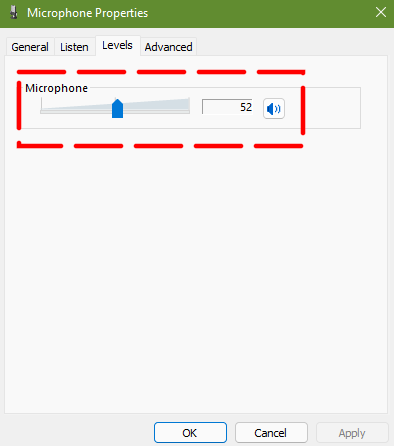
- Right-click on the speaker icon in your taskbar.
- Click on Sound Settings.
- Find More sound settings and click on it.
- Click the Recording tab.
- Select the microphone you’re using then click on the Properties button.
- Click on Levels tab and ensure that the speaker icon has no red sign beside it and volume is at 100.
- If you changed something, make sure to click the Apply button.
Fix #7: Restart Windows Audio Service.
Restarting the services.msc or Windows Services can jumpstart your microphone if it’s still not working at this point. Here’s how:
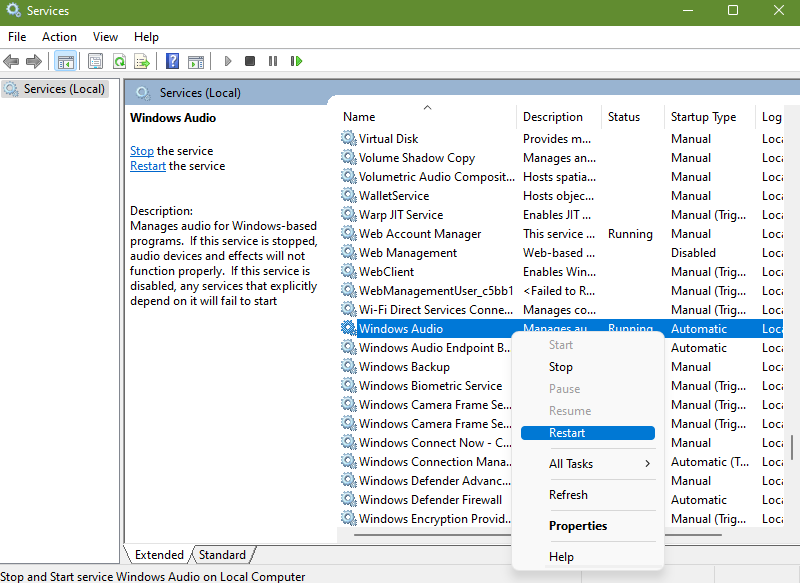
- On your keyboard, press the Windows key + R.
- In the Run dialog box, type in “services.msc” and press Enter.
- Find the Windows Audio service in the Services window and right click on it.
- Select Restart.
OTHER INTERESTING ARTICLES YOU MAY LIKE:
- Fix Steam Error Failed To Start Game (App Already Running) | [2022]
- How To Fix Netflix Site Error in 2026 | Easy Solutions
- How To Fix Google Chrome Won’t Load In Windows 11 | Easy Fixes [2022]
- How To Fix “Spotify Can’t Play This Right Now” Error in 2026
Visit our TheDroidGuy Youtube Channel for more troubleshooting videos and tutorials.