How To Hard Reset A Redmi Note 8 Pro
In this tutorial, we will guide you how to hard reset your Redmi Note 8 Pro to bring it back to its default settings and configuration. You will also learn how to restart your device into the Recovery Mode just in case your device can no longer boot up successfully. Read on to learn more.
A hard reset is basically a factory reset but it’s done differently. It’s because you don’t need to completely boot up your phone and load every service and app. What you have to do is run your device into the Recovery Mode to have access to the hard reset command.
But just like the Factory reset, this will delete all your files, data, settings, apps and other things stored in your phone’s internal storage. So if possible, create a backup before you actually perform this procedure.
Hard Reset Redmi Note 8 Pro
If you still have access to your phone, try to remove your Google account so that the Factory Reset Protection won’t be triggered, or just make sure you know the account ID and the password. If you have that in mind, then you’re good to go. Here’s how to hard reset your phone:
1. Turn off your Redmi Note 8 Pro completely.

2. When ready, press and hold the Volume Up button and the Power key for 8 seconds.

3. Once the Redmi logo shows, release both keys and wait until the device enters the Recovery Mode.

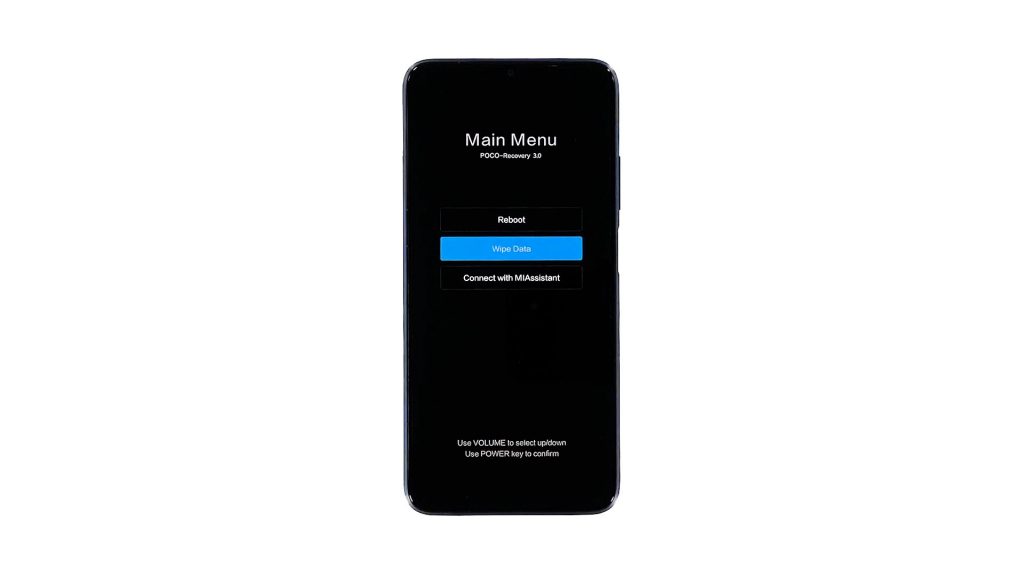
4. Use the Volume Down button to highlight the option ‘Wipe Data’ and then press the Power key to select it.
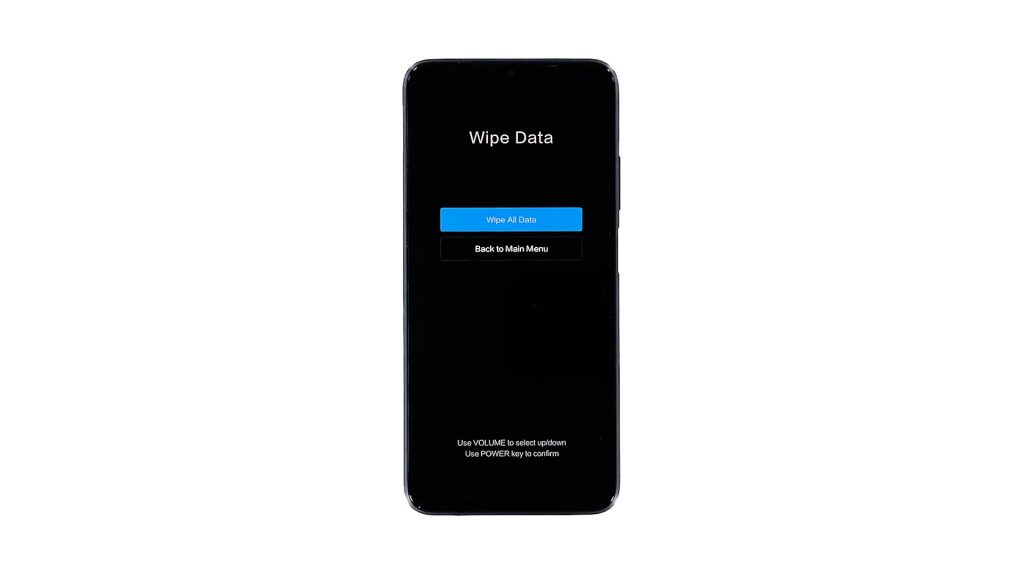
5. Press the Power key one more time to select ‘Wipe All Data’ and wait until your phone finishes the reset.
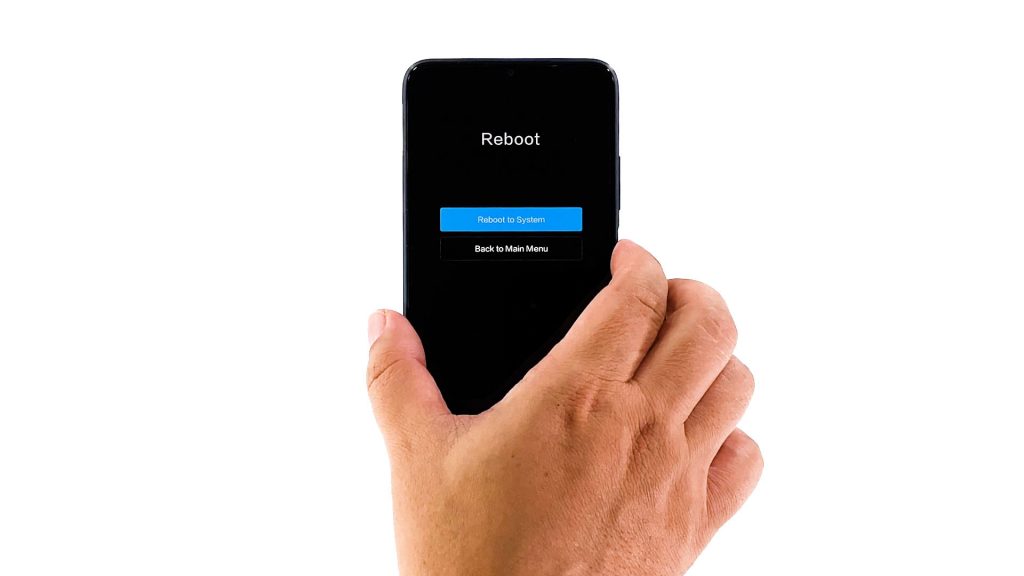
6. After that, select Reboot and then Reboot to system to restart your phone.
It will take a little longer for your phone to finish rebooting as it rebuilds the cache as well as reformats the data partition.
But once your Redmi Note 8 Pro finishes the reboot, you will be prompted to set it up. So you will have to through the usual set up process. After that, your phone will be ready for use and it will feel like new.
We hope that this tutorial can help you one way or the other.
Please support us by subscribing to our YouTube channel. Thanks for reading!
ALSO READ: