Fix For Galaxy Note 20 Moisture Detected Issue
In this post, we will guide you on what to do with the Galaxy Note 20 moisture detected error and determine the cause of the problem so that we can fix it easily. There are some procedures you need to do to be able to do so.
The moisture detected error that often occurs when your phone has come in contact with liquid will prevent your device from charging through the cable. Most times, such an error is triggered by moisture in the charging port, however, there were times when it’s triggered by something else. That’s the reason why you need to do some troubleshooting procedures if you ever encounter this problem.
That’s what we’re going to do in this guide. We will show you what to do with your Galaxy Note 20 that shows the moisture detected error. We will try to consider all possibilities and then rule them out one after another until we can figure out what the problem is all about and probably be able to fix it. If you’re one of the users with this kind of problem, continue reading as we may be able to help you one way or another.
What To Do With Note 20 Moisture Detected Error
As an owner, you should be the first one to know if your Galaxy Note 20 has come in contact with water, or any liquid for that matter. And if it did, then that makes this problem easier to fix since you’ve already known the cause. However, if the moisture detected error just popped out without apparent reason or cause, then follow the troubleshooting procedures below.
Force restart your Galaxy Note 20
Assuming you don’t know the reason why the moisture detected error shows, the first thing that you have to do is to do nothing but refresh the memory of your phone device. As I said earlier, previous Galaxy models have been getting this very same error not just due to the moisture in the charging port but because of a firmware issue. That might be the case with your phone, so here’s what you need to do:
- Press and hold the Volume Down button and the Power key at the same time for 10 seconds or more. This will trigger your Galaxy Note 20 to turn off and power back on.
- Once the logo shows, release both keys and wait until the phone finishes the reboot.
When the restart is finished, try connecting your phone to its charger using the original cable. The moment you do that, your phone will tell you immediately if the moisture detected error is fixed or not. If it shows up instead of just charging the phone, then you have to continue troubleshooting.
Check the charger and the cable
If the forced restart cannot get rid of the moisture detected error on your Galaxy Note 20, then the next thing that you need to do is to make sure both the charger and the cable aren’t the problem. I have personally encountered an issue like this before, wherein my Galaxy device didn’t charge because my power adapter has moisture in its USB port.
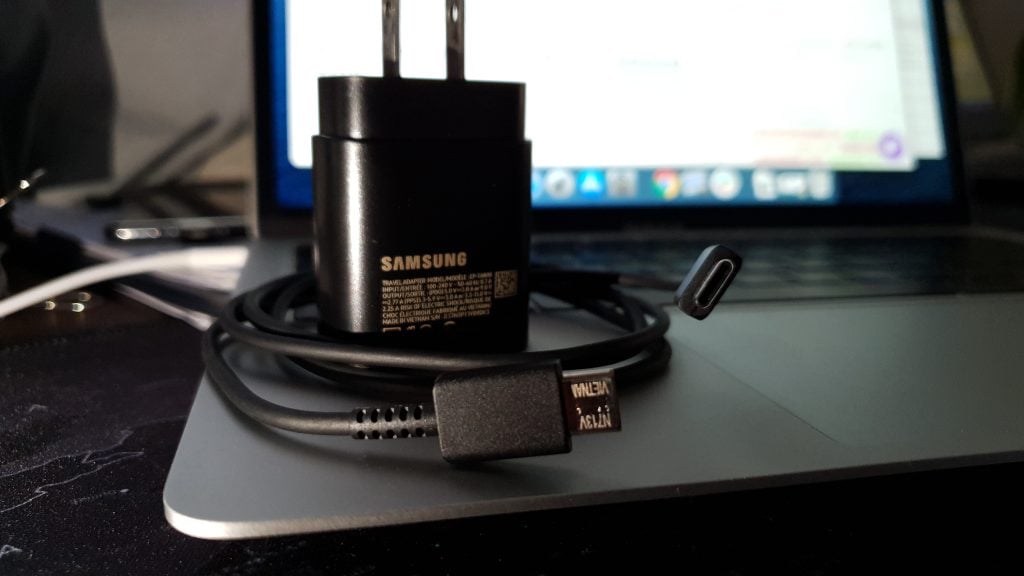
It’s easy to check the power adapter of your Note 20 because it has the USB-C interface. So basically, you just have to look into the port to see if there are some kind of lint, debris or anything that doesn’t belong there. If the port’s dirty, that might also be the reason why you cannot charge the phone properly.
After checking the charger and you haven’t found anything suspicious, then check the data and charging cable. Check both connectors to see if there are lint and debris, and then run your fingers from one end to the other to know if there’s a break or something.
Another way to make sure the charger and the charging cable aren’t the problem, is to use a different set and see if your Galaxy Note 20 charges.
Check and clean the charging port
Regardless of whether the problem is really due to moisture in the USB port or just due to a minor firmware issue, you can always make use of this procedure. First, check the charging port to see if there are lint, debris and foreign objects suspended in it. If there is, then remove it to see if that fixes the problem.
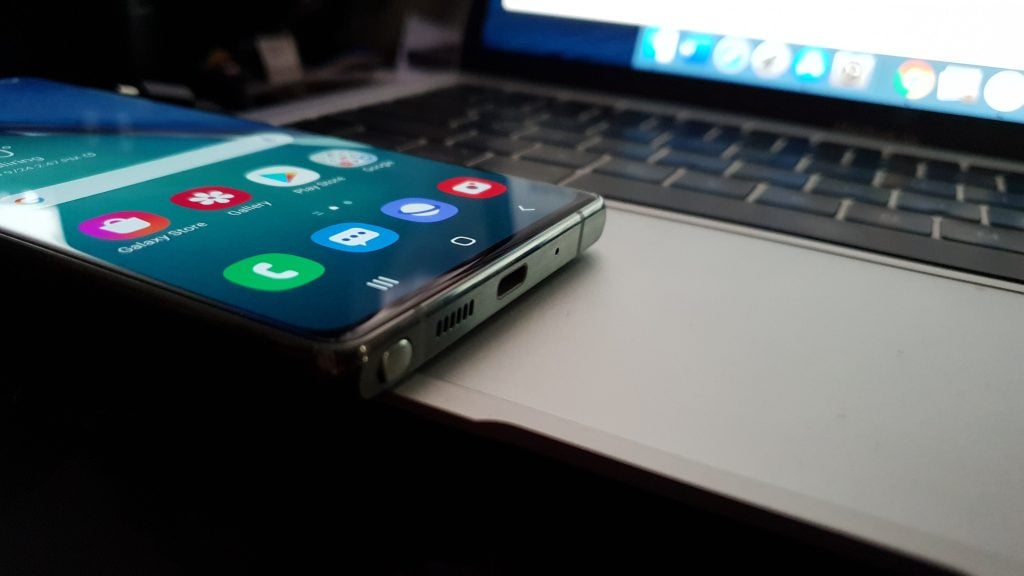
If you’re not sure whether it’s due to moisture, get a small piece of tissue paper and put it in. Leave it inside the charging port for a few minutes to absorb the moisture. You may also use a clean, dry cloth to get rid of the moisture.
Had your Galaxy Note 20 been in contact with water or any liquid and then the moisture detected error started showing up whenever you connect the charging cable, then this is the only procedure you need to do to get rid of it. However, if the problem won’t go away even after making sure the USB port is dry, then move on to the next solution.
Restart your Note 20 in Safe Mode
If the moisture detected error is due to a firmware issue, like what happened with the Galaxy S9 before, then you can still charge your phone without using a wireless charger by running it in safe mode. When the phone is in this mode, all third-party apps and services will be temporarily disabled, including services that are seldom used.
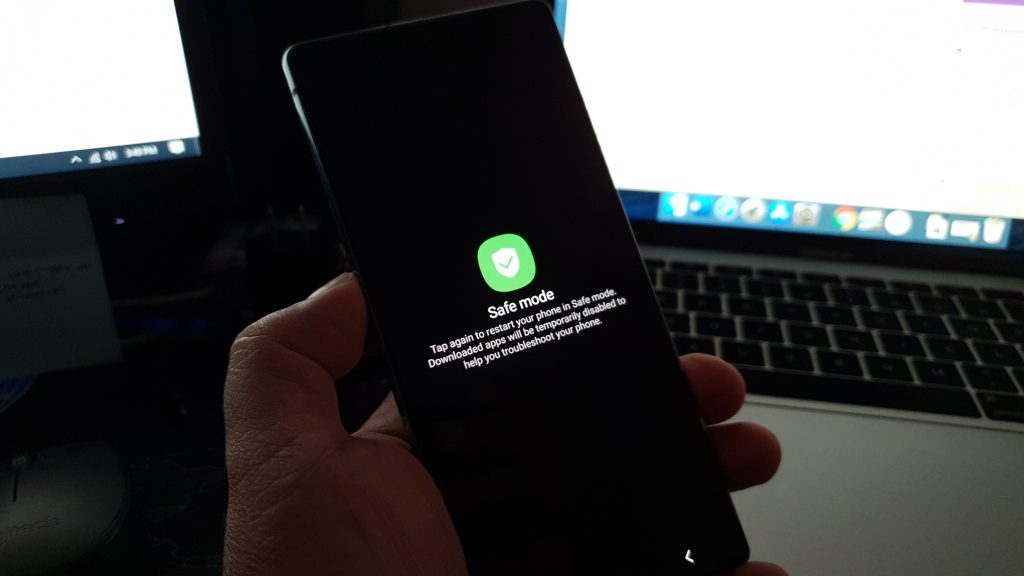
This is clearly not a fix but at least you can still charge your phone using a wired charger, if you don’t have a wireless one. Here’s how to run your phone in safe mode:
- Swipe down from the top of the screen and tap the Power icon.
- When the power options show, tap and hold Power off until it changes to Safe mode.
- Tap the Safe mode icon to restart your phone.
Once the reboot is finished, your Galaxy Note 20 will be in Safe mode and you can confirm that by looking at the lower-left corner of the screen.
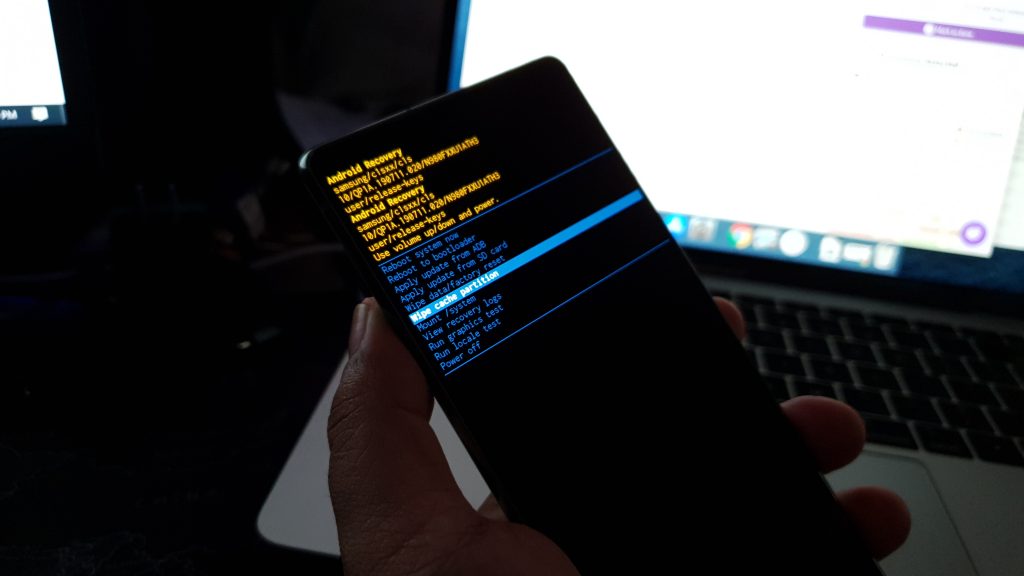
Wipe the cache partition
When it comes to firmware-related issues that just won’t go away no matter what you do, there’s still a couple of things you can about them. The first one is to clear cache partition and the second is the master reset. Again, you only have to do this procedure if the moisture detected error isn’t due to moisture in the USB port. Don’t worry, none of your files or personal information will be deleted. Here’s how it’s done:
- Swipe down from the top of the screen and tap the Power icon.
- Tap Power off to turn your device off.
- Once your Galaxy Note 20 is completely powered off, press and hold the Volume Up button and the Power key for a few seconds.
- Once the logo shows, release both keys and wait until your phone reaches the recovery mode. When you see a black screen with blue and yellow texts, it means you’re in recovery mode of the Android system already.
- Press the Volume Down button until Wipe cache partition is highlighted, and then press the Power key to select it.
- Use the Volume Down button again to highlight Yes, and tap the Power key once again.
- Once the clear cache process is finished, Reboot system now is highlighted by default, just press the Power key to reboot your phone.
After the reboot, connect your Galaxy Note 20 to its charger again and see if the moisture detected issue is fixed.
Factory reset your Galaxy Note 20
After doing the clear cache process and all the preceding solutions and the moisture detected issue still persists, and you can’t charge the phone because of it, then it’s time to reset the device. As long as it’s a minor firmware issue, a reset should be able to fix it. However, if the problem still persists even after the reset, then you have no other choice but to have it checked.
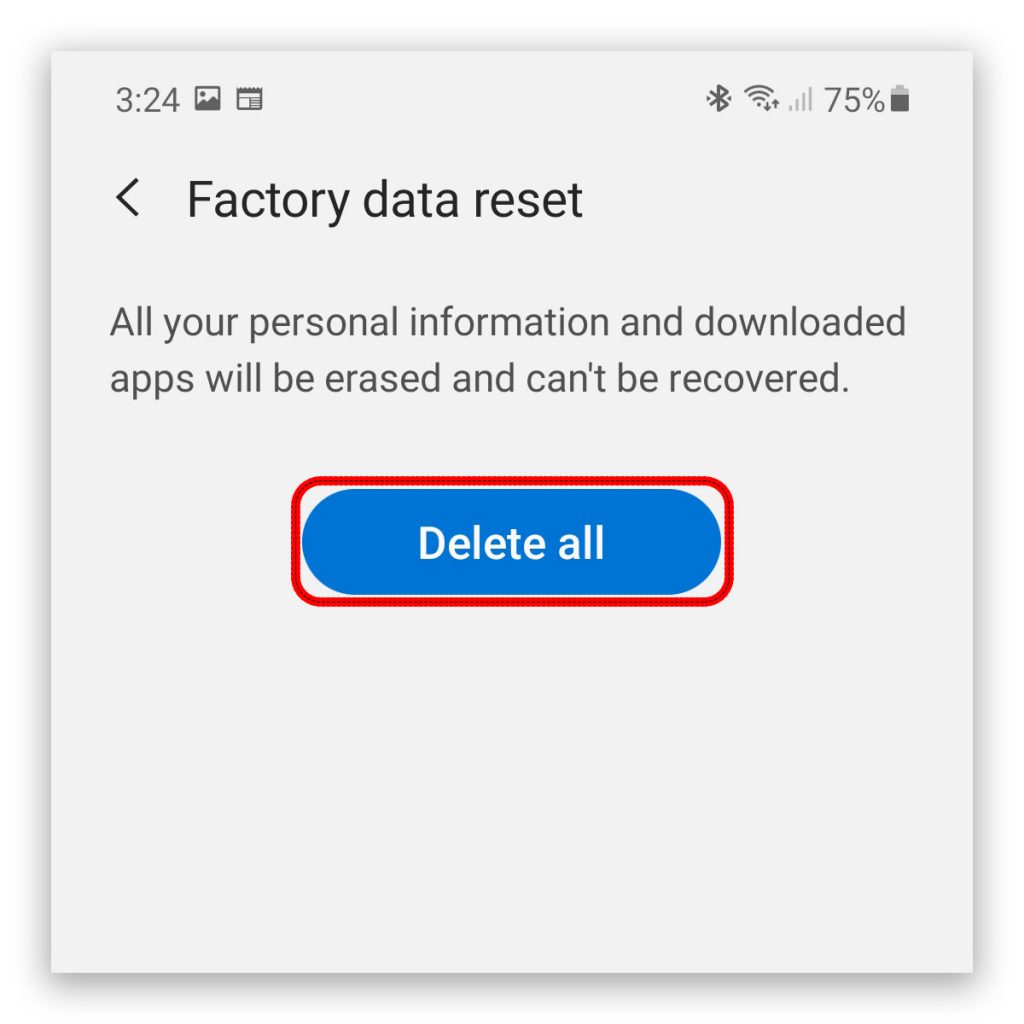
Before the reset though, make sure to create a backup of your important files and data as they will be deleted and you may not be able to retrieve them.
- Swipe down from the top of the screen and tap the gear icon.
- Once inside the Settings menu, scroll down to the bottom of the screen and tap General management.
- Tap Reset to view all reset options.
- Tap Factory data reset, and then scroll down and tap Reset.
- If prompted, enter your security lock and then tap Delete all.
- Enter your Google ID and proceed with the reset.
At this point, you’ve already used up all possible solutions to this problem. If you want you can also try using the wireless charging method to replenish the battery.
We hope that this post can be able to help you one way or the other.
Please support us by subscribing to our YouTube channel. We need your support so we can continue publishing helpful contents.
ALSO READ: