Two Ways To Disable Windows Defender In Windows 11 | Updated 2023
Windows Defender, now known as Windows Security in Windows 11, is the free security suite that comes with the Operating System. While not a perfect anti-malware software, this built-in anti-malware program is more than enough to protect Windows 11 computers from most digital threats. It works just as well as any premium third party antivirus and anti-malware software out there.
In this guide, we’ll show you the ways to disable Windows Security in Windows 11. We don’t recommend that you do this, especially if you don’t have a better alternative security software installed though.
How to disable Windows Defender In Windows 11 temporarily?
The Microsoft Windows Defender or Windows Security, just like in the previous iterations of Windows, is enabled by default in Windows 11. If you want to disable Windows Security temporarily, here are the steps to do that:
- First, you need to pull up the Windows Settings screen by pressing the Window key and I buttons on your keyboard.
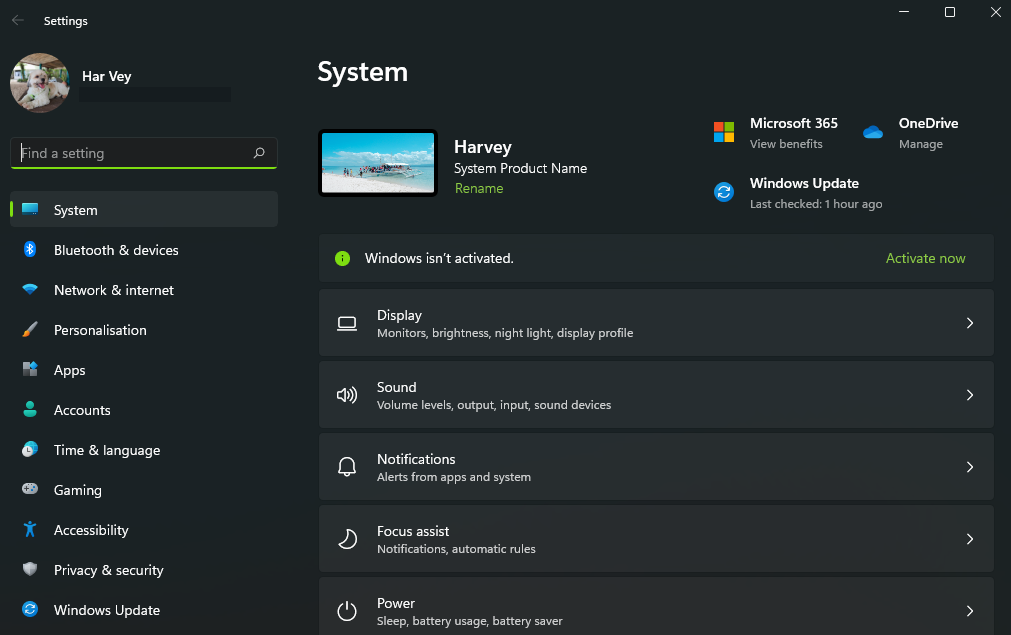
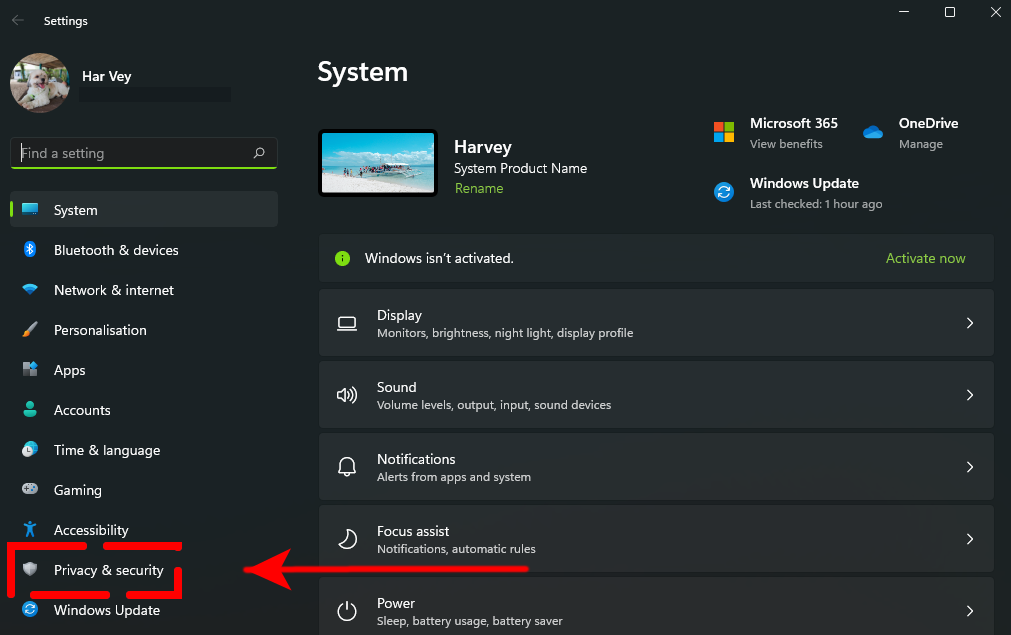
- Once the Windows Settings is opened, click on Privacy & security.

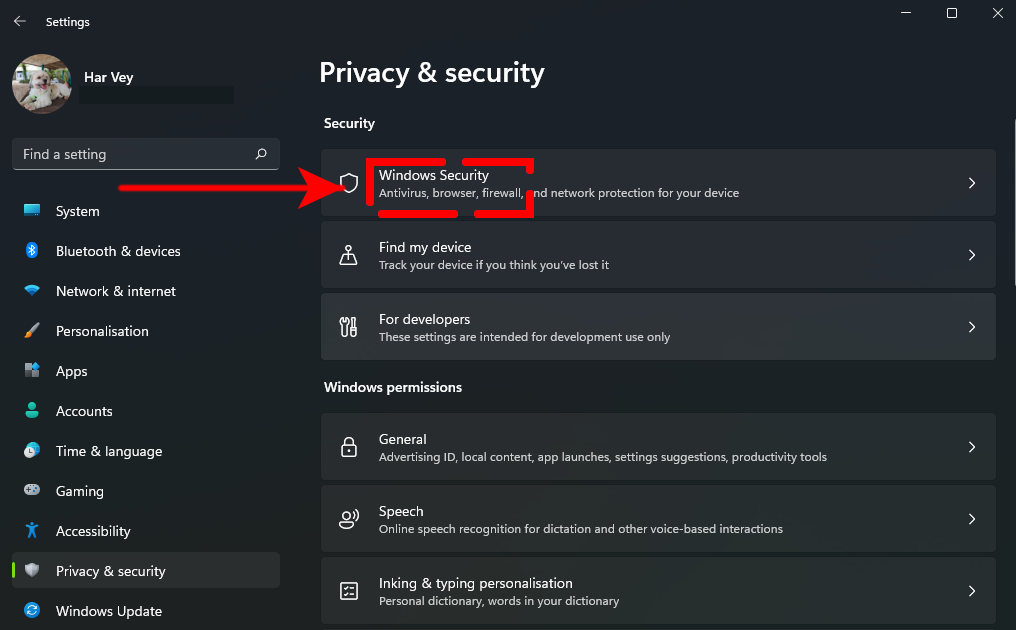
- Then, click on Windows Security.

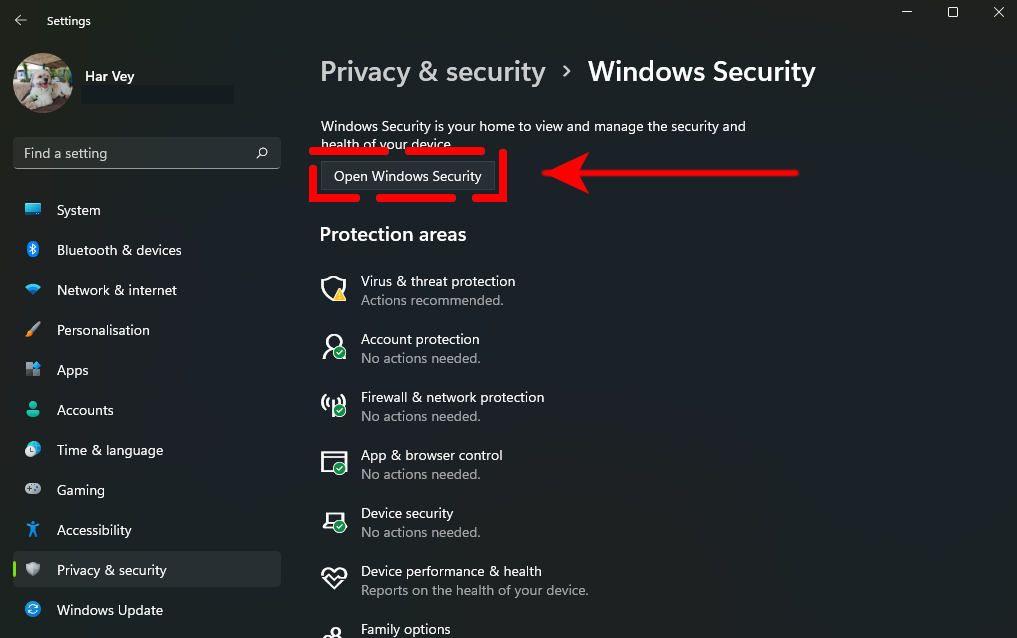
- Click the Open Windows Security button.
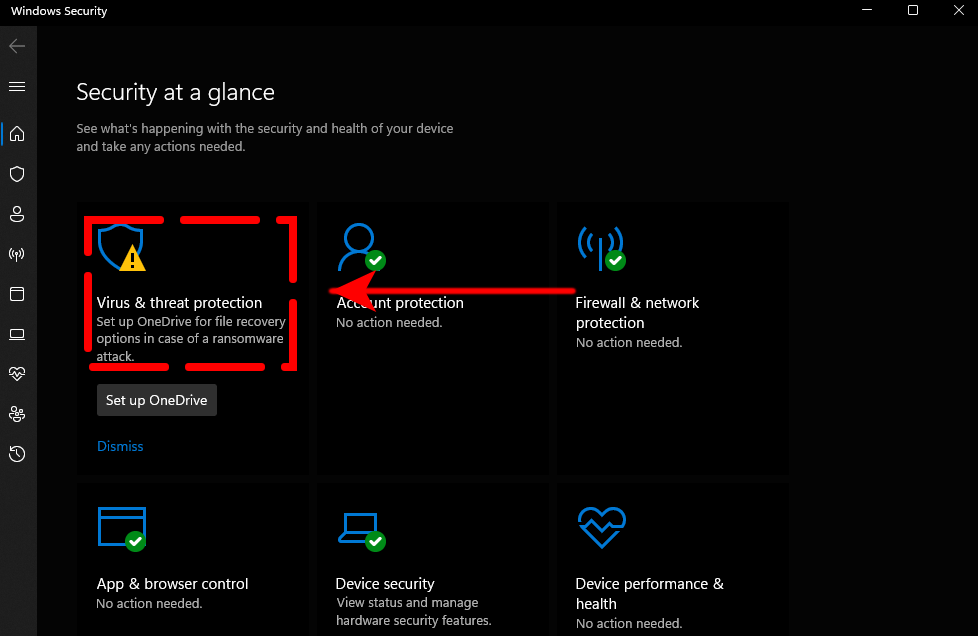
- In the Windows Security app, click the Virus & Threat Protection tile. This is the default antivirus application from Microsoft.

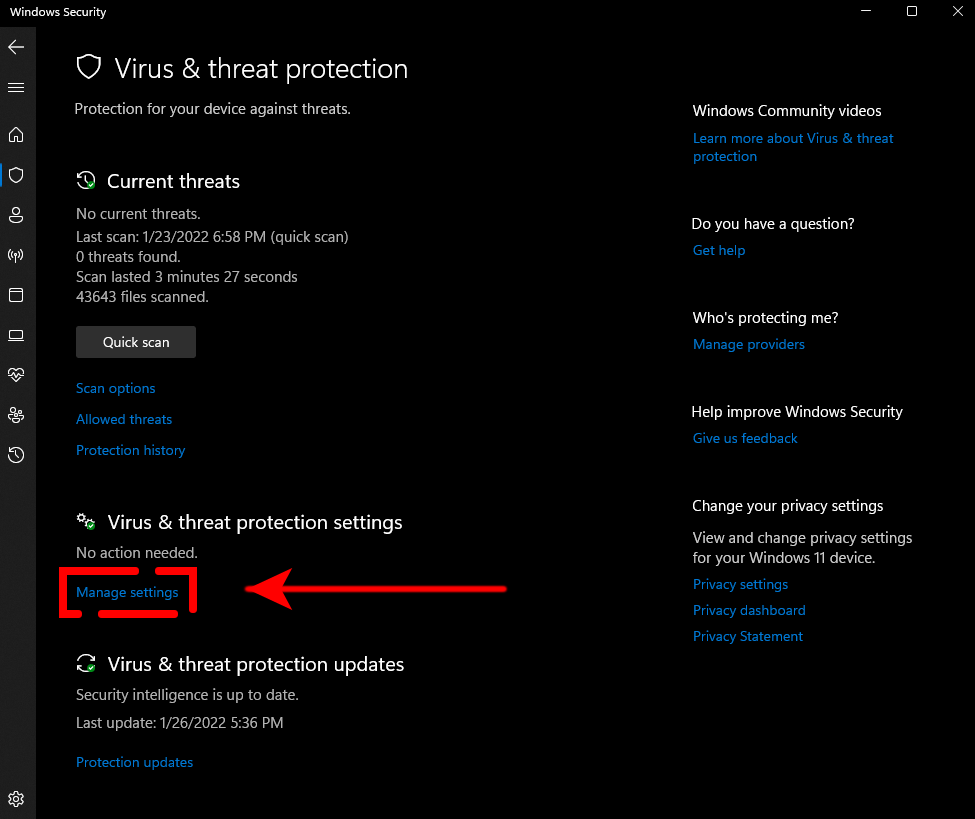
- In the Virus & Threat Protection Settings section, click on the Manage Settings link.

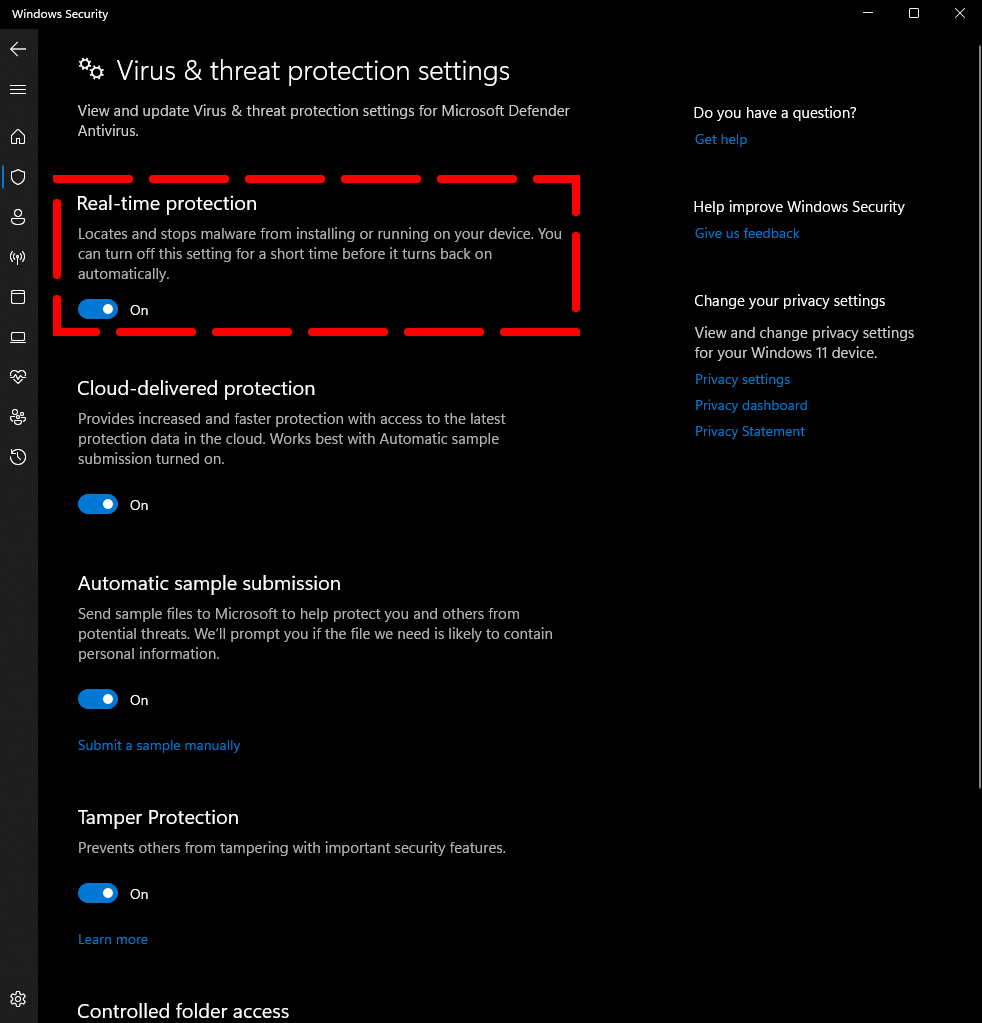
- Inside the Virus & Threat Protection Settings section, you will find multiple options like Real-time protection, Cloud-delivered Protection, Automatic sample submission, Tamper Protection, and Controlled folder access.
- In order to temporarily turn off Windows security, you must disable Real-time protection by clicking on the toggle button below it. This will effectively disable a significant part of your Windows security.

Keep in mind that disabling Real-time protection (Windows Defender antivirus) only works for a limited time. This security feature will enable by itself automatically after some time. Other parts of Windows security suite such as Cloud-delivered Protection, Automatic sample submission, Tamper Protection, and Controlled folder access can also be disabled separately but they won’t turn on automatically by themselves.
How to disable Windows Defender In Windows 11 permanently?
If you have decided not to use the Microsoft Defender in Windows 11 for whatever reason, you can try to disable it for good. Unfortunately, this option is only available for Windows 11 Pro users. If your Windows OS is not the Pro version, you can only temporarily disable Windows security.
If you’re running a WIndows 11 Pro, you also need to disable the Tamper Protection feature in the Windows Security app first. Tamper Protection, as the name suggests, prevents you or any program from modifying system settings. If Tamper Protection is not disabled, you won’t be able to disable Windows Defender in Windows 11 at all as the system will revert all Group Policy changes you made to defaults the next time your PC reboots.
How to disable Tamper Protection
Here are the steps to disable Tamper Protection:
- Press the Windows key on the keyboard and type “Windows security.”
- Click the Windows Security app to open it.
- Once the Windows Settings is opened, click on Privacy & security.
- Then, click on Windows Security.
- Click the Open Windows Security button.
- In the Windows Security app, click the Virus & Threat Protection tile.
- In the Virus & Threat Protection Settings section, click on the Manage Settings link.
- Inside the Virus & Threat Protection Settings section, toggle the switch for Tamper Protection to turn it off.
Turn off Windows Defender antivirus via Group Policy Editor
Once you’ve turned off Tamper Protection, follow these steps to disable Windows Defender antivirus program for good:
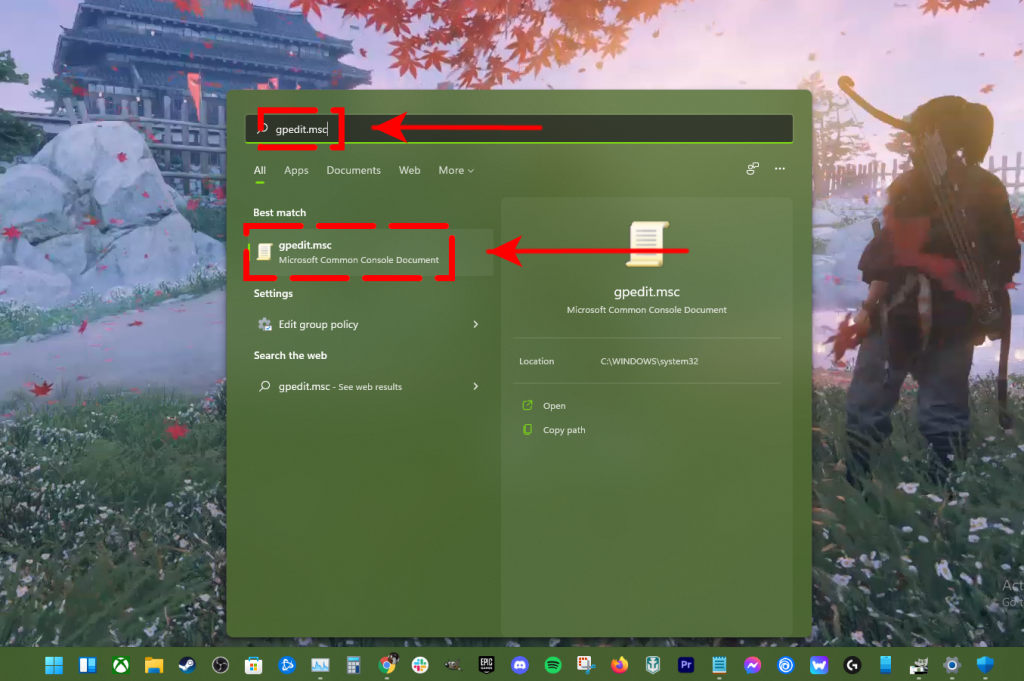
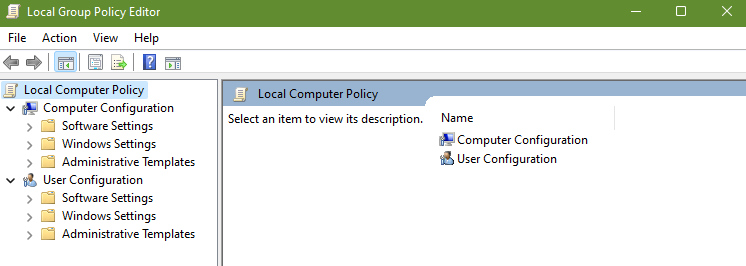
- Press the Windows key on the keyboard and type “gpedit.msc.”

- Open the gpedit.msc editor under the Best match section.
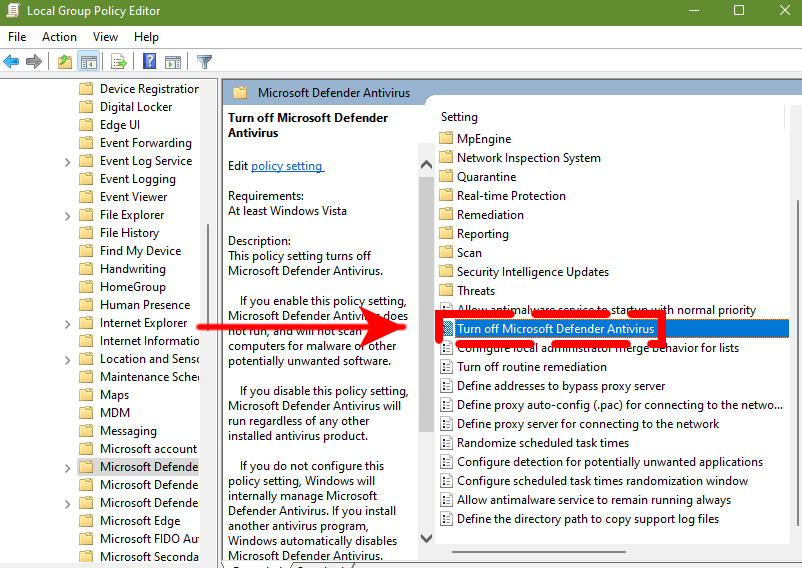
- In the Group Policy Editor, navigate to Computer Configuration > Administrative Templates > Windows Components > Microsoft Defender Antivirus.

- Then, right click on Turn off Microsoft Defender Antivirus and select Edit.

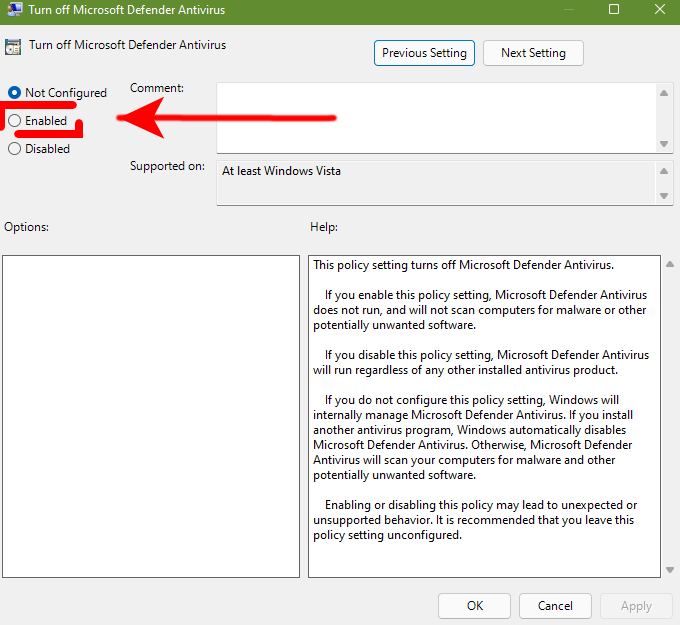
- Select Enabled to set your Microsoft Defender Antivirus to off.

- Click Apply, then hit OK.
- Restart your PC so the changes can take effect.
The following steps should permanently disable Windows Security app Real-time protection from running on its own. If you change your mind later and you want to re-enable the Microsoft Defender antivirus, you don’t need to go back to the Group Policy editor to do so. Instead, you simply have to open the Windows Security app again and turn on Real-time Protection from there.
OTHER INTERESTING ARTICLES YOU MAY LIKE:
- How To Fix Steam Slow Download in 2026 | Easy Solutions
- How To Fix COD Warzone Disc Read Error 6.154 | Updated Fixes [2022]
- How To Fix Battlefield 2042 Error Code 25 | Updated Solutions [2022]
- How To Fix God Of War Crashing On Steam | Easy Solutions [2022]
Visit our TheDroidGuy Youtube Channel for more troubleshooting videos and tutorials.