What To Do If Destiny 2 Stops Responding, Freezes or Stuck
This post will guide you what to do if Destiny 2 stops responding or keeps freezing while you’re playing with it. We will also provide you with other solutions that can potentially fix and prevent a problem like this. So continue reading as we may be able to help.
Game freezes are common but they’re not really that serious. Most of the time, games having issues will freeze for a couple of seconds but respond again after that. Frequent freezes, however, can be very annoying and frustrating as you will surely be wasting your time playing without having any progress.
Some gamers reported that Destiny 2 seems to be having some issues recently as the game gets stuck on a certain screen, freezes or simply stops responding. This often leaves the gamers to just close the game. If you’re one of the people with this problem, here’s what you should do:
Fix #1: Force stop Destiny 2 and open it again
Once the game stops responding or gets stuck, most of the time, it affects your PC’s overall performance. It may cause your computer to stutter and become sluggish. The best thing you can do about it is to force stop the game to release the RAM it’s using. Here’s how it’s done:
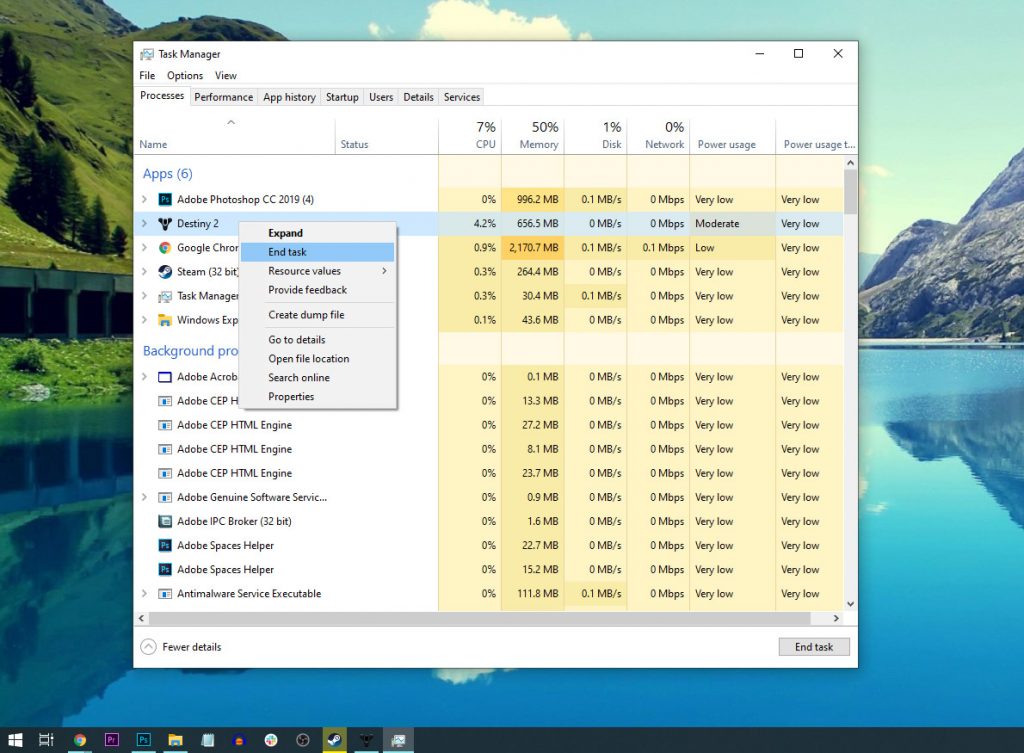
- Right-click on the Taskbar and click Task Manager.
- Look for Destiny 2, click on it and then click the End task button at the lower-left corner of the window.
Once you’ve done, launch the game again and see if it still freezes while you’re gaming.
Fix #2: Make sure everything is updated
Graphics card manufacturers release updates frequently to make sure the hardware works perfectly and to fix some minor issues. If the game started to freeze without apparent reason, then it can be a bug that’s triggered by some inconsistencies in the system.
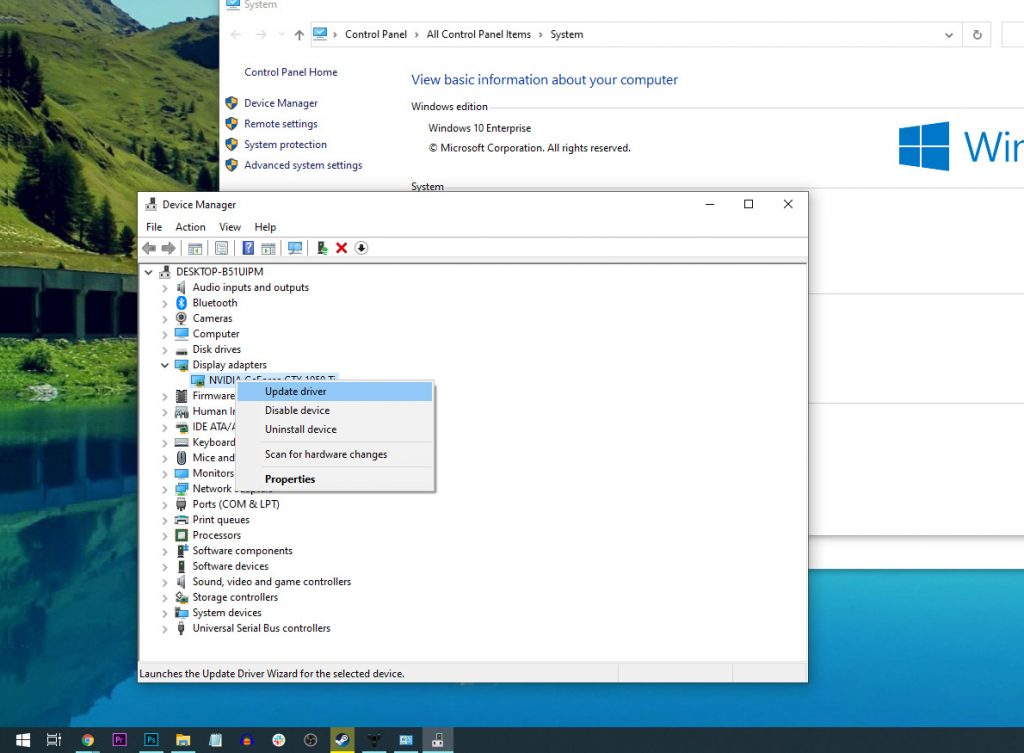
So what you have to do next is make sure you’re running the latest version of Windows and that your GPU has the updated driver. You should also check other components to see if they needed an update.
Here’s how to update your graphics card:
- Click the Start icon, type “file explorer” and click the File Explorer app.
- On the left panel, right-click on This PC and click Properties.
- Click Device Manager.
- Expand Display adapters, right-click on your GPU and click Update driver.
- Click Search automatically for drivers, and wait until your PC finishes the update.
After updating everything that needs to be updated and the problem still occurs, the move on to the next solution.
Fix #3: Delete Destiny 2’s cache
Corrupted cache files may also result in performance issues with games. So if War Thunder started crashing without apparent reason or cause, it might be due to corrupted cache files.
The cache is a temporary set of files that the system creates to make the game run smoothly. It accesses those files every time you open the game. However, there’s a tendency that those files get corrupted and when it happens, issues like this occur. So delete them so that Windows will create a new set of files. Here’s how:
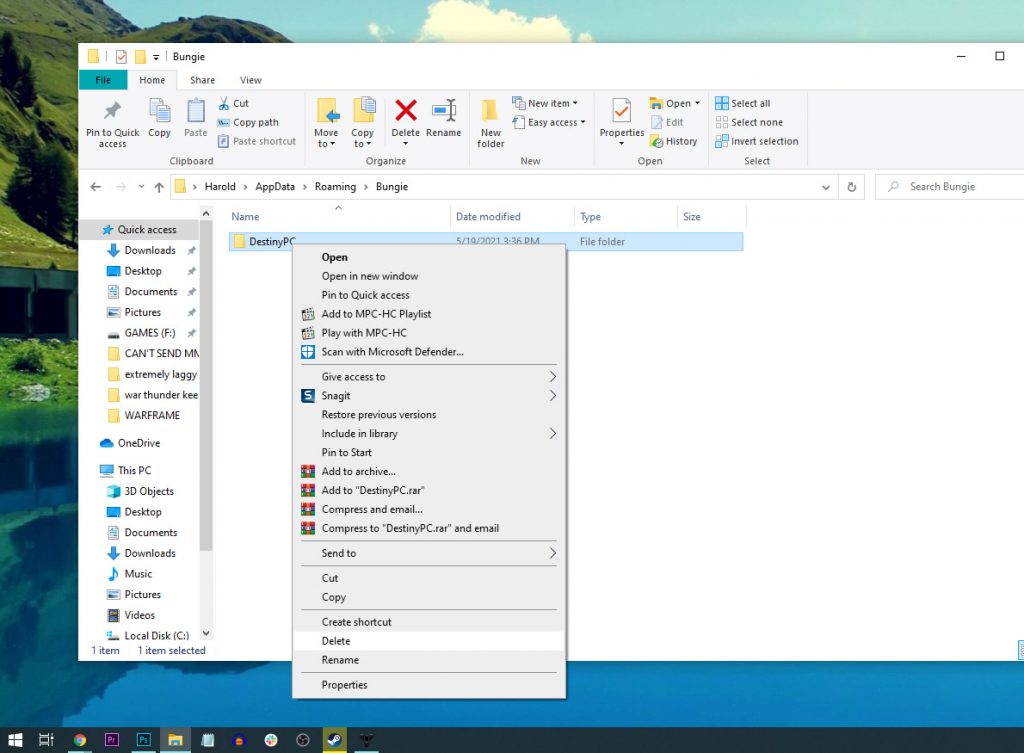
- On your keyboard press the Windows key + R. This will pull up a small window at the lower-left corner of the screen.
- In the text field type %appdata% and click OK. This will open up a folder.
- Look for the folder named ‘Bungie’ and double-click on it.
- Inside it, look for the folder ‘DestinyPC’ and delete it. It contains all the temporary files for Destiny 2.
After deleting it, run Destiny 2 again to see if it still stops responding or freezes.
Fix #4: Verify integrity of game files
Another possibility is that some of the installation files of the game were corrupted, deleted or messed up. You need to rule out that possibility by allowing the Steam client to verify the integrity of the game files. Here’s how it’s done:
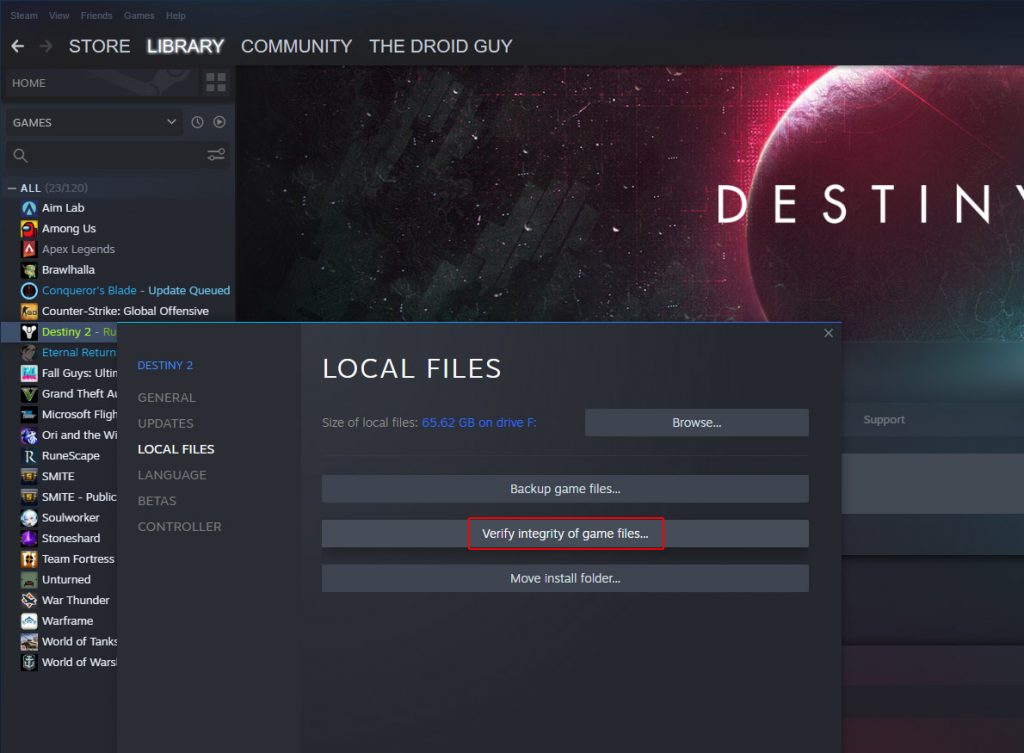
- Launch the Steam client.
- Navigate to the Library tab, right-click on Destiny 2 and click Properties.
- Navigate to Local Files and then click Verify integrity of game files.
- Wait until the verification is finished.
Most of the time, these four solutions are enough to fix a minor problem like this. However, if the issue continues, then you have no other choice but to do the next solution.
Fix #5: Uninstall Destiny 2 and reinstall it
Provided that your PC meets the minimum system requirements of the game and that it has been working properly prior to this problem, then you can fix it by simply reinstalling it. Doing so will delete all of its installation files that may have been corrupted. It will also remove all its association with the system and other applications. And once it’s uninstalled, download a fresh copy from Steam and reinstall it. This always fixes the problem. Here’s how:
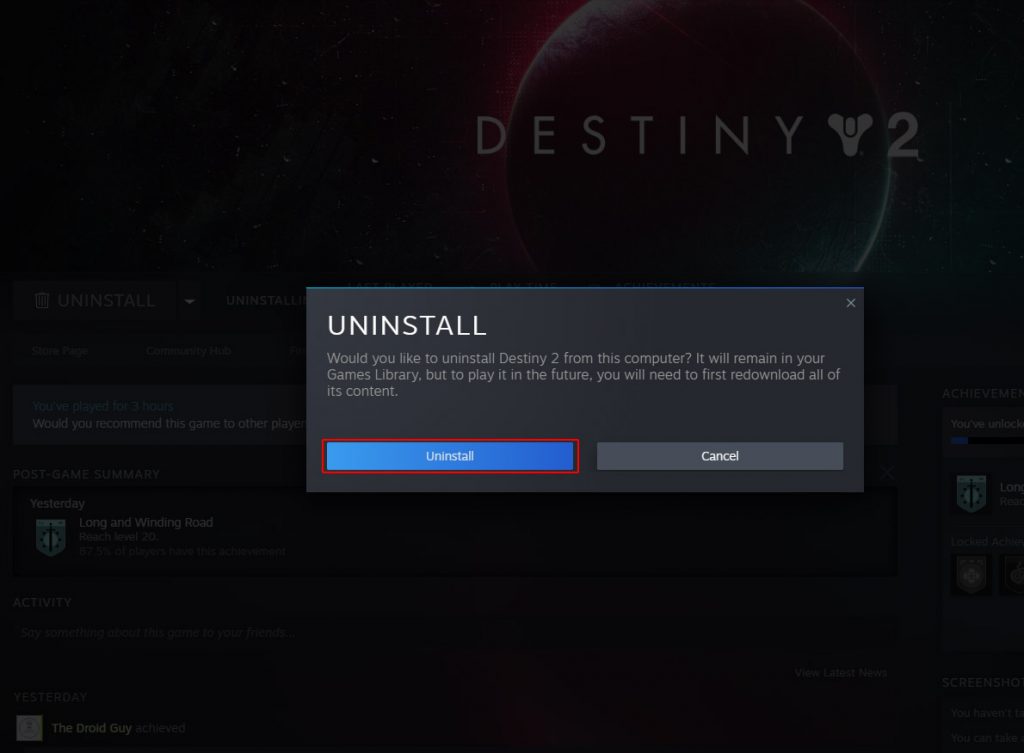
- Launch the Steam client.
- Navigate to the Library tab and right-click on Destiny 2.
- Hover over Manage, and click Uninstall.
- Click Uninstall one more time to remove the game from your computer.
- After the game is uninstalled, restart your PC.
- Download the game and re-install it.
Once the game is reinstalled, launch it and it should work properly now.
We hope that this troubleshooting guide can help you one way or the other.
Please support us by subscribing to our YouTube channel. Thanks for reading!
ALSO READ: