How to Access and Manage the Galaxy Note 20 Screen Recorder Settings
This post will help you modify the existing screen recorder configuration on the Galaxy Note 20 smartphone. Read on to learn how to access and manage the Note 20 screen recorder settings so as to achieve a satisfying screen record output.
Samsung Screen Record Feature
Samsung devices do embed a number of advanced features for both advanced and novice end-users. And the screen record is among them.
With the built-in screen record feature, you can easily record your screen without having to download any third-party apps. This feature can typically be accessed through the notification panel or quick panel on your device. The way this recording feature works may vary between devices.
In Samsung devices, Screen Recording is triggered by a touch on its icon straight from the Quick panel.
When activated, your device will commence recording of the screen after the 3-second countdown. Main controls will then appear on the upper-right section of the display, for you to click on when needed.
Note:
If the screen recording does not commence, press and hold the Power button then tap the Screen Record icon from the Quick panel (notification panel).
To ensure that your saved recordings are processed according to your own preferences, verifying the current configuration is recommended. And here’s how it’s done on your Galaxy Note 20.
Steps to Access and Manage your Note 20 Screen Recorder
The following method will launch the menu where you can modify relevant features on your Galaxy Note 20. These steps are likewise applicable to other Samsung Galaxy smartphones and tablets that are running on the same Android version with that of the Galaxy Note.
1. To get started, go to the Home screen and then swipe up from the bottom.
Doing so will let you access the Apps viewer.
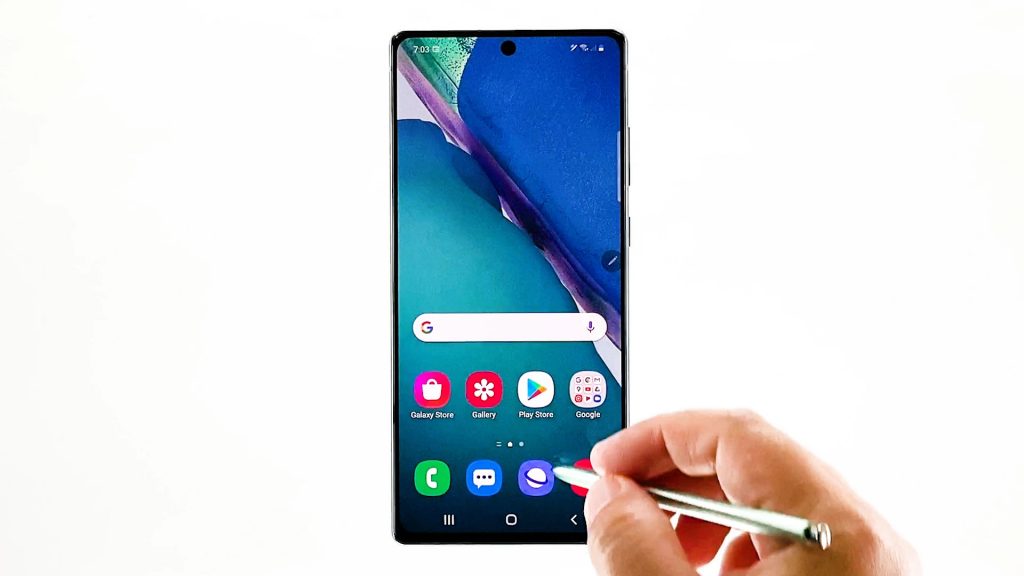
On the Apps viewer, you will see different app icons and shortcuts.
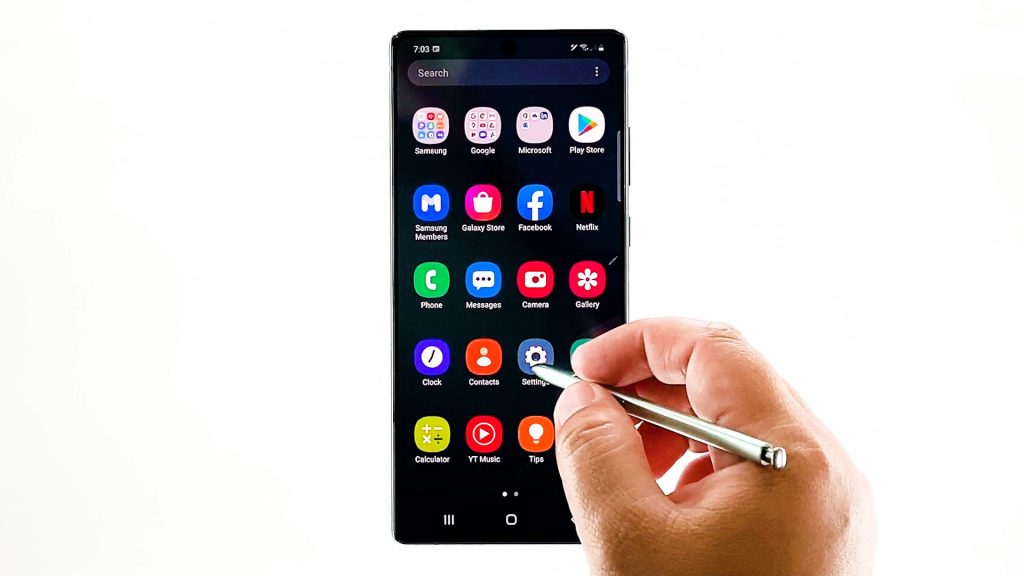
2. Locate and then tap the Settings icon.
Another window opens, highlighting all the basic and advanced features you can manage and utilize.
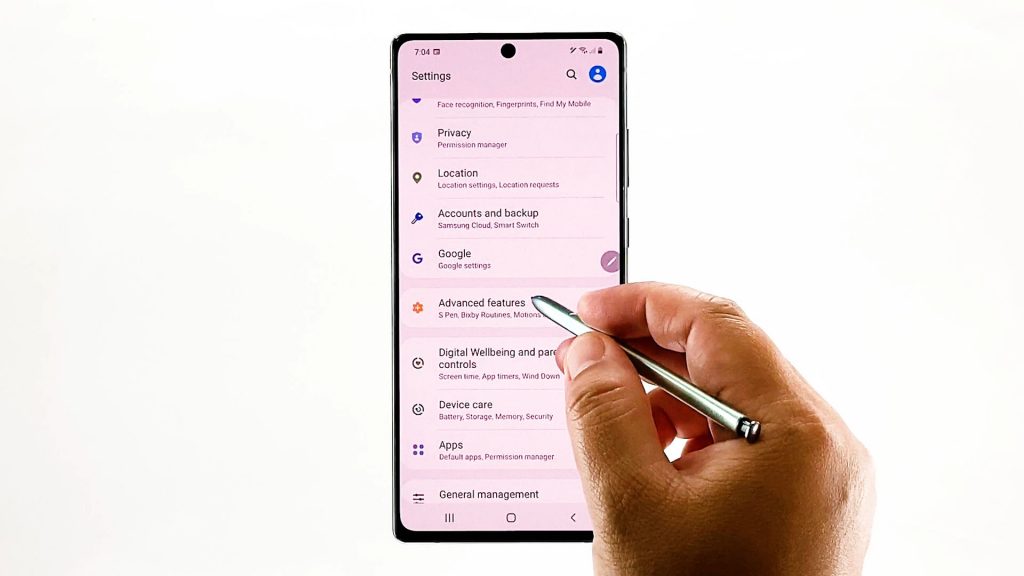
3. Then, select Advanced features.
Built-in advanced features will load up on the next display.
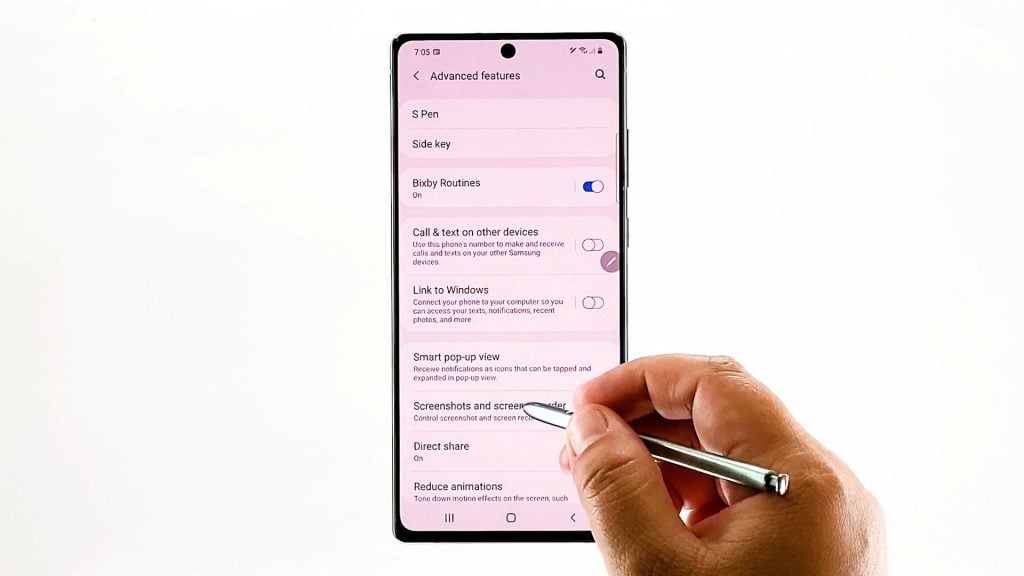
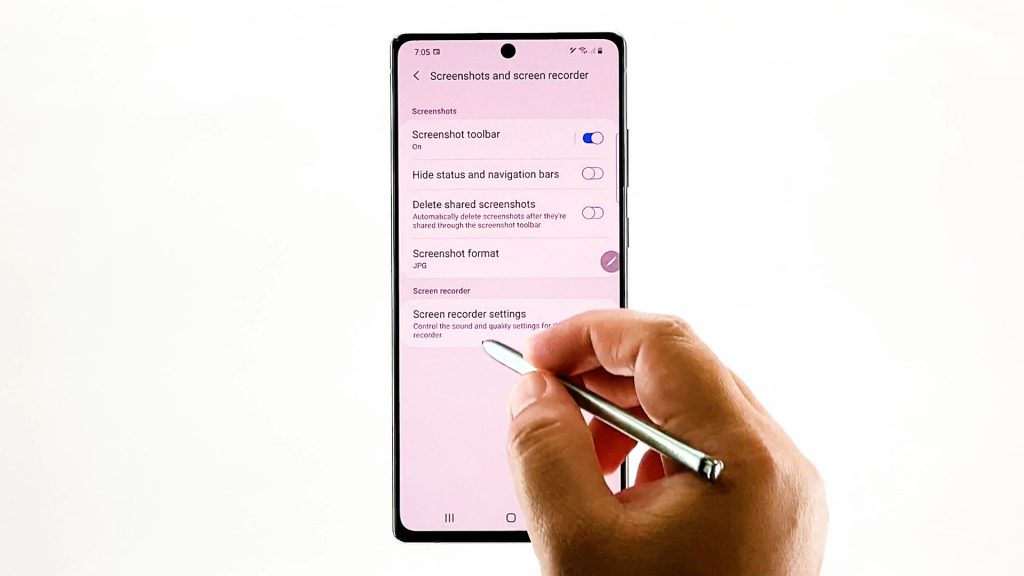
4. Select Screenshots and screen recorder to proceed.
Relevant features and options populate the next display.
5. Scroll down to the Screen recorder section. Then, select Screen recorder settings.
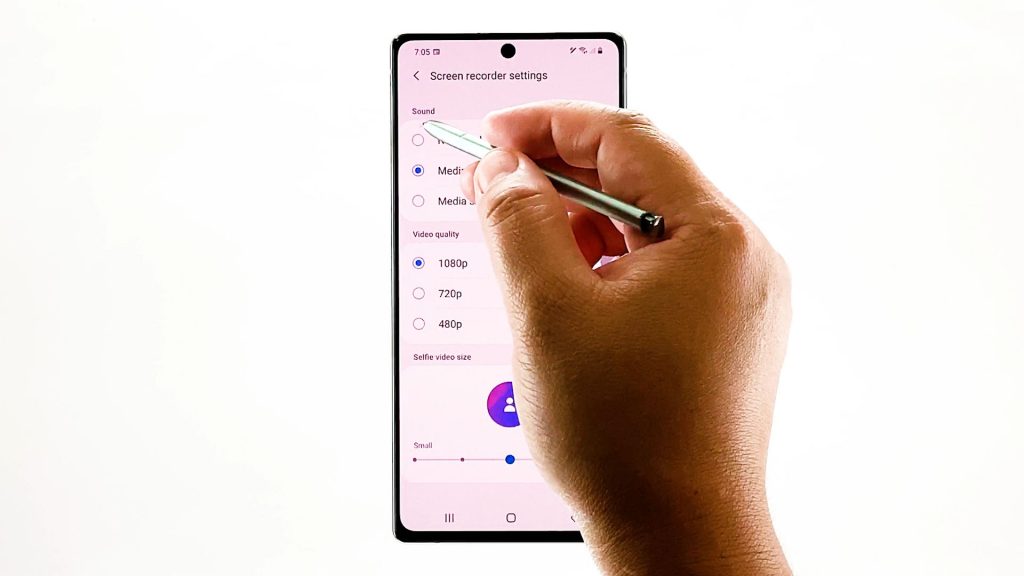
Another menu opens, highlighting different controls you can use to customize sound and quality for the recording outputs.
6. On the Sound section, you can choose any from the other options available. Just tap to mark the radio button before your preferred sound recording option.
As for the video quality, you can choose any from the given three.
7. To adjust the selfie video size, just drag the slider to the right if you want to make it bigger or to the left, if you want it smaller.
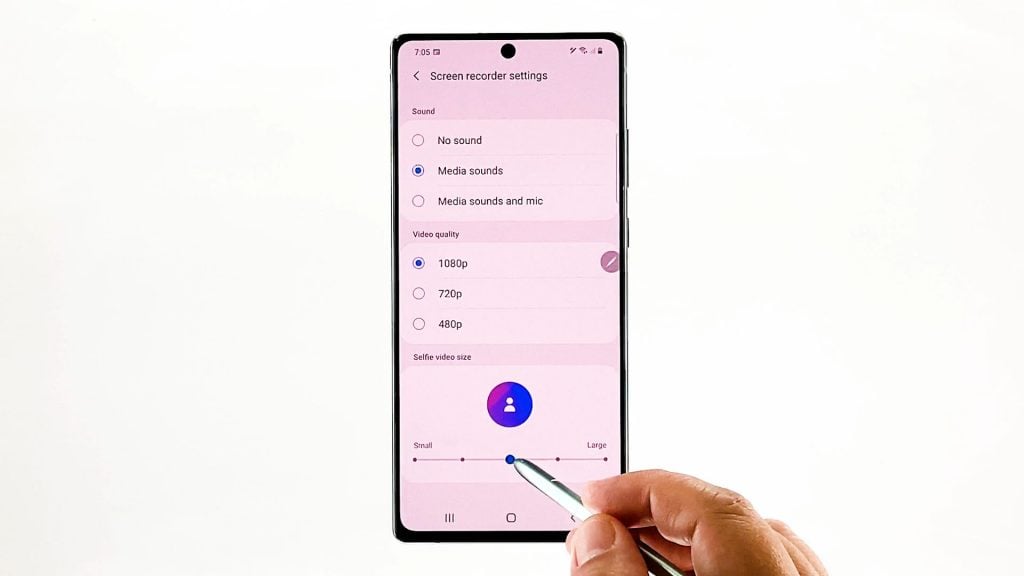
The recent changes you’ve made to the existing configuration will then be implemented right away.
Viewing Saved Screen Recordings on Note 20
To check and see how the recent changes affect your phone’s screen recordings, try carrying out test recording then see the actual output.
All screen recordings are saved inside the DCIM folder. You can access the DCIM folder through the internal storage menu of your device.
To be exact, just go to Settings-> Device care->Storage->Advanced->Files->DCIM.
Once you’re in the DCIM menu, simply open the Screen recordings folder to view its content. Screen recordings are saved as MP4 files that can be open with photo, video player and other relevant apps that support the MP4 file format.
Other Ways to Screen Record
Aside from the built-in screen record feature, you can also resort to some third-party apps to record your screen. Among the widely used tools for this purpose include but not limited to AZ screen, Google Play Games, Vysor and more. You can download any of these apps via Play Store for free or via one-time purchase. Just pick the one that works as intended and is compatible with the Note 20.
Should you encounter any trouble with screen recording like unable to record or the the actual recording process is somehow laggy or sluggish, restarting the device can help. If that doesn’t do any good, check for new software updates to download and install. This is likely what’s needed if the problem is attributed to some system bugs.
Hope this helps!
More Video Tutorials
To view more comprehensive tutorials and troubleshooting clips on different mobile phones and tablets, feel free to visit The Droid Guy channel on YouTube anytime.
You might also want to read:
- 5 Best Android Screen Recording Apps to Create Videos
- How to record Galaxy Note 10+ screen | capture and create video recording of Note10 screen
- How to record gameplay on Galaxy S7 Edge | easy steps to capture the screen while playing
- Samsung Galaxy Note 8 Lag In Recording Video Issue & Other Related Problems