Samsung Galaxy Tab S Tutorials, Tips, Tricks and FAQs
This is the first part of our Samsung Galaxy Tab S Tutorials series that covers both the 8.4-inch and 10.5-inch variants. The tutorials cited in this post are very easy to follow. In fact, you may have already done majority of them. However, we find it necessary to publish posts like this as there are a lot of owners who are still learning a thing or two about their new tablet.
We are not only publishing tutorials, we also offer FREE online Android support. If you have issues with your phone, feel free to contact anytime and tell us about your problem. You may email at [email protected] and we will look into your concerns seriously. We, however, urge you to provide all necessary details about your problem so that we can accurately provide solutions or advices.
Now click on any of the links below to jump to a specific tutorial:
- Boot in Safe Mode
- Performing Factory Reset
- Performing Master Reset
- Clear App Cache and Data
- Taking a Screenshot
- Close Apps Via Task Manager
- Accessing Google Now
- Adding a Contact
- Accessing the Notification Panel
- Copy & Paste Text
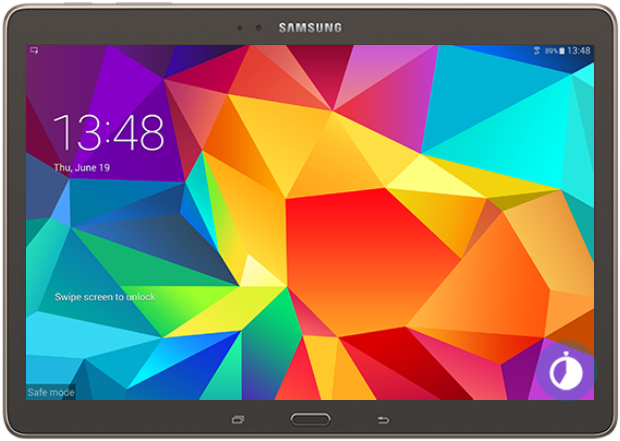
Boot in Safe Mode
When troubleshooting app-related issues, it is imperative you try to boot in safe mode first. This will temporarily disable all downloaded apps leaving pre-installed apps and services running. If the tablet works fine in safe mode, it is obvious the problem is with one of the third-party apps. Here’s how you boot Samsung Galaxy Tab S in safe mode:
- If the tablet is currently on, press and hold the power key for five seconds to turn it off.
- With the device completely turned off, press and hold the power key for two seconds to turn it on.
- Immediately after the Samsung logo displays, press and hold the Volume down key until the tablet reaches the lock screen.
- The text “safe mode” will be displayed in the lower-left corner if the boot up was successful.
- To exit safe mode, reboot the phone normally.
Performing Factory Reset
Factory reset will revert the settings to factory defaults and will result to the loss of data saved in the tablet’s internal storage. It is one of the most effective procedures to fix firmware- and app-related problems or glitches. It is, however, imperative you spend time backing up your data before you follow the steps below.
- Swipe with one finger from the top of the screen to the bottom to bring down the Notification Panel.
- Tap the Settings icon (cogwheel).
- Under the General tab, touch Backup and reset.
- You may now set the Backup and Restore options.
- Touch Factory data reset.
- If you may, read the warning and then tap the Reset device button.
- To confirm the reset, tap the Delete all button.
- The tablet will begin the reset and once completed, it will automatically restart.
Performing Master Reset
Master reset is also being referred to as hardware factory reset. It does what the typical factory reset does and it reformats the data partition where all settings and majority of system-related files are saved. Once finished, the tablet will not only be reset to factory defaults, all possible corrupt data files would also be deleted giving the device a fresh start. This kind of reset will be most helpful if the tablet fails to boot normally into Android interface. Here’s how to do it:
- Backup all your important data as they will be deleted during the reset process.
- Turn off the tablet completely.
- Press and hold the Home key and the Volume Up key, and then press and hold the Power key.
- When Recovery Booting appears on the screen, release all keys.
- Press the Volume Down key to highlight “wipe data/factory reset.”
- Once highlighted, press the Power key to select it.
- Press the Volume Down key again to highlight Yes — delete all user data.
- Press the Power key to confirm the reset.
- Once completed, highlight “reboot system now” and press the Power key.
- Master reset is now complete and the tablet will restart.
Clear App Cache and Data
Cache files contain all necessary information about specific apps that are used by the system so that they can be easily and smoothly loaded. Data files, on the other hand, contain settings and user preferences. These files can easily be corrupted and when they do, it is more likely that an app would stop functioning normally. The most common result is frequent force closing of apps that may also affect core functions and operations. More often, app-related issues can be fixed by simply clearing an app’s cache and data. Here’s how…
- Swipe with one finger from the top of the screen to the bottom to bring down the Notification Panel.
- Tap the Settings icon (cogwheel).
- Under the Applications tab, touch Application manager.
- Swipe to the All tab.
- Scroll to and tap the app.
- Tap the Clear Cache button.
- Tap the Clear Data button.
- Read the warning and tap OK to confirm your action.
Taking a Screenshot
It’s easy to take a screenshot using Galaxy Tab S but unlike Samsung’s flagship, the tablet doesn’t have Air Gestures feature, so you only have one way to capture what’s on the screen.
- Go to the screen you want captured.
- Press the Home key and the Power key simultaneously.
- The tablet will then take the screenshot.
- The picture will be saved in the “Screenshots” folder and will be visible in the Gallery.
Close Apps Via Task Manager
Instead of the Menu key, Samsung replaced the function of key left of the Home key–it’s now called Recent Apps key. As the name implies, you will be able to view apps you recently used when you hit it. It is also through that key that you can access the tablet’s task manager.
- From any screen, touch the Recent Apps key to bring up the Recent Applications screen.
- You can swipe any app up or down to close it.
- Touch the Task manager icon at the bottom of the screen.
- All active apps will be displayed. Touch the End button beside the app you want to close and touch OK.
- To force close all active apps, touch the End all button.
Accessing Google Now
There are many benefits of using Google Now and one of them is that it delivers timely information based on your location, schedule or time of the day. People who are new to Android may have not known this service exists.
- Go back to the Home screen and then touch and hold the Home key until Google Now service appears.
- Tap Next.
- Touch Yes, I’m in to launch the service. You may have to choose an account if you’ve setup more than one Google account on your tablet.
- Now touch any of the available cards to get more details.
Adding a Contact
If you got a Galaxy Tab S with 3G capability, then adding a contact makes more sense. If you got the WiFi-only version, you can still use the tablet to store important contacts information. Here’s how you add contact on your tablet:
- From the Home screen, tap the Contacts icon.
- Touch the Add new contact icon (represented by a Plus sign) in the upper-right corner.
- Now, enter the name, phone number, and email address.
- If you wish to add a contact photo, touch the default thumbnail and choose the image you want to use for that specific contact.
- Touch Save.
Accessing the Notification Panel
The Notification Panel is hidden but can be accessed by swiping a finger from the top of the screen to the bottom. It contains shortcuts to most common functions and settings, so it is imperative you know how to access and use it.
- Pull down the Notification Panel by swiping a finger from the top of the screen to the bottom.
- If there are notifications, you can dismiss them by swiping to the left or to the right.
- You may also swipe a notification with two fingers, slightly apart, to expand it for more details.
- To access the Quick Panel, swipe from the top of the screen using two fingers.
- You may now turn on or off a feature by tapping on its icon.
- To reorder the shortcuts, touch and hold a shortcut and drag it to a new location.
There are other things not mentioned here that you can do in both Notification and Quick panels.
Copy & Paste Text
Tablets with larger screens are often use as alternative to laptops for word processing. Thus, Google made copy and paste functions easier on Android. Here’s how you do it on a Tab S:
- For this tutorial, let’s use the stock browser.
- Touch and hold the area containing the text you want to copy.
- The text will be highlighted.
- Touch and drag the anchors to enclose text that you want to copy.
- Touch Copy.
- Now open the location or app where you want to paste the text.
- Touch and hold the text field.
- Touch Paste.
Connect with us
We are among the very few people who offer free Android support online and we are serious about it. So, feel free to contact us regarding your concerns, questions and problems. You may reach us at [email protected] or post on our Facebook and Google+ pages.
Much help but, my galaxy 10.1 says connected to 2 different routers, but trying to do anything either says network not available or processing failure. Any further direction to help or articles.