How To Fix PS4 HDMI Not Working Issue | NEW & Updated in 2026
Have you turned on your PlayStation 4 only to be greeted by a black screen? Or maybe you see a “No Signal” error? An unresponsive PS4 HDMI port can be incredibly frustrating, but don’t worry – the issue is usually easy to diagnose and fix.
In this comprehensive guide, you will learn how to fix the PS4 HDMI not working issue on your console. Troubleshoot and repair any HDMI port issues with expert tips.
Confirm Your PS4 is Turned On
Before troubleshooting anything else, you’ll want to confirm that your PS4 is actually powered on. Here’s how:
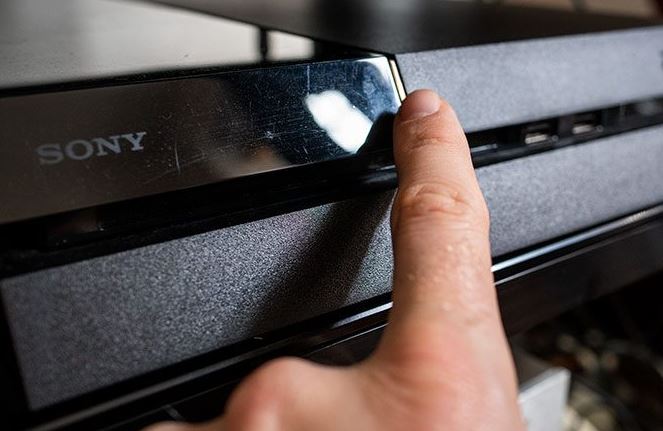
- Press the power button on your console – it should beep once if it turns on.
- Check for lights on the front. When powered on, the PS4 will show a solid white light.
- Listen for the fans. If the console is on, you should hear them spinning.
If your PS4 isn’t turning on at all, you likely have a separate issue unrelated to the HDMI. Try reseating the power cable or consult Sony’s troubleshooting guide for help turning it on.
Try Different HDMI Cables and Ports
The most common cause of PS4 HDMI issues is a faulty cable connection. Before looking at any advanced fixes, try using different cables and ports:
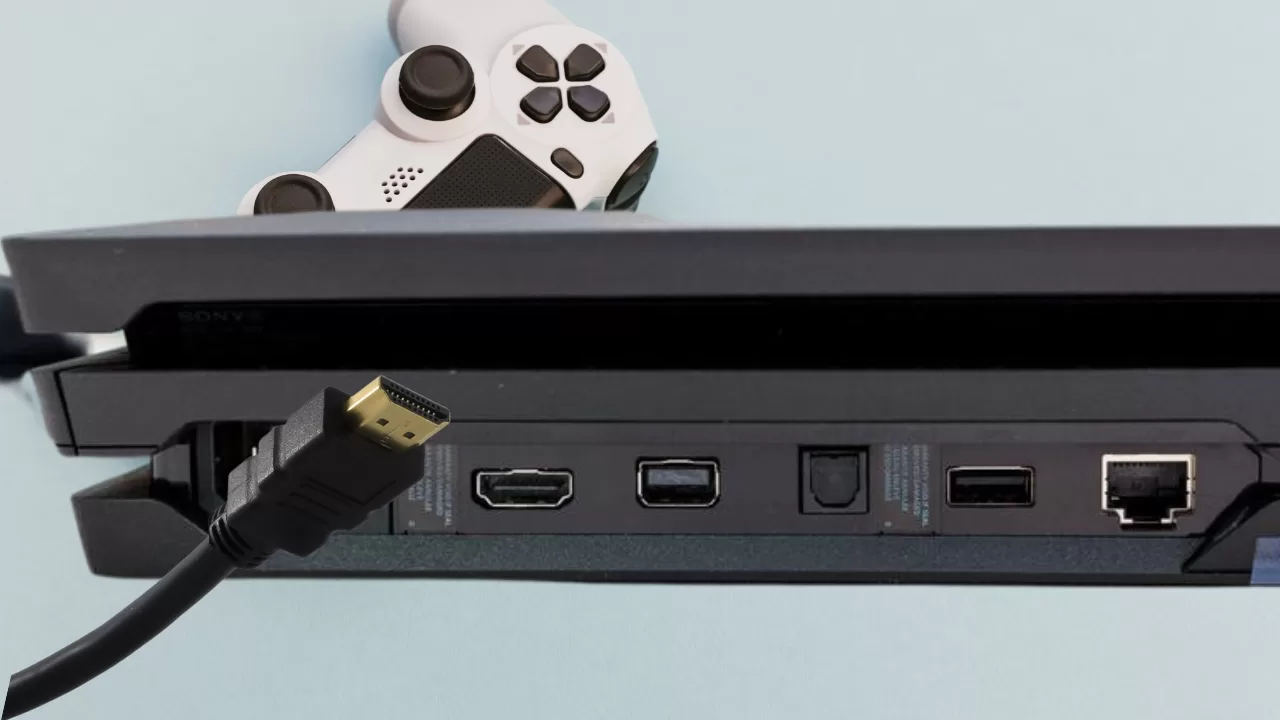
- Make sure the HDMI cable is plugged securely into both the TV and PS4. Remove and reinsert both ends.
- Try connecting your PS4 to a different HDMI port on your TV if possible.
- Test different HDMI cables, including brand new ones, if available.
Occasionally the port itself gets damaged, so switching to a different cable and TV input is a quick way to isolate the issue.
Inspect the HDMI Ports for Damage
If you’ve verified the console turns on but different cables and TV ports don’t help, inspect the HDMI ports for damage:
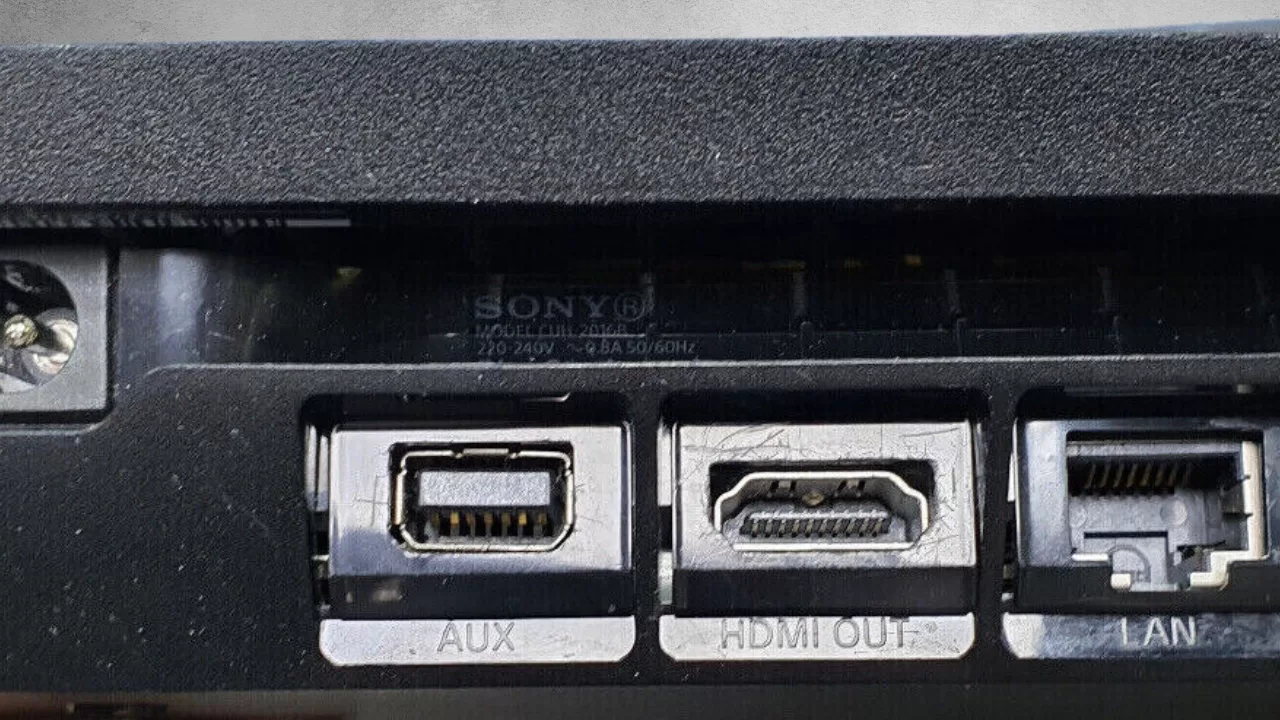
- Look inside the PS4’s HDMI port using a flashlight. Check for broken pins, bent pins, or pins pushed too far into the port.
- Examine the outer port as well. See if the port is loose, crooked, or pushed inward.
- Check the TV’s HDMI ports too. Faulty ports on either device can cause connection issues.
Damaged pins are a very common HDMI issue with PlayStation 4 consoles. If you spot any, the port will likely need to be replaced. We’ll cover that more later.
Reset Your PS4’s Video Resolution
Here’s a quick fix you can try if different cables and ports don’t help:
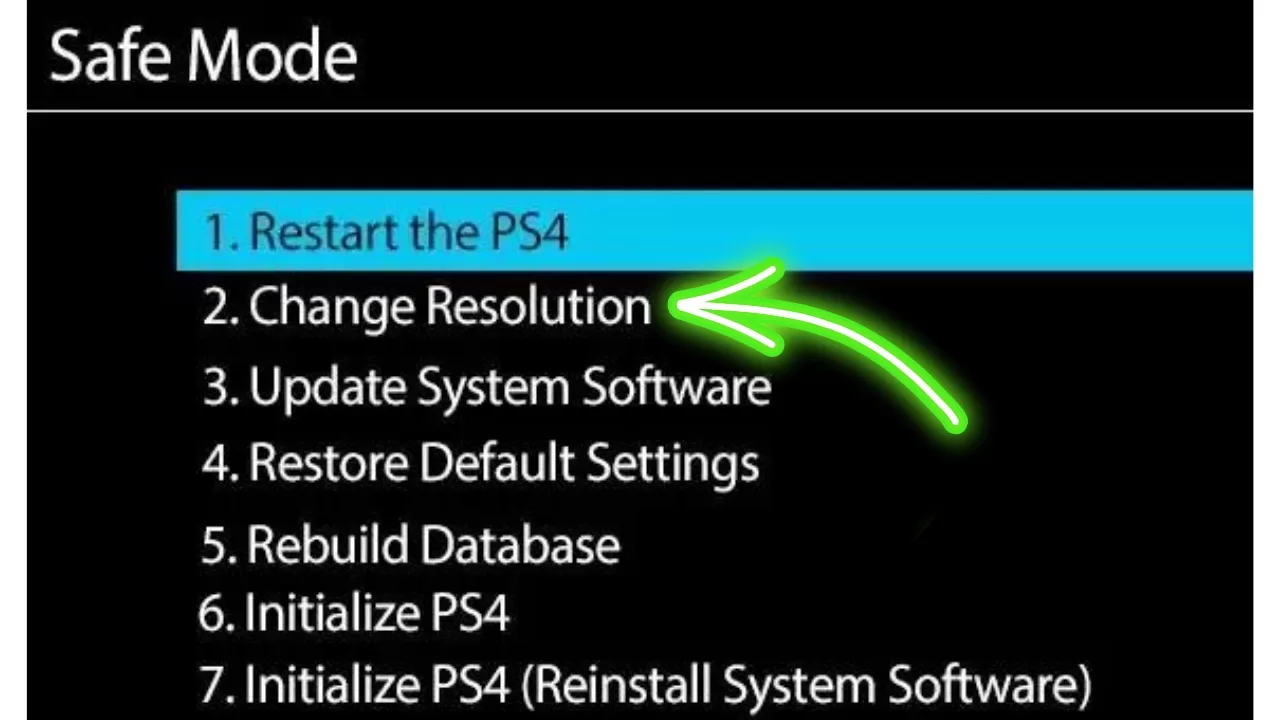
- Turn off your PS4 completely by holding the power button for 7 seconds until it beeps twice.
- Once powered off, press and hold the power button again until you hear two beeps. This will boot your PS4 into Safe Mode.
- Connect a controller to your PS4 using a USB cable. Press the PS button to bring up the Safe Mode menu.
- Select Change Resolution and press X to confirm.
- Choose Reset Video Settings to reset your PS4’s resolution.
Resetting the video output will return your console’s resolution to the default 480p. If your PS4 previously tried to output an unsupported resolution, this can get your picture back!
Make Sure Your TV Supports the PS4’s Resolution
While we’re on the topic of display resolution, double check that your TV or monitor supports the PS4’s video output.
The PlayStation 4 can output video at 480p, 720p, 1080i, and 1080p resolutions. If you manually selected a resolution your display doesn’t support, you’ll see the “No Signal” error.
You can avoid issues by setting your PS4 back to Automatic resolution selection in the Sound and Screen settings menu. The console will then choose a resolution your TV supports automatically.
Try Safe Mode Options to Fix Software Issues
In rare cases, PS4 HDMI problems stem from system software issues rather than hardware. You can try using Safe Mode to fix software:
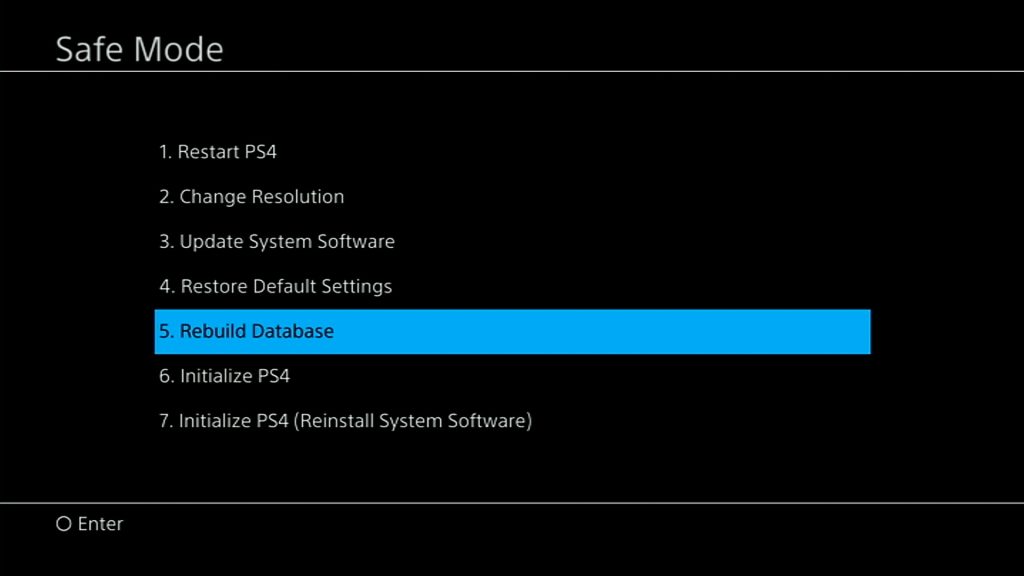
- Enter Safe Mode again by holding the power button for 7 seconds and waiting for 2 beeps.
- Connect a controller with a USB cable and press the PS button.
- Select Rebuild Database to scan for corrupt data and reorganize files.
- Alternatively, select Initialize PS4 to fully reset the console to factory settings. You’ll lose all data.
If neither Safe Mode option resolves your problem, it likely isn’t a software problem. Initializing your PS4 should be a last resort too.
Replace a Faulty HDMI Port
If you’ve tried everything else and confirmed your PS4’s HDMI port has bent or broken pins, a damaged housing, or other physical damage, replacement is the permanent solution.
Full port replacement requires soldering skills. If you aren’t experienced with electronics repair, getting professional help is recommended. If you do want to DIY, follow these key steps:
- Remove the PS4’s case to access the motherboard and locate the HDMI port.
- Use a hot air station to desolder the old HDMI port. Remove it once the solder liquefies.
- Thoroughly clean the port area and apply flux to the solder joints.
- Carefully solder the new HDMI port onto the board, ensuring all pins are connected.
- Reassemble the PS4 case and power it on to test.
This repair takes practice – watch video tutorials to see the process in action. And take your time to avoid damaging the motherboard.
When to Get Professional PS4 Repair Help
While many PS4 HDMI issues can be resolved yourself, depend on pros when:
- You lack the technical skill to solder and replace ports.
- Opening the console risks voiding your warranty.
- You simply don’t have the time or patience for complex repairs.
Trusted repair shops like UBreakiFix offer services nationwide to replace PS4 HDMI ports and other components.
Their technicians are experts in game console repair, and getting professional help ensures the job is done quickly and correctly.
Frequently Asked Questions About PS4 HDMI Issues
Here are answers to some commonly asked questions about debugging and fixing PlayStation 4 HDMI problems:
Why does my PS4’s HDMI port stop working suddenly?
Most HDMI issues are caused by physical damage to the port. Frequent plugging/unplugging of cables can bend pins over time. Dropping your console or transporting it roughly can also misalign and break pins.
Can I fix a PS4 HDMI port myself?
Technically yes, but only if you have decent soldering skills. The only permanent fix is fully replacing the damaged HDMI module. This requires desoldering the old one and soldering a new port on securely.
How much does PS4 HDMI port repair cost?
If done professionally, expect to pay $100-$150 for parts and labor. DIY will cost $10-$20 for tools if needed, plus $10-$15 for a replacement part.
What causes the PS4 White Light of Death?
The White Light of Death is when your PS4 turns on but displays only a blank screen. It’s nearly always caused by a loose HDMI connection or damaged port/cables preventing video output.
Why won’t my PS4 connect to my TV?
If your HDMI cable is plugged in but the PS4 isn’t displaying, it’s likely a loose connection, compatibility issue, or hardware problem with the console, TV, or cable. Trying different troubleshooting steps can help narrow down the cause.
How do I get Safe Mode on my PS4?
To access Safe Mode, turn off your PS4 and press/hold the power button until you hear two beeps (about 7 seconds). This will boot the console in Safe Mode, allowing you to rebuild the database, restore default settings, and more.
Get Back to Gaming
With any luck, the troubleshooting tips in this guide helped you get your PS4 HDMI output working again. But if you continue experiencing problems, don’t hesitate to seek professional repair assistance. Specialists like UBreakiFix have the skills and experience to efficiently diagnose and fix all types of PS4 issues.
Whether your HDMI port needs replaced or your console has another underlying problem, reliable experts can quickly get your PlayStation back up and running. Being without your favorite gaming system is no fun, so contact a repair shop to discuss your options if you’ve exhausted all self-fixes.