6 Proven Ways to Fix a PS4 Not Connecting to TV (2023 Updated)
Have you suddenly lost video output from your PS4 to your TV? Don’t panic – in most cases, you can get your PS4 displaying on your TV again with some simple troubleshooting.
This guide will outline the most common reasons a PS4 not connecting to TV and walk through solutions to try yourself before taking it for professional repair.
Why is My PS4 Not Showing Up on My TV?
There are a few common causes when a PS4 fails to connect or display on a TV:
- Loose HDMI connection
- Wrong input source selected on TV
- HDMI cable damaged/faulty
- HDMI port damaged on PS4 or TV
- Incorrect video resolution set in PS4
- Software crash or glitch
- TV compatibility issues
Trying a few quick fixes at home can determine whether the issue is a loose connection, software problem or hardware failure.
How To Get Your PS4 to Display on Your TV
Follow these troubleshooting steps when your PS4 won’t show up or connect to your TV:
1. Check HDMI Cable Connection
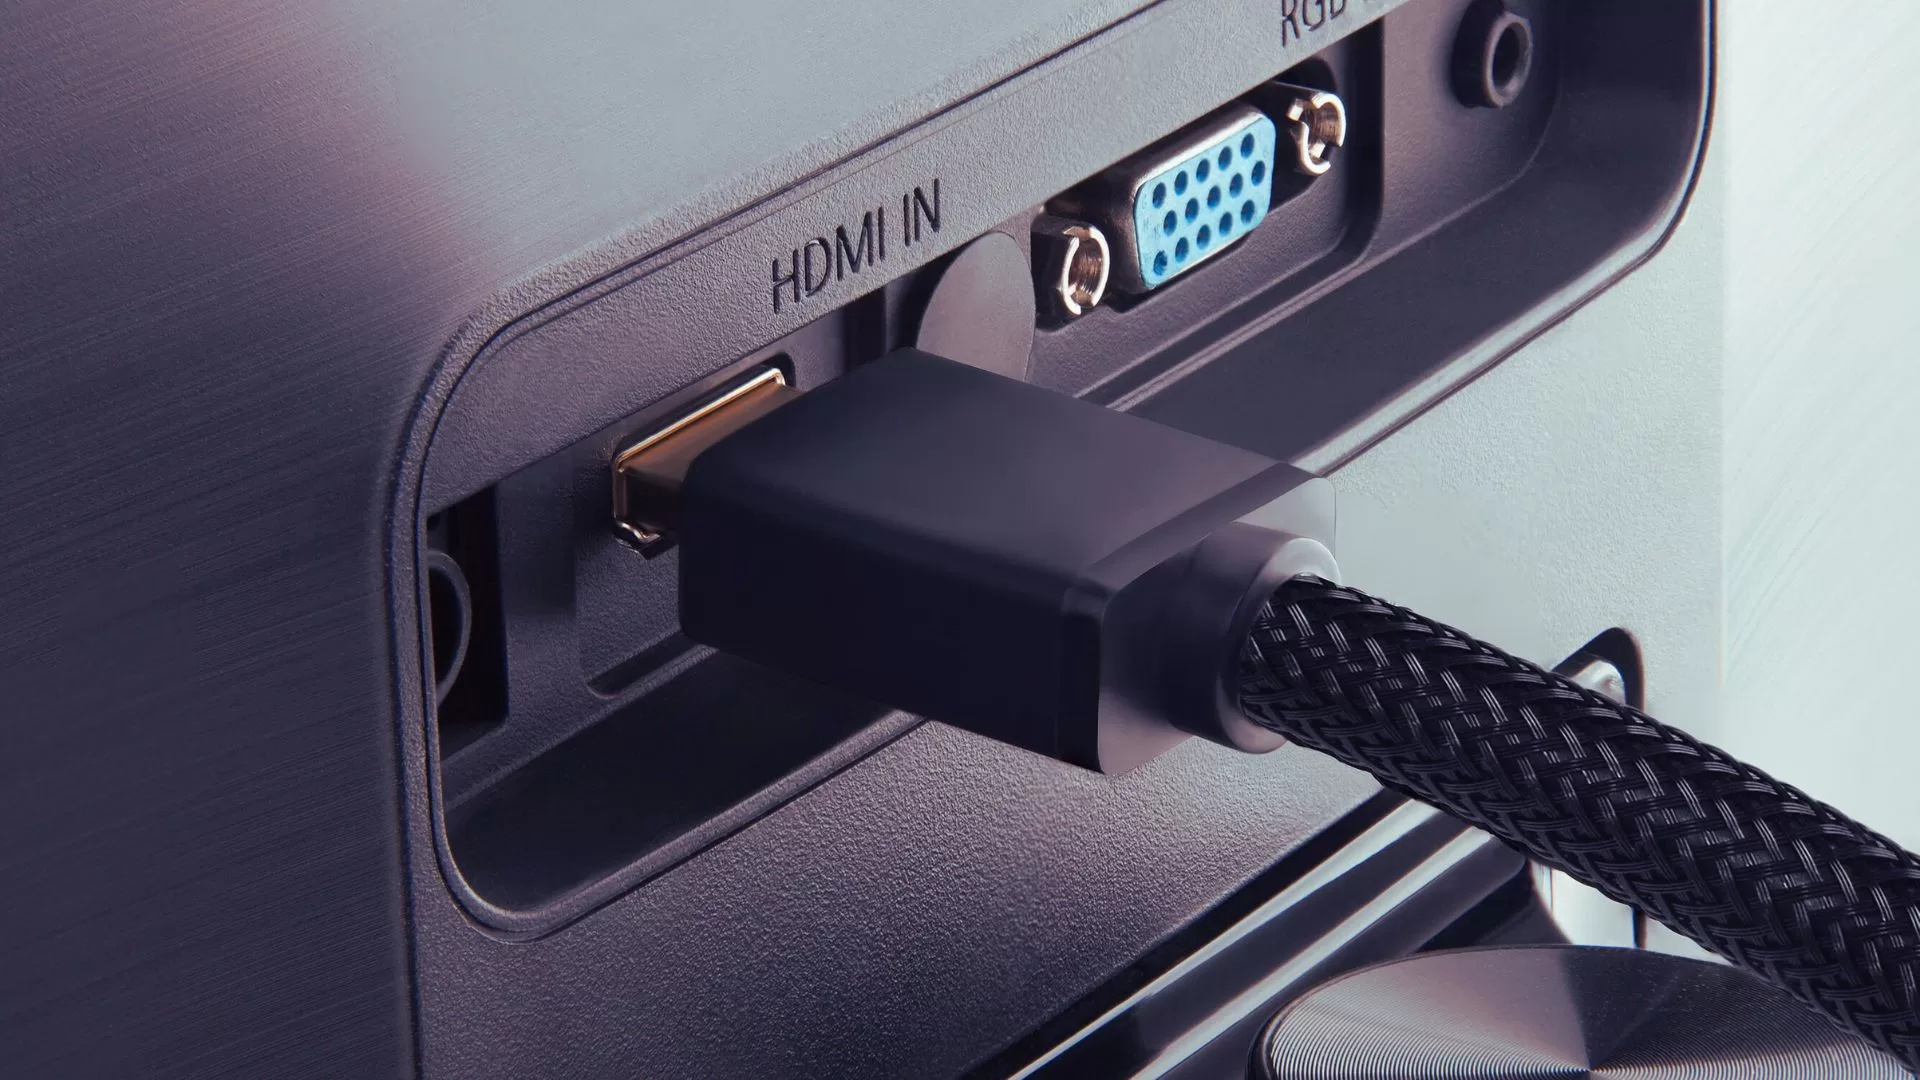
Ensure the HDMI cable is securely inserted into both the PS4 and TV. Try different cables and ports.
2. Check Correct Input Source on TV
If your PS4 is not connecting to your TV, one of the first things you should check is the input source. Make sure that your TV is set to the correct input source for the HDMI port that your PS4 is connected to.
- Once you have found the input button, press it repeatedly until the correct input source is selected.
- The input source for your PS4 will typically be labeled as “HDMI 1”, “HDMI 2”, or “HDMI 3”.
3. Reset PS4 Resolution
If your PS4 is not displaying the correct resolution on your TV, you can reset it to the default resolution. To do this, follow these steps:
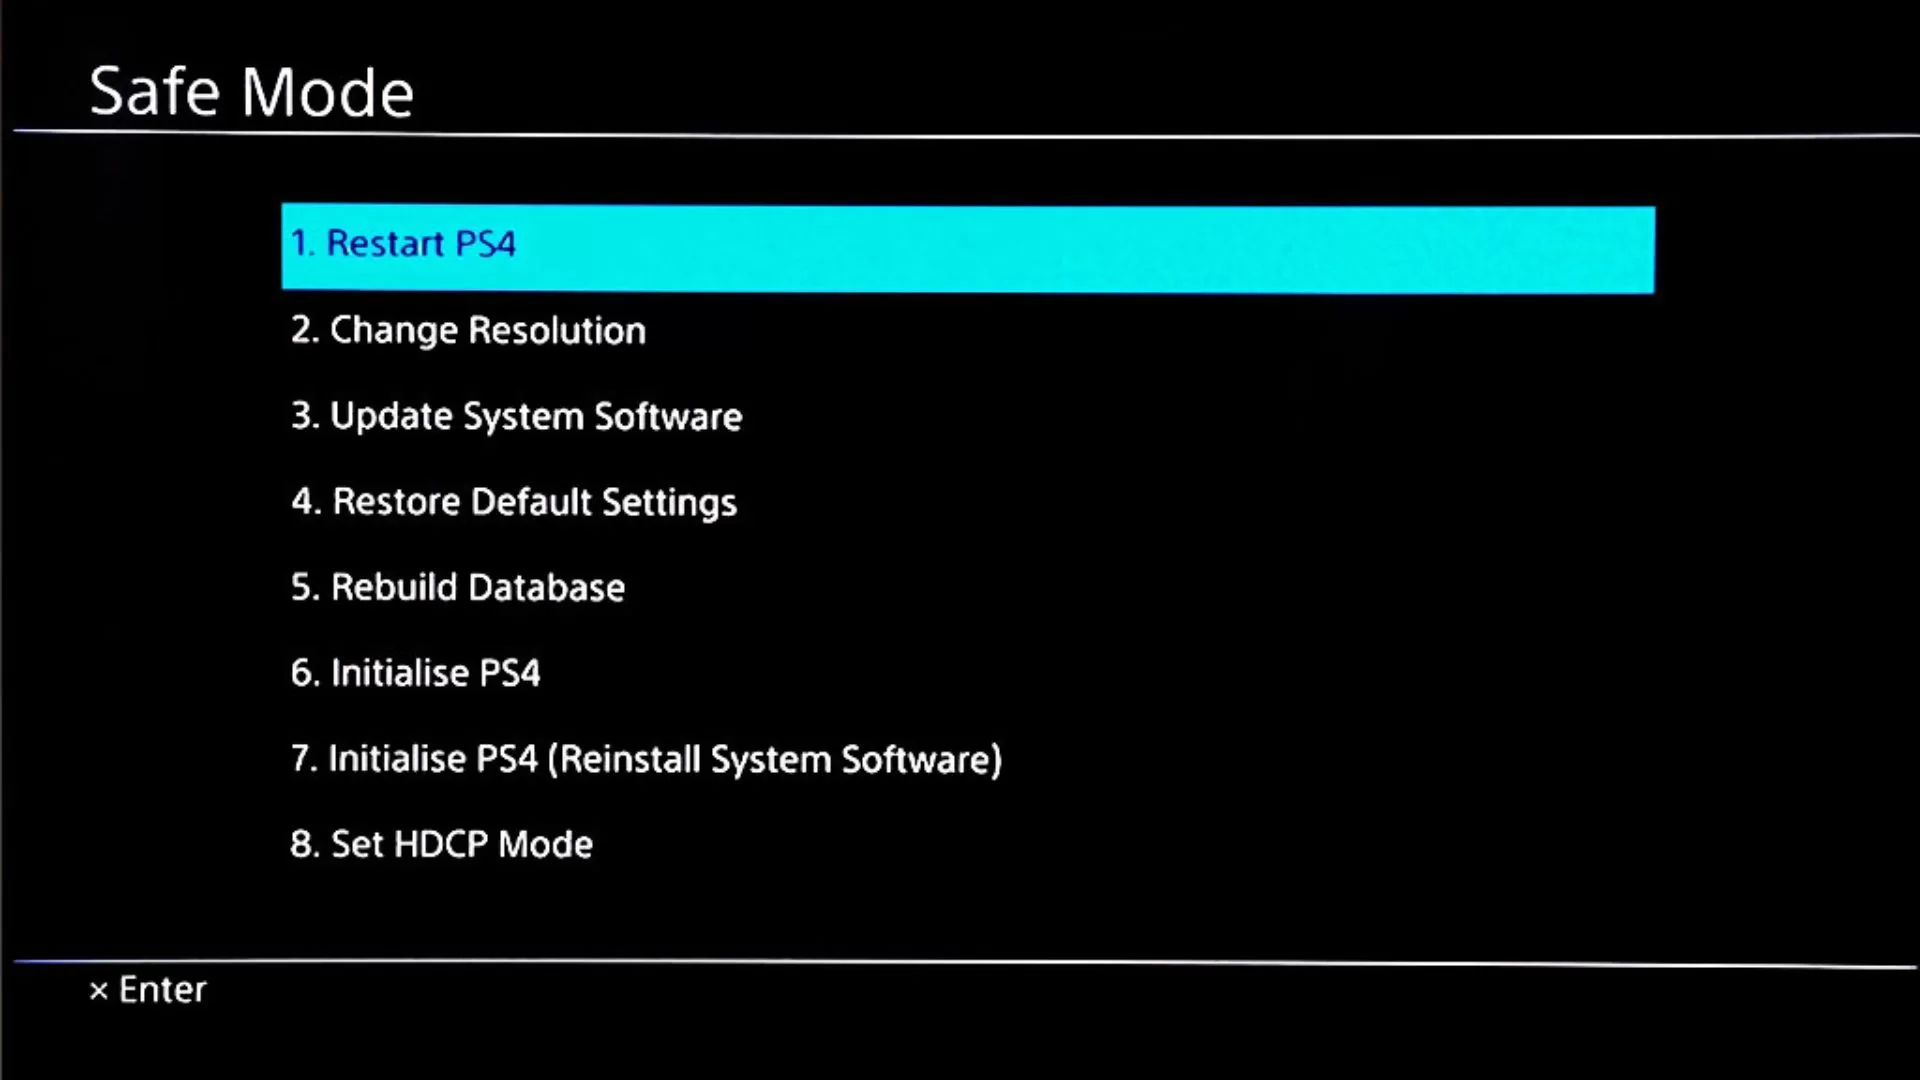
- Turn off your PS4.
- Hold down the power button for about 7 seconds, until you hear two beeps.
- Release the power button and connect your PS4 controller to the console using a USB cable.
- Press the PS button on your controller.
- Select “Change Resolution” from the Safe Mode menu.
- Select the correct resolution for your TV and press the X button.
- Your PS4 will restart and the correct resolution will be displayed on your TV.
4. Update PS4 Software
Keeping your PS4 software up to date is important for both security and performance. Software updates often include bug fixes and performance improvements, as well as new features.
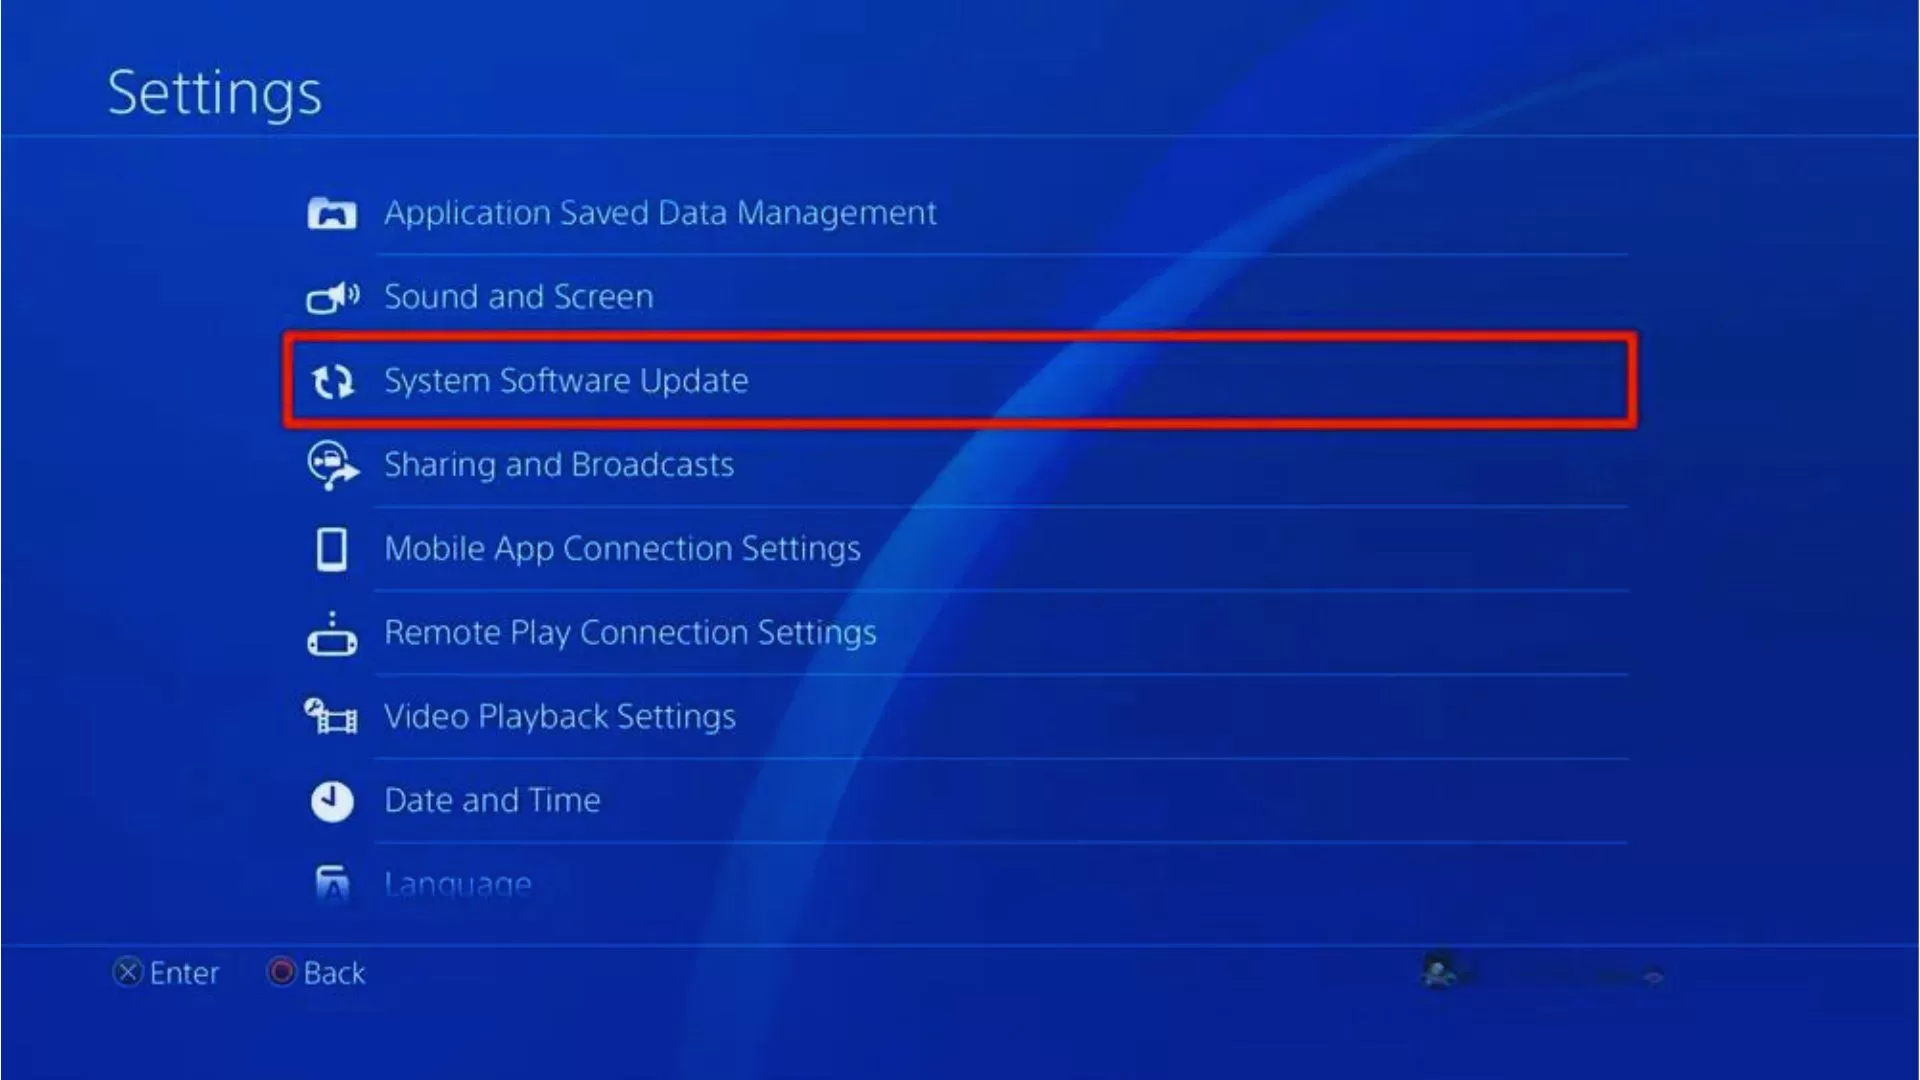
To update your PS4 software, follow these steps:
- Go to Settings > System Software Update.
- If an update is available, select Download and Install.
- Follow the on-screen instructions to complete the update process.
5. Factory Reset PS4
If you are having trouble with your PS4, such as slow performance, freezing, or crashing, you may want to consider performing a factory reset. This will erase all of the data on your PS4, including your games, saved data, and user settings, so be sure to back up anything important before proceeding.
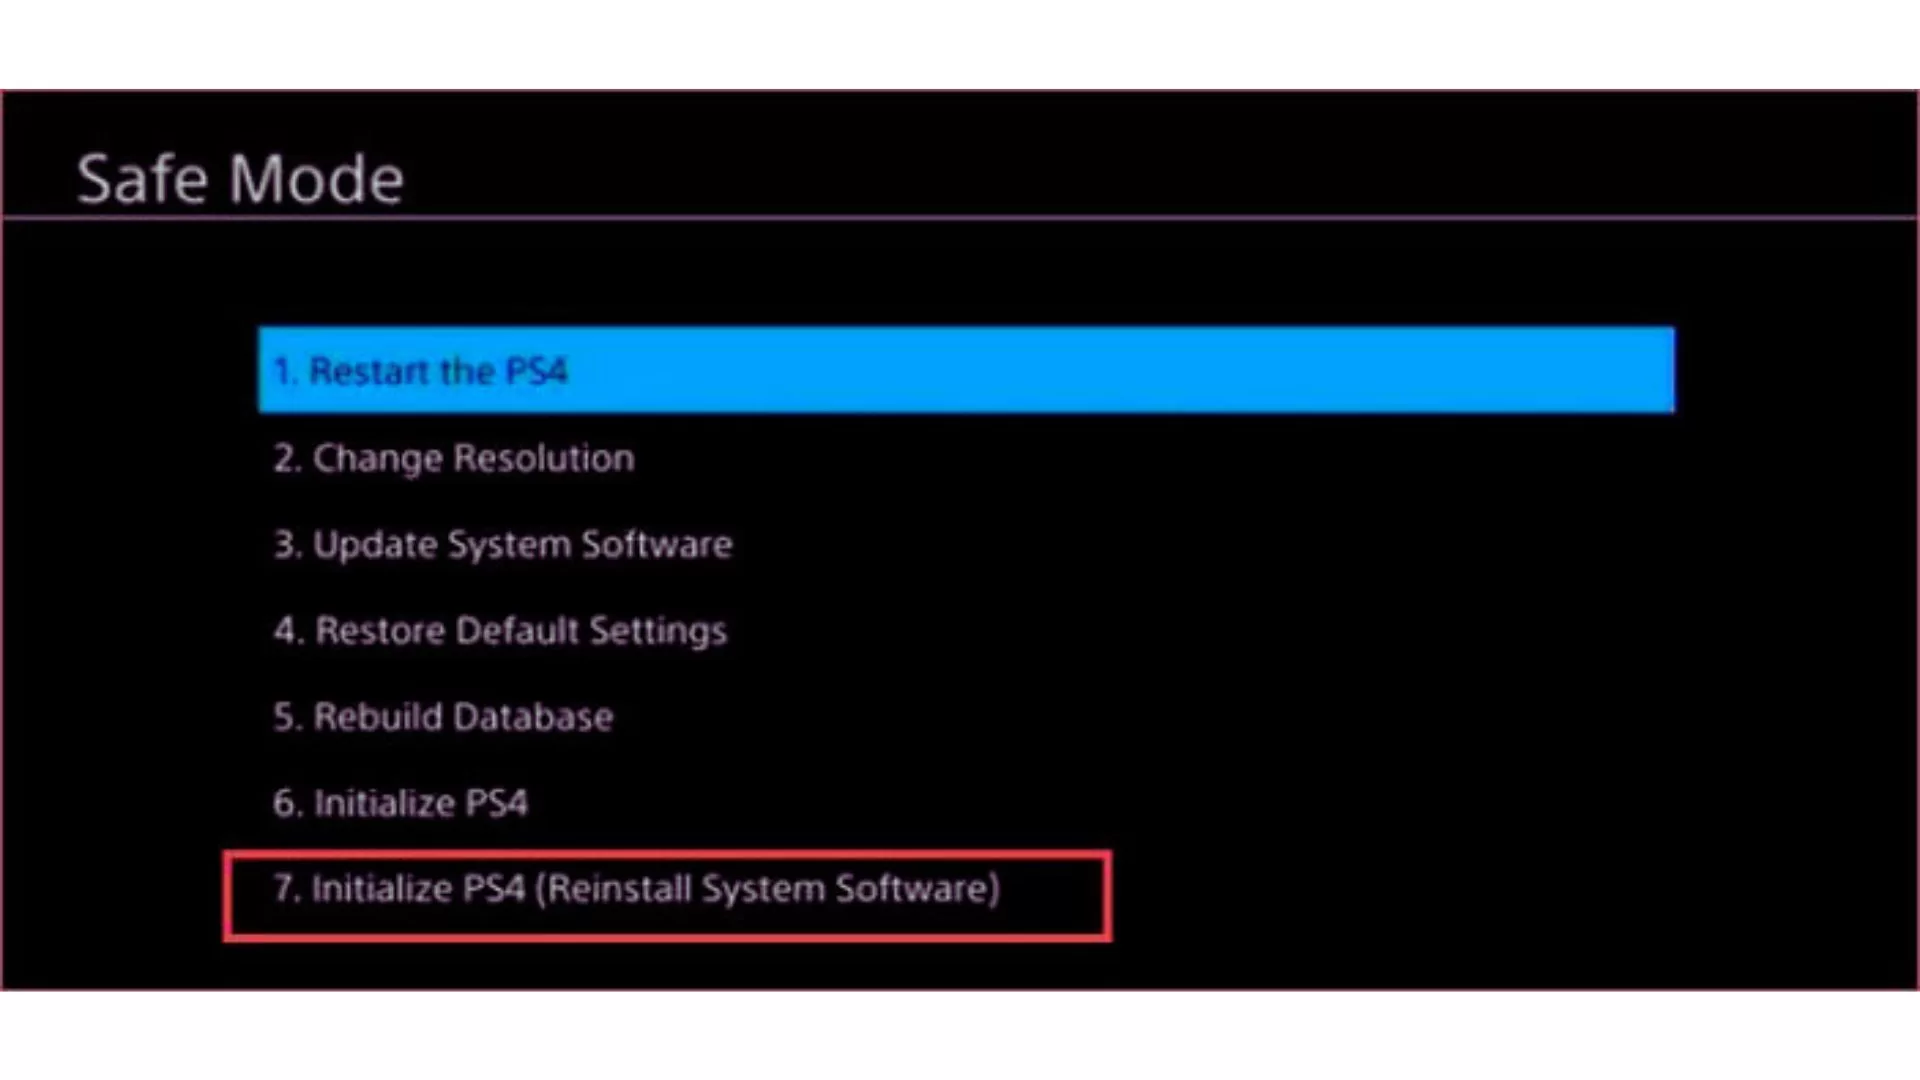
To factory reset your PS4, follow these steps:
- Go to Settings > Initialization.
- Select Initialize PS4.
- Select Full.
- Follow the on-screen instructions to complete the factory reset process.
Once the factory reset is complete, your PS4 will be restored to its factory default settings. You will need to set up your PS4 again as if it were new.
6. Get Professional Repair
For any hardware damage like a faulty HDMI port, seek qualified tech assistance to replace parts.
Following these steps should get your PS4 displaying on your TV again. But if you still have no signal after trying everything, your PS4 likely needs repair to replace any internal hardware that has failed.