How To Restrict Child Playing Time On Nintendo Switch (Parental Controls)
The Nintendo Switch is the hottest gaming console nowadays as it can provide fun for both kids and adults. If you’re a parent though and you want to put some limitations on how long your child plays, or what content restrictions he or she can access, you can make use of the built-in Nintendo Switch Parental Controls feature.
If you’ve not heard of Parental Controls before, or if you have no idea how to enable it, read on.
What is Parental Controls On Nintendo Switch?
By default, the Nintendo Switch does not impose content restrictions for users. This means that all contents that can be accessed by the console are readily available for each user, including mature games. As you can see, this is hardly ideal if you let a young child or teen use it for gaming.
In order to limit your child from downloading grown-up contents, you need to enable Parental Controls. This feature does not only restrict downloads but also provides a parent with an option to track a kid’s play activity, set his or her play-time limit, and even use the console as his or her alarm bedside alarm.
How to enable Parental Controls On Nintendo Switch?
How to set up Parental Controls with an app
A more convenient way to configure Parental Controls for your Switch is by using a smartphone app. Both iOS and Android versions are supported. For demonstration purposes, I’m using an Android to show you the steps. The steps to do this on an iPhone should be generally similar.
- On your Android device, open the Play Store app.
- Search for “Nintendo Switch Parental Controls.”
- Download and install the app.
- Open the app and tap on Sign In/Create Account button.
- Tap Sign in under For existing users.
- Enter your Nintendo account email and password.
- If prompted, verify your account with CAPTCHA.
- Tap on Select this account. This will allow the app to link your account to your Nintendo Switch Parental Controls.
- Hit Next.
- On your console, go to System Settings>Parental Controls>Parental Control Settings and select If You’ve Already Downloaded the App.
- Enter the shown code from your smartphone to your Nintendo Switch console.
- Select Link button.
- Continue setting up Parental Controls by tapping on Set Play Time or Later on your smartphone.
- Follow the rest of the instructions on the Nintendo Switch Parental Controls app.
If you want a more customized restrictions instead of the presets (Teen, Young Child, Child, etc., you can select Custom Settings.
How to delete Parental Controls On Switch
In case you don’t need to use Nintendo Switch Parental Controls, you can easily delete your settings with these steps:
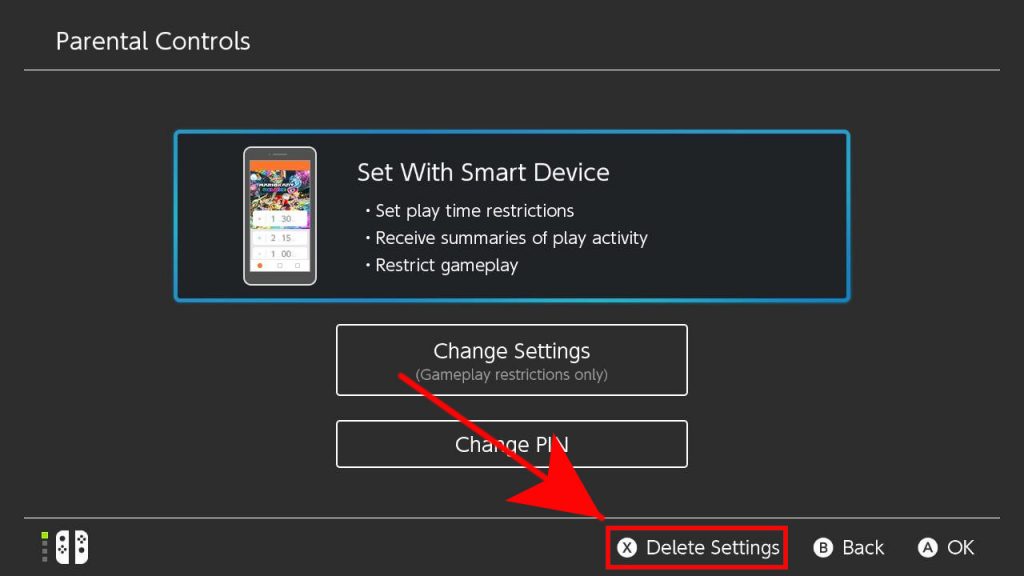
- Open System Settings on your Nintendo Switch.
- Scroll down and select Parental Controls.
- Select Change Settings on the right side of the screen.
- Enter your PIN.
- Hit Delete Settings on the screen or the X button on your controller.
- Confirm by selecting Delete.
How to unlink your Nintendo Switch from Parental Controls smartphone app
If you decide to unregister your Switch from your phone Parental Controls app, follow the steps below.
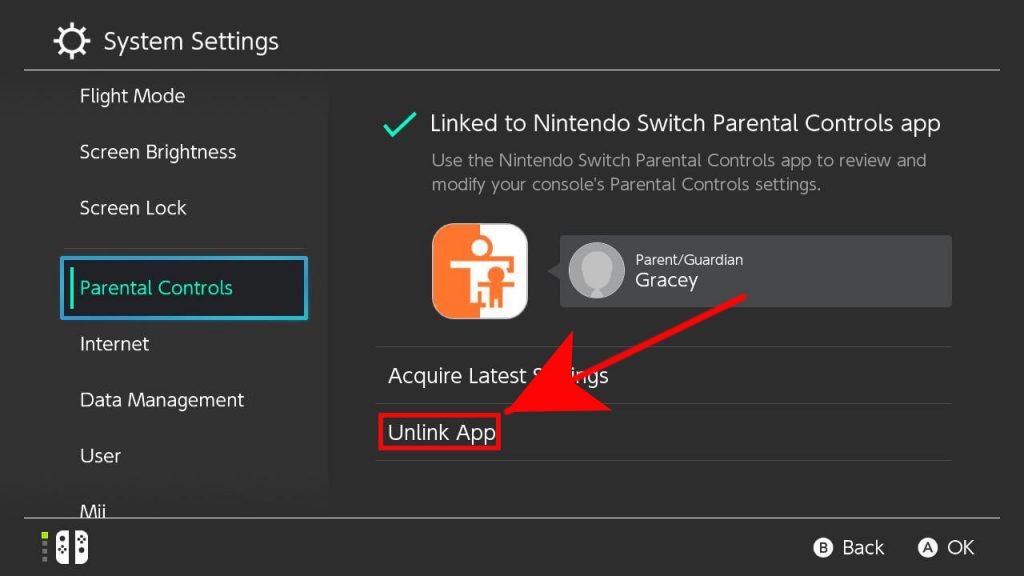
- Open System Settings on your Nintendo Switch.
- Scroll down and select Parental Controls.
- Select Unlink App.
- Enter the PIN.
- Select Unlink.
- Hit OK.
Suggested readings:
- How To Check Nintendo Switch Play Time For Legend Of Zelda: BOTW
- How To Fix Nintendo Switch Error Code 2813-0998 in 2026
- How To Change The DNS Settings On Nintendo Switch
- Best PC Settings For Call Of Duty Warzone To Boost FPS
Visit our TheDroidGuy Youtube Channel for more troubleshooting videos.