How to Troubleshoot Galaxy S23 Grainy Photos in Low Light
Finding your Galaxy S23 images turn out grainy, noisy, or lacking detail, specifically when shooting in low light conditions, can be incredibly frustrating. You likely rely on your phone’s exceptional night photography capabilities. But don’t worry – grainy low-light shots are usually caused by a few adjustable settings or shooting techniques.
With some informed troubleshooting, you can determine what factors are contributing to noisy low-light shots from your S23 and make corrections for sharp, clean images even in dark conditions. This guide will cover common causes and practical solutions to test. A few tweaks can dramatically improve low-light photos.
Common Causes
Typical reasons your Galaxy S23 produces grainy low-light photos include:
- High ISO levels – Using high ISO sensitivity introduces noise. Use lower ISO when possible in low light.
- Long shutter speed – Slow shutter speeds can create blur and noise. Use Night mode to prevent this.
- Lens flaws – Lens defects like smudges, cracks, or misalignment reduce image quality. Clean the lens carefully.
- Focus issues – Incorrect focus exacerbates the appearance of graininess. Manually focus on the main subject.
- Motion blur – Even slight camera shakes become blurry with slow shutter speeds. Use a tripod at night.
- No Scene Optimizer – Intelligence helps optimize night shots. Make sure this setting is on.
- Processing artifacts – Heavy-handed HDR and processing can over-sharpen images.
Troubleshooting Procedures
To reduce graininess in Galaxy S23 low-light photos, try these subsequent workarounds and camera tweaks before opting for service:
Step 1: Use Night Mode
Night mode is a feature on some cameras that allows you to take better photos in low-light conditions. It works by adjusting the camera’s settings, such as the ISO and shutter speed, to capture more light and produce a clearer image.
Here are the steps on how to enable Night mode on your Galaxy S23:
- Open the Camera app.
- Swipe to the MORE tab.
- Tap Night.
Night mode will now be enabled. You can see a moon icon on the top left corner of the screen.
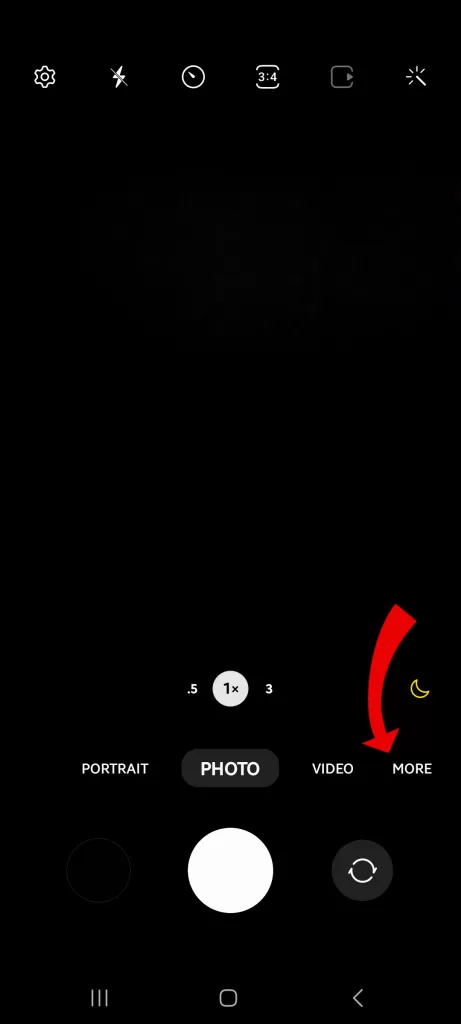
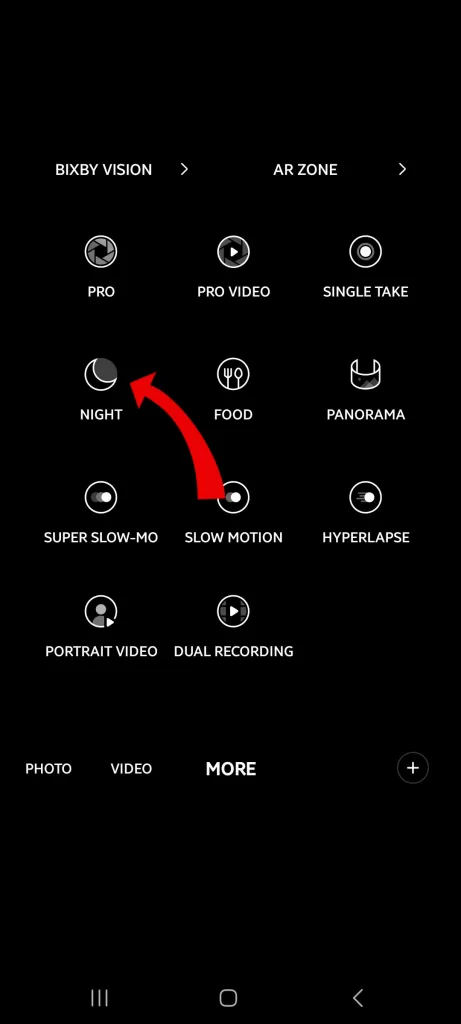
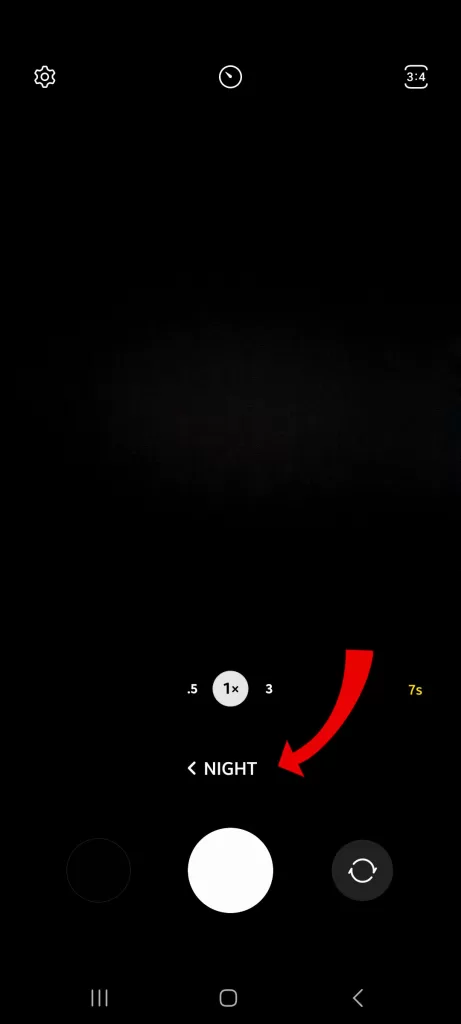
Night mode uses longer exposure times and lower ISO settings to capture more light in low-light conditions. This can help you to take sharper and brighter photos in the dark.
Furthermore, Night mode can create better results than simply relying on high ISO and extended shutter speeds alone.
Step 2: Adjust ISO Lower
The ISO on your Galaxy S23 camera controls the camera’s sensitivity to light.
When taking photos in low light conditions, the camera may automatically boost the ISO to compensate for the lack of light. However, this can result in excessive noise and grain in the image.
To prevent this, it’s recommended to manually set the ISO to a lower number, such as ISO 400 or 800. This will result in a cleaner and clearer image.
To adjust the ISO on your Galaxy S23 camera, follow these steps:
- Open the Camera app.
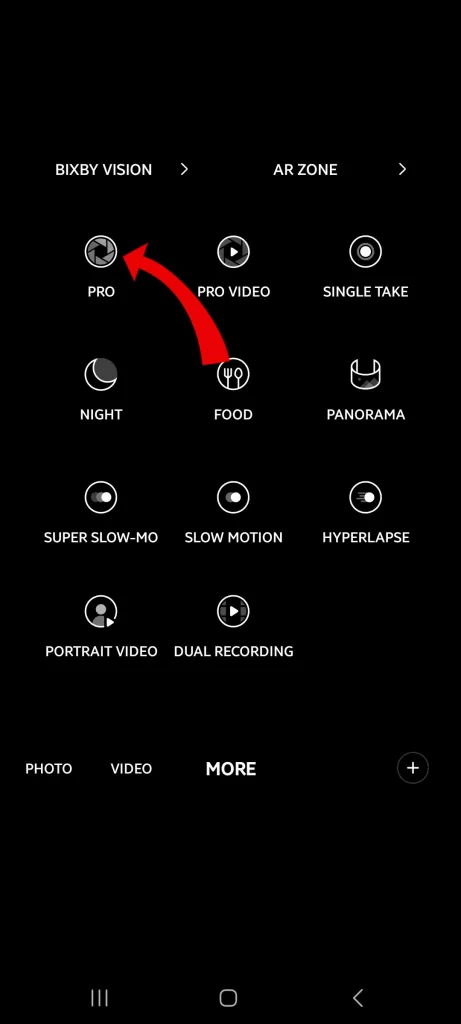
- Swipe to the MORE tab.
- Tap Pro.
- Scroll down and tap ISO.
- Use the slider to adjust the ISO setting.
The default ISO setting on the Galaxy S23 is 100. You can adjust the ISO setting from 50 to 6400.
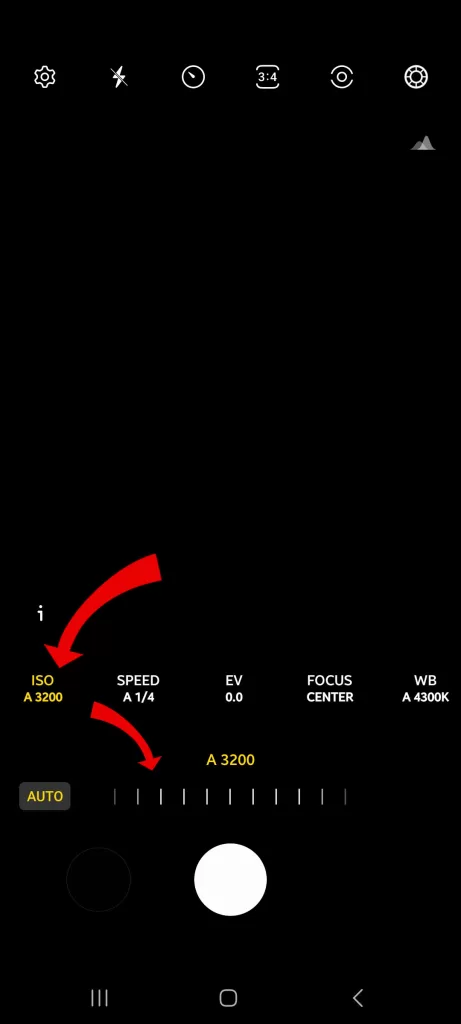
A higher ISO setting will make the camera more sensitive to light, which can help you take sharper photos in low-light conditions. However, a higher ISO setting can also introduce noise, which is a grainy or speckled appearance in the photo.
Step 3: Enable Scene Optimizer
Enabling Scene Optimizer on your camera will help you take better pictures in low-light conditions. It will automatically adjust settings like ISO, noise reduction, and processing to optimize the image quality when you are taking pictures at night.
Here’s how to enable Scene Optimizer on your Galaxy S23 camera:
- Open the Camera app.
- Tap the More options (three dots) icon in the top right corner.
- Tap Settings.
- Scroll down and tap Scene Optimizer.
- Toggle the Scene Optimizer switch to the on position.
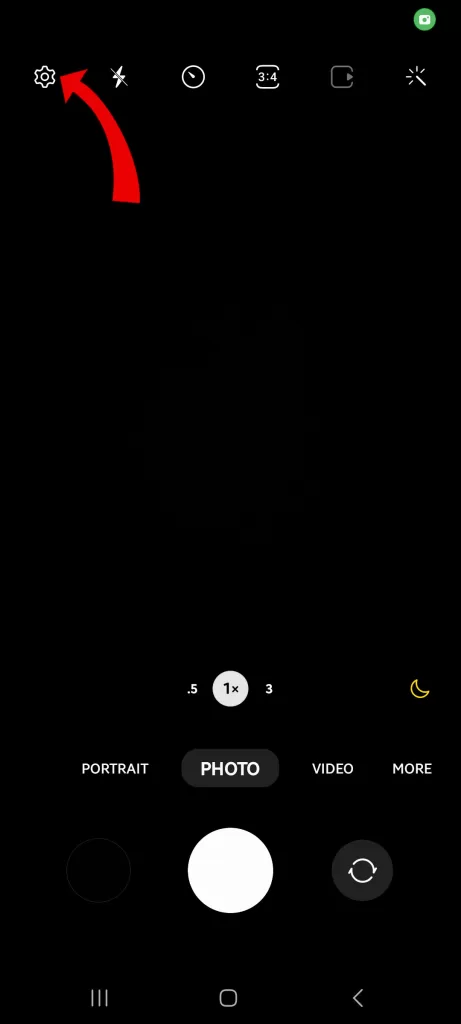
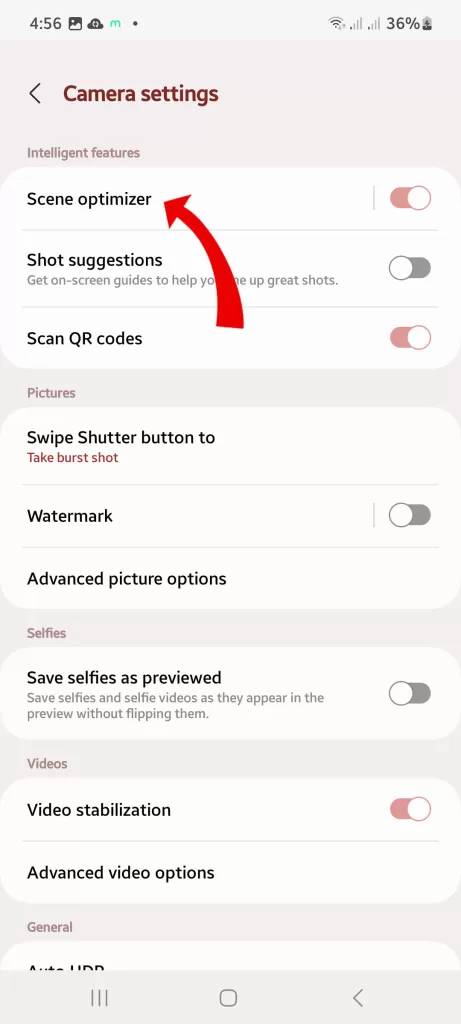
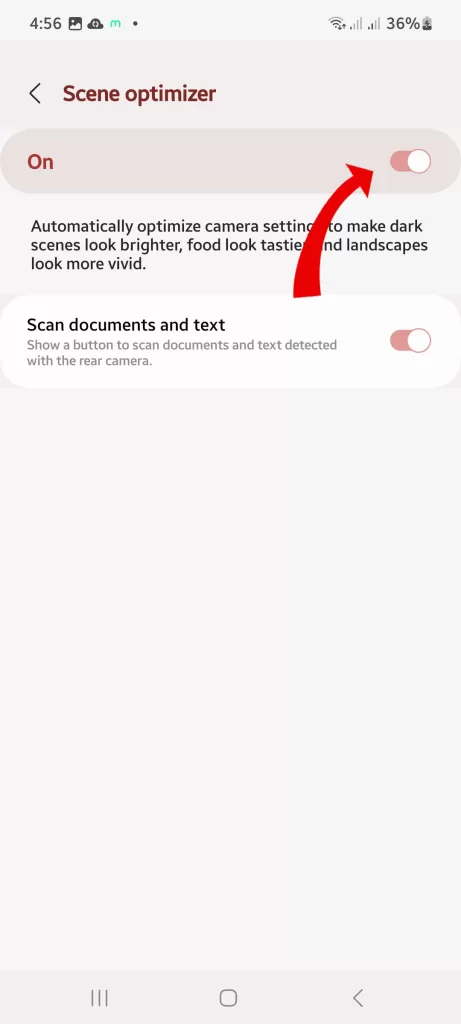
Scene Optimizer is a feature that uses artificial intelligence to automatically adjust the camera settings for the best possible shot. It can identify over 30 different scenes, including food, landscapes, and portraits.
This will make your photos look clearer and more vibrant, even in low-light environments.
If you want to disable Scene Optimizer, simply toggle the switch to the off position.
Step 4: Shoot in Pro Mode
Adjusting the shutter speed can help control the amount of light that enters the camera while adjusting the ISO can help determine the camera’s sensitivity to light.
Here’s how to use Pro Mode on your Galaxy S23 camera:
- Open the Camera app.
- Swipe to the MORE tab.
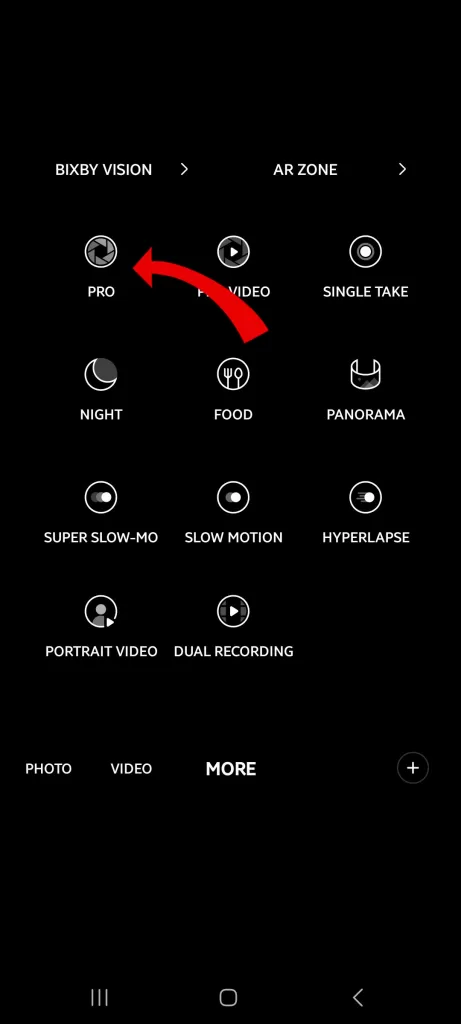
- Tap Pro.
Once you are in Pro Mode, you will have access to the following settings:
- ISO: This controls the camera’s sensitivity to light.
- Shutter Speed: This controls how long the shutter is open, which affects the amount of light that is captured.
- Focus: This controls where the camera is focused.
- White Balance: This controls the color temperature of the image.
- Exposure Compensation: This adjusts the brightness of the image.
You can adjust these settings to get the perfect shot for your scene.
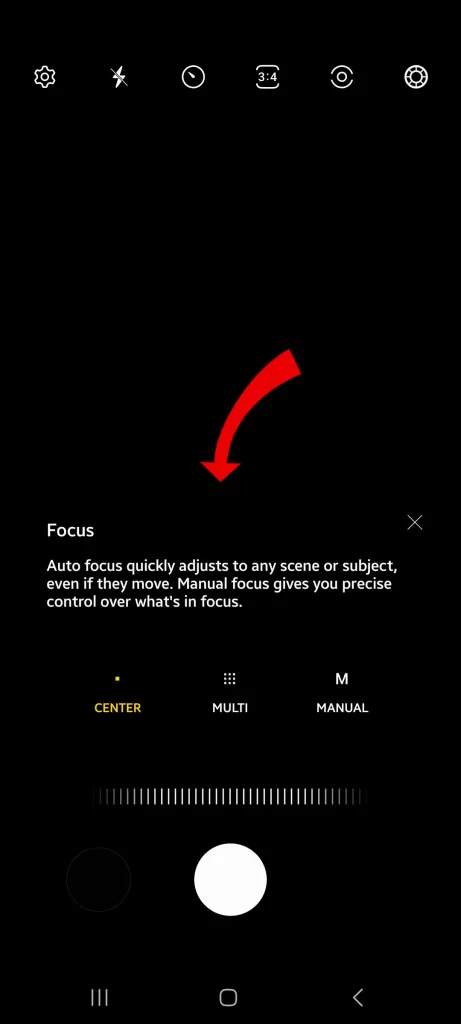
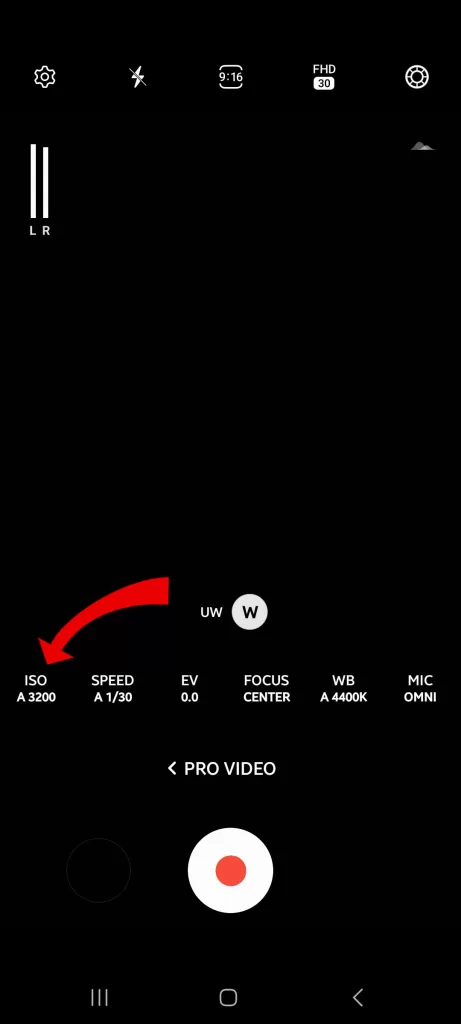
The metering method can help the camera determine the correct exposure for the scene. With these settings adjusted manually, you can capture stunning photos even in low-light conditions.
Step 5: Clean the Lens
Wipe the rear camera lens gently with a microfiber cloth to eliminate any dust or smudges that could reduce image sharpness.
Keeping the rear camera lens clean is important because it can affect the quality of your photos and videos. Using a microfiber cloth is recommended because it’s gentle on the lens and won’t scratch or damage it.
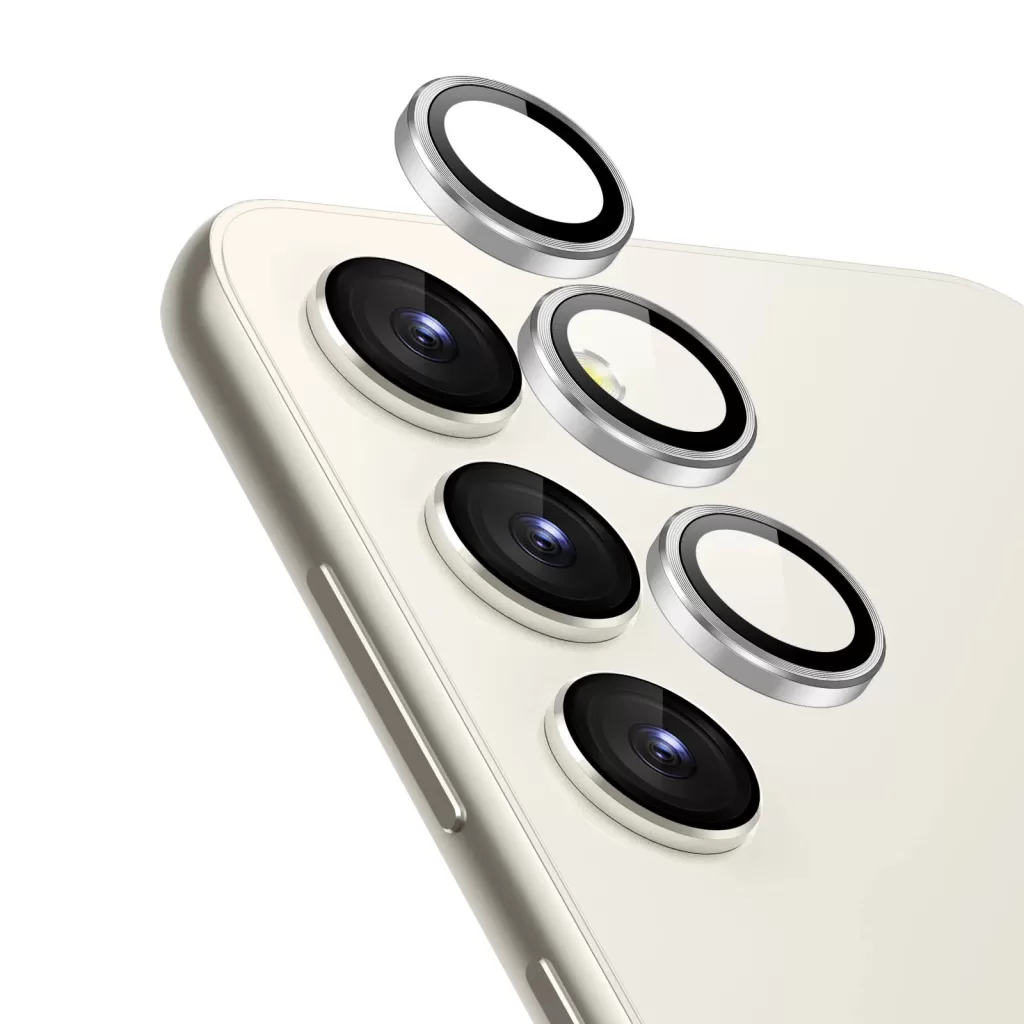
When wiping the lens, be sure to use a light touch and avoid pressing too hard. Also, try to avoid using any harsh chemicals or abrasive materials, as they can damage the lens.
Step 6: Focus on Main Subject
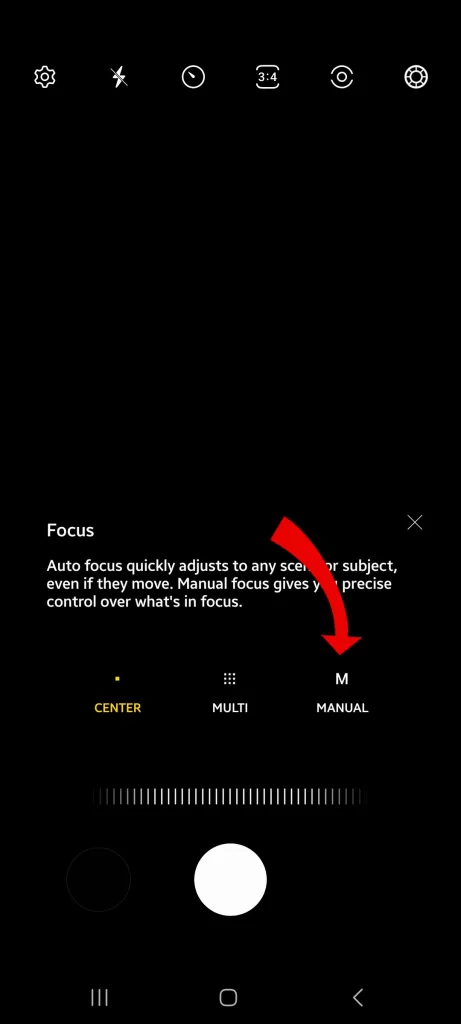
When taking photos in low light, the camera’s autofocus may struggle to find the main subject and result in blurry images.
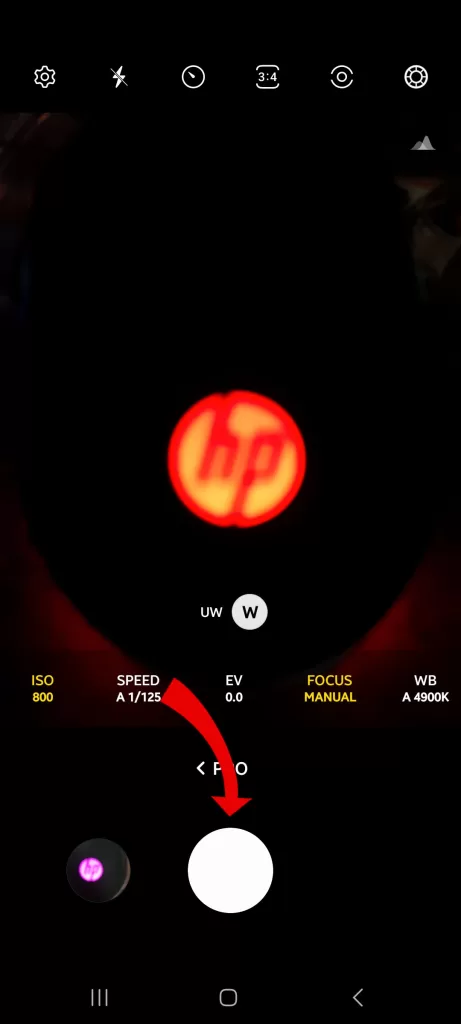
To avoid this, it is suggested to manually adjust the focus on the main subject before taking the photo. This will ensure that the subject is in focus and the image is clear.
Simply adjust the focus ring on the lens until the subject appears sharp in the viewfinder or on the camera’s screen.
Step 7: Use Tripod or Steady Surface
When taking photos in low light conditions with slower shutter speeds, it can be difficult to avoid blurry images caused by handshakes.
One way to address this issue is by using a tripod or a stable, flat surface. A tripod provides a stable base for your camera, allowing you to take sharp and clear photos.
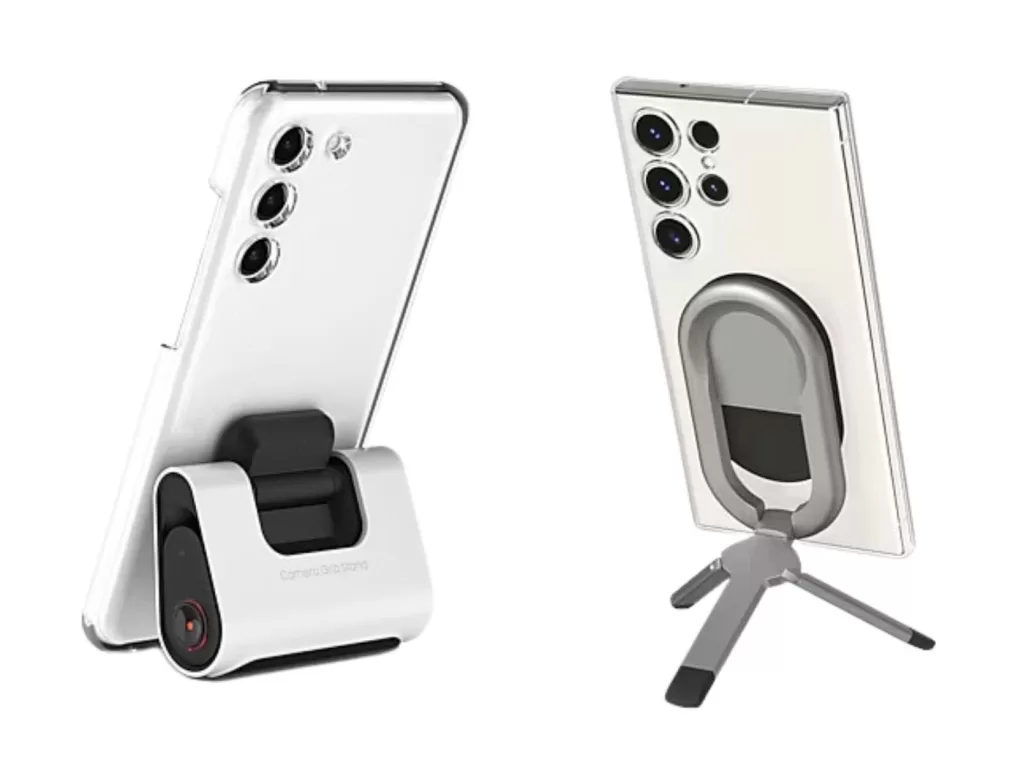
Alternatively, if you don’t have a tripod, you can try placing your camera on a flat surface like a table or a wall to keep it steady. This will help you avoid blurry photos and capture high-quality images even in low-light conditions.
Step 8: Select Lower Resolution
When you use digital zoom, the camera is essentially cropping the image and enlarging the remaining portion, which can result in a loss of detail and an increase in graininess.
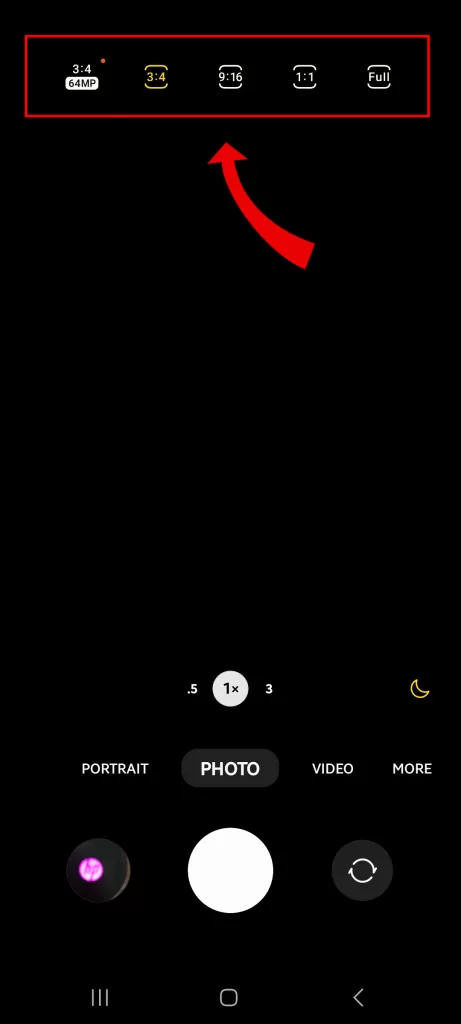
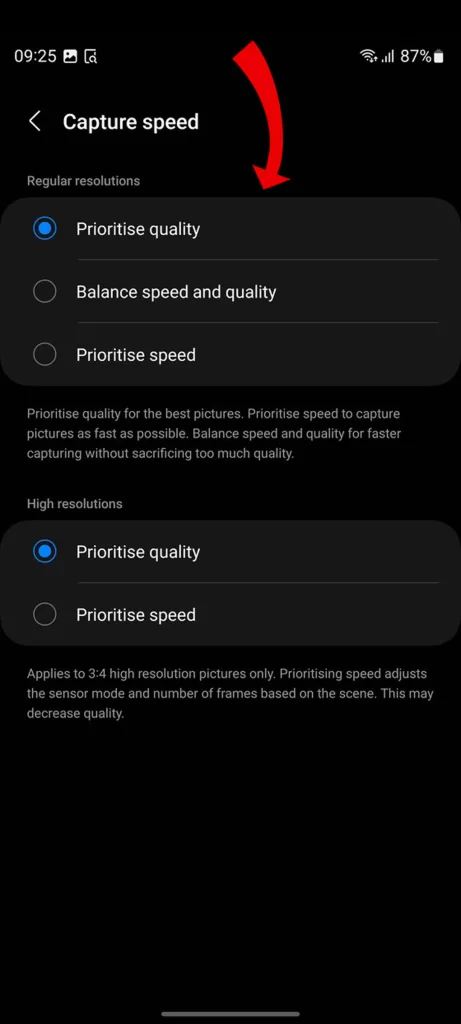
Using a lower megapixel setting can help you avoid this issue and capture higher-quality images. It’s also a good idea to stick with the resolution of the main lens, as this will produce the best results.
With practice balancing settings based on lighting conditions, you can achieve spectacular low-light photos with your Galaxy S23. Just take an informed, troubleshooting approach.