How to Troubleshoot Galaxy S23 Blurry Photos and Videos
Realizing the photos and videos you capture on your Galaxy S23 are consistently coming out blurry or lacking sharpness is highly frustrating. You likely purchased the S23 for its exceptional camera capabilities, so soft and fuzzy-looking shots are unacceptable. Don’t worry – blurry images are often caused by easily correctable mistakes or camera settings adjustments.
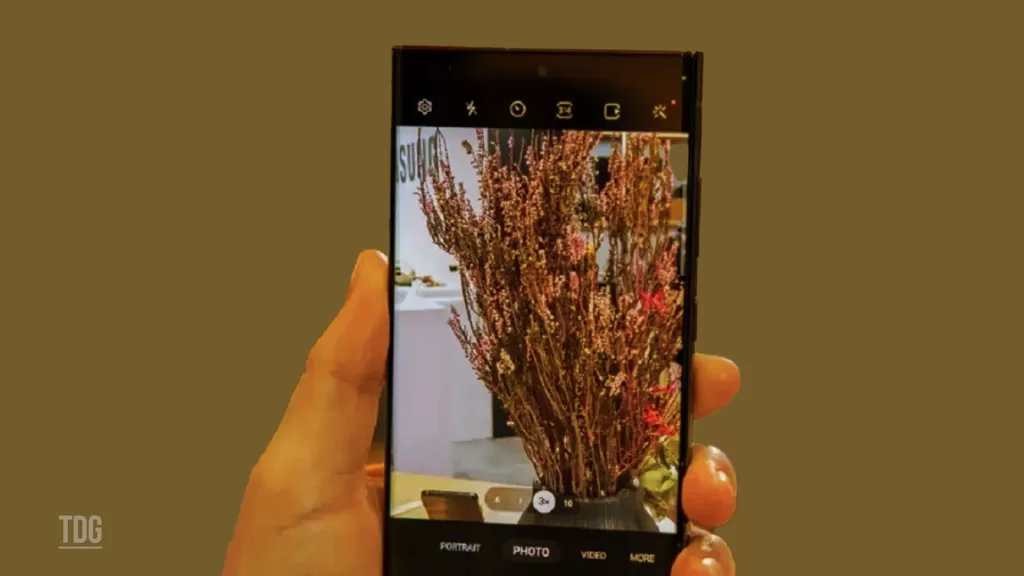
With some informed troubleshooting, you can get your Galaxy S23 capturing tack-sharp, vibrant images once again. This guide will cover the most common causes of blurry shots and actionable solutions to try on your device. A few simple techniques can drastically sharpen up your photos.
Common Causes
Some typical reasons your Galaxy S23 produces blurry photos or videos include the following:
- Lens dirty or damaged – Debris or scratches on the lens prevent sharp focus and introduce blur.
- Focus not locked – Failing to press and hold to lock focus results in blurry moving subjects.
- Motion blur – Naturally shaky hands or fast motion creates blur when not using a tripod. Enable anti-shake.
- Shooting in low light – Poor lighting requires slower shutter speed that can create blur. Use night mode.
- Digital zooming – Digital zoom decreases resolution and sharpness, unlike optical zoom. Move physically closer instead of zooming.
- Background too bright – High contrast between dark subject and bright background confuses the camera. Control lighting or move the subject.
- Software processing issue – Some scene conditions confuse processing algorithms and inadequately sharpen them.
Troubleshooting Procedures
If your Galaxy S23 photos and videos appear consistently blurry, you can try these troubleshooting techniques:
Step 1: Clean the Camera Lens
When you use your rear camera frequently, it can accumulate dust or oils on the lens, which can cause soft focus or blurriness in your photos.
To fix this issue, you can use a microfiber cloth to gently wipe away any dust or oils that may be on the lens.
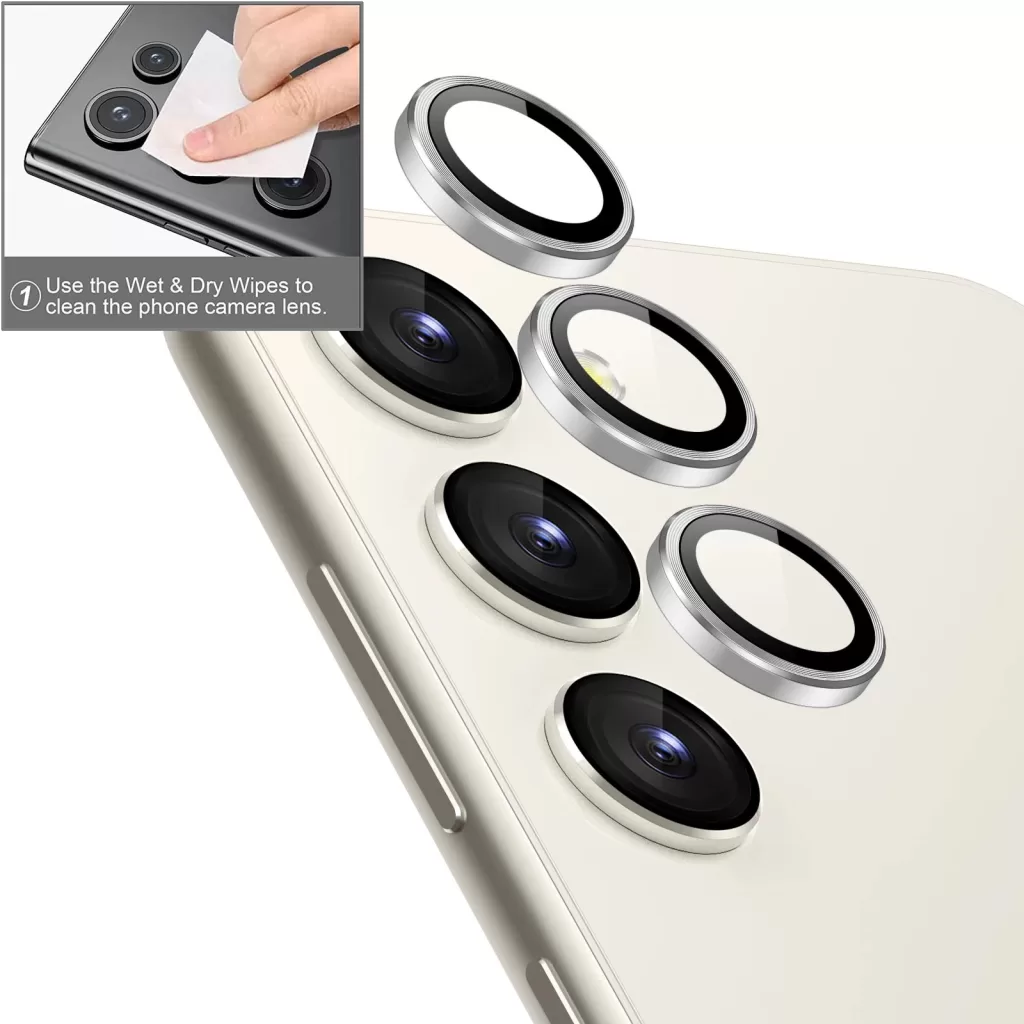
This should help improve the quality of your photos and ensure that they are clear and focused.
Step 2: Enable Focus Lock
When you tap and hold on a moving subject, the camera will lock focus and exposure settings in place. This means that even if the subject moves around, the camera will continue to focus on it and adjust the exposure accordingly.
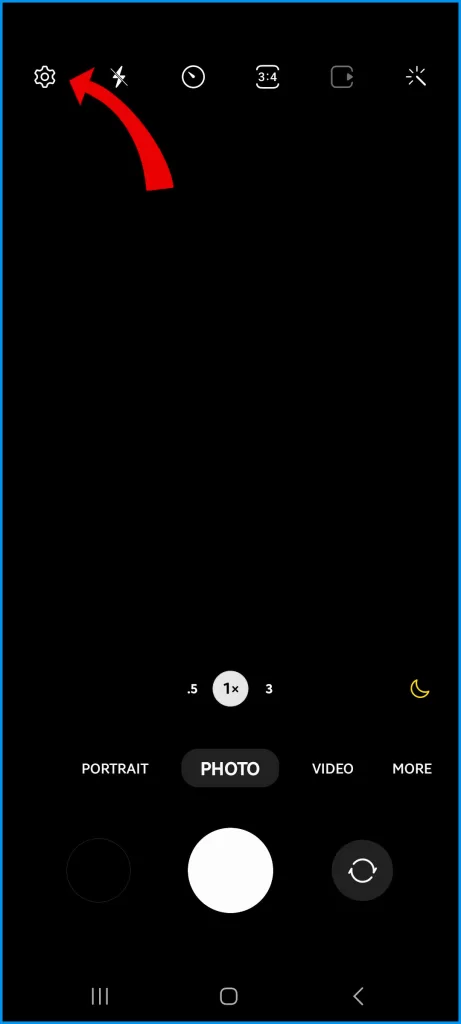
To enable Focus Lock on your Galaxy S23, follow these steps:
- Open the Camera app.
- Tap the More options (three dots) icon in the top right corner.
- Tap Settings.
- Scroll down and tap Focus Lock.
- Toggle the Focus Lock switch to the on position.
Once Focus Lock is enabled, the camera will automatically keep the focus locked on the subject you’ve selected, even if the subject moves or the camera shakes. This can be helpful for taking sharp photos of moving subjects or in low-light conditions.
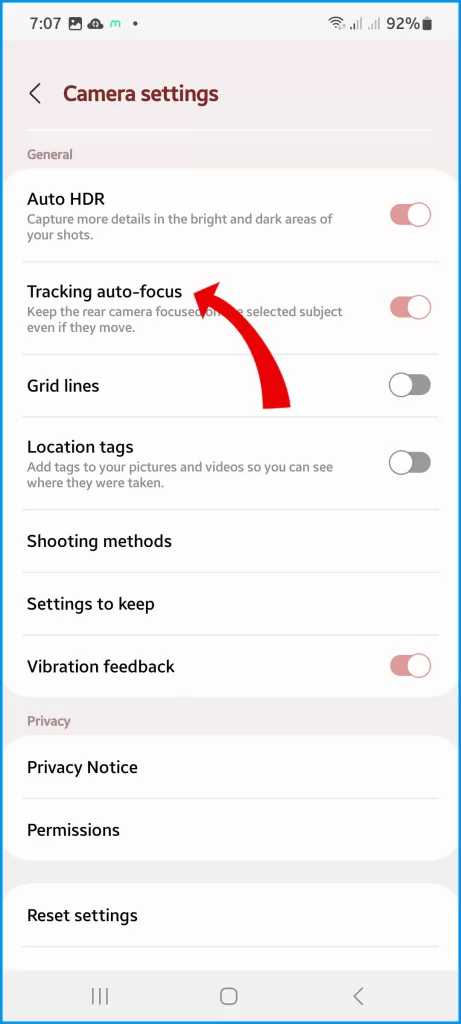
The AE/AF lock icon serves as a visual indicator that the focus has been locked in place. This feature is particularly useful when capturing fast-moving objects or when you want to maintain a specific focus point within a scene.
Step 3: Activate Anti-Shake
The Anti-shake feature is designed to minimize the effects of any natural movement that may occur while you’re using your camera. When it’s turned on, it will help compensate for any handshakes or motion, resulting in clearer and sharper photos or videos.
The Galaxy S23 has two types of anti-shake features: Optical Image Stabilization (OIS) and Electronic Image Stabilization (EIS). OIS uses a gyroscope to detect the camera shake and then moves the lens to compensate for it. EIS uses software to digitally stabilize the image.
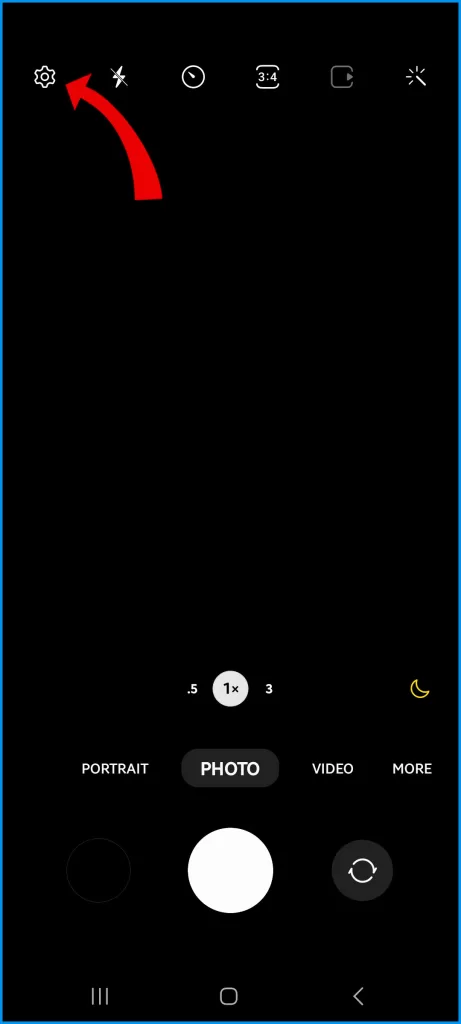
To activate anti-shake on your Galaxy S23, follow these steps:
- Open the Camera app.
- Tap the More options (three dots) icon in the top right corner.
- Tap Settings.
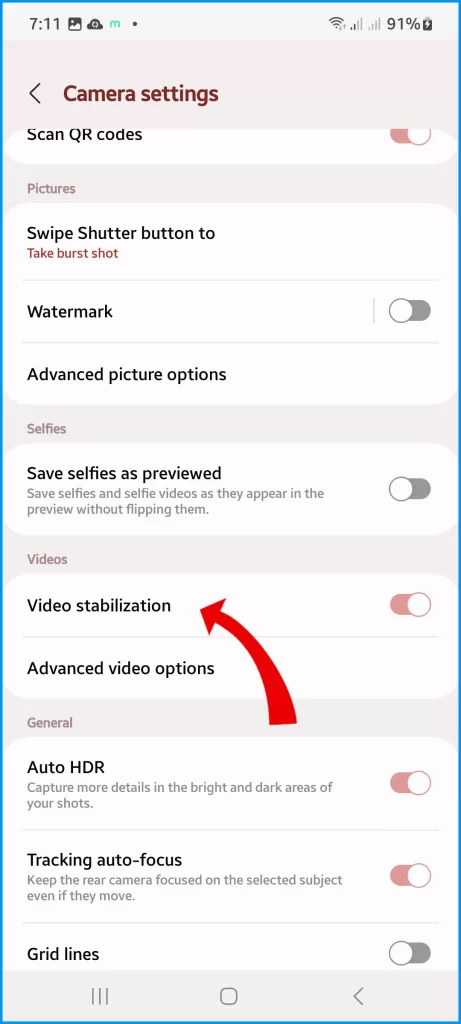
- Scroll down and tap Video Stabilization.
- Select the type of anti-shake you want to use.
- OIS+EIS: This uses both OIS and EIS to provide the best possible stabilization.
- OIS: This uses only OIS.
- EIS: This uses only EIS.
Step 4: Leverage the Scene Optimizer
The automatic adjustment feature of Scene Optimizer can improve the overall quality of your photos by adjusting various settings to match the scene.
For example, if you’re taking a photo in low light conditions, Scene Optimizer can adjust the lighting settings to make the photo brighter and clearer.
Similarly, if you’re taking a photo of a landscape, Scene Optimizer can adjust the sharpness and contrast settings to make the photo more vibrant and detailed.
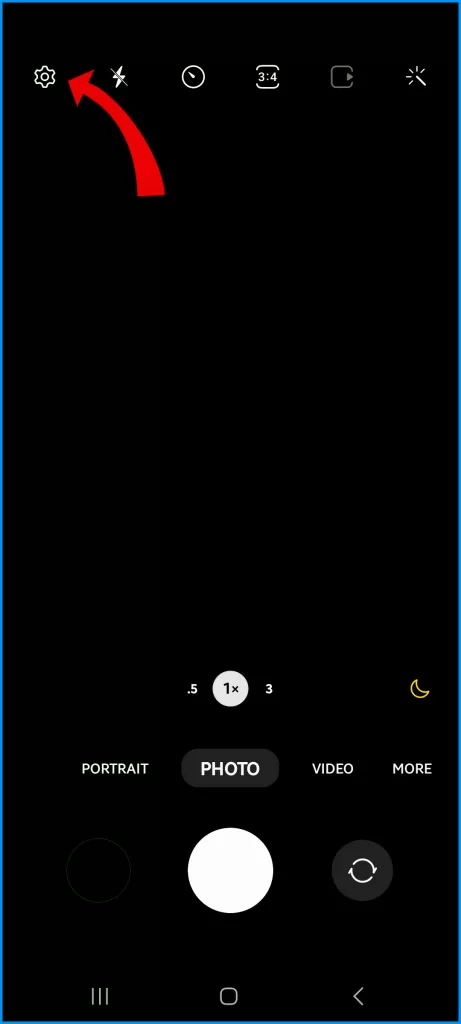
Here are the steps on how to enable Scene Optimizer on your Galaxy S23:
- Open the Camera app.
- Tap the More options (three dots) icon in the top right corner.
- Tap Settings.
- Scroll down and tap Scene Optimizer.
- Toggle the Scene Optimizer switch to the on position.
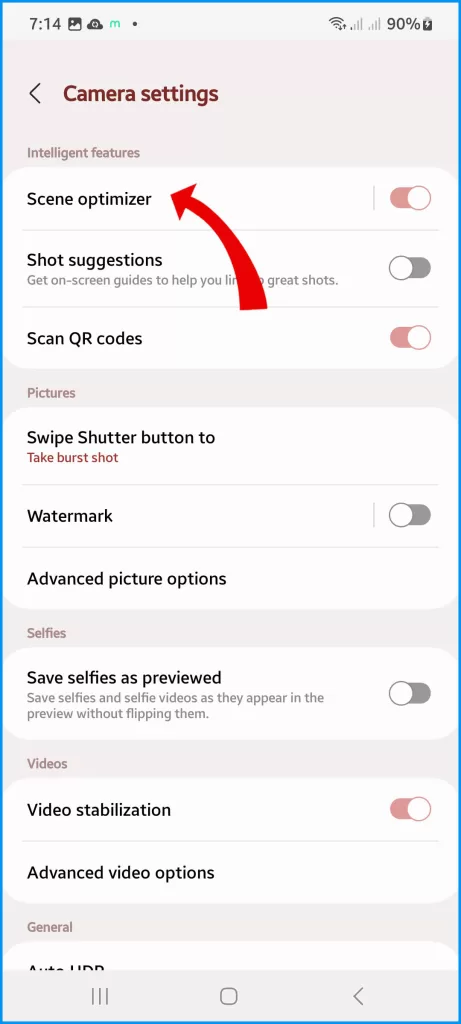
Scene Optimizer is a feature that uses artificial intelligence to automatically adjust the camera settings for the best possible shot. It can identify over 30 different scenes, including food, landscapes, and portraits.
Keeping this feature enabled can help ensure that your photos always look their best without having to manually adjust the settings yourself.
Step 5: Shoot Using Rear Lenses
Using the rear camera lenses with higher resolution will result in better-quality photos. Digital zoom can often decrease the quality of the image.
It’s recommended to move closer to the subject instead of relying on digital zoom. This will ensure that the image remains sharp and clear.
Step 6: Control Lighting Conditions
When taking a photo, the lighting conditions can greatly affect the quality of the image. If the lighting is too dim or too bright, the image may come out blurry or with poor contrast.
To avoid this, try adjusting the lighting by moving to a better-lit area or using additional lighting equipment.
Additionally, if the subject of the photo is in an area with high contrast, such as a bright light source behind them, it can also cause blurriness.
To prevent this, try moving the subject to a location with more balanced lighting or adjusting the angle of the shot to avoid the high contrast conditions.
Step 7: Try Pro Mode
In Pro mode, you can manually adjust the camera settings to achieve the desired image sharpness. ISO controls the camera’s sensitivity to light, while shutter speed determines how long the camera’s sensor is exposed to light.
Here are the steps on how to activate Pro Mode on your Galaxy S23:
- Open the Camera app.
- Swipe to the MORE tab.
- Tap PRO.
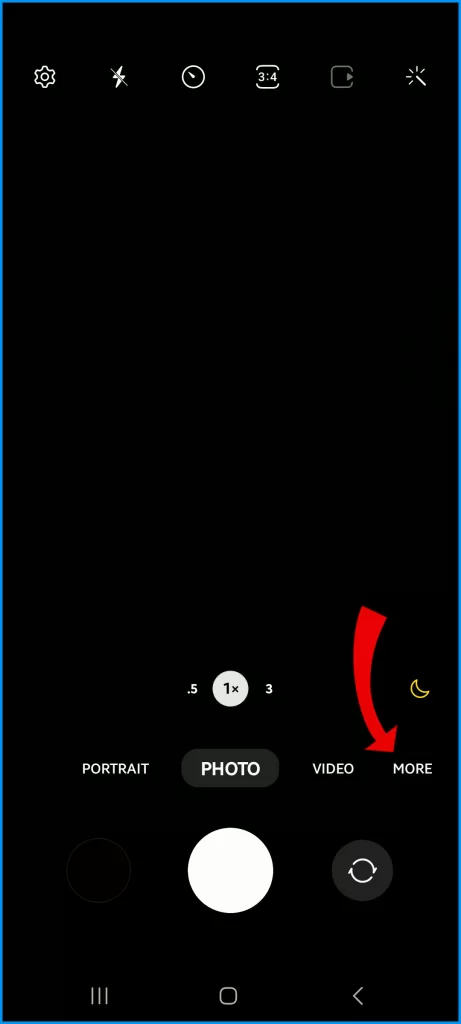
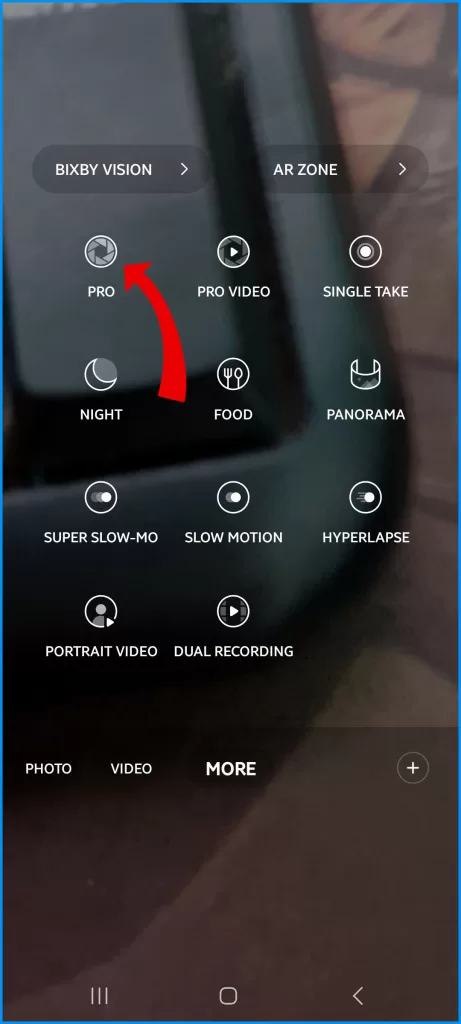
Once you are in Pro Mode, you will have access to the following settings:
- ISO: This controls the camera’s sensitivity to light.
- Shutter Speed: This controls how long the shutter is open, which affects the amount of light that is captured.
- Focus: This controls where the camera is focused.
- White Balance: This controls the color temperature of the image.
- Exposure Compensation: This adjusts the brightness of the image.
You can adjust these settings to get the perfect shot for your scene.
The metering method determines how the camera measures the light in the scene. Fine-tuning these settings can help you capture sharper and more detailed photos.
Contact Samsung Support
For hardware-related blur unfixed by troubleshooting, Samsung Support can diagnose potential camera defects and arrange repair options.
With some practice and tweaking camera settings for your conditions, your Galaxy S23 is capable of taking incredibly sharp, print-worthy photos. Just tap that focus lock!