How to fix your Samsung Galaxy S7 Edge that can no longer send and receive picture messages [Troubleshooting Guide]
Text messaging is one of the basic service any mobile phone can offer. For smartphones as powerful as the #Samsung Galaxy S7 Edge (#S7Edge), sending and receiving text messages should work without a hitch. But when it comes to transmitting #MMS like texts with attached pictures, emojis or other files, there’s something that needs to be met before you can send or receive large files over cellular data network.
In this post I will tackle this problem once again as we keep receiving complaints from our readers who are bugged this text messaging issues including this one. So, if you own an Galaxy S7 Edge or any Android smartphone for that matter and are currently experiencing this problem, read on to understand more about it and to learn how to fix it.
But before anything else, if you have other concerns, make sure you visit our S7 Edge troubleshooting page and find issues that are similar or related to yours. If ever you need more assistance from us, you can always reach out to us by completing our Android issues questionnaire. Remember that our troubleshooting depends on the information you provide, the more detailed your description is the more accurate our solutions are.
Galaxy S7 Edge cannot send and receive picture messages anymore
Problem: For some reason, my Samsung Galaxy S7 Edge now has difficulty sending and receiving picture messages or text messages with pictures. It just happened and I don’t have any idea what caused it let along have a clue how to fix it. All I know is that on Wednesday I was still able to send a few pictures to a friend and I got a few replies with attached pictures as well but now whenever I send the text with a picture it fails and since this problem started, I haven’t received any picture messages when in fact, I receive at least 2 a day. Can you help me look into this matter and see if I can fix it on my own? Thank you!
Troubleshooting: To be able to send and receive picture messages or MMS, mobile data has to be enabled on your phone. Most of the time people think that sending an SMS and texting with pictures are the same. They’re not. The latter needs to transmit the files over the mobile data network so the phone has to be connected to it first off and then the account must be in good standing to use the service. But that’s not all so I’m giving you the list of possibilities that might have resulted to this problem:
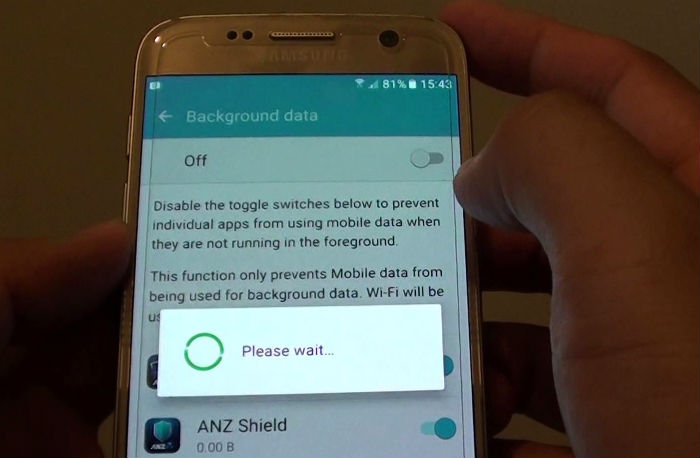
- Mobile data may have been disabled for some reason.
- APN Settings on your phone may be incorrect.
- Your account may not be in good standing or barred from using the service.
- Signal or the reception keeps dropping.
- Corrupt cache and data may have affected the phone’s radios.
- It might be a more complex hardware problem.
Now that we’ve enumerated these possibilities, here’s what you need to do:
Step 1: Verify mobile data is enabled
Mobile data is the key to sending picture messages or MMS. While there are apps that offer the same service over Wi-Fi, if you’re using the built-in messaging app then you really have to check on this. Here’s how you enable mobile data:
- From a Home screen, tap Apps (located in the lower-right). (These instructions apply to Standard mode only.)
- Tap Settings.
- Tap Data Usage.
- Tap the Mobile data switch to turn on.
Once you’ve enabled mobile data, compose a text messages and attach a picture and send it to your own number that way you’ll be able to tell if the message comes through and if you can receive it.
Step 2: Verify the APN Settings on your phone are correct
If you’ve already enabled mobile data and the test message didn’t go through, then you’ll have to check the APN Settings and verify if your phone still bears the correct ones. Just like email settings, APN also has outgoing and incoming settings. So if your text message did go through but you weren’t able to receive it, then the incoming settings should be checked. Remember that if there’s one incorrect character, the messages won’t be received. Here’s how you check the APN Settings on your phone:
- From the Home screen, tap the Apps icon.
- Tap Settings.
- Tap Mobile networks.
- Tap Access Point Names.
- If available, tap the T-Mobile US APN (the bullet point fills with green). If not available, tap the MORE icon, and then tap New APN. Note: To reset your APN settings, tap the MORE icon and then tap Reset to default.
- Verify and update the settings for the Data APN based on the settings provided by your service provider:
- After making necessary corrections, tap Save.
- Tap the desired APN profile you want to use. The bullet point fills with green next to the
- APN profile.
After this, try to compose another message and attach a picture and send it to your own number.
Step 3: Check the signal bars and call tech support
Checking the signal bars will immediately tell you if your phone is getting a decent reception from the tower because if it doesn’t, then that’s the reason why you can’t send and receive messages. While checking the signal, try to see if there’s an icon of a plane beside the bars. If there is, then disable Flight Mode first.
Assuming the phone has good reception but still can’t send and receive MMS, then it’s time to call tech support and inquire about the following:
- if there’s an issue with the service in your area
- if there’s a problem with your account
- if it’s a known problem and if so, how long it has been happening and when it would be fixed
After calling tech support and the problem isn’t with your account nor with the network, then it’s time to resort to a couple of troubleshooting procedures that may address all issues with the firmware.
Step 4: Delete the system cache and then reset your phone if necessary
We won’t know for sure if the problem is caused by some corrupt caches but if it occurred out of the blue without apparent cause, then it’s always safe to assume that some caches got corrupted and caused the phone to work this way. So, delete all the system caches as we can’t delete them one by one. Here’s how…
- Turn off the phone.
- Press and then hold the Home and Volume UP keys, then press and hold the Power key.
- When the Samsung Galaxy S7 Edge shows on the screen, release the Power key but continue holding the Home and Volume Up keys.
- When the Android logo shows, you may release both keys and leave the phone be for about 30 to 60 seconds.
- Using the Volume Down key, navigate through the options and highlight ‘wipe cache partition.’
- Once highlighted, you may press the Power key to select it.
- Now highlight the option ‘Yes’ using the Volume Down key and press the Power button to select it.
- Wait until your phone is finished wiping the cache partition. Once completed, highlight ‘Reboot system now’ and press the Power key.
- The phone will now reboot longer than usual.
Once the phone has successfully rebooted and ready, compose a text message with attached picture and send it to your number. If the message doesn’t go through or if you can’t receive it, then it’s time to backup your data and reset your device.
- Turn off your Samsung Galaxy S7 Edge.
- Press and then hold the Home and Volume UP keys, then press and hold the Power key. NOTE: It doesn’t matter how long you press and hold the Home and Volume Up keys, it won’t affect the phone but by the time you press and hold the Power key, that’s when the phone starts to respond.
- When the Samsung Galaxy S7 Edge shows on the screen, release the Power key but continue holding the Home and Volume Up keys.
- When the Android logo shows, you may release both keys and leave the phone be for about 30 to 60 seconds. NOTE: The “Installing system update” message may show on the screen for several seconds before displaying the Android system recovery menu. This is just the first phase of the entire process.
- Using the Volume Down key, navigate through the options and highlight ‘wipe data / factory reset.’
- Once highlighted, you may press the Power key to select it.
- Now highlight the option ‘Yes , delete all user data’ using the Volume Down key and press the Power button to select it.
- Wait until your phone is finished doing the Master Reset. Once completed, highlight ‘Reboot system now’ and press the Power key.
- The phone will now reboot longer than usual.
After this, set your phone up but don’t install apps just yet. Instead try composing a text message with a picture in it and send it to your own number. If the problem remains, then you have to send the phone in for repair.
Galaxy S7 Edge having difficulty sending picture message to an iPhone
Problem: I as well as my husband who has the same phone (Samsung Galaxy S7 Edge) and my mother who has a Galaxy S6 are having problems with sending and receiving pictures. Sometimes they go through and sometimes they do not. As well sometimes I receive photos sent from them and sometimes I do not. We also have problems sending pictures to my mother in law who has an iPhone. Besides the pictures not always going through, sometimes after you send the same picture 4-6 times and one finally goes through then the picture is scrambled and or discolored. Any advice on this issue?
Solution: There are a lot of reasons why your phone cannot receive and send picture messages that’s why we need to troubleshoot it to know what the issue is. This problem is common not just with Samsung device but to other smartphones as well.
One of the factors why the device cannot receive picture messages or MMS is maybe because the mobile data is disabled or turned off. Keep in mind that mobile data is a prerequisite when transmitting large files over cellular network.
But if it is already turned on and the issue is still happening, then there might be a problem with the signal or reception in your area or the APN settings needs to be re-configured. If you are not familiar with the procedures on how to configure the APN of your handset, calling your service provider is the best thing to do. Perhaps, there will be troubleshooting procedures to be provided by the representative and if it’s just a minor problem there is always a chance that the issue will be fixed.
On the other hand, maybe the reason why your mother in-law cannot receive the photos you sent to her is because there might be a problem with the signal reception in her area or there can also be settings in her device that needs to be changed so that she can receive picture messages from Android phones without a problem.
I suggest you follow the same troubleshooting as above to see if you can solve this problem on your own.
CONNECT WITH US
We are always open to your problems, questions and suggestions, so feel free to contact us by filling up this form. This is a free service we offer and we won’t charge you a penny for it. But please note that we receive hundreds of emails every day and it’s impossible for us to respond to every single one of them. But rest assured we read every message we receive. For those whom we’ve helped, please spread the word by sharing our posts to your friends or by simply liking our Facebook and Google+ page or follow us on Twitter.