How to fix Samsung Galaxy Note 5 that can no longer send / receive text messages, other texting issues
Texting problems are among the most common issues we receive from #Samsung Galaxy Note 5 (#Note5) owners as text messaging covers both #SMS and MMS. In this post, I will address two texting issues you may encounter while using your phone. The first being the issues in sending and receiving SMS and MMS while the second is about the sent messages that aren’t visible in the thread.
Click on the link to jump to a specific issue:
- Galaxy Note 5 can no longer send / receive text and picture messages
- Galaxy Note 5 can only view received message in a thread, sent messages not visible
If you have other issues with your phone, make sure you visit our Note 5 troubleshooting page. We have already addressed hundreds of issues with this phone so try to find problems that are similar with yours and use the solutions we provided. In case you need further assistance, you can always contact us by completing our Android issues questionnaire. Just give us necessary information about the problem and we’ll do our best to find solutions for you.
Galaxy Note 5 can no longer send / receive text and picture messages
Problem: Hello guys I just hope you can help me with my problem. I have a Galaxy Note 5 phone and the problem is that I cannot send text messages any more and when I try to send a picture message, it fails. I tried sending a text message without any picture, it fails and it seems also that I cannot receive SMS and MMS. I don’t know what happened to it. Can you guys help? Thanks.
Troubleshooting: So, you actually have two problems here; you cannot send / receive SMS and MMS. Let’s try to troubleshoot these issues separately because while both of the seem the same, they’re not. When you talk about SMS, the phone only needs to be connected to your provider’s cellular network and has to be provisioned to use the texting service while MMS needs mobile data to transmit much larger files. With all that being said, here’s what you need to do to address these problems.
Fix Note 5 that can’t send/receive SMS
Just follow these steps to see if the problem can be fixed without any help from a technician. While they’re safe, due to human error, things may happen along the process so please proceed at your own risk.
Step 1: Check the signal bars right away
When it comes to texting, signal is very important. I know you’ve already rebooted your phone a hundred times so we won’t do that. Instead, let’s try something very practical–making sure your handset is receiving a decent reception.
At the top-most part of your screen you can see the status bar. Try to look at the signal indicator to see if the phone is getting good signal from the tower. If it doesn’t, then that’s the problem but while looking at the signal indicator, also try to look for an airplane icon because if you can see one, it means the phone is in Flight Mode, which means all wireless communications are disabled. Turn on Flight Mode and the problem will be solved.
If the phone doesn’t get any signal, contact your service provider and inquire about possible outage in your area. Things like this can be fixed in a day or two, otherwise your provider will provide you the date when the problem will be fixed.
On the other hand, if the phone shows it’s getting good signal but you still can’t send / receive SMS, then you need to continue troubleshooting.
Step 2: Check the Message Center Number of your phone
The Message Center Number is necessary so that your phone can use the SMS service. Without it or if configured in correctly, you won’t be able to send text messages. So, follow these steps and verify that your phone indeed has a Message Center Number set and make sure it’s the correct one:
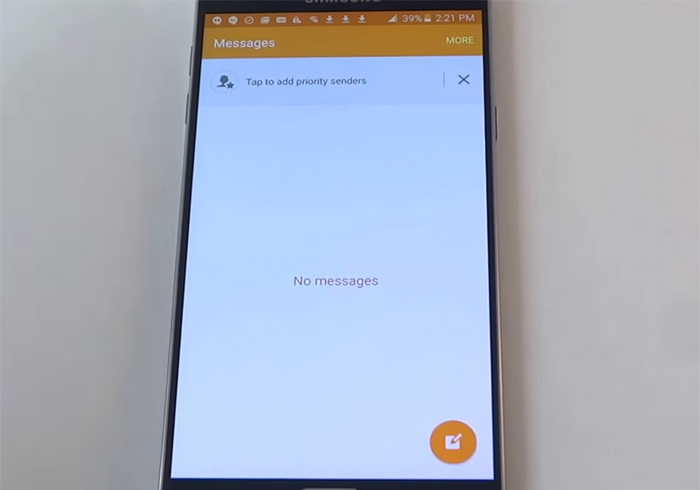
- From any Home screen, tap Messages.
- Tap the MORE icon.
- Tap Settings.
- Tap More settings.
- Tap Text messages.
- View the number under Message center.
Only a few actually know about this number and why it’s necessary, so more likely, you don’t know the correct center number for your phone. Therefore, you better call your provider and ask for it to verify if what you have on your phone is the correct one.
Step 3: Check if your phone still has enough storage left
Messages are also being “downloaded” and they take up storage. If you’ve already used up all the storage in your phone’s internal memory, then that might be the reason why your phone can no longer receive those messages because there’s no place to save them.
Free up some space by moving your pictures to your microSD card or copying them to your computer. After you’ve done that, you may be able to receive all those messages you missed.
Step 4: Reset your messaging app by clearing its cache and data
There is always a possibility that the messaging app you’re using crashes from time to time and that might be the reason why you can no longer send and receive text messages. So, in this step, try to reset the app by clearing its cache and data:
- From any Home screen, tap Apps.
- Tap Settings.
- Scroll to ‘APPLICATIONS,’ then tap Application manager.
- Swipe right to the ALL screen.
- Scroll to and tap Messages.
- Tap Clear cache.
- Tap Clear data, then OK.
If the problem still persists after resetting the messaging app, then the next step may help you.
Step 5: Do the Factory Reset
If you still can’t send and receive SMS after doing steps 1 to 4, then this one may do it. However, make sure you backup your data and files before following the steps below:
- From the Home screen, tap the Apps icon.
- Find and tap the Settings icon.
- Under the ‘Personal’ section, find and tap Backup and reset.
- Tap Factory data reset.
- Touch Reset device to proceed with the reset.
- Depending on the security lock you used, enter the PIN or password.
- Tap Continue.
- Touch Delete all to confirm your action.
Now that we’re done troubleshooting your phone to be able to send and receive text messages, it’s time to fix the MMS sending and receiving issue.
Fix Galaxy Note 5 that can’t send / receive MMS
Multimedia Messaging Service or MMS requires mobile data to be able to transmit use amount of data over the air. This is what you’re going to do:
Step 1: Verify that mobile data is enabled
There’s a switch you need to flip to enable / disable mobile data. That’s what you’re going to check first because if it’s disabled, then obviously that’s the reason why you can no longer send and receive MMS.
- From the Home screen, tap the Apps icon.
- Tap Settings.
- Tap Data usage.
- Slide the Mobile data Switch to the ON position.
Step 2: Check the APN Settings of your phone
The Access Point Name or APN is necessary so that your device can connect to your provider’s mobile data network. Every character entered on your phone must conform with the correct APN set by your service provider. So, if you don’t know the correct APN for your device, you may google it or call your provider and ask for it. Here’s how you verify the information on your phone:
- From any Home screen, tap the Menu key.
- Tap Settings.
- Tap Mobile networks.
- Tap Access Point Names.
- If available, tap the APN for your provider (the bullet point fills with green). If not available, tap the Menu key, and then tap New APN. Note: To reset your APN settings, tap the Menu key and then tap Reset to default.
- Verify and update the settings for the Data APN.
After this and the problem still persists, do the next step.
Step 3: Reset your Galaxy Note 5
After everything else and the problem still occurs, then it’s time to reset your phone but make sure you backup your data and files.
- Back up data on the internal memory. If you have signed into a Google account on the device, you have activated Anti-theft and will need your Google credentials to finish the Master reset.
- Turn off your Galaxy J7.
- Press and hold the Volume Up button and the Home key, then press and hold the Power key.
- When the device logo screen displays, release only the Power key
- When the Android logo displays, release all keys (‘Installing system update’ will show for about 30 – 60 seconds before showing the Android system recovery menu options).
- Press the Volume down key several times key to highlight ‘wipe data / factory reset.’
- Press Power button to select.
- Press the Volume down key until ‘Yes — delete all user data’ is highlighted.
- Press Power button to select and start the master reset.
- When the master reset is complete, ‘Reboot system now’ is highlighted.
- Press the Power key to restart the device.
I hope this helps.
Galaxy Note 5 can only view received message in a thread, sent messages not visible
Problem: Hi. I just started having an issue with the messaging on my Galaxy Note 5. I can send and receive texts but I can only view the received message in a thread. My sent messages are not visible. I’ve restarted and cleared the cache as well. Same issue. Any thoughts? Thanks!
Troubleshooting: Hello! This kind of issue is not that harmful to the device, sometimes, there are configurations that was not set properly like the date and time. Or other software issue that affects the messaging but, don’t worry we can recommend some solutions that can help resolve the problem.
In your case, we highly recommend checking the date and time of your device. Actually, we received several emails with problem similar to what you experience right now. And we were able to help them. Simply check your Inbox if the receive message is under the sent message, if it is, then simply change the date and time as well as the time zone. How to do it, the steps are written below.
Solution 1: Auto-Update Time (NITZ)
This is the default setting of your device to automatically update the time zone. It even sets the device clock to automatically update based on what time zone it is in.
- From the Home Screen, tap Apps.
- Tap Settings.
- Scroll to System, then go to Date and Time.
- Tap Automatic Date and Time to select the check box.
Solution 2: Manually set the Time and Date
Just in case the phone is not set to default or you will be doing the manual, you may correct it by setting up the correct time and date of your device clock. You may follow the steps.
- From the Home Screen, tap Apps.
- Tap Settings.
- Scroll to System, then go to Date and Time.
- Tap Automatic Date and Time to clear the check box. You may now see the set date and set time light up now accessible.
- Tap Set Date and set the date. Once finished, tap Set. Note: You may also use a 24-hour format if you wished by enabling when a clock mark is present.
- Tap Select Date Format.
- Choose Regional (12/31/2013)
- To finally complete the process, just tap Set.
Once you have successfully changed the appropriate date and time on your device, you may now go to your messaging and check if sent items are already visible. Try sending a message from your own mobile number, as you may see the receive is above the sent. For future reference, just in case this may happened again or you have a friend who’s having this problem. Just follow these steps and pretty much sure your problem on sent items visibility will be completely fixed effortlessly.
CONNECT WITH US
We are always open to your problems, questions and suggestions, so feel free to contact us by filling up this form. This is a free service we offer and we won’t charge you a penny for it. But please note that we receive hundreds of emails every day and it’s impossible for us to respond to every single one of them. But rest assured we read every message we receive. For those whom we’ve helped, please spread the word by sharing our posts to your friends or by simply liking our Facebook and Google+ page or follow us on Twitter.