How To Enable And Use Remote Desktop On Windows 11
ByHarvey HisonaPosted onUpdated on
Do you know that you can allow another computer to access your Windows 11 computer remotely? Windows 11 provides Remote Desktop functionality that will let you connect to another computer and control it as if you’re physically present in front of that machine. In this brief guide, we’ll show you the ways to enable Remote Desktop on Windows.
What is Remote Desktop?
Remote Desktop has been around. Microsoft introduced this functionality way back when they released Windows XP in 2001. With each iteration of Windows, the Remote Desktop function has also become more refined, stable and effective. Not a lot of average users use Remote Desktop though but it’s a quite effective tool for those in the IT profession and for anyone who wants to remotely access a computer or network of computers to offer help and troubleshoot issues as well as do other things.
So, what is Remote Desktop? Remote Desktop is a Windows functionality that allows a user to create a remote connection from one Windows machine to another Windows PC, Mac, or Linux-based computer. Remote Desktop uses the Remote Desktop Protocol or RDP to move files, take control of a peripheral, launch a program, etc. between remotely connected computers.
In order to use this function, you need to enable Remote Desktop first. Microsoft has disabled it for security reasons so you have to manually turn it on to use Remote Desktop connection.
Why use the Remote Desktop?
Microsoft’s Remote Desktop app is usually used by network technicians to access computers, perform diagnostics, run patches, and solve issues. It’s not limited to IT professionals though and even an average user can enable remote desktop feature on their machines and access a friend’s computer and control it over the internet as if it’s right in front of him or her.
In most instances, Remote Desktop is usually used in a business setting to address certain issues.
How to enable and use Remote Desktop on Windows 11?
There are several ways to enable remote Desktop on Windows 11. Let us show you how to do each of them below.
Method #1: Enable Remote Desktop thru System Settings
The easiest way to enable Remote Desktop is by going into System Settings. Here’s how:
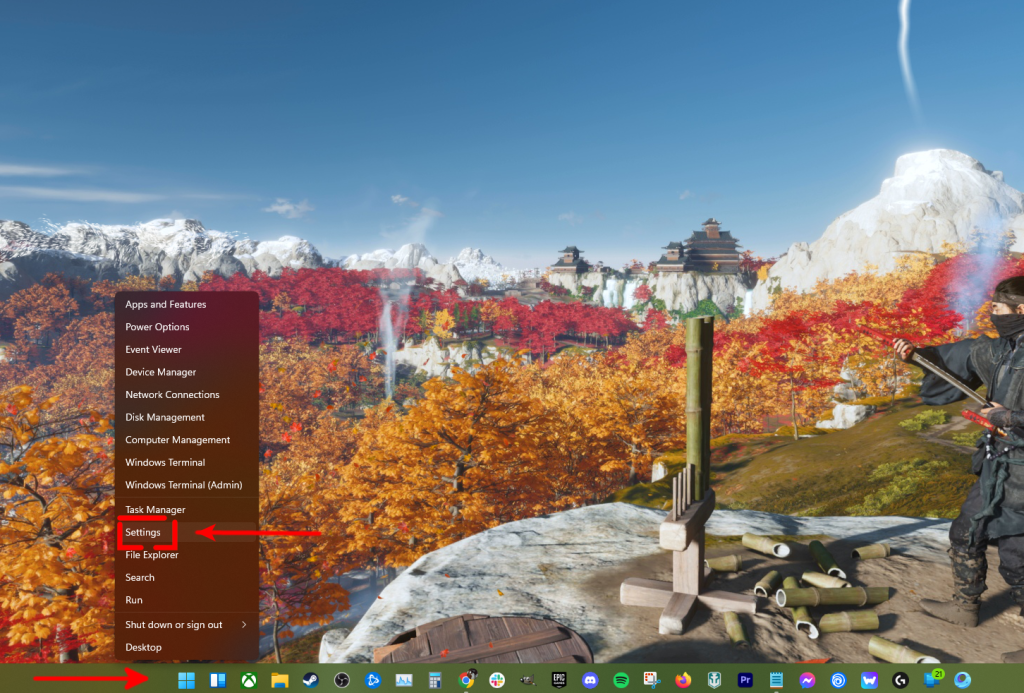
Right click the Start button and select Settings. Alternatively, you can press the Windows key + I.
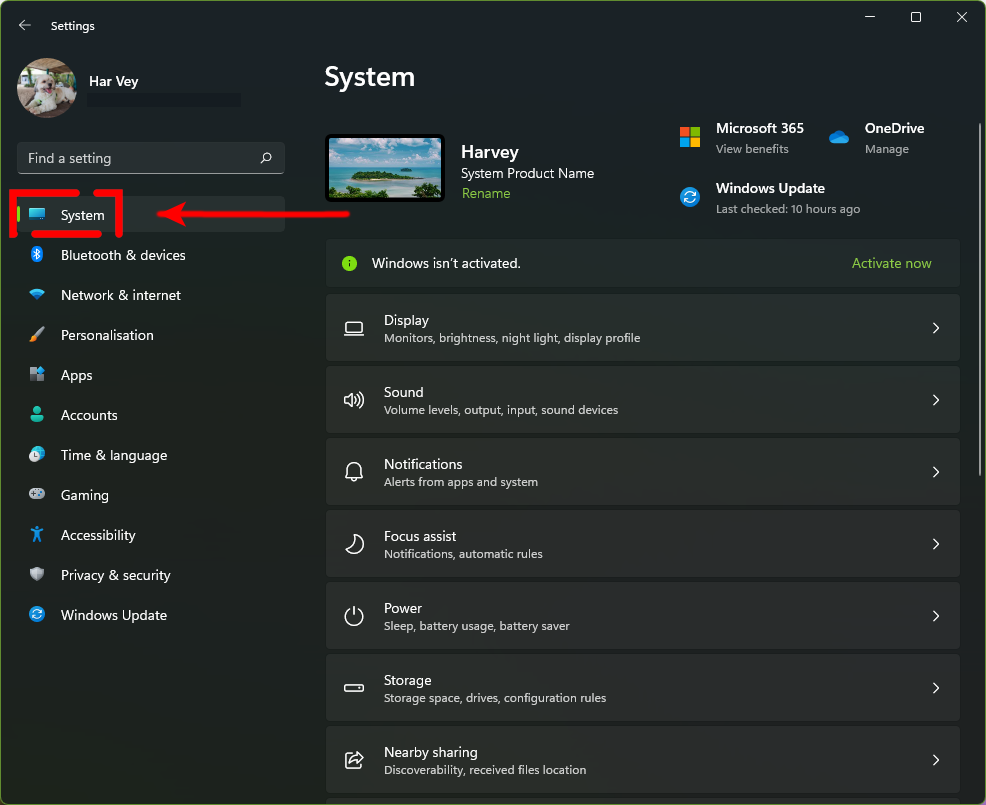
Select the System tab.
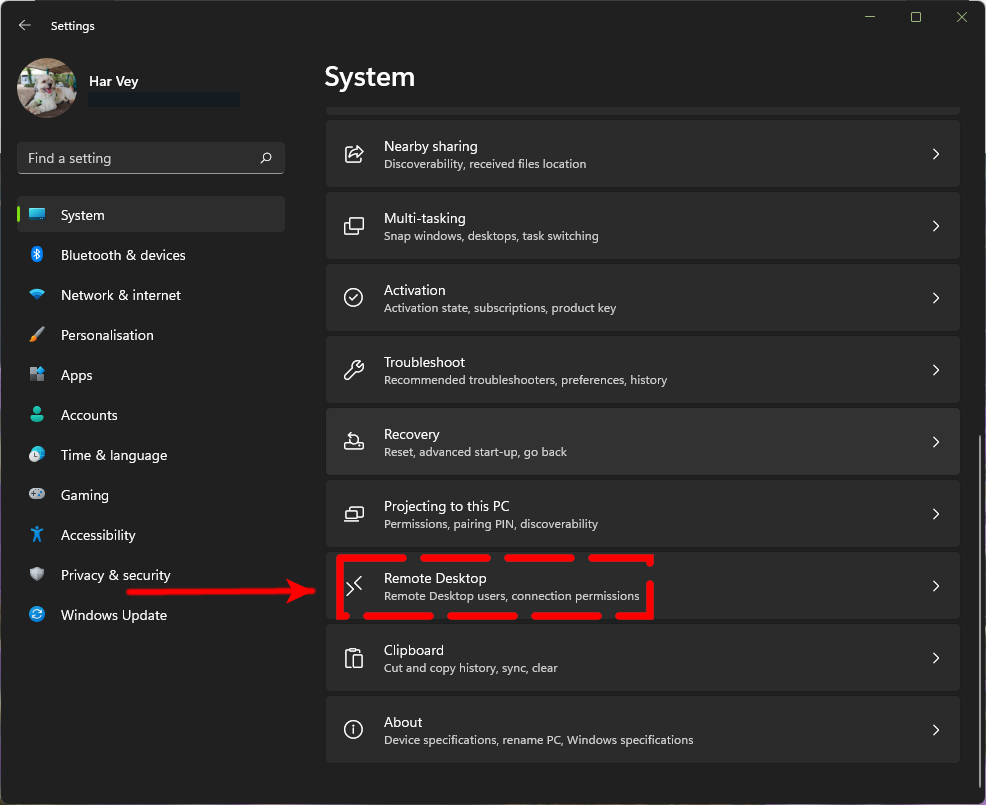
In the System menu, click on Remote Desktop from the right panel.
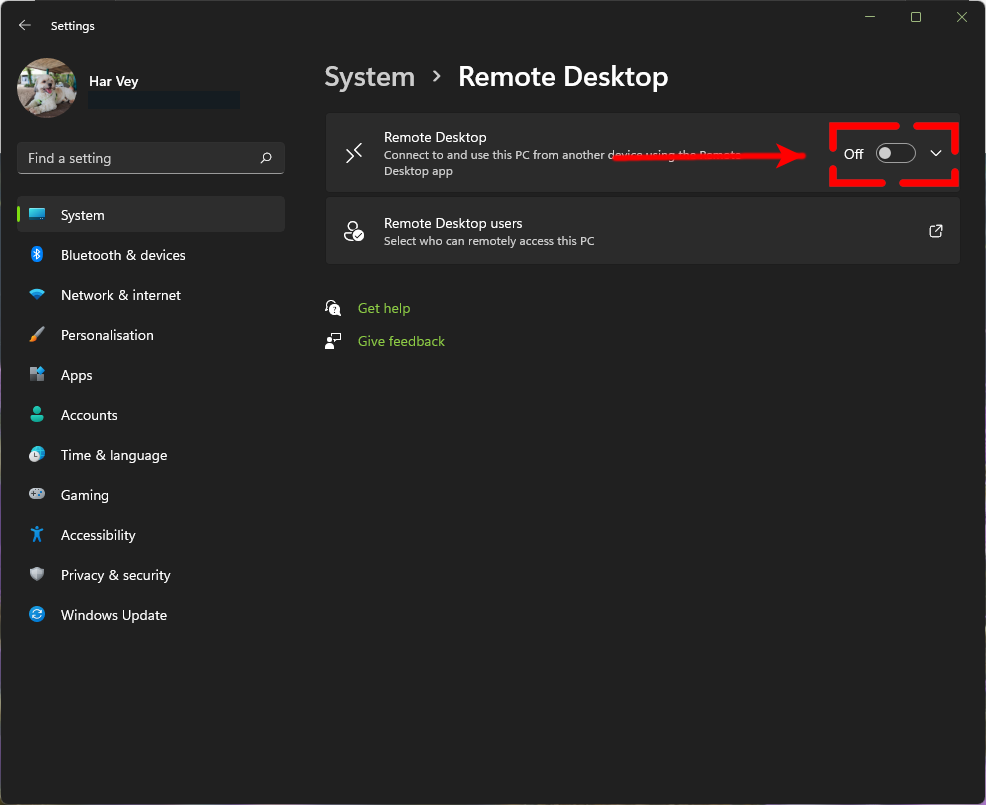
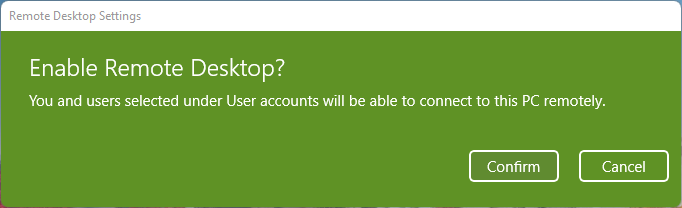
Enable the Remote Desktop Toggle Switch to turn the feature on.
Click on Confirm.
After doing the steps above, the Remote Desktop protocol in your PC should be enabled.Your PC should now be ready for a remote desktop connection. If you want to give it a try, you can use the Microsoft-built software called Microsoft Remote Desktop.
By default, ‘the “Network Level Authentication” option is enabled for more security so make sure that it stays that way. You can check by clicking on the dropdown arrow beside Remote Connection in the System Settings menu.
In the event that you need to manually change the settings of your router to allow remote connections outside your network, you can also check the port needed for this task which is 3389.
Method #2: Enable Remote Desktop via the Control Panel
The other way to enable remote desktop on Windows 11 is by going through the Control Panel app. These are the steps to do that:
Right click the Start button and select Search.
Type in “control panel” and open the Control Panel app.
In the View by section, it should say Category.
Click on System and Security.
Click the Allow remote access option under the System section.
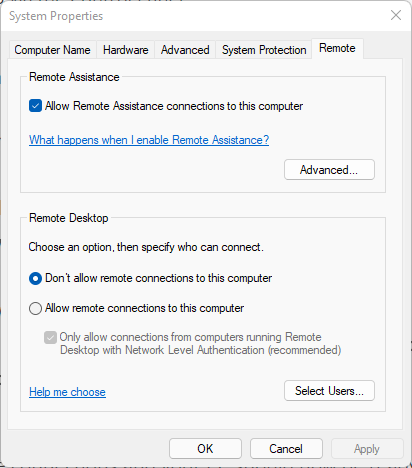
Once the System Properties window appears, select the Remote tab.
In the Remote tab, make sure that the “Allow Remote Assistance connections to this computer” and “Allow remote connections to this computer” options are all selected.
Click on OK.
Those steps should enable remote connections and your PC should now be ready to connect to a remote computer as well.
Method #3: Enable Remote Desktop using the Command Prompt
The other easy way to enable the Remote Desktop option on your Windows 11 machine is by using the Command Prompt application. Here’s what you should do:
Right click the Start button and select Search.
Type in “cmd”
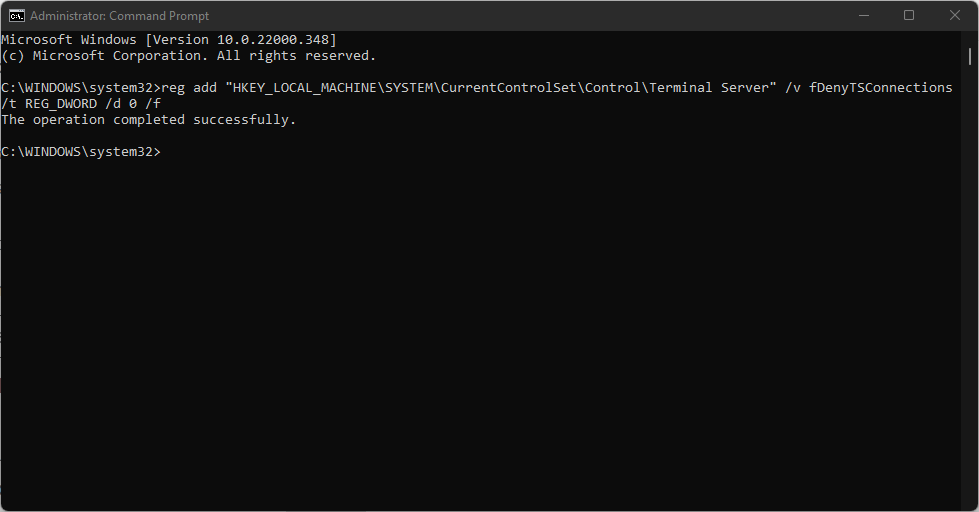
Once the search result shows the Command Prompt option, right click on it and run the app as Administrator.
In the Command Prompt, type in this command line: reg add “HKEY_LOCAL_MACHINE\SYSTEM\CurrentControlSet\Control\Terminal Server” /v fDenyTSConnections /t REG_DWORD /d 0 /f
Afterwards, type in this command to ensure that your Windows Firewall will not block any RDP connections:
netsh advfirewall firewall set rule group=”remote desktop” new enable=Yes
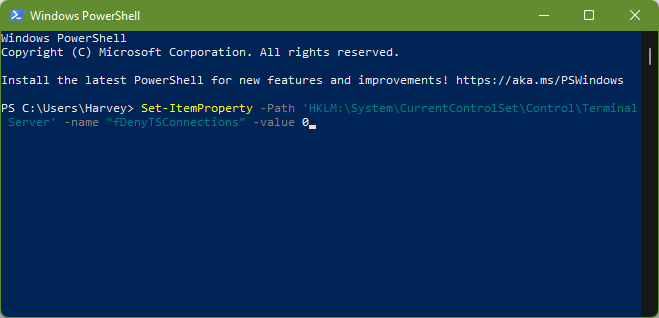
Method #4: Enable Remote Desktop using the PowerShell
If you prefer to use the Windows 11 Powershell instead of the Command Prompt, here’s what you need to do:
Right click the Start button and select Search.
Type in “powershell”
Once the search result shows the Windows Powershell app, right click on it and run the app as Administrator.