How to Enable/Disable Find My Device on the Galaxy Note 20 Device Admin Settings
Where to find the Device Admin Apps on the Galaxy Note 20? If you have the same question, then this post is for you. In this quick guide, I will show you how to activate and deactivate the Find My Device app on the new Galaxy Note Device Administration Apps menu. Read on if you need help accessing and altering the current permission and admin privileges granted to your new Note’s Find My Device tool.
Samsung Device Administrator
New Samsung phones and tablets including the recently rolled out Galaxy Note phablet do have a device administrator feature, which supports some installed apps that require special permissions or device administration privileges.
Among the apps that have such privileges include enterprise applications such as corporate emails and security apps like Find My Device.
With device administration privileges enabled for this application, you will be able to lock the device or restore its factory settings, remotely.
Find My Device Admin Permission Missing?
After the Android 10 was rolled out, many users have a hard time finding the built-in Find My Device feature. Normally, this feature comes enabled by default in Android 10 devices but for some reason, it appears to be disabled by default on other Android phones and tablets. That being said, many users couldn’t get to manage permissions and privileges for certain apps, particularly those that are required to remotely erase and lock devices. If you’re having trouble locating this setting on your new Galaxy Note, then this post should be able to help you out.
Steps to Activate/Deactivate Find My Device via Note 20 Device Admin
The following steps can also be used when activating or deactivating Find My Device on other Samsung Galaxy devices that are running on the same Android OS or UI version. Actual screens and menu items however, may vary between device models and service providers.
1. Swipe up from the bottom of the Home screen, to get started.
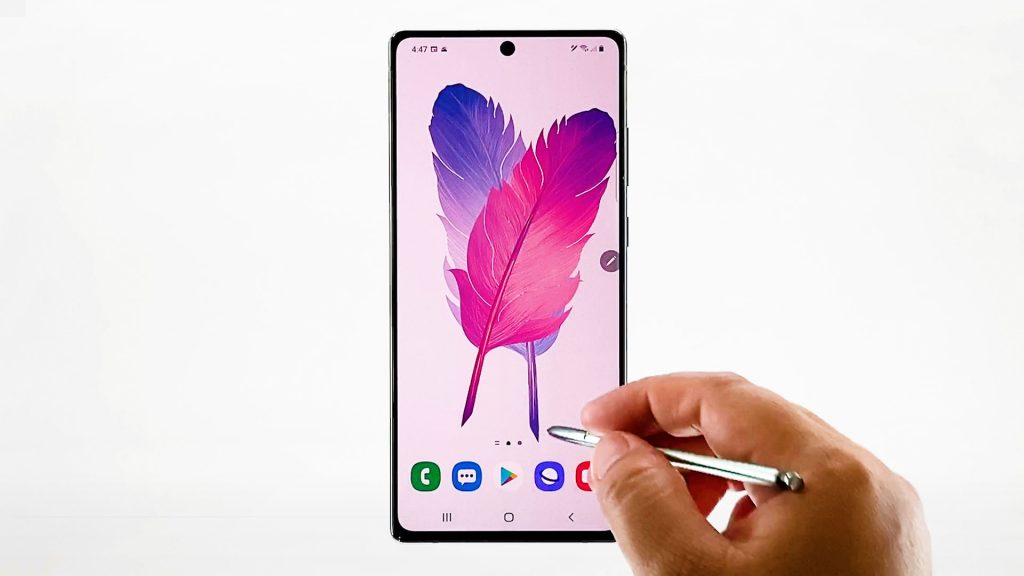
Doing so will let you access the Apps viewer with different app icons or shortcut controls.
2. Tap the Settings icon to continue.
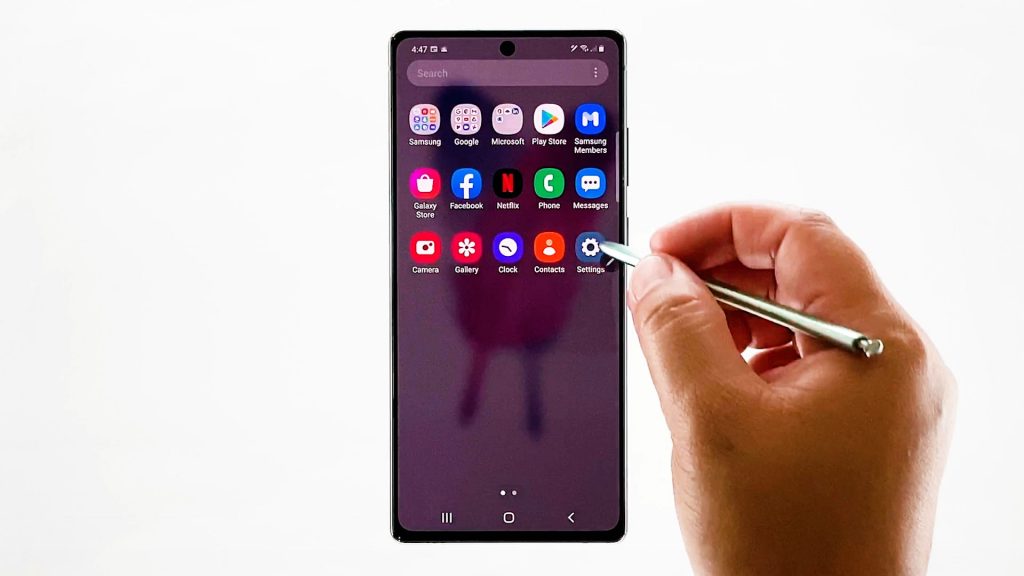
Another screen opens with a list of all basic and advanced settings you can manage.
3. Scroll to locate Biometrics and security and then tap on it.
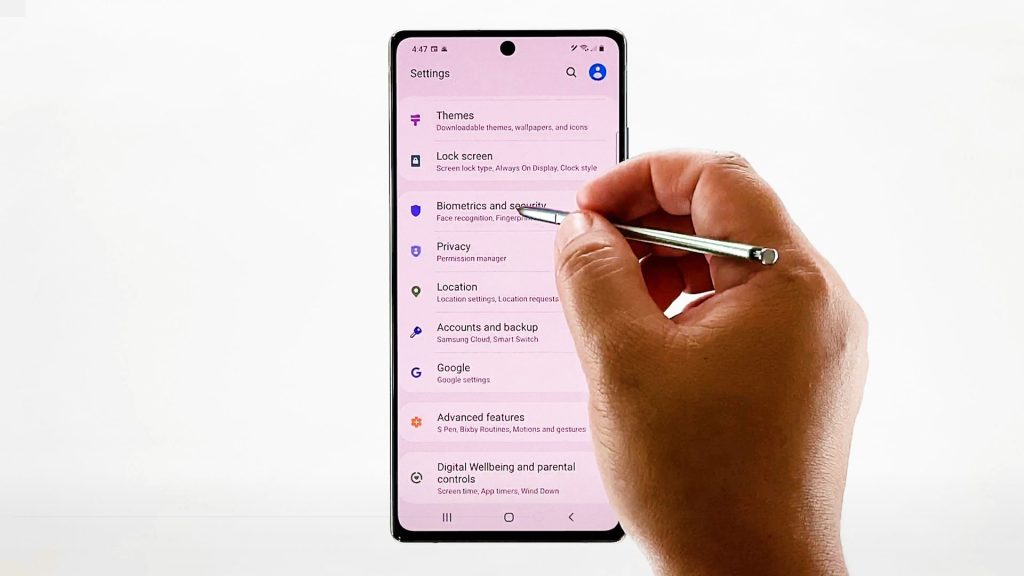
Advanced security features will load up on the next screen.
4. Scroll down to the bottom of the list and then tap Other security settings.
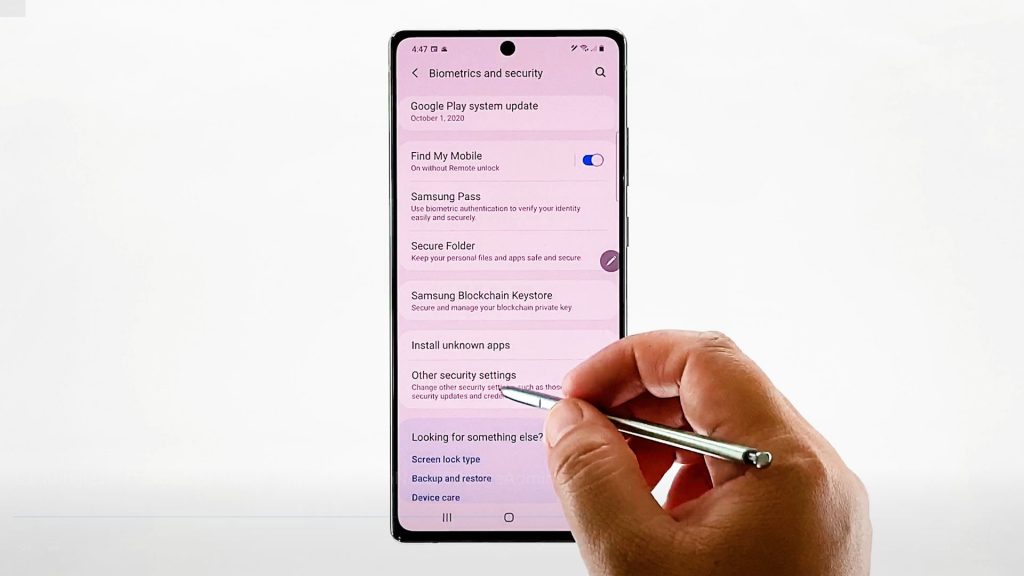
On the next menu, you will see a list of more advanced security features and options.
5. Tap Device admin apps to proceed.
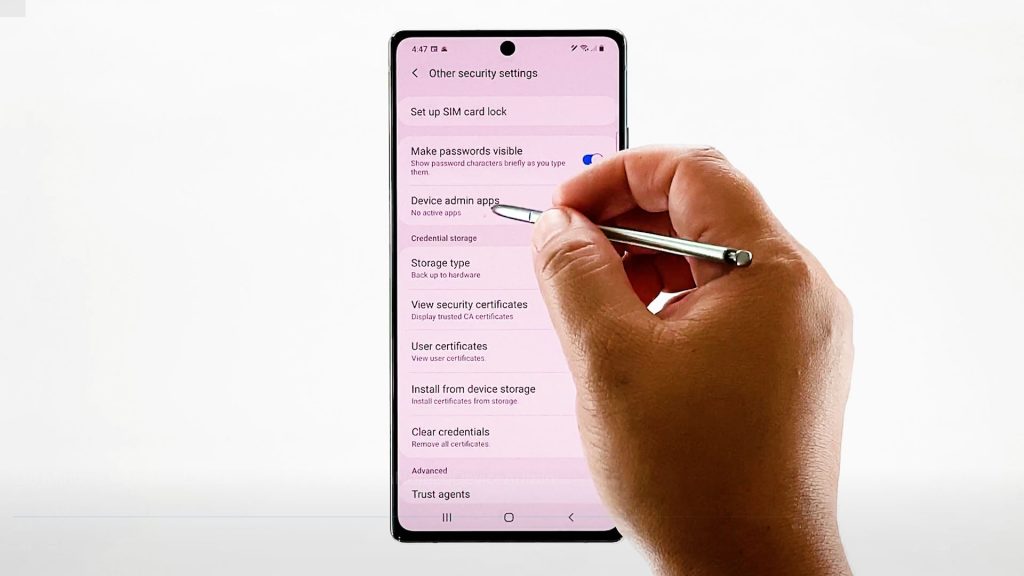
Installed apps with device admin privileges will be displayed on the next window.
If you’ve granted such permission upon installation of the app, then it will appear in the list.
6. To activate device admin privileges for the app, toggle to turn on the switch next to Find My Device.
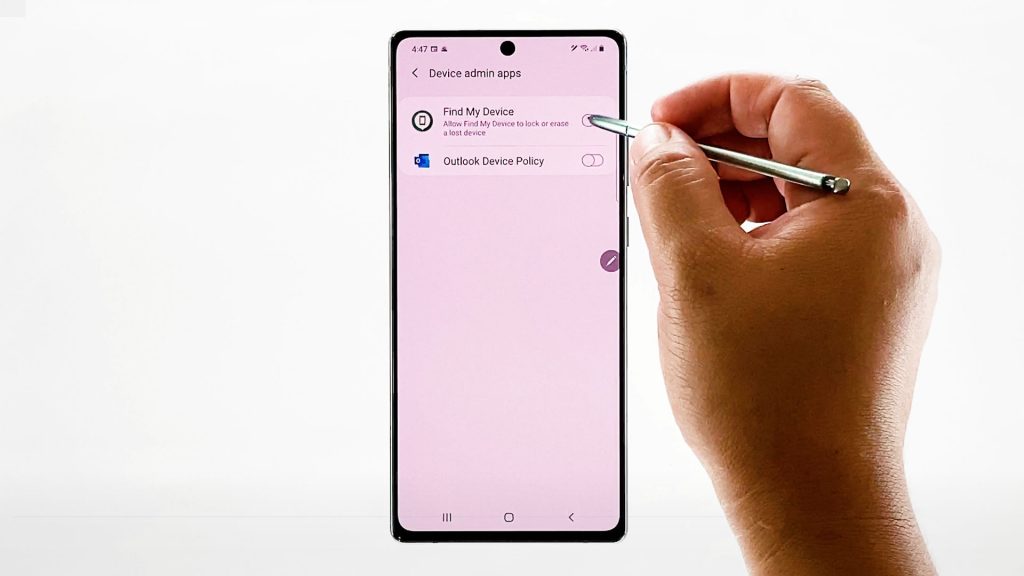
7. If you activate the device admin app for Find My Device, you will be prompted with a message telling about the actions you can do when using the service. Read and review the message and then tap Activate to confirm.
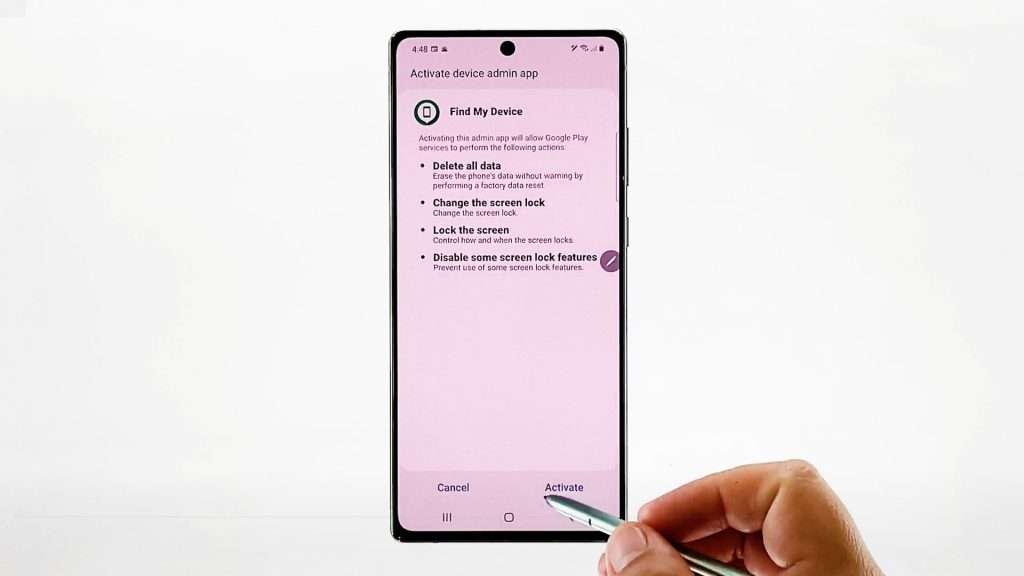
Otherwise, toggle to turn the switch off and deactivate the app’s admin privileges.
If you wish to activate or deactivate admin privileges for other installed apps in the list, just repeat the same steps.
How Does Find My Device Work?
Find My Device is an essential Android tool that helps you trace and locate your lost or misplaced Android device. With this tool, you can lock or erase your device remotely, when needed.
Through this app, you can see your device’s location on a map, navigate to your device using Google Maps, play a sound, lock or erase the device when needed.
Hope this helps!
More Video Tutorials
To view more comprehensive tutorials and troubleshooting clips on different mobile phones and tablets, feel free to visit The Droid Guy channel on YouTube anytime.
You might also want to read: