How To Wipe Cache Partition on Galaxy S22
The cache partition is basically just another directory in your phone’s storage that contains all the caches of the system, features and services.
🚨Note: We’ve updated the instructions for users running Android 12 or above. You can find instruction to Wipe Cache Partition here. 🛠️
A cache is basically a set of temporary files that often get created when you use an app or a feature.
The Android system actually creates a cache the moment you power your phone on. It is stored in the cache partition and so are other temporary files that get created as you use your device throughout the day.
There are times when the cache gets corrupted and since you cannot actually determine which of the files is corrupt, let alone access them manually, the best thing you can do is wipe the cache partition.

It means that you will have to delete all the files that are contained in the cache directory so that the Android system can recreate them.
You can do that on your Samsung Galaxy S22 by rebooting it in Recovery mode where you will have access to the command that allows you to delete those files.
So if you’ve been looking for a guide that will direct you in deleting the cache in your phone, continue reading as we may be able to help.
Wiping Cache Partition on Galaxy S22
The first part of this tutorial is to run your device into the Android recovery screen or Recovery mode.
From there, you will be able to access several commands that can help you fix firmware-related issues on your device.
Here’s how it’s done:
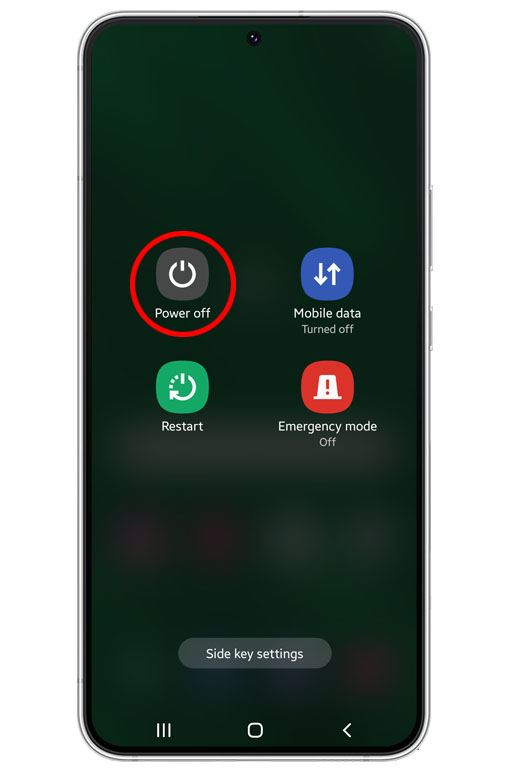
Step 1: Turn off your phone.

If it’s still powered on, press and hold the Volume Down and Power keys for a couple of seconds until the Power options show, and then tap Power off.
You would know if your device has completely powered off if it vibrates slightly shortly after the screen turned black.
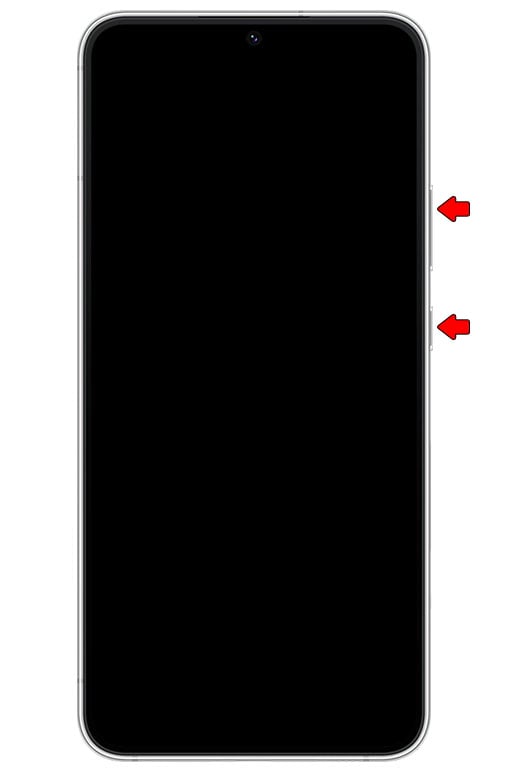
Step 2: Press and hold the Volume Up button and the Power key for 8 seconds.

Most of the time, it won’t take up to 8 seconds before you feel a slight vibration followed by the Samsung logo’s appearance on the screen.
So as soon as you feel the vibration or when the Samsung logo appears, release both keys and wait until the device enters the Recovery mode.
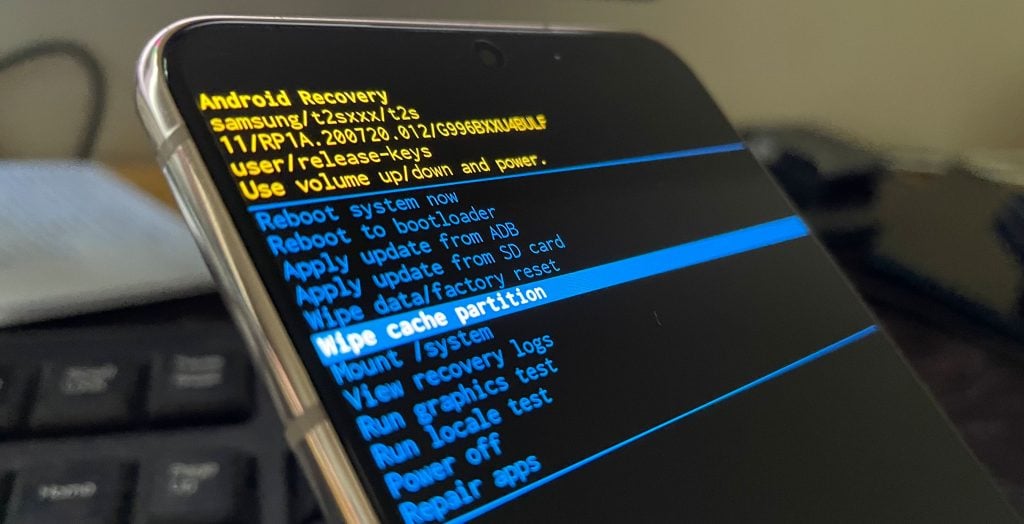
You would know if you reach that screen if you can see the Android recovery menu options in yellow text.
Step 3: Use the Volume Down rocker to highlight wipe cache partition.

Make sure to select ‘Wipe cache partition’ and not ‘Wipe data/factory reset’ if you don’t want to lose your important files and stuff in your phone.
Step 4: Press the Power key to select it.
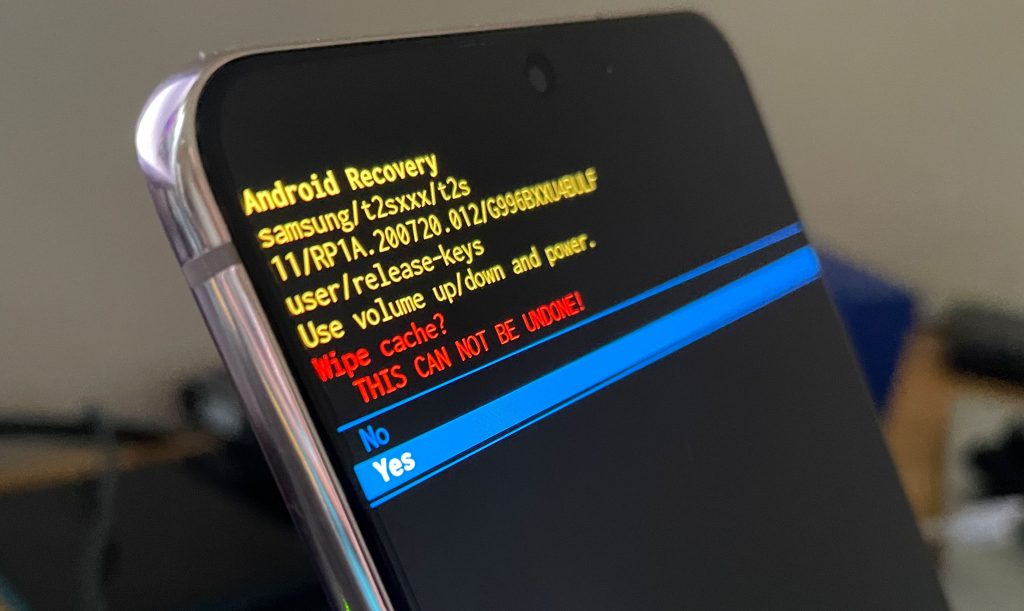
Step 5: Press the Volume Down button once to select ‘Yes’ and then press the Power key again to select it.

It will only take a second or two before your Galaxy S22 finishes wiping the cache partition and brings you back to the Android recovery main screen.
Step 6: All you have to do now is to press the Power key once to select ‘Reboot system now’ and it will restart your Galaxy S22.
And that’s the end of the cache partition wipe on your phone.
It might take a few seconds longer for your phone to boot up as it rebuilds the system cache but once it’s finished rebooting, you can use it normally after that.
Galaxy S22 won’t run in Recovery mode
Some users reported that their devices cannot enter the Recovery mode. As a result, they can do the hard reset or wipe the cache partition.
This kind of issue affected a lot of users but we really don’t know what caused it. However, we found a workaround for you to be able to enter the Recovery mode.
So if you’re one of the users that can’t access the recovery menu, here’s what you should do:
Step 1: Power off your phone.
Step 2: Plug the USB-C headset to it.
We strongly suggest to use the Samsung USB-C headset.
Step 3: Press and hold the Volume Up button and the Power key at the same time until the logo shows.
Step 4: Wait until the phone enters the Android recovery screen.
This procedure works for us but other users reported it does not work on their devices. So if you’re one of them, here’s what you should do instead.
Step 1: Turn off your phone and connect it to its charger.
Step 2: Press and hold the Volume Up button and while doing that, press and hold the Power key.
Step 3: When the Samsung logo shows, release the Power key but continue holding down the Volume Up button.
Step 4: When the phone reaches the recovery screen, release the Volume button.
And that’s pretty much it.
We hope that this simple guide can help you wipe the cache partition on Samsung Galaxy S22.
Have a great day!
Thank you so much for putting out the information and put it in a step-by-step format. I was able to use the first option and it cleared up my speaker from making that buzzy sound very much appreciated excellent information.