How to Set Galaxy Note 20 to Delete Old Messages Automatically
This post will help you configure the Galaxy Note 20 to delete old messages automatically whenever the maximum message limit is reached. Read on if you need help setting up your device to clear out old messages and conversations that are no longer useful.
Built-in Messages Management Feature
Android devices including Samsung’s recent Galaxy flagship smartphones sport a number of advanced SMS messages management features. Among these is the command to automatically delete old messages that are no longer useful on the device whenever the maximum number is reached. Such features are deemed essential when it comes to storage management.
If you’re wondering how to set up your Galaxy Note 20 to work in this manner, then this video will show you how it’s done.
Steps to Configure the Galaxy Note 20 to Delete Old Messages Automatically
The following steps depicts the standard process of configuring the built-in Messages app settings to prompt the Galaxy Note 20 to clear out old messages and conversations automatically.
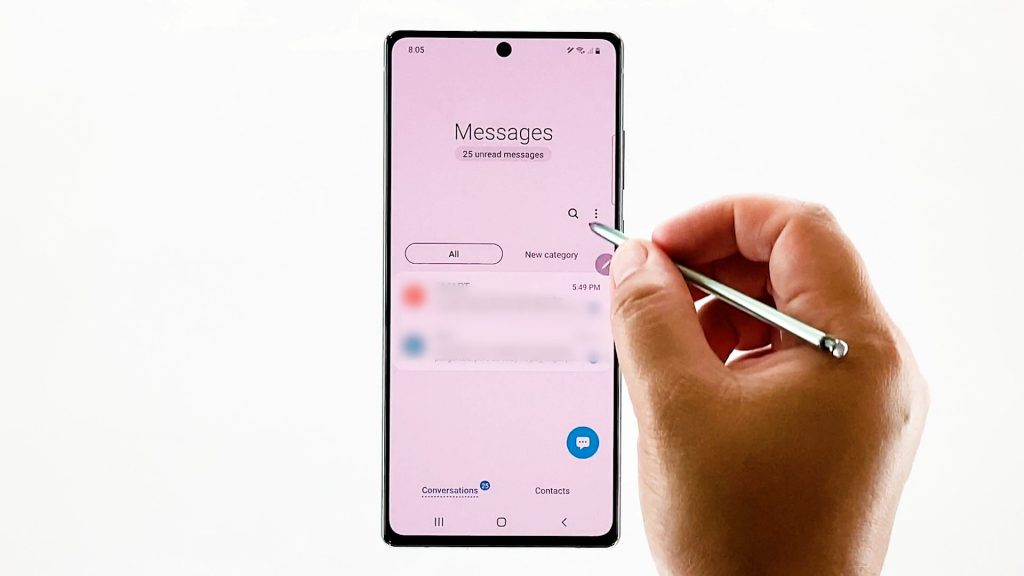
1. To get started, go to the Home screen and then tap the Messages icon at the bottom.

If you don’t see Messages from the main icons, then you can access it through the Apps viewer. Simply swipe up from the bottom of the Home screen to launch the Apps viewer and then tap the Messages icon to launch it.
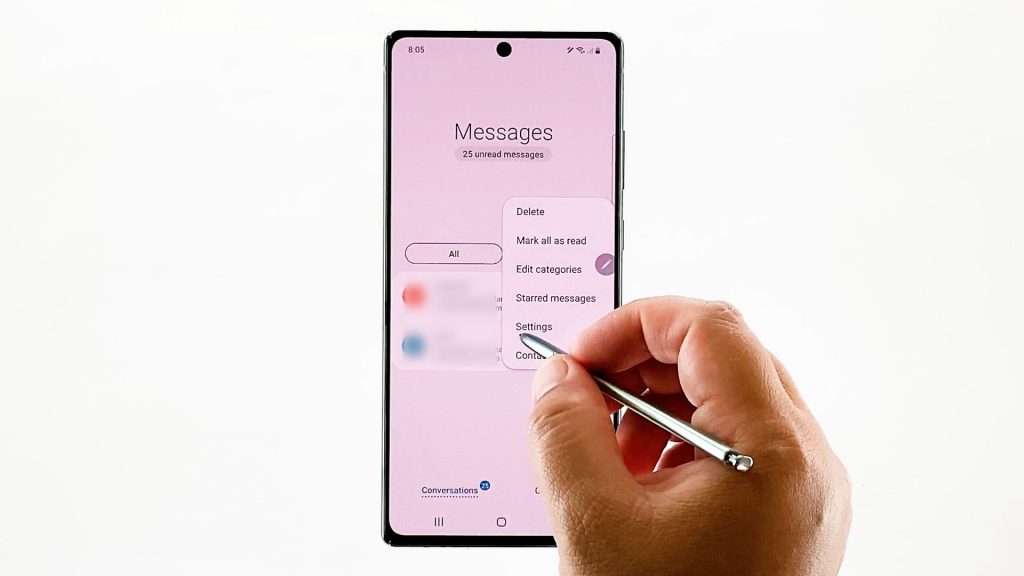
2. On the Messages app main screen, tap the three dots or quick menu icon to view the messages menu.
A side menu pops up.
3. Tap Settings to continue.
Another window opens with the list of the Messages settings.
4. Tap More settings from the given items.
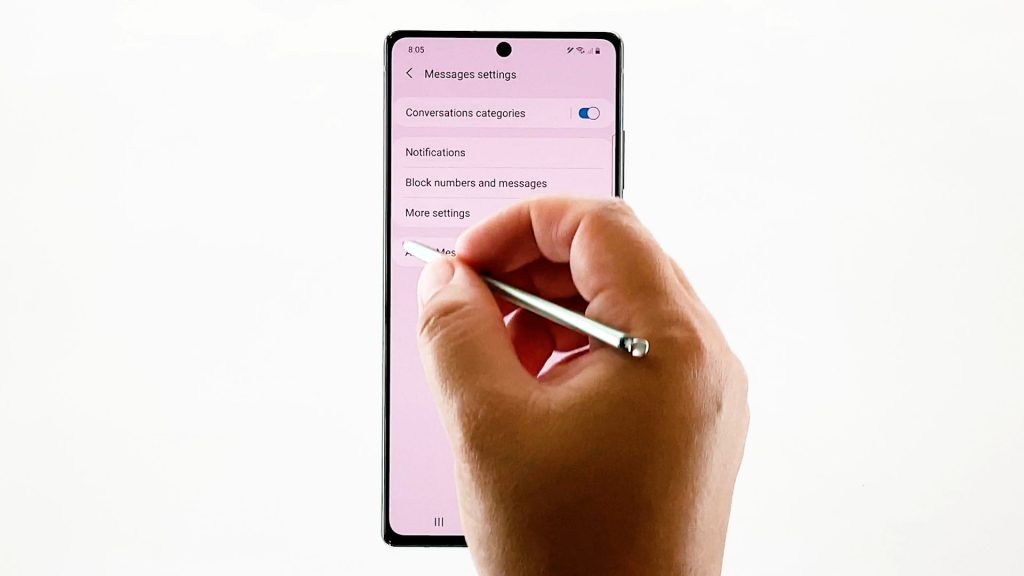
Additional settings will populate the next display.
5. Scroll down to the bottom of the list and then toggle to turn on the switch next to Delete old messages.
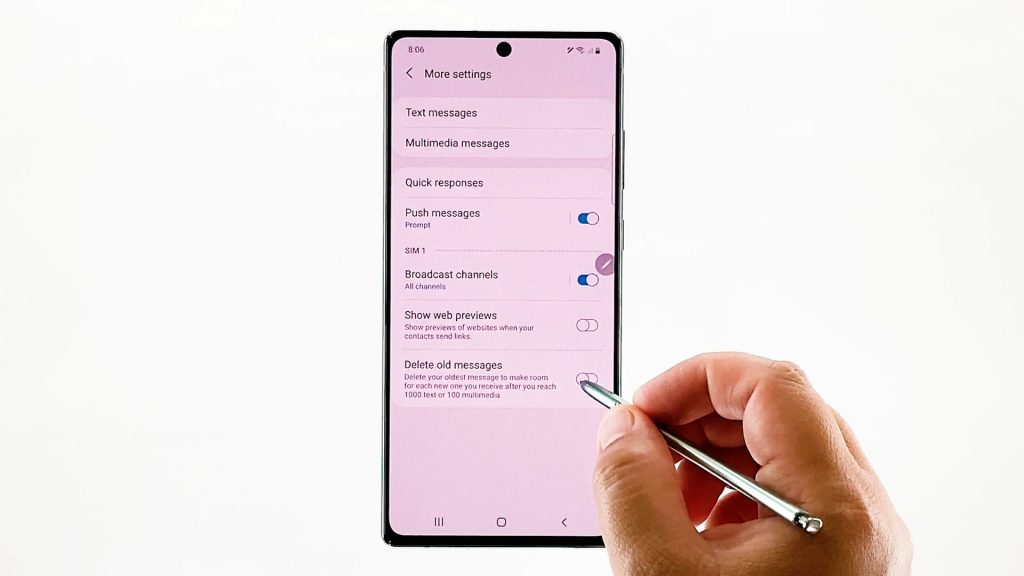
Doing so enables the feature that prompts the device to delete the oldest saved messages when the maximum number is reached.
How does this feature work?
Enabling this feature is among the recommended workarounds to free up space whenever the device is running low on storage. It also makes room for each new message.
The Galaxy Note 20 is capable of storing 1000 text messages (SMS) and 100 multimedia messages (MMS). Once the accumulated messages have reached these numbers, expect your device to remove the oldest to make room for the new ones you get.
Automatic Deletion of Messages Not Working?
Should you encounter any error and couldn’t get to activate this feature on your device, force close then re-run Messages. When the app loads up, go back to the settings menu to make sure you have everything configured properly. If that doesn’t help, perform a soft reset on the phone. This is often needed to clear out random system glitches that might have prevented Messages from working as intended after the recent changes to its settings are implemented.
Clearing the app’s cache and data can also be regarded among other potential solutions you can try on.
- To do this, navigate to Settings-> Device care-> Storage menu and then select the Messages app from the list. Finally tap the command to clear cache to remove all temporary files stored on Messages then tap Clear Data to permanently remove all stored in-app data. Any associated errors are likewise rectified in the process.
After clearing the app’s cache and data, it will download every bit of information it requires, just like the first time you run the app on your device.
Also ensure that your device is running the latest Android version. If necessary, download and install any available software update on your device. These updates usually embed some dedicated fix patch to get rid of any existing bugs that might have caused system apps like Messages to glitch.
Contacting your carrier can also be considered among the last options, if all fails to resolve the issue.
More Video Tutorials
To view more comprehensive tutorials and troubleshooting clips on different mobile phones and tablets, feel free to visit The Droid Guy channel on YouTube anytime.
You might also want to read: