How To Reset Camera on Samsung Galaxy A51
In this video, we will show you how to reset Camera on Galaxy A51. There are two methods you can do it but both have the same effects. It’s important that you learn how to do even just one of them because they can be very helpful if you’re having issues with your phone’s camera. Continue reading to learn more about them.
There are times when the camera of your device acts up and you don’t know why such a problem occurs. If it happens to you, don’t worry because you’ll be able to fix it by bringing all the camera settings back to their default values.
There are a couple of methods you can use to reset the camera of your phone. The first one can be found if you launch the camera, while the second one can be done via Settings.
Reset the Camera from the App
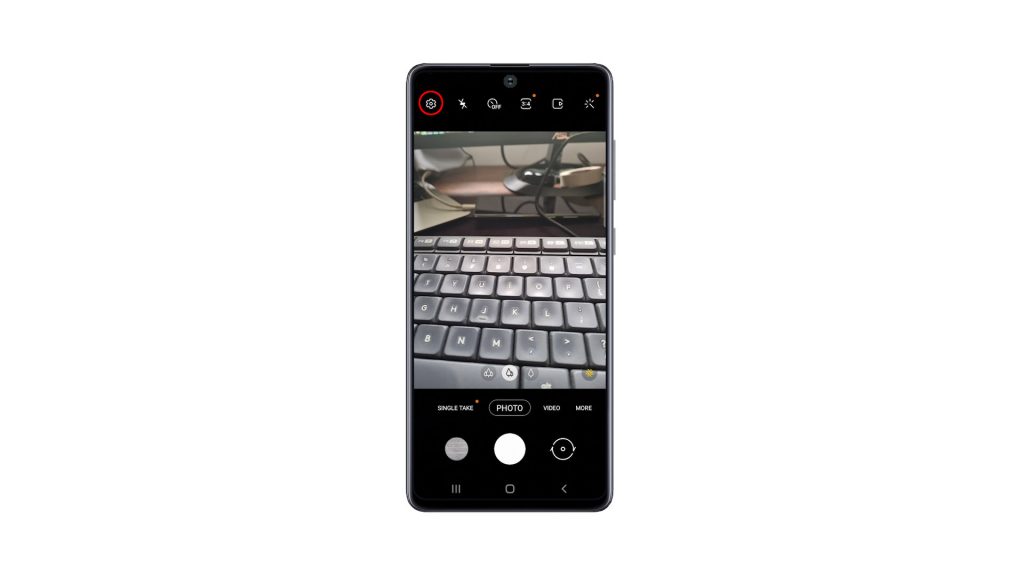
- To begin, launch the Camera.

2. Look for the gear icon at the upper-left corner of the screen. Tap on it to open Camera settings.
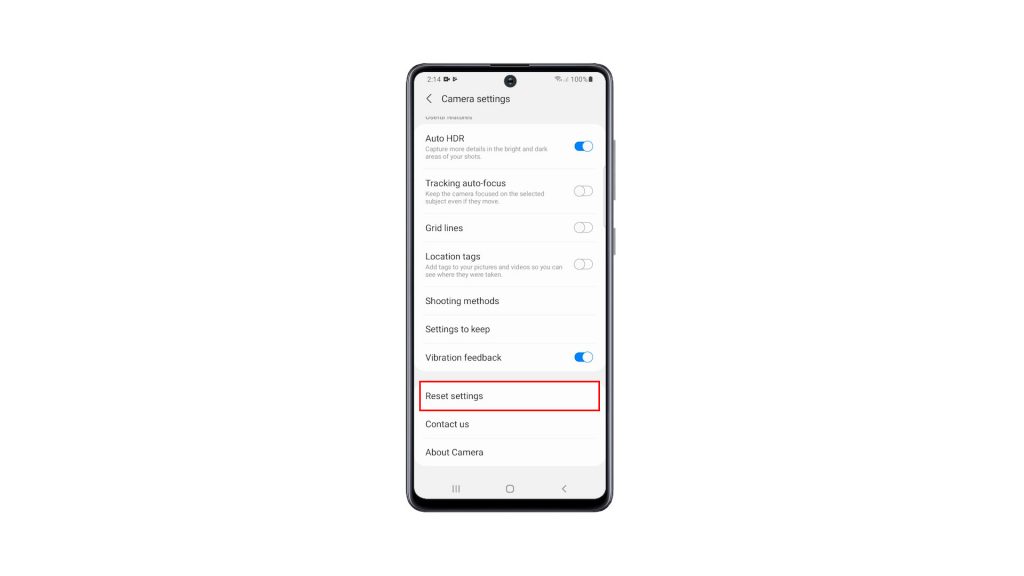
3. Scroll all the way down to find Reset settings.
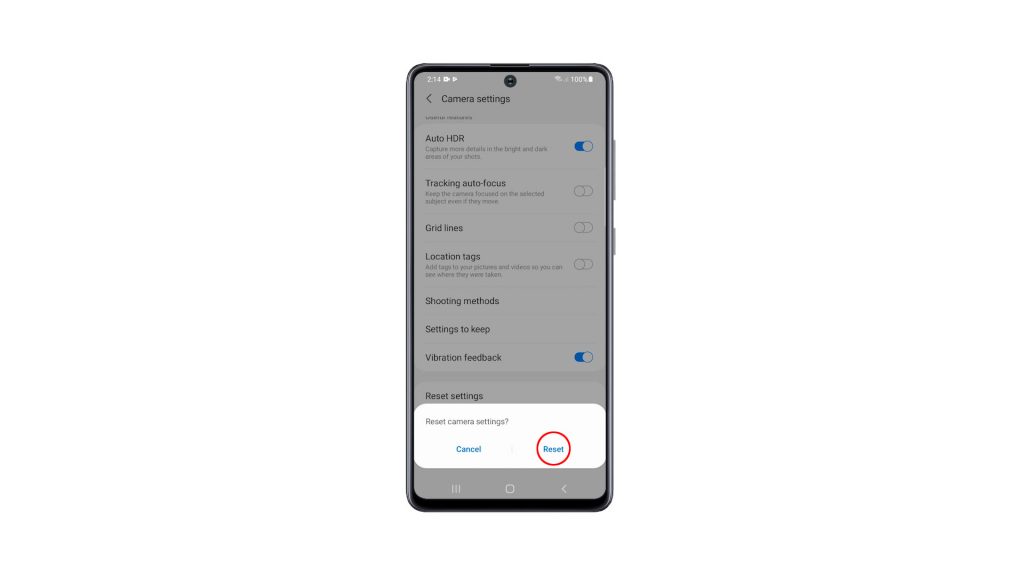
4. Once found, tap on it, and then tap Reset to confirm.
This method alone can fix any minor camera related issues.
Reset the Camera through Settings
1. If you want to use the other method, all you have to do is tap and hold on the Camera icon until the options menu shows.
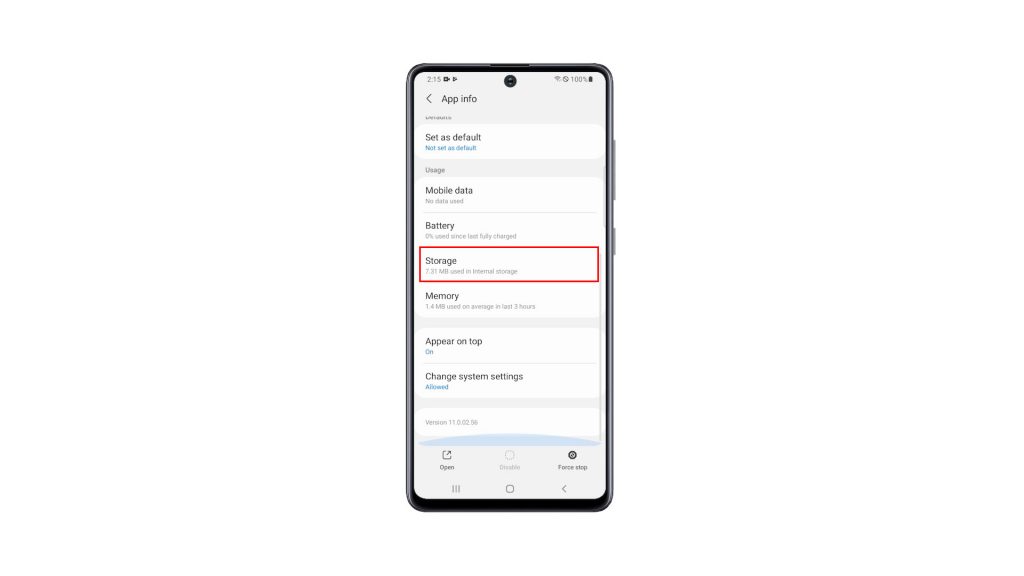
2. Look for the App info icon, and then tap on it.

3. Scroll down a bit to find Storage, and once found, tap on it.
4. Tap Clear cache.
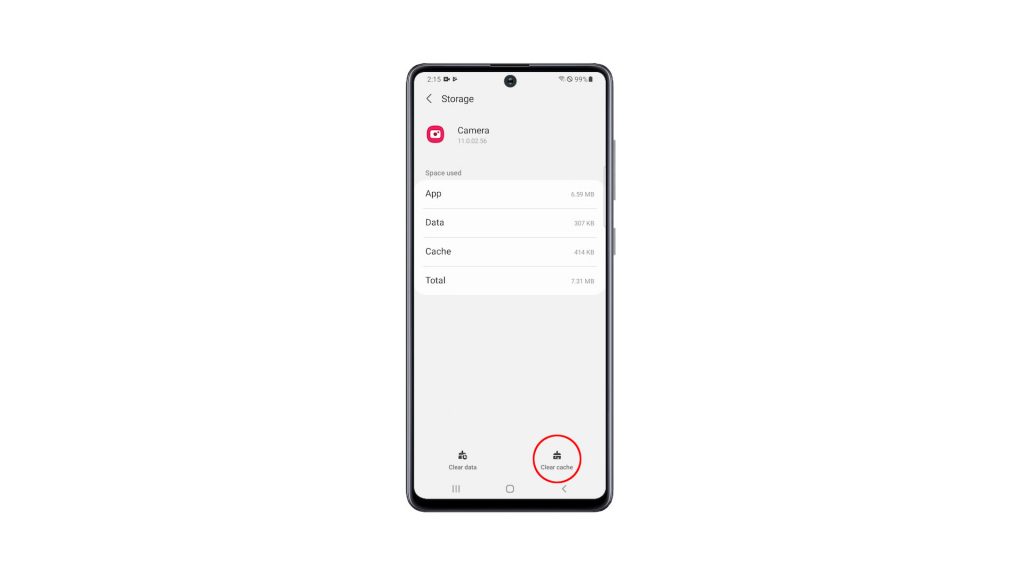
5. Tap Clear data, and then touch OK to confirm it.
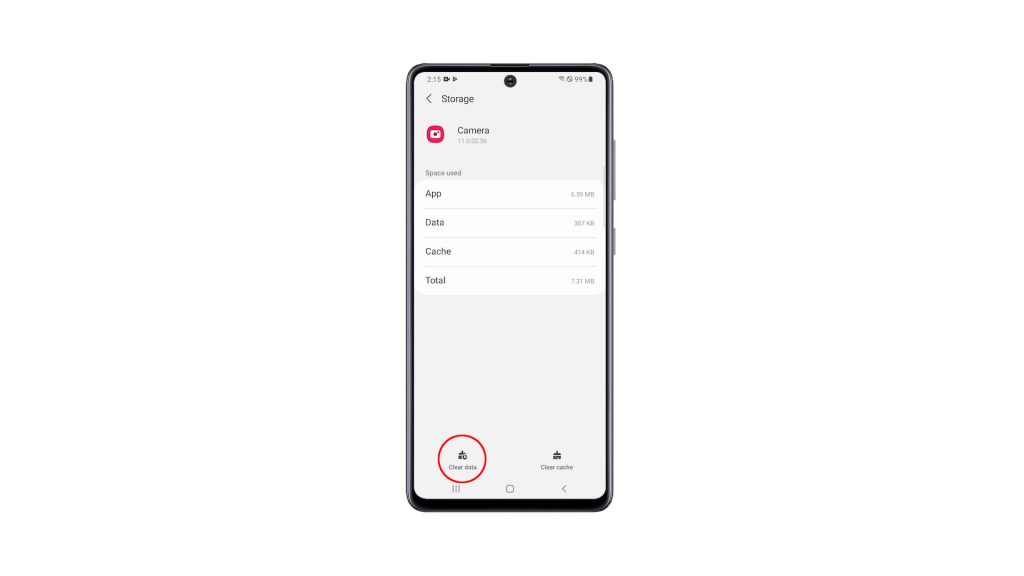
This procedure has the same effect as the previous method.
After doing any of the procedures, you have to set the camera again so that it will work the way you want it. If it has issues, then it should work properly now that you’ve reset it.
And those are the two procedures you use to reset Camera on your Galaxy A51. We hope that this tutorial can be helpful to you.
Please support us by subscribing to our YouTube channel. Thanks for reading!
ALSO READ: