How to Access and Manage Galaxy Note 20 Ringtone Settings
This post will help you access and customize your Galaxy Note 20 ringtone settings. Read on to view a step by step walkthrough.
Ringtones in Cellphones
Every cell phone has a designated ringtone for incoming calls and messages. These ringtones can be personalized in such a way that would suit the owner’s personal preferences. The ever increasing handsets availability has likewise result in a wide variety of ringtones. These comprises of monophonic (simple) tones and polyphonic (complex) tones. The latter ringtones are those that are supported in newer devices.
Android Ringtones
While many people are mollified with the default ringtones on their respective smartphones, others are not that puffed up. Thus, they would consider ringtones among other first features to set up and modify. Thankfully, manufacturers have likewise schemed every new rolled out device to have customizable ringtone settings.
The process of accessing and modifying ringtones in Android devices is fairly easy. Nonetheless, it could be a bit of a challenge to those who are still new to the Android platform. And that’s the main purpose of this content.
If you are wondering how to access and manage the ringtone settings on your new Note 20 phablet, then feel free to make this demo as personal reference.
Easy Steps to Assign New Ringtone on your Galaxy Note 20
The following steps will let you access the Galaxy Note 20 settings menu where you can replace the default ringtone with another built-in tone or audio file from a music directory.
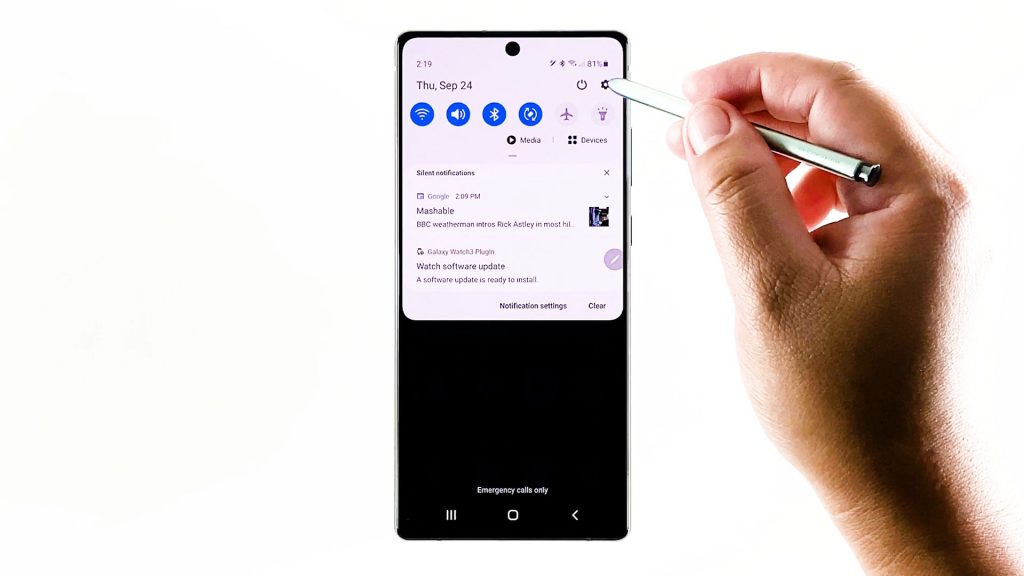
1. To get started, open the Settings menu either through the Notification Panel shortcut or from the Apps viewer.
The faster way to access the phone’s main settings is through the notification panel.

2. Just swipe down from the upper-mid section of the screen and then tap the Gear icon to launch the Settings app.
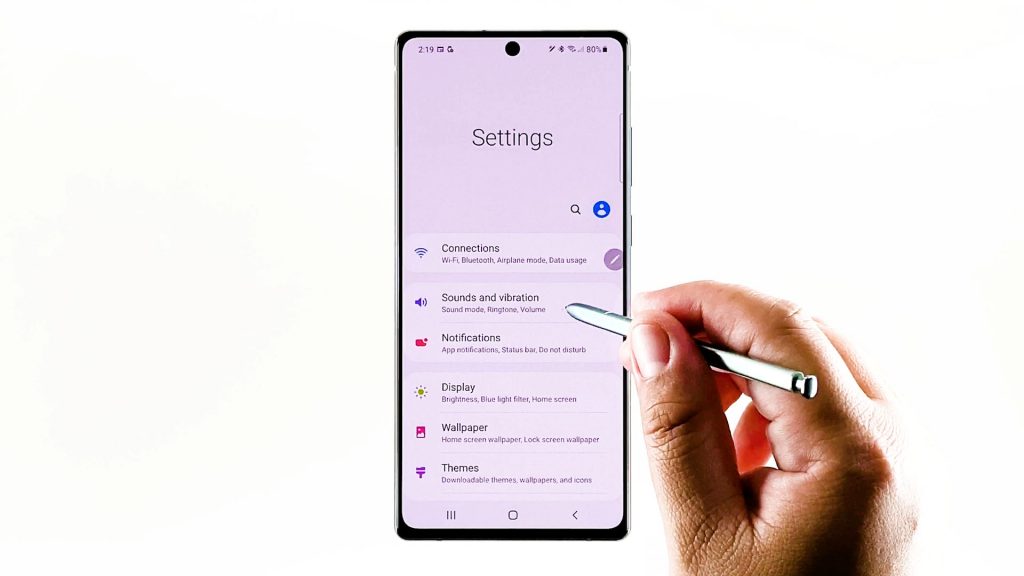
On the next screen, you will see a list of all basic and advanced features to manage and utilize.
3. Tap Sounds and vibration to proceed.
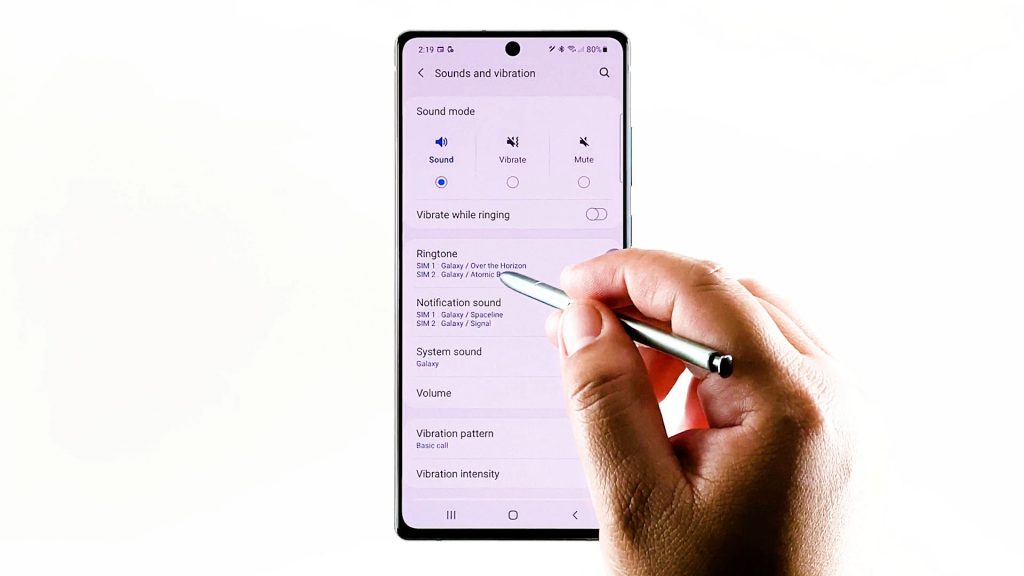
Another menu opens with relevant settings for sound mode, volume, ringtone, vibration pattern, system sound and more.
4. To access and manage the ringtone settings of your phone, tap Ringtone.
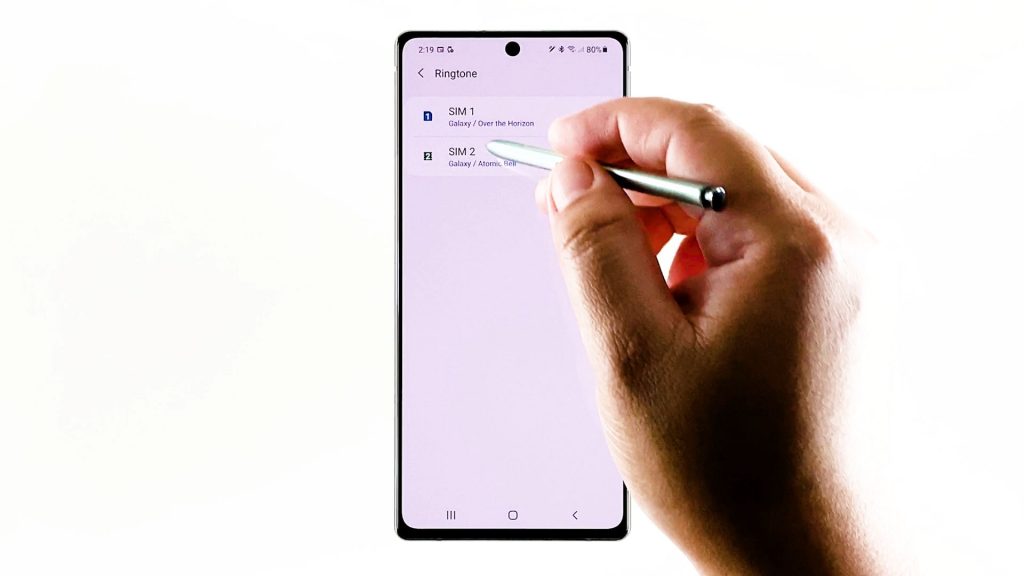
On the next screen, you will see the default ringtone assigned for you SIM card.
5. Tap to select the SIM card you’d like to manage or customize ringtone for.
Let’s just choose SIM 1 to continue with this demo.
A list of built-in ringtones will show up on the next screen with the default ringtone marked.
6. Scroll down to view and search for your preferred ringtone from the list. Or, tap the Plus sign on the upper-rightmost corner.
The Sound picker screen will launch. Here, you will see a list of other tones you can use.
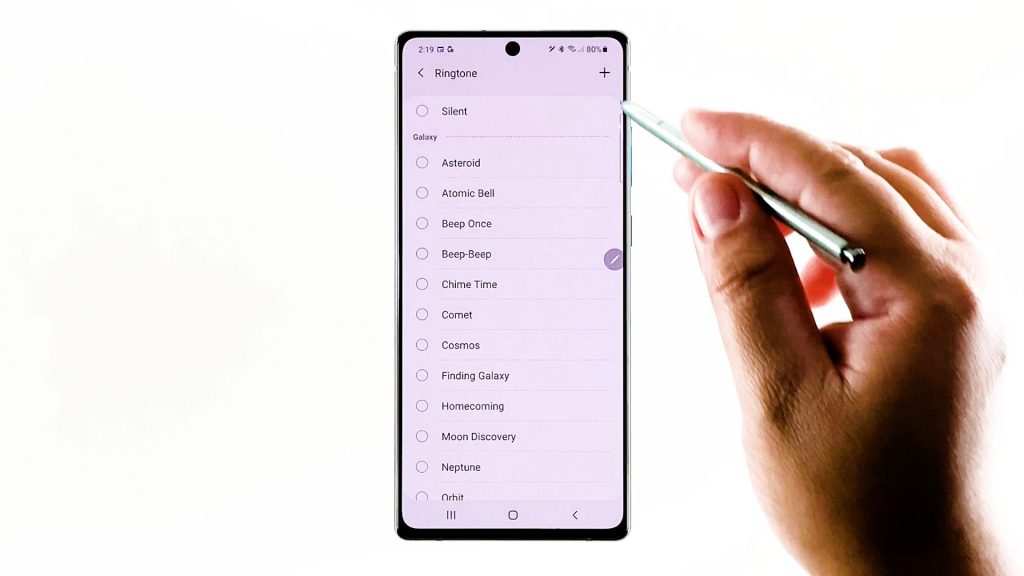
You can choose any from the given directories such as tracks, albums, artists or folders. To select an audio file, just tap to mark the radio button before it.
7. You can also perform a quick search. Just tap Search on the top-rightmost corner of the Sound picker menu and then type the audio filename into the provided search field.
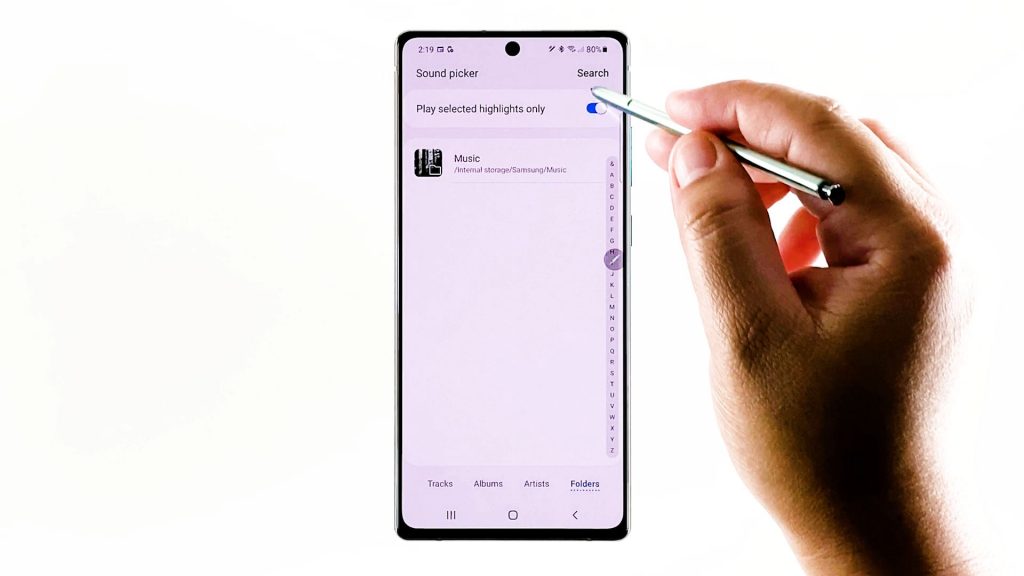
Once you’re done making necessary changes to your ringtone settings, place a test call or send a sample text to your phone. If you still don’t like the new ringtone, just repeat the same steps to get back to the sound picker and choose another ringtone you’d like.
And that’s it!
Having Trouble Changing your Ringtone?
If for some reason you cannot change the default ringtone with a custom ringtone like an MP3 file, verify and ensure that permission for the app is granted or allowed. Resetting app preferences can also help.
Video Tutorials
To view more comprehensive tutorials and troubleshooting videos on different mobile phones and tablets, feel free to visit The Droid Guy channel on YouTube anytime.
You Might Also Want to Read:
I recently performed a factory reset on a Galaxy Note20 5G. In the settings, under “Sounds and vibration”, there is no display for ringtones, believe it or not. Directly below “vibrate while ringing” is “Notification sound”. The word Ringtones is not shown anywhere in this menu. However, I will inform you that I do have a new, unactivated SIM card currently in the phone. When I activate my phone account on this SIM, will the “ringtones” populate? Thanks.