How To Fix Backspace Not Working In Windows 10
The Backspace key is perhaps the most popular and widely used key on your keyboard. It is considered to be the most vital key on your keyboard. However, there are instance when issues on your keyboard can occur such as not being able to use the Backspace key as well as other keys such as spacebar and enter keys. If you are unable to use the Backspace key many users are having a hard time using the computer. Not to worry because in this latest installment of our troubleshooting series, we will talk about the recommended troubleshooting solutions that you can try to fix Backspace not working in Windows 10.
What to do if Backspace not working in Windows 10
There are several factors that may have caused this particular problem to occur, which is not related to the computer and or the operating system, such as a faulty keyboard, issues with the driver to issues with the system configurations settings. If you are unable to use the Backspace on your keyboard as well as the spacebar and enter keys, try the following solutions below backspace not working problem.
But before performing any of the recommended troubleshooting solutions below, its best to restart your computer. This action refreshes the operating that removes corrupt data that could be causing Backspace key not working on Windows 10.
Solution 1: Clean keyboard keys
The very first thing that you need to do and the basic solution for the problem is to clean the keyboard keys. There are instances where dust and dirt can get lodged in the keyboard causing backspace not working problem. . Try to clean the keyboard using a dampen cotton swabs to clean between the keys. You can also remove the backspace key to clean it completely, make sure to return it correctly.
Cleaning the keyboard may have worked for some users if the problem is caused by dirt or dust, however, if the problem still occurs after cleaning then perhaps the problem is related to the hardware and can now proceed with the next solutions below.
Solution 2: Check Keyboard Hardware using on-screen keyboard
An on-screen keyboard is available on Windows and is mostly used to cases when the physical keyboard is not working or not functioning. Therefore in this case, to rule out for any hardware related issues on the keyboard, try checking the keyboard using the backspace key on the on-screen keyboard.
To do this:
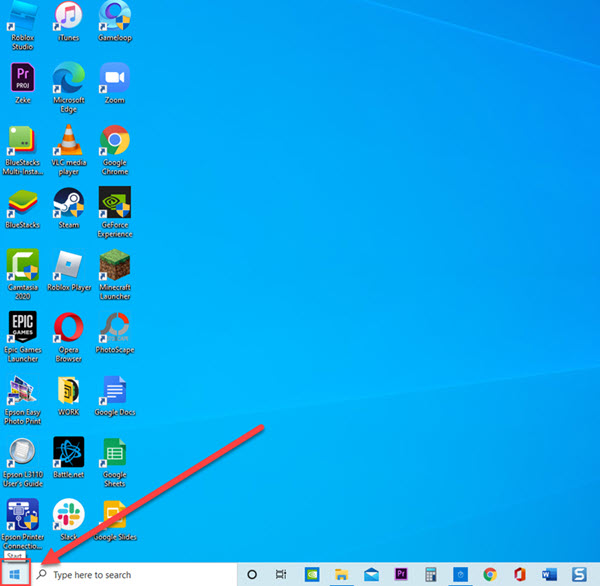
- Press Windows key or Start button located at the lower left.

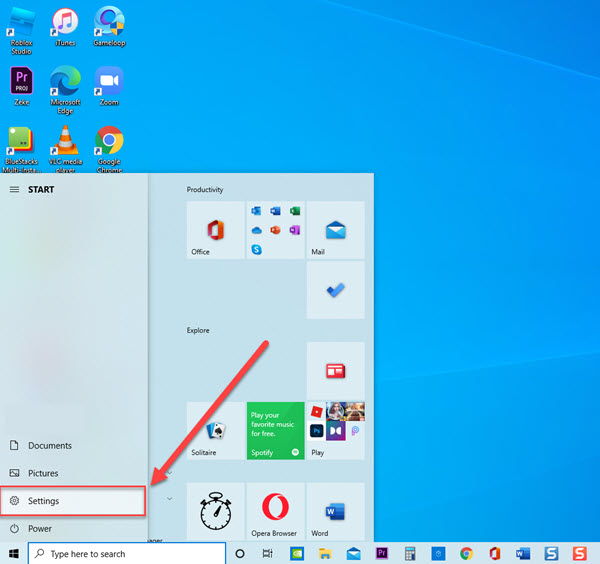
- Click Settings, an icon that looks like a gear to open Windows Settings.

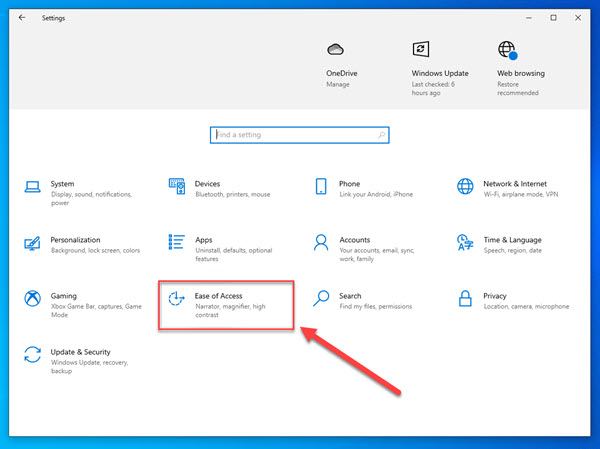
- At Windows Settings, click Ease of Access

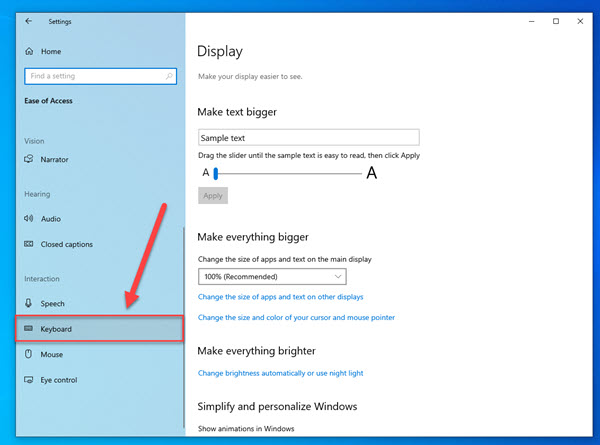
- At left pane, scroll down and select Keyboard under Interaction for keyboard settings

- At right pane, toggle ON On-screen keyboard to turn it on.

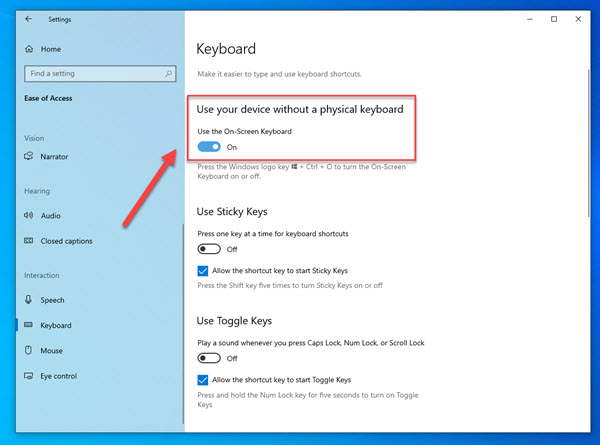
Once on-screen keyboard appears, try to use the backspace key on the virtual keyboard to check if it is functional. If the backspace key is working on the virtual keyboard it simply means that the physical keyboard if faulty and you may need to replace a new one.
Solution 3: Check Keyboard using an External keyboard
Another solution that you can try if you are experiencing backspace not working is to use another external keyboard or you can either connect the keyboard that is having issues to another computer. That way you can check if the problematic keyboard is physically broken or there are issues with keyboard software
Solution 4: Disable Sticky Key and Filter keys
Sticky Keys and Filter keys are two features Windows Ease of Access that Microsoft developed to allow users use the computer with ease. Since sticky keys allows PC users to use combinations of keys by pressing in a sequence pattern rather at the same time while filter keys on the other hand allows the users to use the keyboard and ignore repeated keystrokes. Most of the time, when these keys are enabled, it can cause issues with the backspace key not working. To fix backspace key problem, try to disable sticky keys and filter keys and then check if the issue will be fixed.
To do this:
- Press Windows key or Start button located at the lower left.
- Click Settings, an icon that looks like a gear to open Windows Settings.
- At Windows Settings, click Ease of Access
- At left pane, scroll down and click on Keyboard under Interaction to access keyboard settings.
- At right pane, toggle off Sticky keys if it is Enabled to turn off sticky keys.
- Toggle off Filter Keys if it is enabled.
- Exit Settings window.
After disabling Sticky keys and Filter keys, Check if Backspace not working in Windows 10 still occurs.
Solution 5: Uninstall Keyboard Driver
Most of the hardware components on your computer needs to function in a way it should be, however, there are times when the keyboard driver gets corrupted causing issues. To fix this, you may need to uninstall the keyboard driver that is experiencing backspace not working problem and then reinstall the driver.
To do this:
- Press Windows logo key + R on your keyboard to open RUN dialog box.
- At RUN dialog box, type devmgmt.msc and press Enter or click OK. This will open device manager section.
- At Device Manager window, find keyboard and click on it to expand keyboards section.
- Under keyboard, right click on your keyboard and select Uninstall device from the drop down menu.
- Restart your computer.
Once computer completely reboots, driver of the keyboard automatically reinstalls. Check if Backspace key not working on your keyboard in Windows 10 still occurs.
Solution 6: Update Keyboard Driver
Aside from uninstall the driver, if the issue is still present, you may need to update keyboard driver at this time. An outdated keyboard drivers can cause issues such as backspace key not working on Windows 10. Make sure keyboard driver is using the latest driver.
To do this:
- Press Windows key + R on your keyboard to open RUN dialog box.
- At RUN dialog box, type devmgmt.msc and press Enter or click OK. This will open device manager section.
- At Device Manager window, click keyboard to expand it.
- Under keyboard, right click on your keyboard and click Update driver from the drop down menu.
- Click Search Automatically for drivers. Windows will now search for available updates and install updates if there are any.
- After keyboard driver are installed and updated, click Close to exit.
- Restart your computer.
Once computer completely reboots, check if Backspace not working on your keyboard in Windows 10 still occurs.
Solution 7: Install the latest Windows Update
Updating to the latest version of Windows operating system does not only fixes bugs that may have caused backspace not working issue on your computer but also brings updated features and security enhancements as well. Therefore, it is highly recommended to check for and install available Windows updates.
To do this:
- Press Windows or Start Button.
- Click Settings, an icon that looks like a gear. This will open the Windows settings.
- Click Update and Security
- Click Windows Update at left pane.
- Click Check for updates. Windows will now search for and install updates. Wait for it to complete.
- After Windows update is complete, close Windows settings
- Restart computer
Once computer completely reboots, check if Backspace not working on your keyboard in Windows 10 still occurs.
After following the solutions mentioned, you will successfully to fix backspace key not working issue on Windows 10. . Visit our TheDroidGuy Youtube Channel for more troubleshooting videos.
Also read: