How To Change Margins On Google Docs
Google Docs is an outstanding web-based platform to create and share documents. Changing margins can be a bit confusing for new users – especially if you’re only used to using Word.
Drag Google Doc Ruler
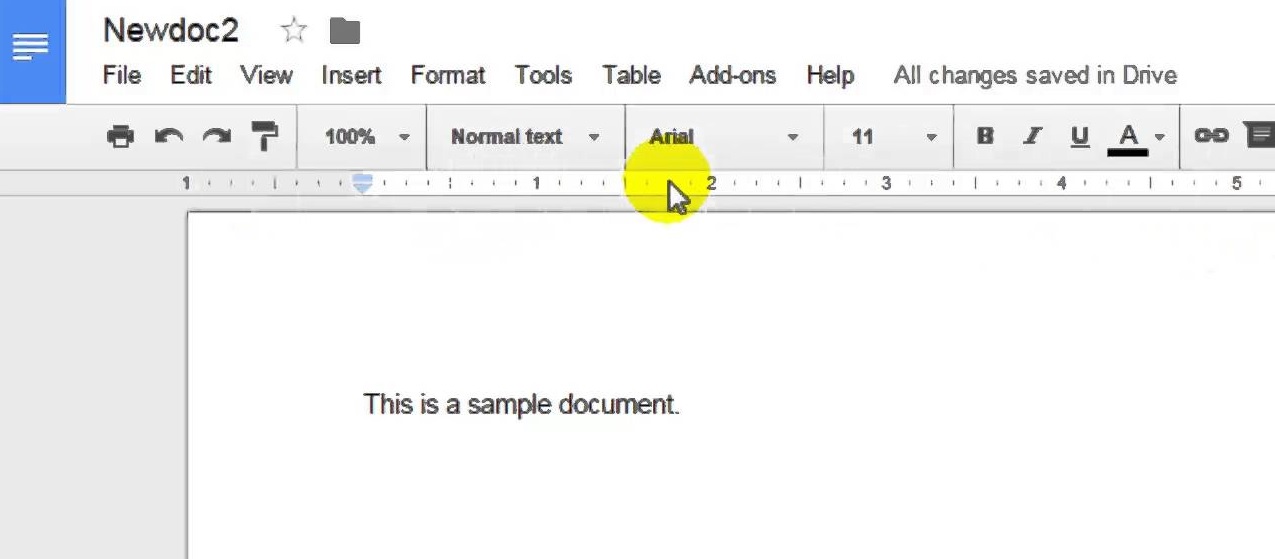
The quickest way to change margins in Google Doc is to just drag the ruler to the margin you like.

The ruler can be found at the top of your Google Doc, just below the menu, it literally looks like a ruler, and simply drag that little blue triangle to the ideal margin you are looking for.
To be clear, there is a left margin and right margin bar, so you can adjust the margin on each side, just simply drag the triangle on each side.

Page Setup
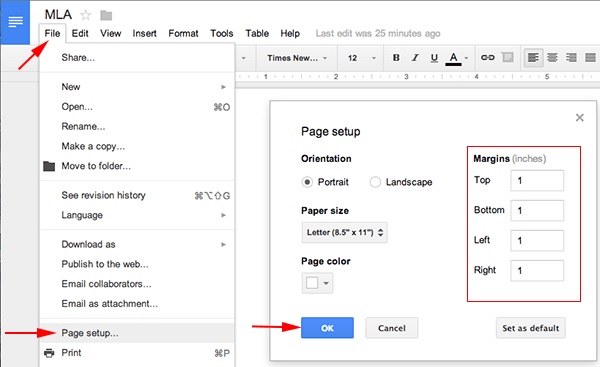
You can also change the Google Doc margins by going through the page setup. You can find the page setup page by going to “File” in the menu, and find ” Page Setup”, then in that page setup menu, you will find a section called “Margins”, go ahead and enter the ideal margin you want there and the page should save.
Altering Margins
In order to change paragraph margins, go to File and then select Page Setup. Once there, you will see orientation on the left-hand side and margins on the right. Now, you will see the Margins menu open up and you can adjust your top, bottom, left, and right margins. Clicking OK will finalize it and if you want, you can Set as Default to save that setup for all future documents.
Changing Paragraph Margins is more intensive, but still fairly easy to do. This requires you to go to the ruler and click and drag the left downward-pointing triangle. Doing this changes the left margin for only that one paragraph. Changing the right is easy and just requires doing the same thing for the right downward-pointing triangle.
Verdict
As you can see, changing margins is fairly easy to do, and there are at least two ways that you can do it, with the latter being a little more difficult to be precise in.