How To Fix A Galaxy Note 20 That Keeps Lagging
In this troubleshooting guide, we will show you what to do with your Galaxy Note 20 that keeps lagging and freezing. These performance issues are common and many have already reported having a their powerful device to work slowly.
Performance issues are common, but most of the time, they’re not that hard to fix. If a premium phone like the Note 20 starts to lag, you can rest assured that it’s just a minor problem that you can fix on your own. So if you’re one of the users with this problem, here’s what you should do:
First solution: Close background apps and do the forced restart
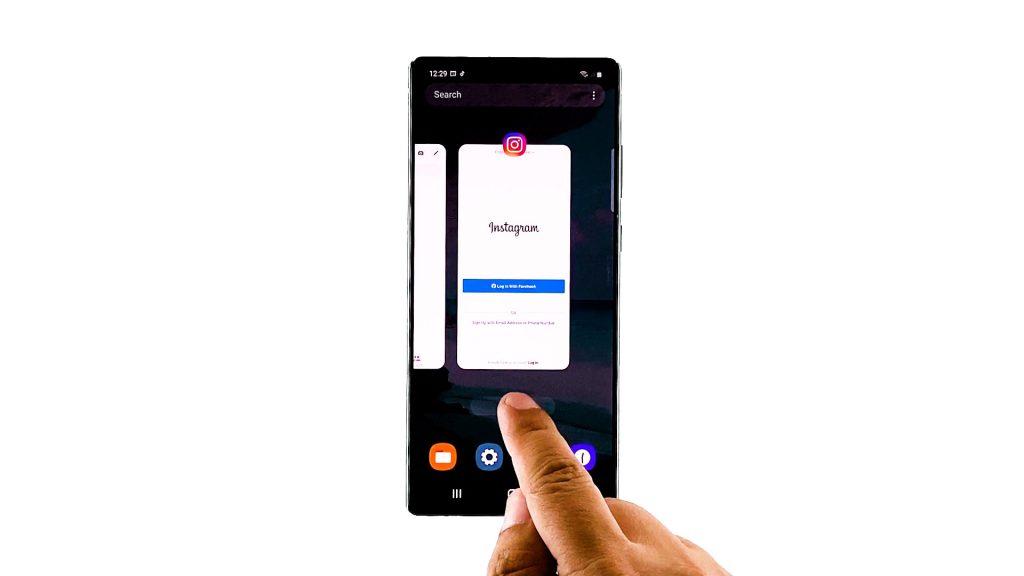
It’s possible that there are already a lot of apps that run in the background. If that’s the case, those apps might be the reason why your device is lagging. So close them and refresh your phone’s memory by doing the forced restart. Here’s how:
- Tap the Recent Apps key to view the apps.
- Tap Close all to force close all of them in one click.
- Now, press the volume down button and the power key at the same time, and hold them both for at least 10 seconds. This will trigger your phone to shut down and power back up.
- When the phone vibrates or once the logo shows, release both keys and allow the device to boot up.
Once the boot process is finished, try to see if your Note 20 is still lagging.
Second solution: Restart your phone in Safe mode

The purpose of this procedure is for us to determine if the lagging is caused by third-party apps and service, because if so, then you just have to find the app that causes the problem and uninstall it. To run your Note 20 in safe mode, follow these steps:
- Swipe down from the top of the screen and tap the Power icon.
- Tap and hold the Power off option until it turns into Safe mode.
- Now tap Safe mode to restart your phone.
- Once your phone has finished rebooting, you’ll notice a text at the lower-left corner that says Safe mode. It means that your phone is now running in safe mode.
Observe your device to see if it still lags or freezes. If it still does, then try the next solution.
Third solution: Wipe the cache partition
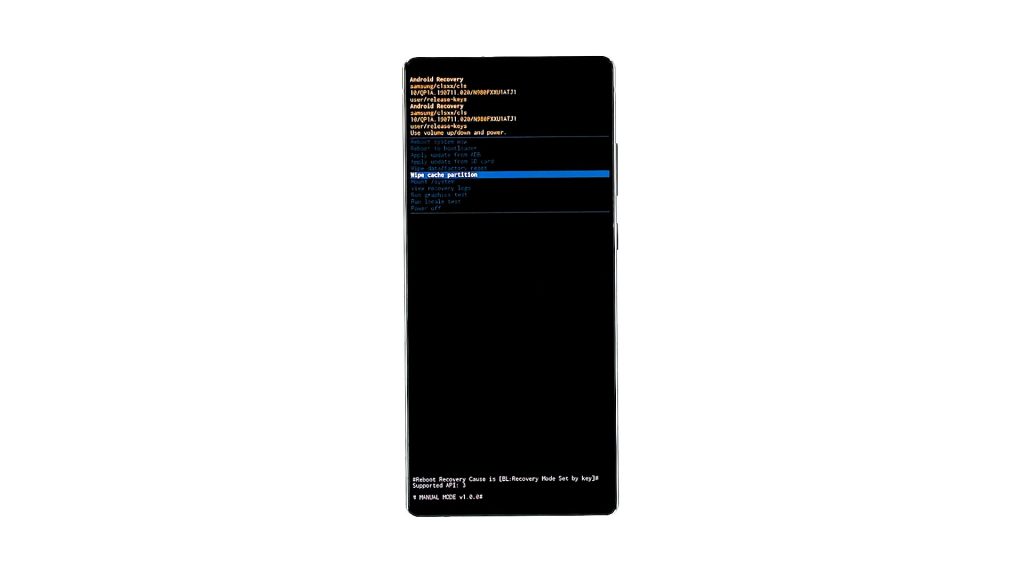
At this point, it’s possible that the problem is caused by some corrupt system cache. So to rule out such a possibility, you have to wipe the cache partition so that the system cache will be replaced with a new one. Here’s how it’s done:
- Turn your phone off completely.
- Press and hold the Volume Up button and the Power key for a few seconds.
- Once the logo shows on the screen, release both keys and wait until your phone enters the Recovery mode.
- Using the Volume Down key, highlight wipe cache partition, and then press the Power key to select it.
- Highlight Yes, and press the power key again to confirm.
- After the cache partition is cleared press the Power key to select Reboot system now.
After the reboot, try to see if the lags and freezes are fixed.
Fourth solution: Reset all Settings

If your Note 20 still lags and freezes after clearing the cache partition, then it’s time to reset all settings. This will bring your device back to its default configuration without deleting any of your files.
- Swipe down from the top of the screen and then tap the Settings icon.
- Find and tap General management.
- Touch Reset.
- Tap Reset settings.
- Tap the Reset settings button.
- If prompted, enter your PIN, Password or Pattern.
- Finally, tap Reset.
After doing this and your Galaxy Note 20 is still lagging, then move on to the next solution.
Fifth solution: Factory reset your phone
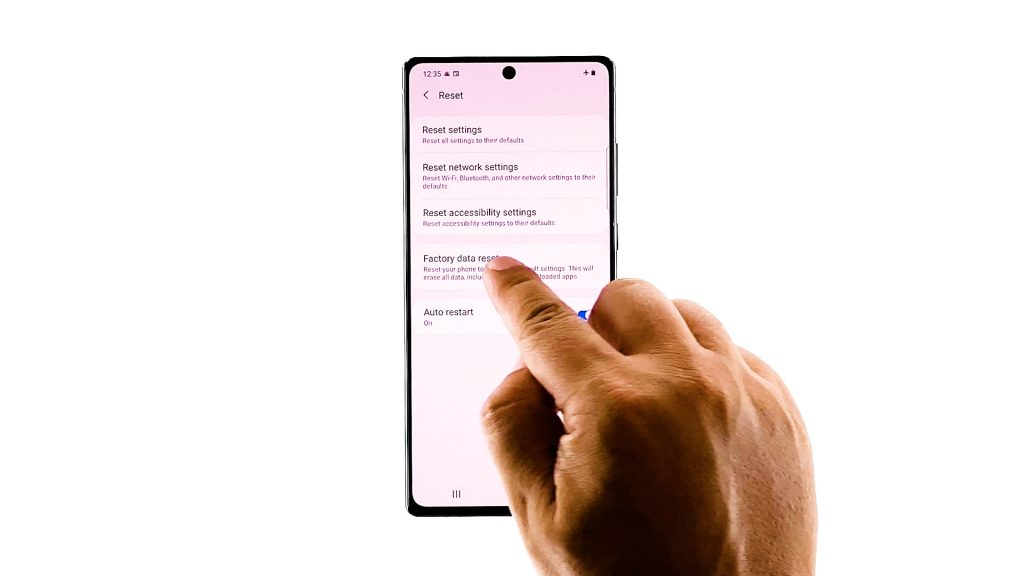
If all else fails, then you have no other choice but to reset your device. A factory reset will fix this problem but make sure you create a backup of your important files and data. When ready, follow these steps:
- Swipe down from the top of the screen and then tap the Settings icon.
- Find and tap General management.
- Touch Reset.
- Tap Factory data reset.
- Scroll down to the bottom of the screen and tap Reset.
- If prompted, enter your PIN, Password or Pattern.
- Tap Delete all.
- Enter the password of your Samsung account to verify your identity, and wait until the reset is finished.
When the reset is finished, set up your phone as a new device, and that should do it.
I hope that this troubleshooting guide has been helpful.
Please support us by subscribing to our YouTube channel. We need your support so that we can continue creating helpful contents. Thanks for reading!
ALSO READ: