How To Enable USB Debugging on Samsung Galaxy A51
In this post, we will show you how to enable USB debugging on your Galaxy A51, and explain its importance and basic use. For most users, this feature may not be important, but for developers, you may need to enable it every now and then. Continue reading to learn more.
The USB Debugging is a way for your Android phone to communicate with the Android SDK over a USB connection. If you’re into app development, then you will need to enable USB debugging on your phone.
But turning it on will make your device vulnerable to attacks, that’s why you need to be careful in giving access to computers, and enable such a feature if needed.
Enable USB Debugging
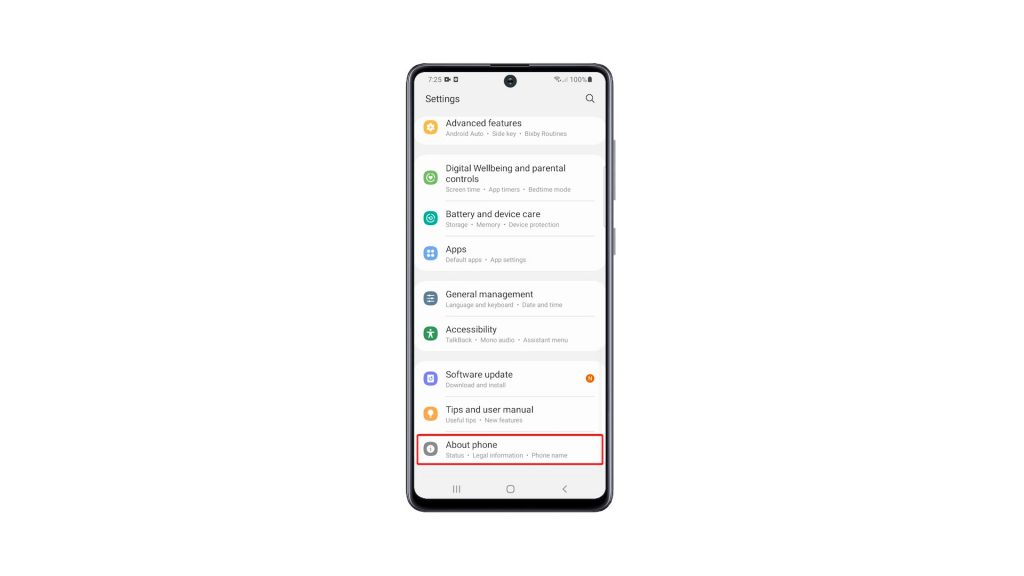
1. To begin, pull up the app drawer and tap Settings.

2. Scroll all the way down, and tap About phone.
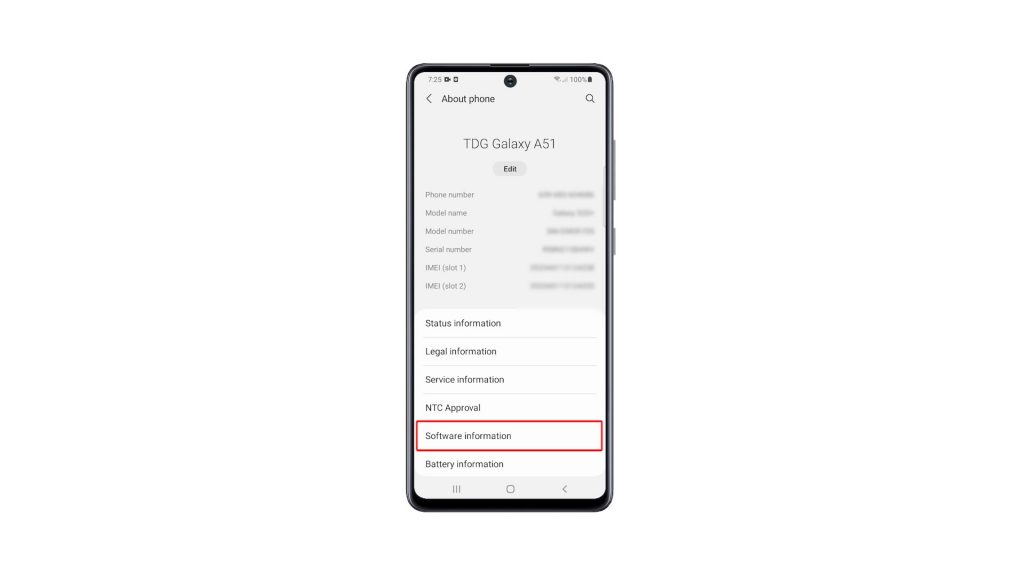
3. Assuming you haven’t enabled the Developer Options yet, tap Software information.
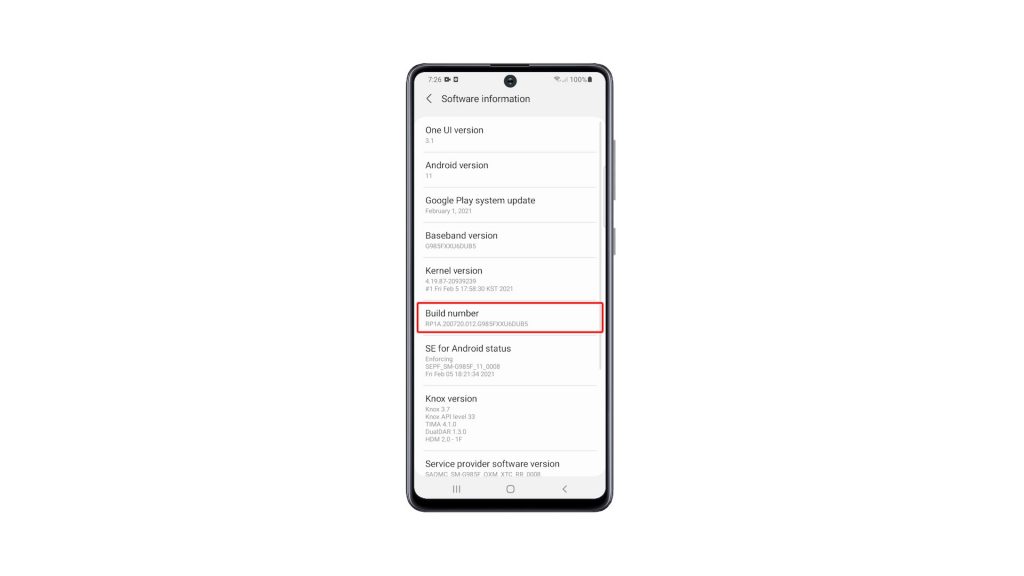
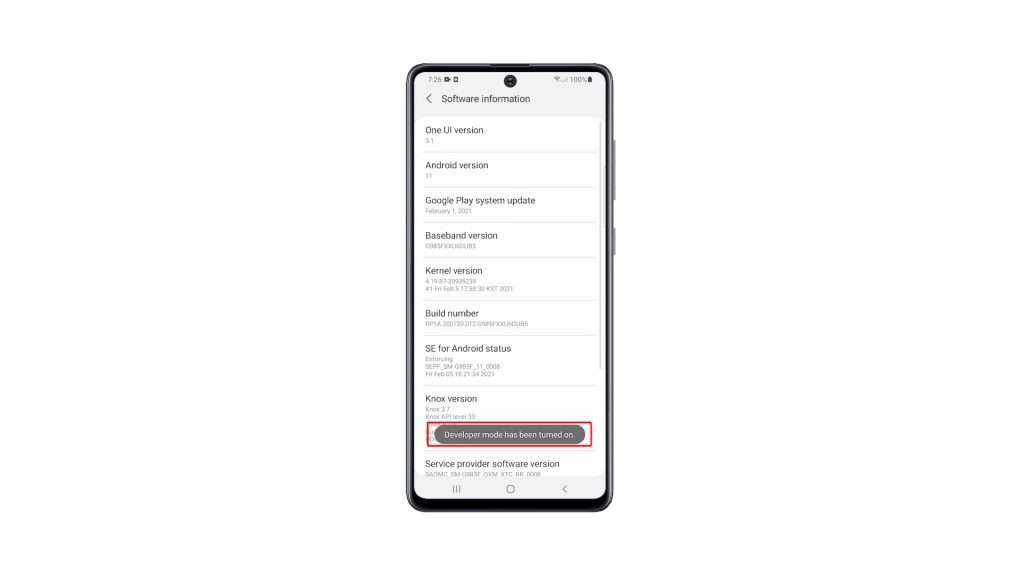
4. Now tap the Build number seven times, and enter your security lock.
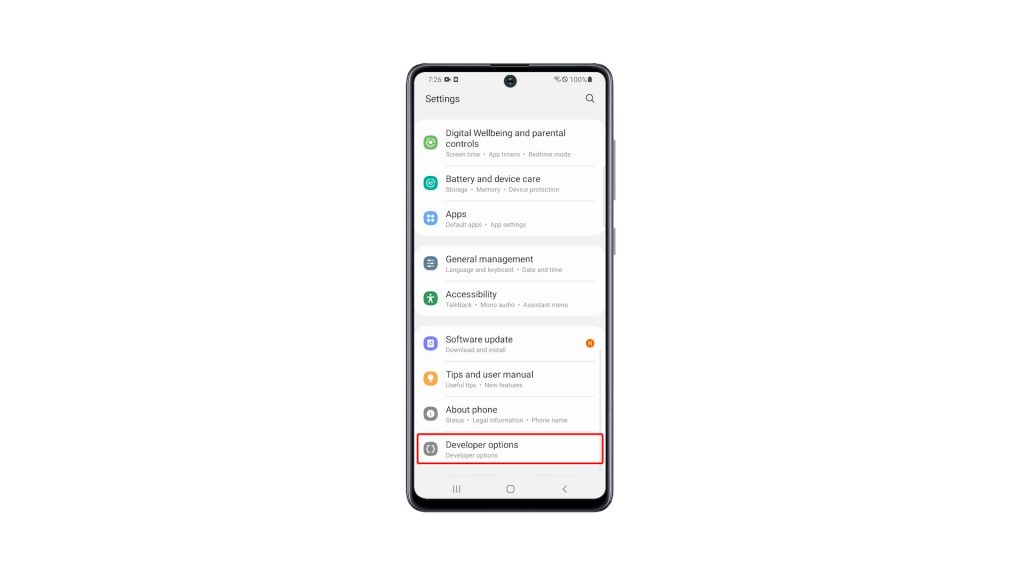
5. Once the Developer Options is enabled, go back to the main Settings page.
6. Scroll down and then tap Developer Options. It should be below About phone.
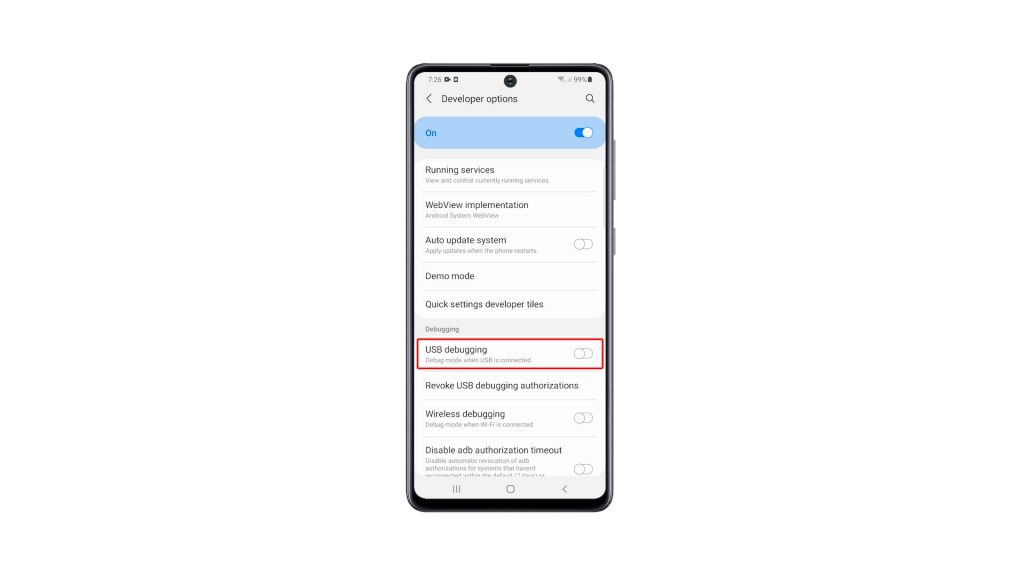
7. Once you’re inside, look for USB Debugging and then tap the switch next to it to enable it.
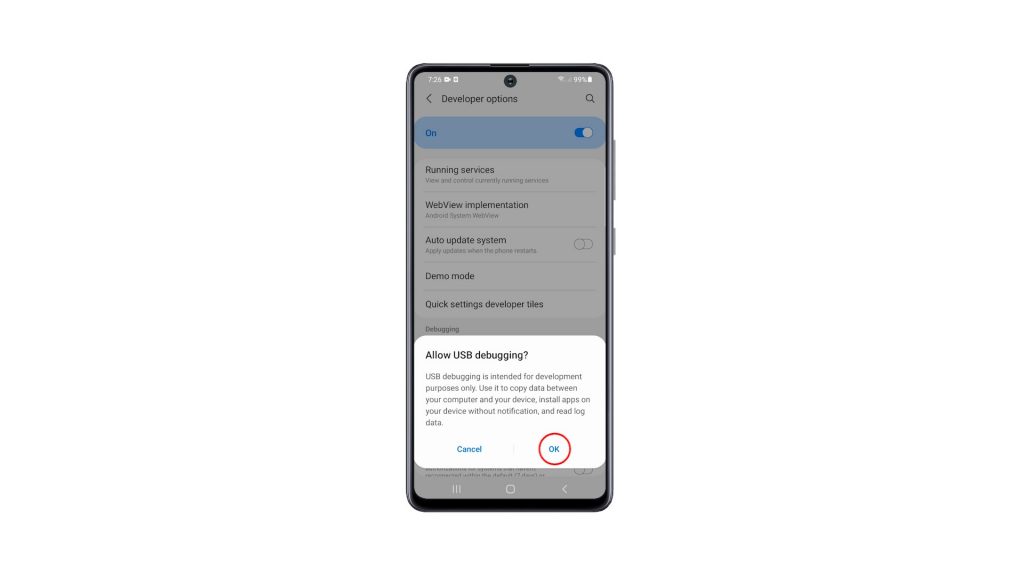
8. If prompted, tap OK to allow USB Debugging.
After doing this, the feature is now enabled. Be responsible enough to disable it after you use it.
We hope that this simple tutorial video can be helpful.
Please support us by subscribing to our YouTube channel. Thanks for reading!
RELEVANT POSTS:
its odesnt work