How to Change Windows 11 Network from Public to Private
- Understand the difference between the Public and Private network profiles.
- Learn how to change the network profile from public to private for both wireless and wired connections on your Windows 11 computer.
- Learn how to configure firewall settings for your network.
- Learn how to fix most of the network-related issues with Network reset.
In this article, you will learn the difference between the Public network and Private network and their privileges. We will also show you how to change from one network to another through your Windows 11 settings menu.
What is a Private Network on Windows 11?
On a private network, Windows 11 network discovery features are enabled by default. It means that it will be easier for you to see other devices on the network, and those devices can also find your computer easily.
This allows for easy file sharing and use other networked features. For instance, the Public folder of one computer can easily be accessed without the need for password or other permissions. This makes sharing of media files easier.
You use the Private network profile if you have full access to the network such as your home or office network. You can do so with both LAN or Wi-Fi connection.
What is a Public Network on Windows 11?
In a public network, like those in coffee shops, while your device is connected to it, you don’t want other users to see your device let alone access your files and other data. So Windows turned off discovery features by default the moment you choose this profile.
Your computer won’t appear to other devices on the network and won’t try to discover them. Windows assumes that public networks are full of other people’s devices you don’t want to connect to, so it uses different network settings.
However, if a computer connected to the local network enabled network discovery, other users who try to access it may need a password to be able to do so.
That’s the reason why when your computer connects to a new network, it will prompt you immediately if you want to use the Public or Private network profile.
How to Change Windows 11 Network from Public to Private?
When you first connected to a Wi-Fi network, you may have chosen to use the Public profile, which disables all network discovery features. Fortunately, Windows allows you to change the profile from public to private, and vice versa.
Change a Wi-Fi Connection to Private
In this section, we will assume that you’ve chosen to use the Public profile when you connected to a Wi-Fi network. So we will change it to private. Here’s how you do that:
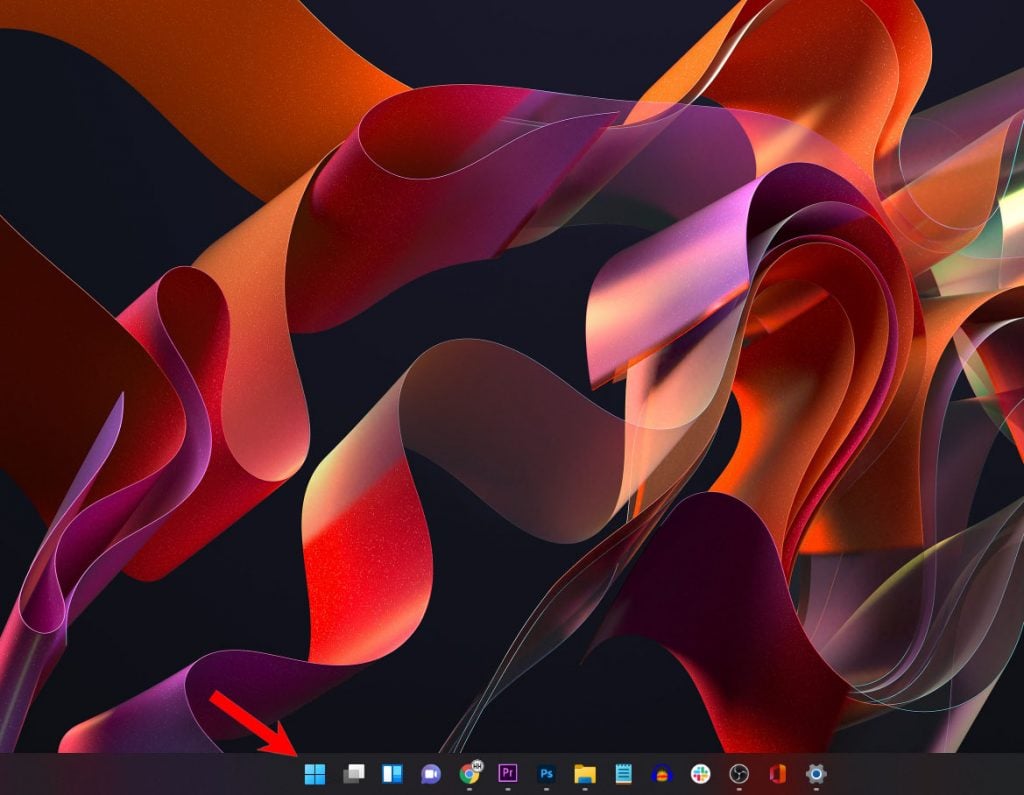
Step 1: Right-click on the Windows icon on the taskbar to pull up the options menu.
Step 2. Look for and click Settings to open the Settings app.

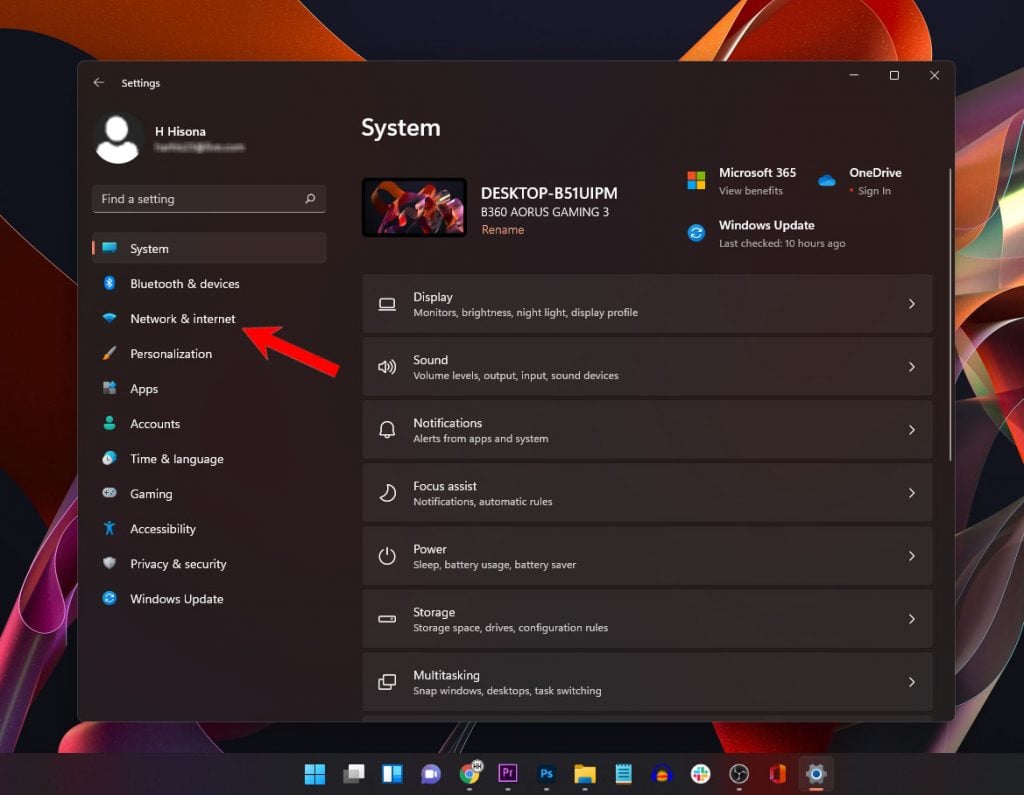
Step 3: At left pane, look for Network & internet and click on it.
Step 4: Click Wi-Fi on the right pane.
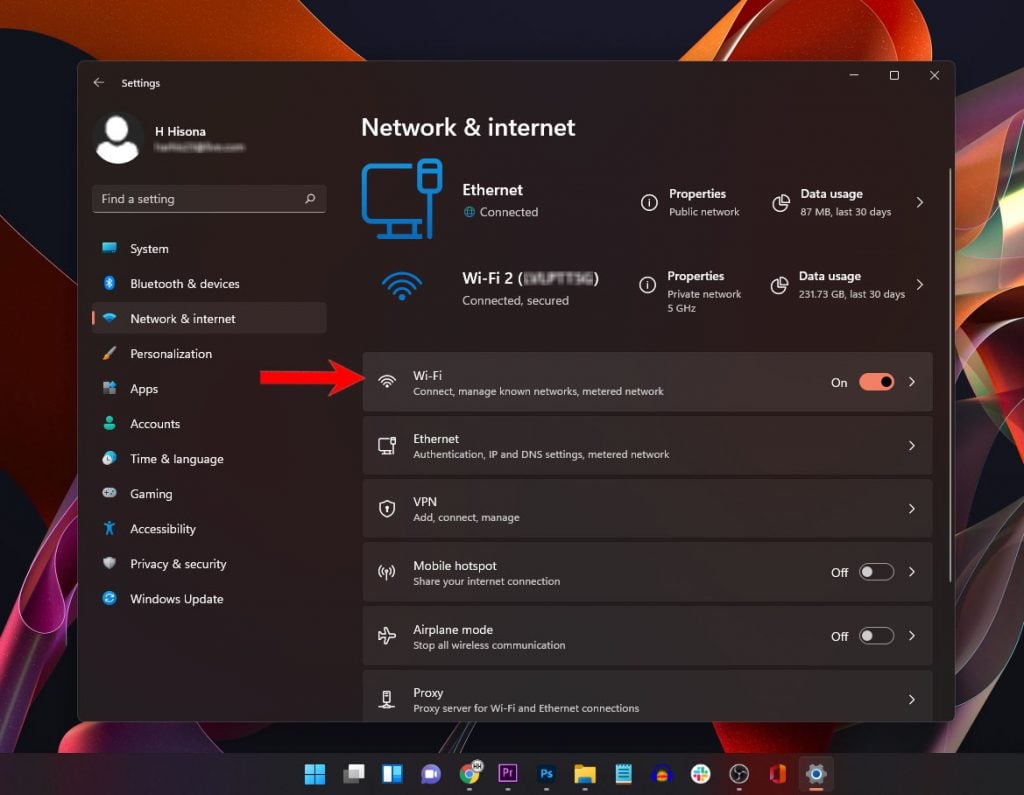
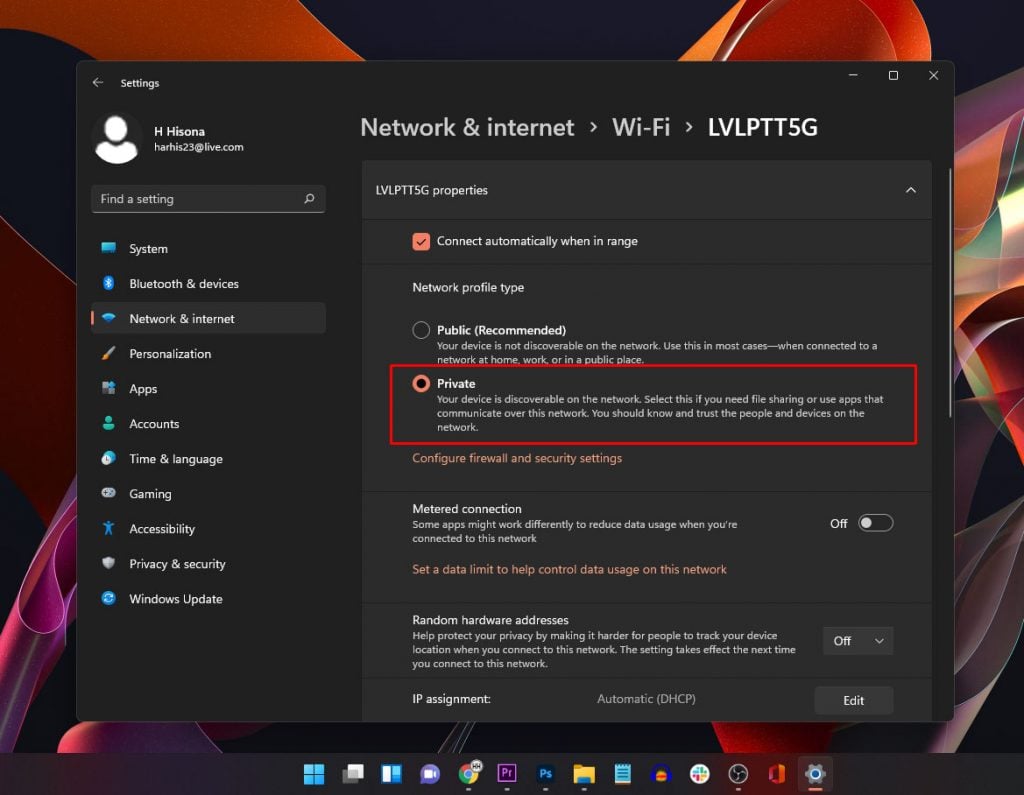
Step 5: Click the name of the Wi-Fi network you’re connected to.
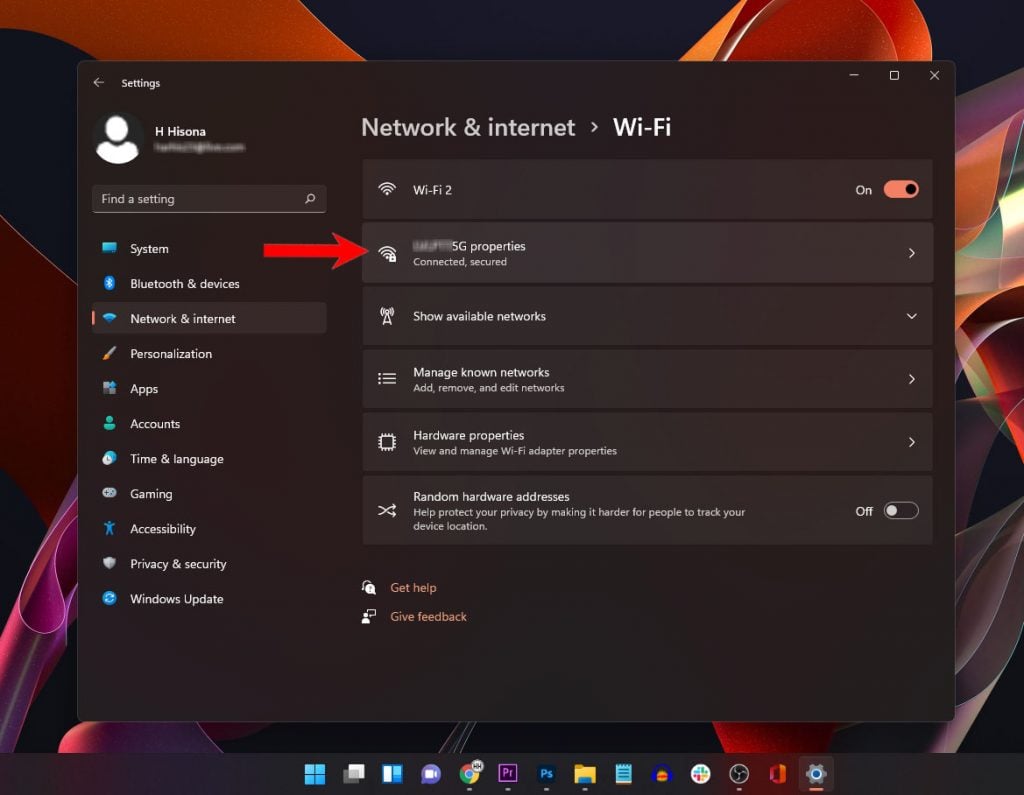
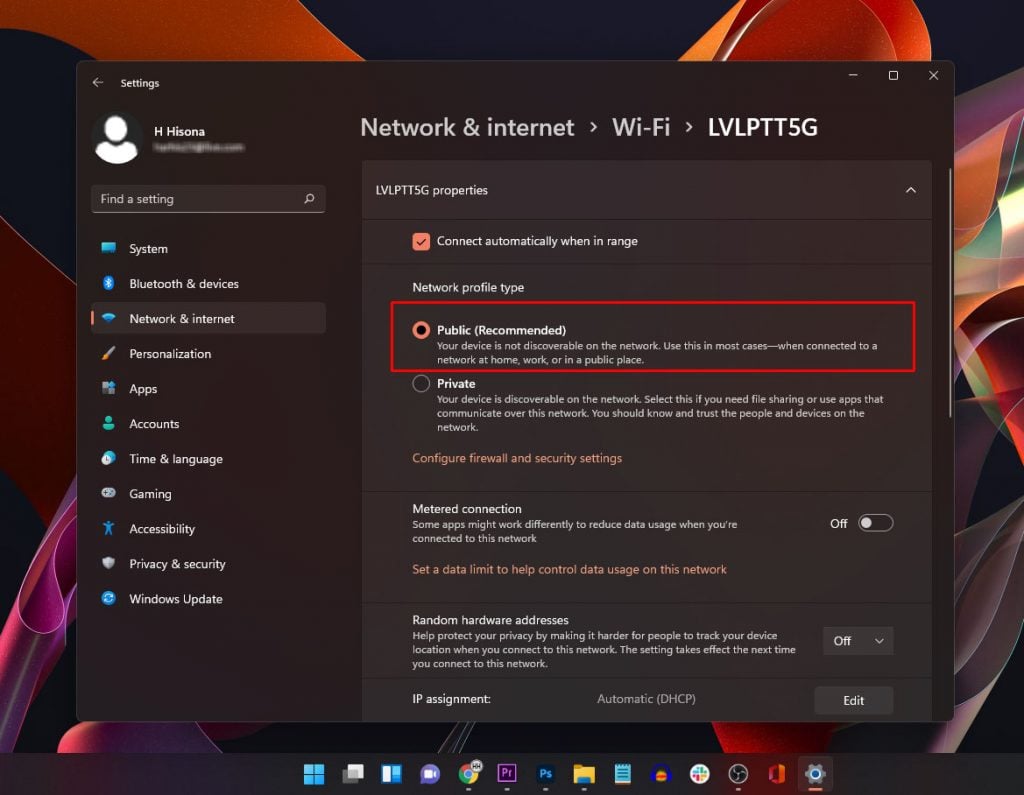
Step 6: Under Network profile type, click Private to select it.
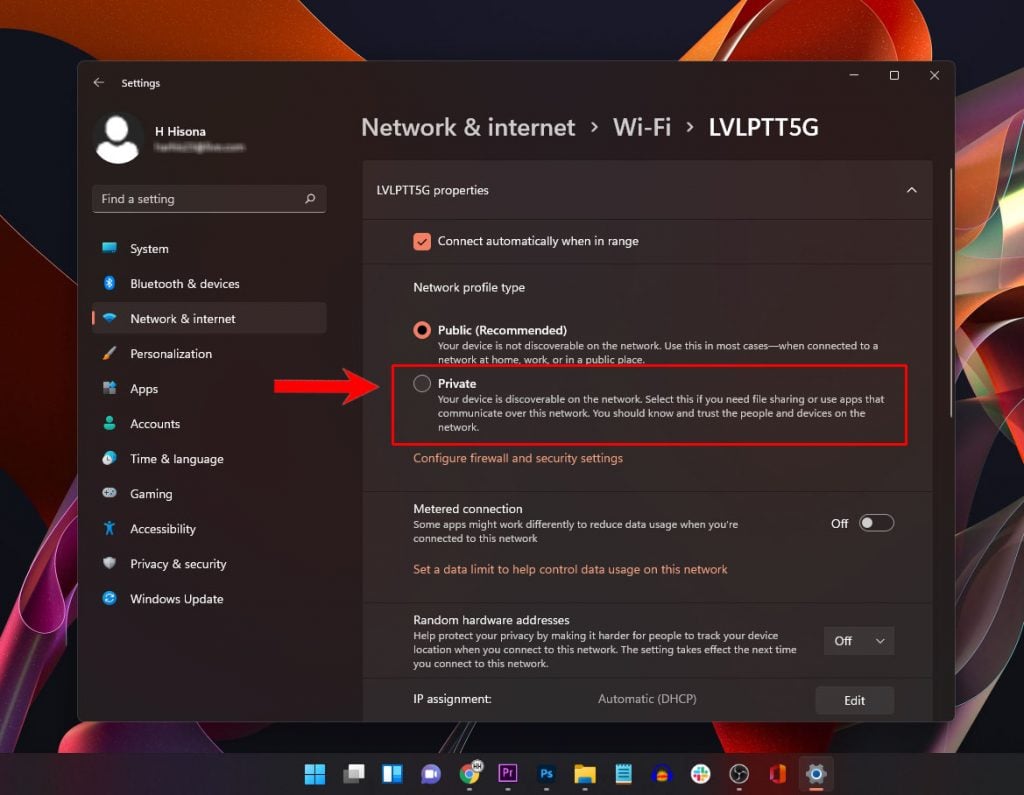
Immediately after that, the Wi-Fi network profile will be changed from public to private. However, if you chose private and want to change it to public, you just have to do the same but select Public instead.
Change an Ethernet Connection to Private
Just like WiFi networks, you can also change the network profile of your wired connection to either public or private in Windows 11. Here’s how you do it:
Step 1: Right-click on the Windows icon on the taskbar to pull up the options menu.
Step 2. Look for and click Settings to open the Settings app.
Step 3: At left pane, look for Network & internet and click on it.
Step 4: Click Ethernet on the right pane.
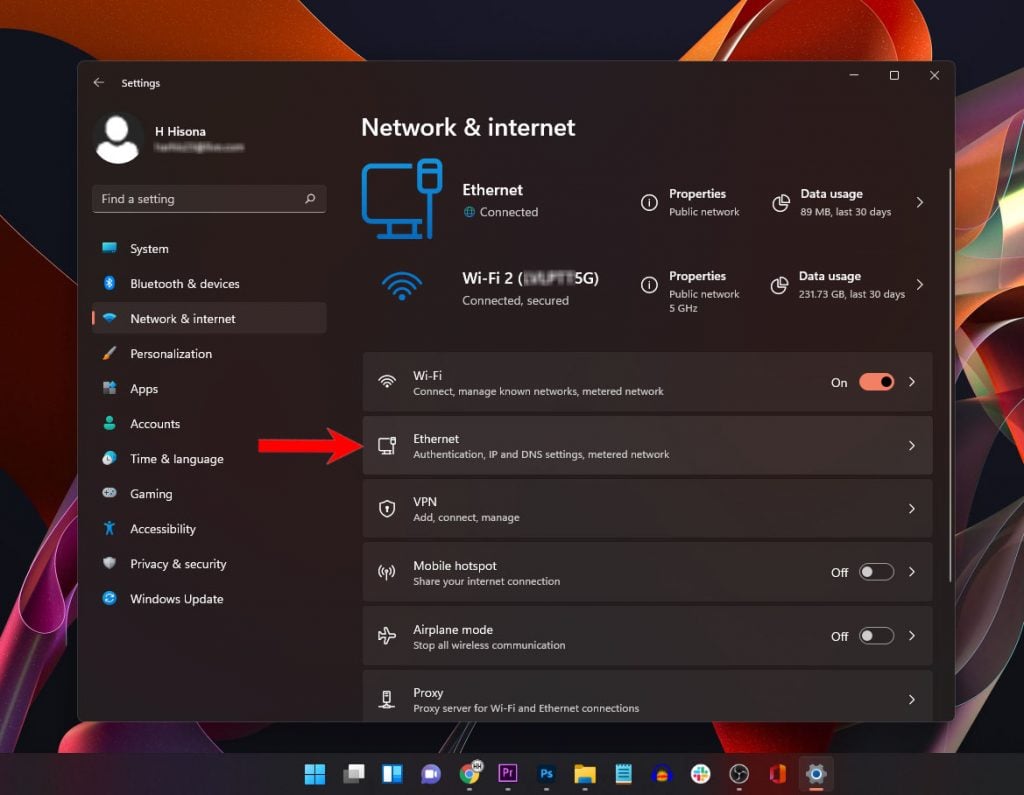
Step 5: Under the Network profile type, click Private to select it.
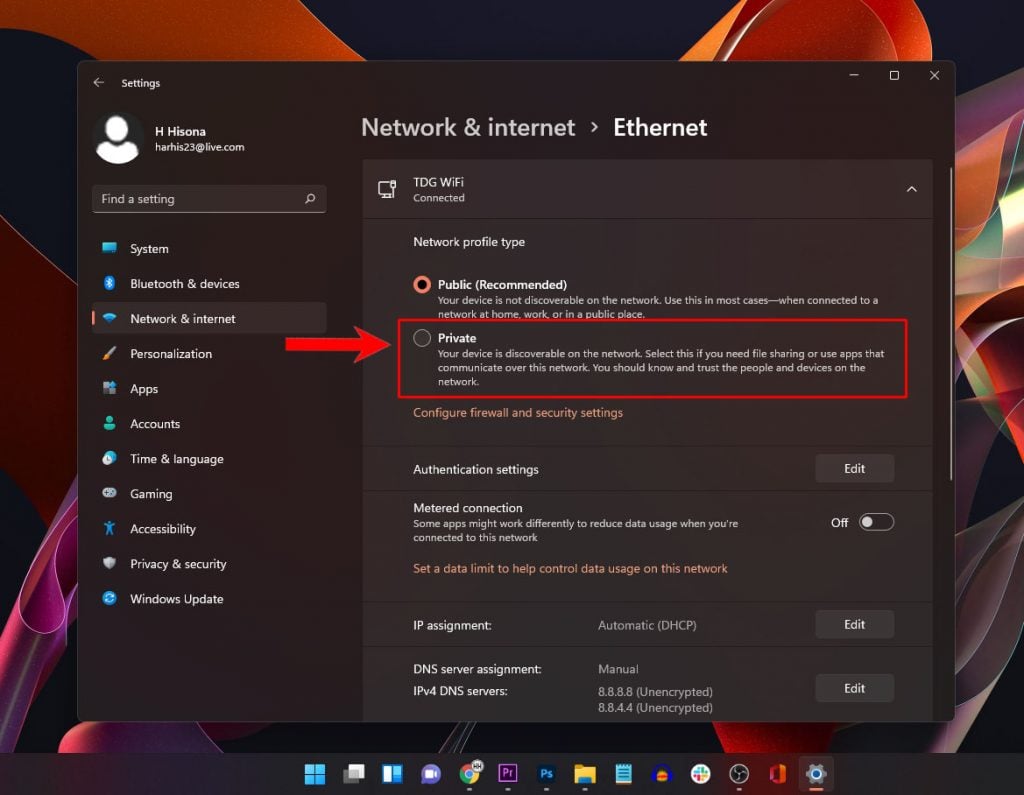
Once changed, file sharing as well as printer sharing will be enabled and all network discovery features can be used.
You don’t need to change any internet settings for the network adapter when switching from public to private or vice versa. The same fact is also applicable to your WiFi network connection.
Basically, those are the things you need to do to access other computers connected to same network.
Firewall Settings for Network Profile
Another way to prevent attacks on your computer is making sure both network profiles are firewalled, especially if you have sensitive files and data.
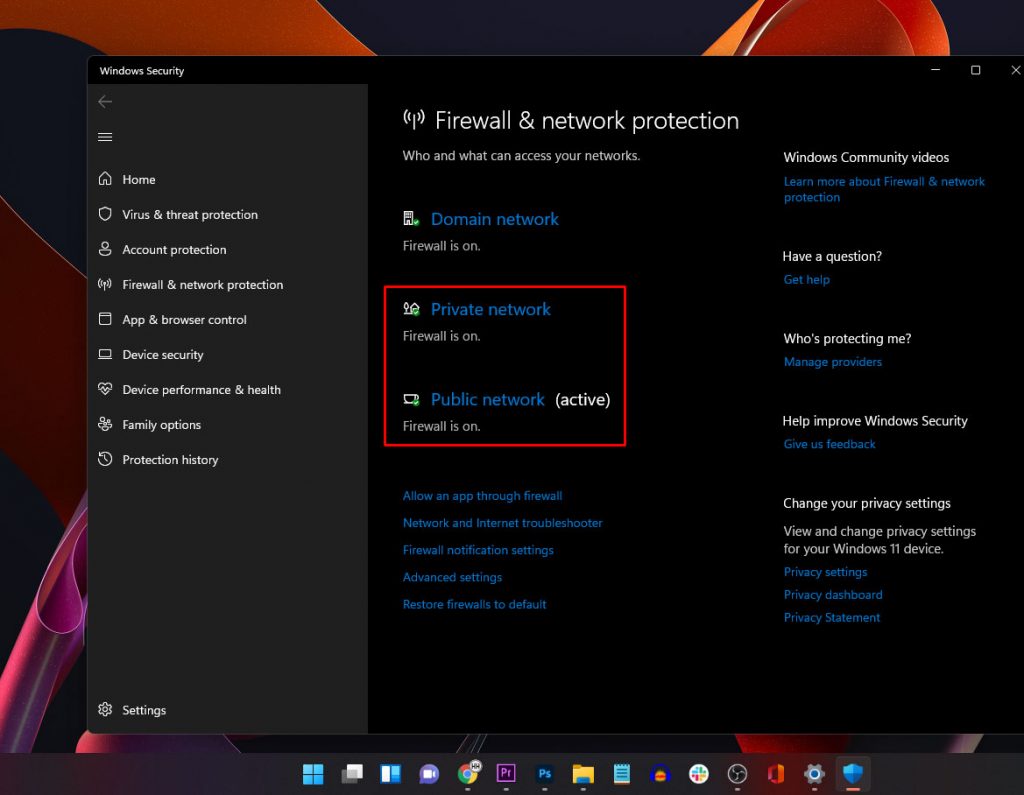
You can choose to disable the firewall for your network and if you really want to do that, you simply have to navigate to your network connection and then click Configure firewall and security settings and then change the firewall settings for your network.
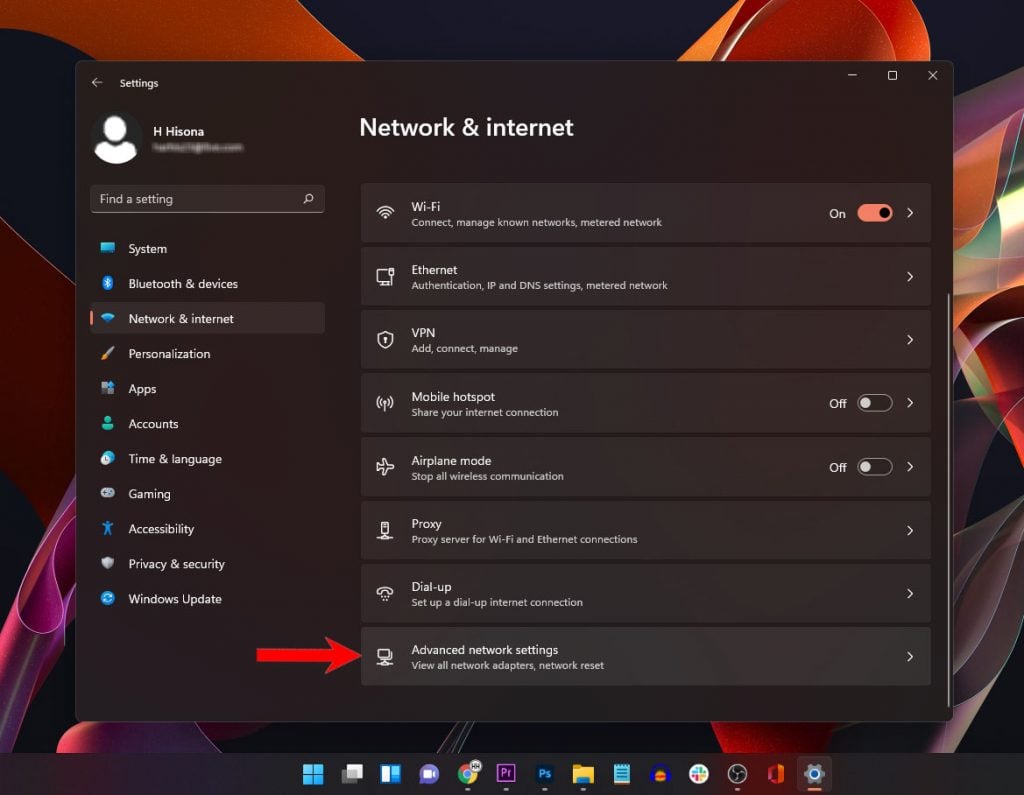
Advanced Network Settings
Under the Advanced network settings menu, you can disable the network adapters of your computer, monitor the data usage of your apps, view your Hardware and connection properties, as well as reset your network. Here’s how you access it:
Step 1: Right-click on the Windows icon on the taskbar to pull up the options menu.
Step 2. Look for and click Settings to open the Settings app.
Step 3: At left pane, look for Network & internet and click on it.
Step 4: Scroll down to the bottom of the screen and click Advanced network settings.
Step 5: Under the Network adapters section, you can disable any of your connection by clicking on the Disable button.

Troubleshooting Network Related Issues
If you’ve changed some Windows settings including your Internet settings but encountered some network connection issues, don’t worry because Windows now allows you to bring all the network settings back to their default configuration.
You can also use the same procedure if you’re having some browsing issues with your computer, or having some other wireless network connection problems such as Bluetooth issues. Here’s what you should do to fix network issues:
Step 1: Right-click on the Windows icon on the taskbar to pull up the options menu.
Step 2. Look for and click Settings to open the Settings app.
Step 3: At left pane, look for Network & internet and click on it.
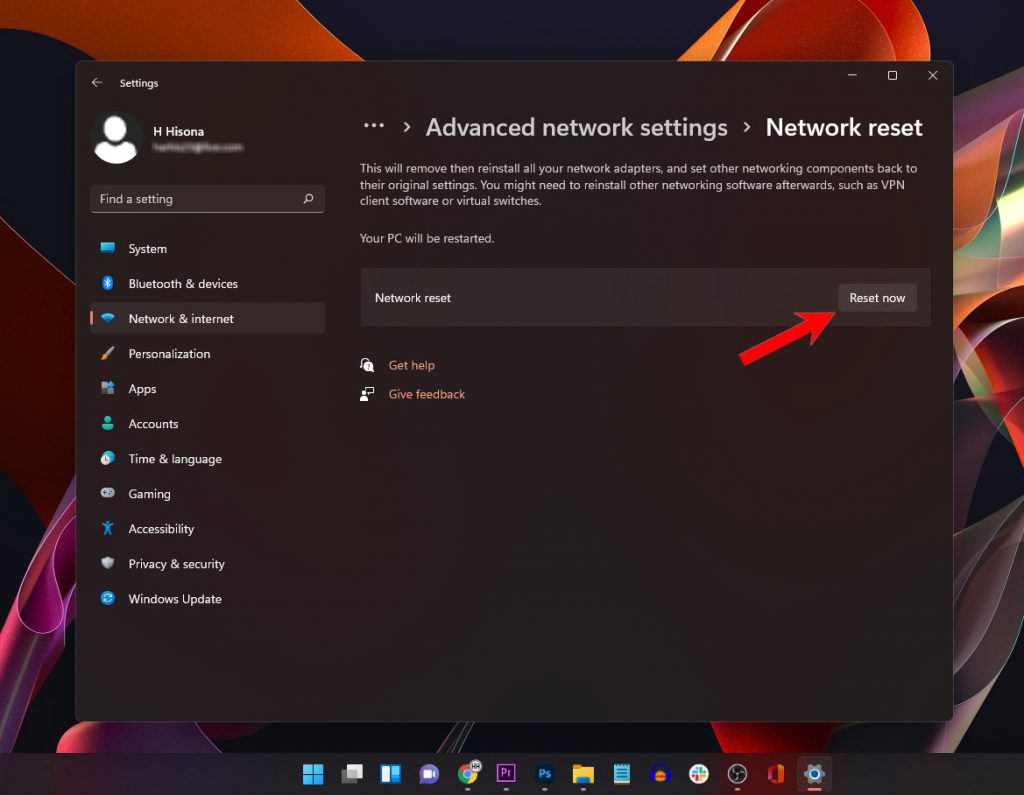
Step 4: Scroll down to the bottom of the screen and click Advanced network settings.
Step 5: Click Network reset.
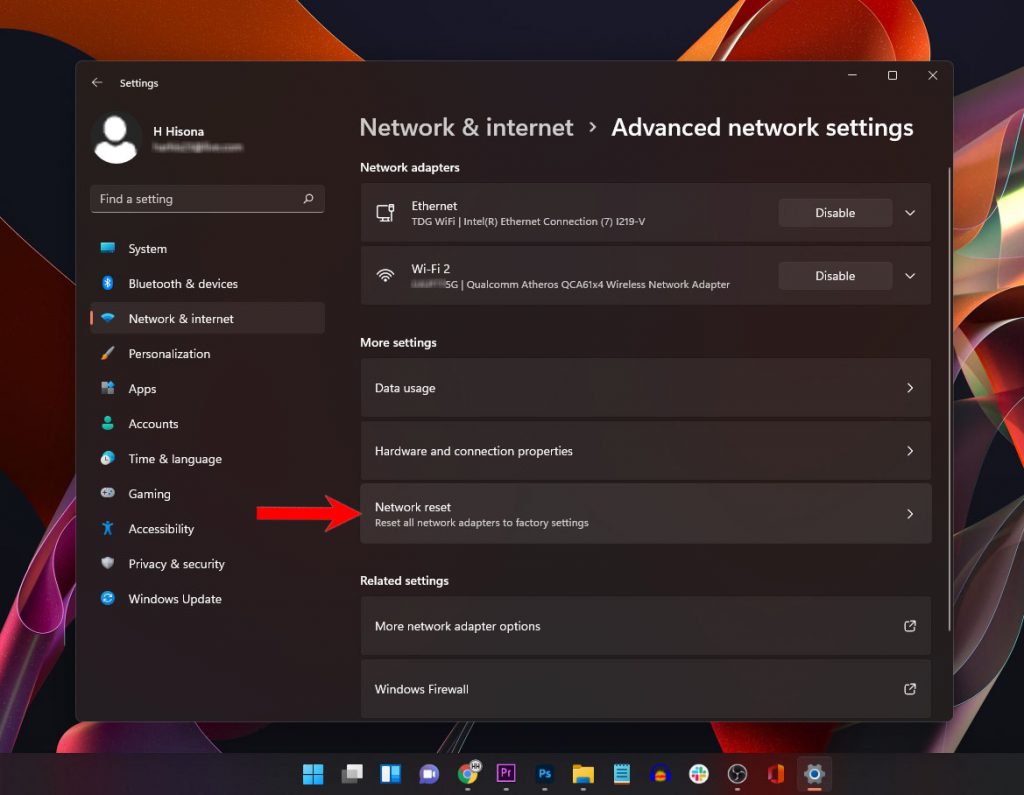
Step 6: Click the Reset now button to proceed.
Once the network reset is finished, restart your computer to refresh the memory.
Some Windows settings and all network configuration will be brought back to their default values when the computer boots up.
We hope that this post can help you one way or the other.
the option public/private hs been removed, I guess… nowhere to be found in Windows 11 Home. Any ideas?
Windows 11: Settings: Network & Internet: Ethernet (ie: A WIRED connection)
There is no option to set public or private.