Best Settings For Layup Timing In NBA 2K24
Perfecting layup timing in NBA 2K24 can be frustrating, but with the right settings, you can significantly improve your chances of making contested shots around the rim. This article will provide step-by-step instructions for optimizing your layup success.
Top tips to greatly improve your Layup Timing in NBA 2K24
Layups require precision timing in NBA 2K24. A mistimed release will lead to endless missed shots, even when wide open under the basket. Follow these tips to greatly improve layup timing:
Use Layup Meter
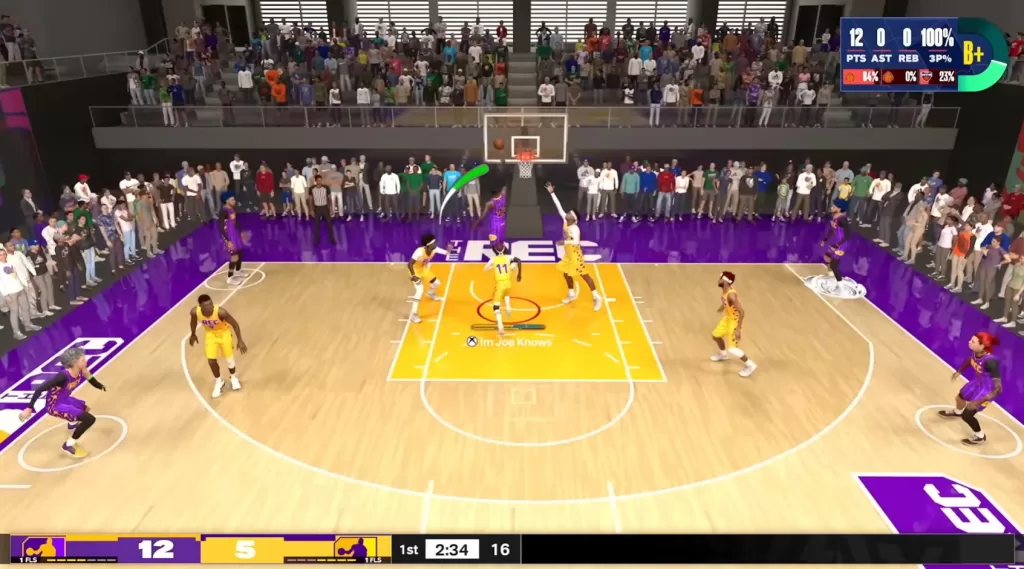
The layup meter provides a timing indicator for your release. While it can fluctuate with contests, it’s a useful visual aid.
It may take some practice to get used to the layup meter. But it gives you a clear visualization of the release window for your timing. Try to release the ball when the meter is near the top, at the apex of the green section. This gives you the maximum chance of still being within the window if it suddenly shrinks due to an opponent’s contest.
Be patient and keep playing games with the layup meter on. Over time, it will help develop your muscle memory for executing layups with perfect timing. Pay attention to how the meter behaves on different types of layups like floaters or reverse finishes. Eventually, you’ll recognize the precise meter motion and release point for optimal timing.
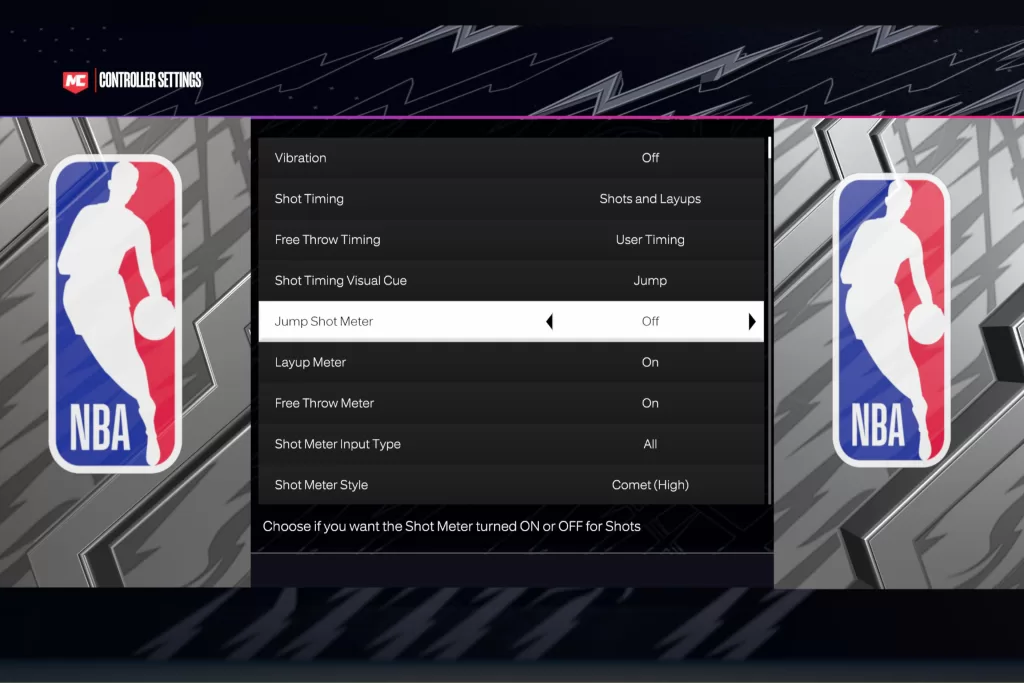
By default, the Layup Meter is enabled so you should be fine. But in case you forget, here’s what you must do:
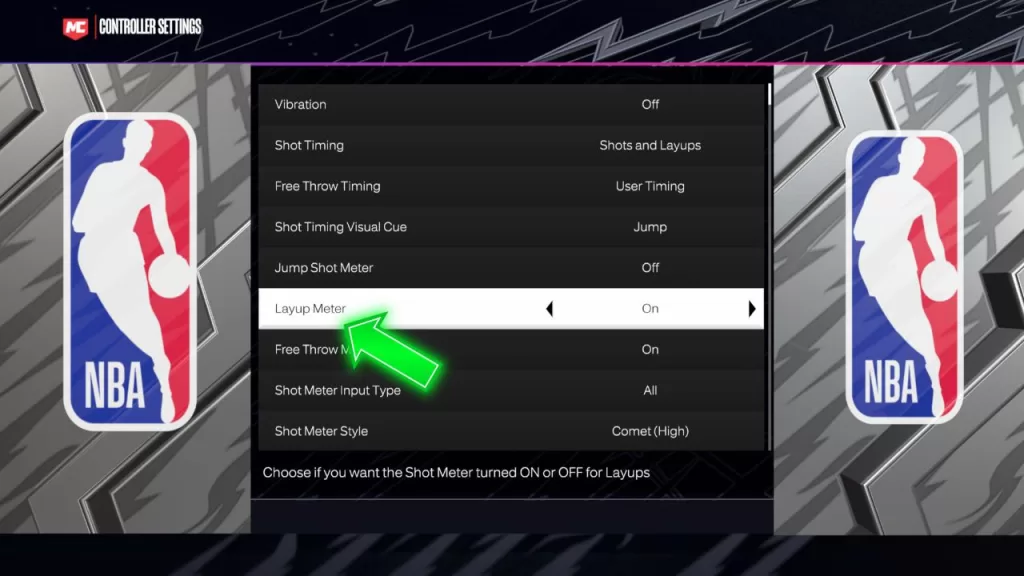
- Go to Settings.
- Select Controller Settings.
- Scroll down to “Layup Meter.”
- Set this to “On”
Master Release Window
When using the layup meter, focus on mastering the release at the very top or apex of the meter. Do not release too early within the green section. Even if most of the window is green initially, a late contest can change it suddenly. Releasing lower in the green risks being pushed outside the window by a closing defender.
Strive to time your release for the very top of the meter, when it is near the maximum. This gives you the best chance of still landing inside a shrinking window when contested. Develop a feel for reaching the peak through regular practice. When contested, the meter may speed up or change, but you’ll retain the muscle memory to release near the apex regardless.
Mastering the upper release point will lead to better consistency finishing layups, especially contested ones around the rim. Reduce frustration from missed open layups by developing proper timing at the very top of the layup meter.
Upgrade Finishing Badges
As you play NBA 2K24 games, you’ll earn badge points to upgrade your MyPlayer. Allocate some of your points into the Finishing category. Badges like Pro Touch, Giant Slayer, and Fearless Finisher are valuable for layup timing.
The higher the badge tier, the more it will expand your green release window on layups. For example, a Bronze badge gives a small boost, but at the Hall of Fame tier, your window will stay wide even on heavily contested attempts around big defenders.
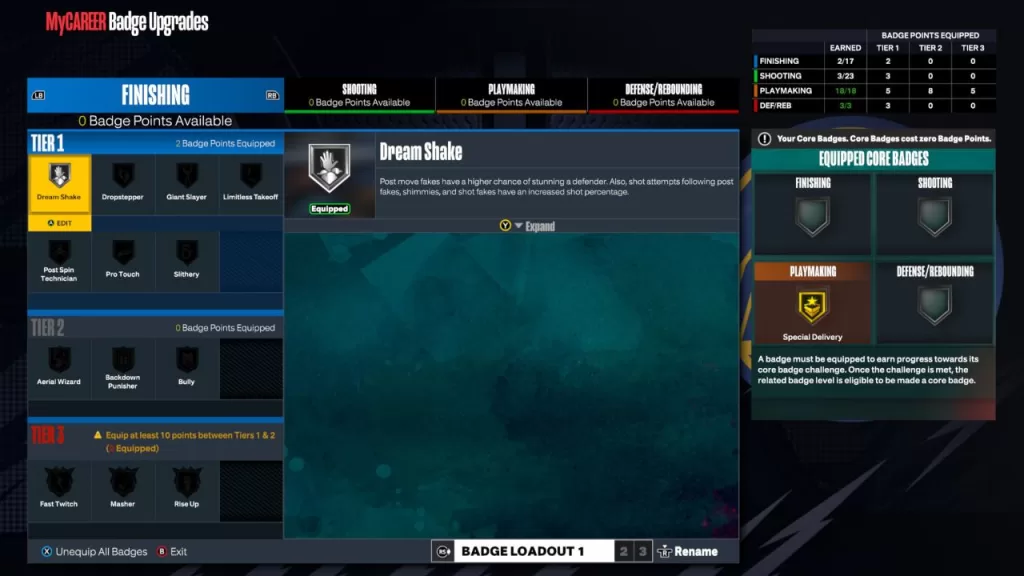
Make it a priority to upgrade your main finishing badges to at least Gold if not Hall of Fame. The increased green window gives you much more leeway for perfect timing. Pair this with mastery of the release point at the meter’s apex.
As you work toward upgrading your badges, be patient with slightly mistimed layups. A Bronze badge makes the release more demanding. But as your badges improve, so will your ability to convert contested looks, even with moderate timing errors.
Practice Layup Types
Not every layup animation suits your game. In practice mode, experiment with moves like floaters, reverse layups, euro steps, and off-foot scoops. How quickly you release timing differs between moves.
Pay attention to the visual cues of how the meter behaves on each move. Some may have a quicker meter motion that fits your release better. Others like floaters may move slower and give you a larger window to time the apex point.
Learn which layup types have an easier, more intuitive release timing for you. Then lean on those trusty moves during games. You may green floaters effortlessly while normal cradle layups throw off your rhythm. Tailoring your go-to moves to match your release capabilities is key.
As you increase finishing badges and improve timing, you can expand your arsenal. But initially, stick with the layup animations that naturally match your release skills. Let go of the notion that you must master every possible type of layup right away. Build confidence in the moves you can green consistently.
Use Smart Layup Packages
Pay close attention to which layup package you have equipped under MyPlayer > Animation in the menu.
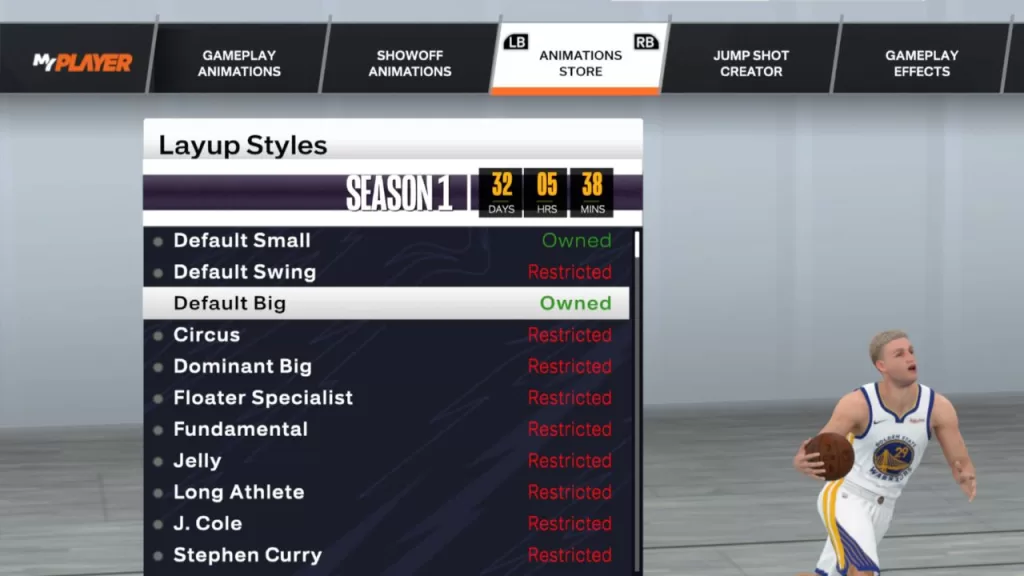
Packages like Long Athlete work well for pure finishers with high driving stats. Others like Circus provide more stylish animations suited for playmakers and shot creators.
Be willing to experiment with different layup packages to find one that clicks with your release timing. The speed and cues will differ between packages. One may match your instincts better than another. Take various packages into practice mode to test them out extensively.
Aim to equip a package aligned with your player build and strengths. Read 2K’s descriptions of what each package excels at. For example, if you’re a slashing wing, Long Athlete is likely a sharp choice to enhance your crafty drives. Keep layup packages tailored to your attributes and scoring style.
Turn Off Shot Meter
Once you’ve completely mastered layup timing, consider turning the shot meter off fully. This removes the on-screen visualization and focuses you squarely on following release cues like player hand motion.
Without the distraction of the moving meter, your timing instincts can sharpen and become second nature. But this is only recommended after extensive practice with the meter first. You need to have the muscle memory engrained before removing the visual aid.
Turn the Layup Meter setting to Off once you feel ready. At first, you may struggle without the meter’s guidance. Be patient and focus on the release feel, not the result. Over time, you should see improved timing consistency without the shot meter’s presence.
This advanced technique puts timing mastery fully in your hands. But make sure to walk before you run. Build a solid foundation with the layup meter first. Mastering releases without it requires unwavering touch and reactions. Only attempt this once truly ready.
Change camera settings
Cameras like Drive open up better sight lines to the rim for timing layup releases. Avoid settings like 2K that zoom in on your player.
The Frustrating Layup Meter In NBA 2K24
A Reddit user illustrates the issues with NBA 2K24’s layup meter. They explain how the green section will frequently change at the last millisecond as defenders contest, ruining their timing. Though wide open, a defender within a foot shrinks the window and causes a miss.
This validates the importance of mastering your release at the top of the meter. The user says he timed shots based on the initial green window size. But a last-second contest changed the window, moving their release outside and turning a likely make into a miss. Timing for the top gives you the best chance of still being inside a shrinking window.
Ultimately, the player finds the inconsistent layup meter very frustrating. It causes repeated misses on shots that seem like they should be automatic around the rim. However, the tips above regarding shooting badges, release mastery, and layup animations can offset the meter problems and have you finishing contested layups with confidence.
Best Settings for Layup Timing
To recap, here are the most important NBA 2K24 settings for layup timing proficiency:
- Layup Meter: On
- Layup Timing: On
- Shot Feedback: All Shots
- Pro Stick Function: Default
- Shot Timing Visual Cue: Push
- Takeover Icon: On
- Shot Meter Settings:
- Size: Medium
- Style: Arrow
- Location: To The Side
These settings will provide the necessary tools and visual feedback to learn the precise layup timing needed to convert tough looks in traffic. Take them into practice mode to find your groove.
Pair these settings with finishing and shooting badges plus solid layup animations for your player build. With enough practice, you’ll be Euro-stepping through defenses and scooping shots over bigs with ease. Don’t let the finicky layup meter ruin your scoring chances. Master these tips, and become an elite finisher at the rim.