How to Activate Galaxy Note 20 Dark Mode
This post will walk you through customizing the display settings on Samsung Galaxy Note 20 and enable night mode. Read on to view a step-by-step walkthrough on how to activate the Galaxy Note 20 dark mode interface.
Samsung Dark and Light Themes
One of the significant benefits of setting a darker theme on your smartphone or tablet is evading from eye strain. With dark mode enabled, you will be able to use your device more comfortably during day and night without having to endure some adverse eye reactions from the blue-light emission.
Samsung devices including the recently rolled out Note phablet have light theme set as the default display interface. In case you’re wondering how to access the new Galaxy Note display settings where you can switch to the dark mode interface, I’ve laid a step-by-step demo that you can use as personal reference.
And here’s how it’s done.
Easy Steps to activate the Galaxy Note 20 Dark Mode
Activating the dark theme in most Samsung devices that are running on the same Android version as that of the newest Galaxy phablet is typically carried out through these steps. Actual screens and menu items may vary depending on the device model and service provider.
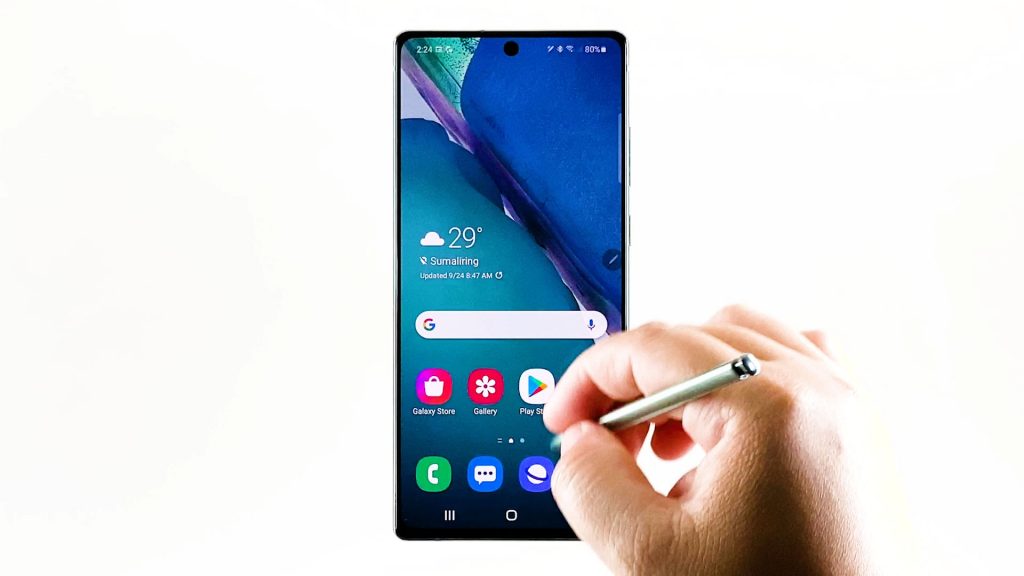
- To get started, access the Apps viewer by swiping up from the bottom of the Home screen.
On the Apps viewer, you will see different app icons or shortcut controls.
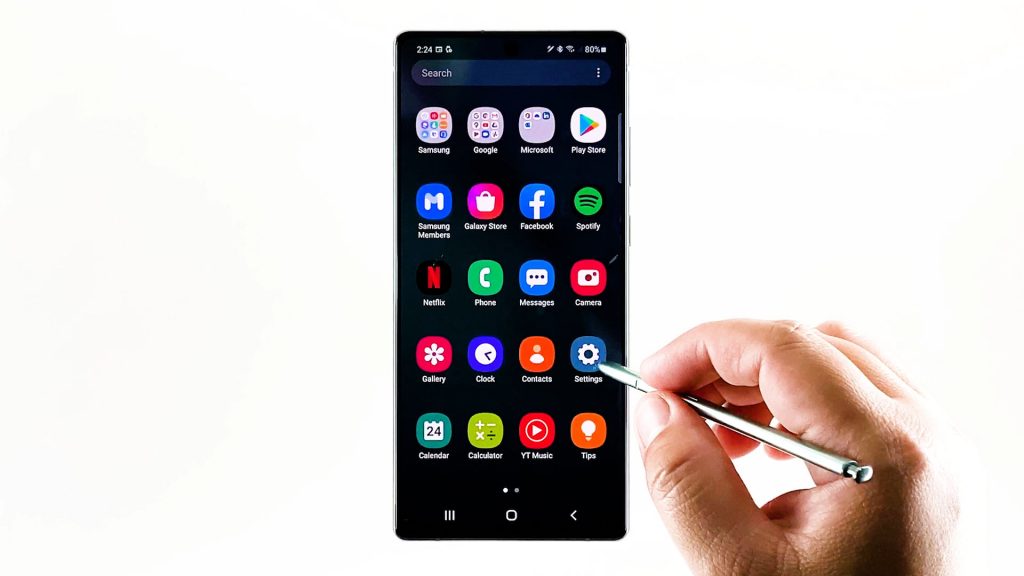
2. Locate and then tap the Settings icon.
Doing so will launch the main settings menu, highlighting the basic and advanced features you can manage and utilize.
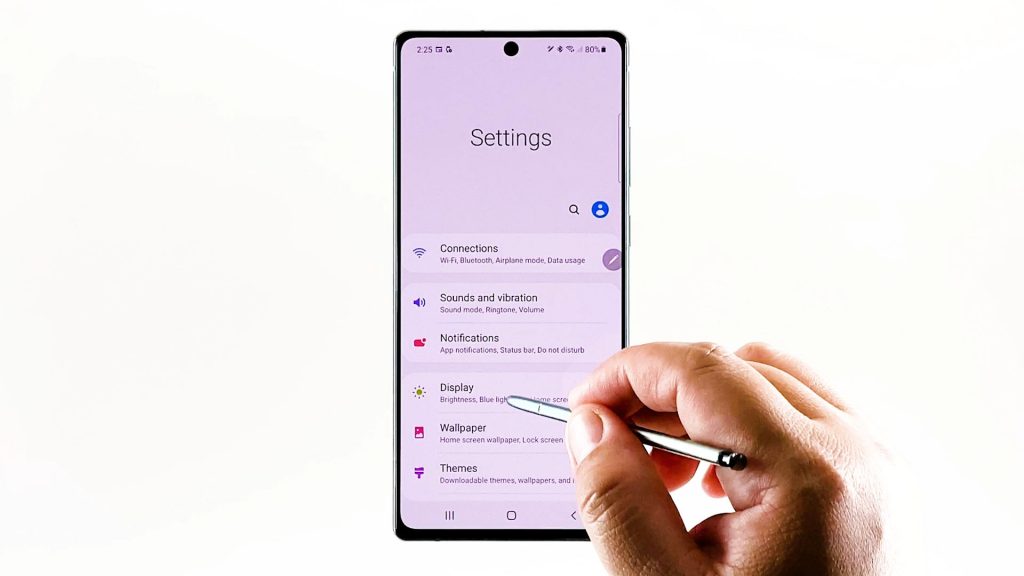
3. To access the display settings, tap Display.
Another screen opens prompting the current display settings on your phablet.
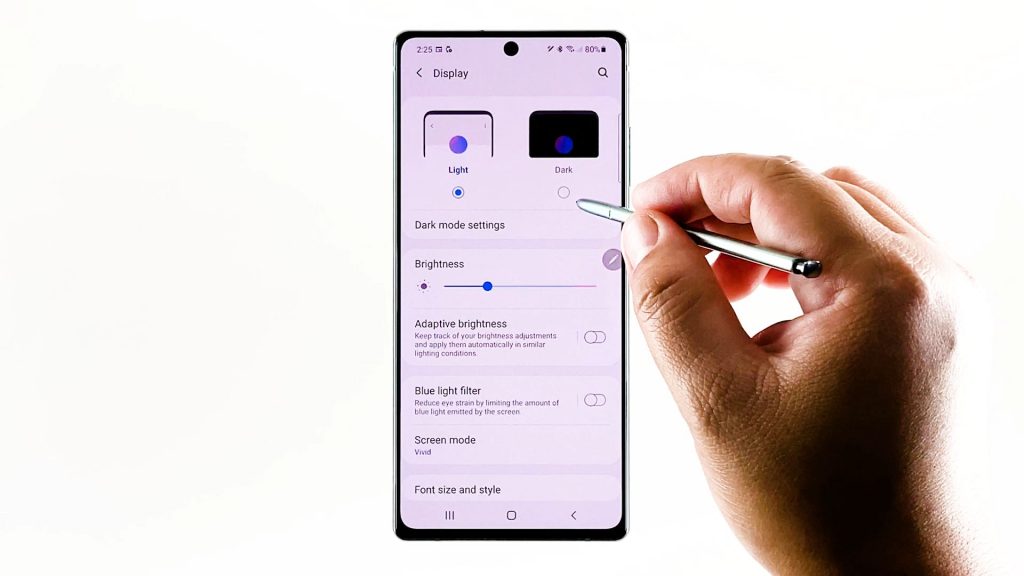
Here, you can see that the selected theme is Light.
4. To switch to a dark theme, simply tap the switch beneath Dark.
Doing so will enable dark mode on your phablet as the changes take effect instantly.
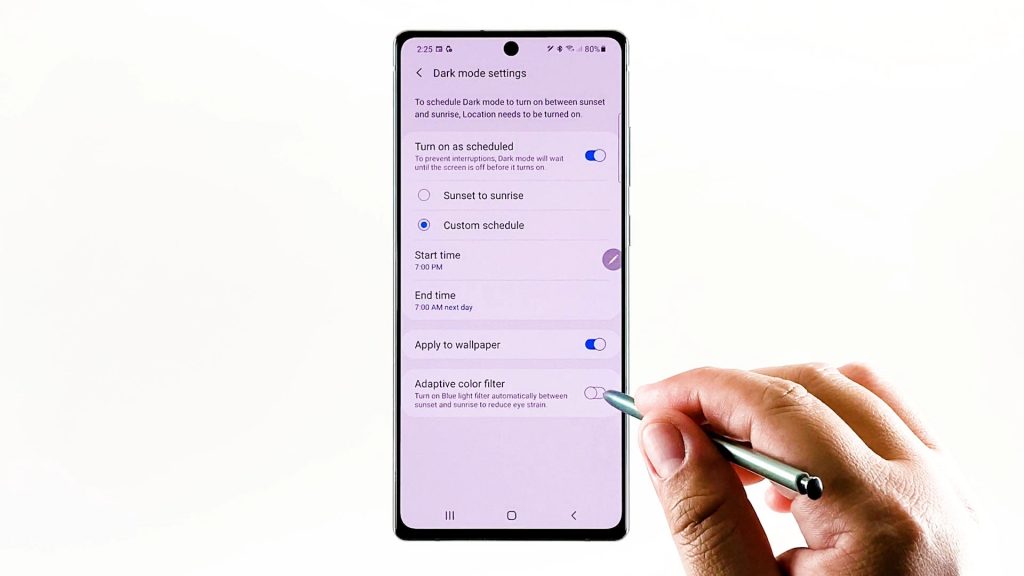
5. There is also an option to customize dark theme. To do this, simply tap Dark mode settings.
On the next menu, you will see relevant options to turn on or off.
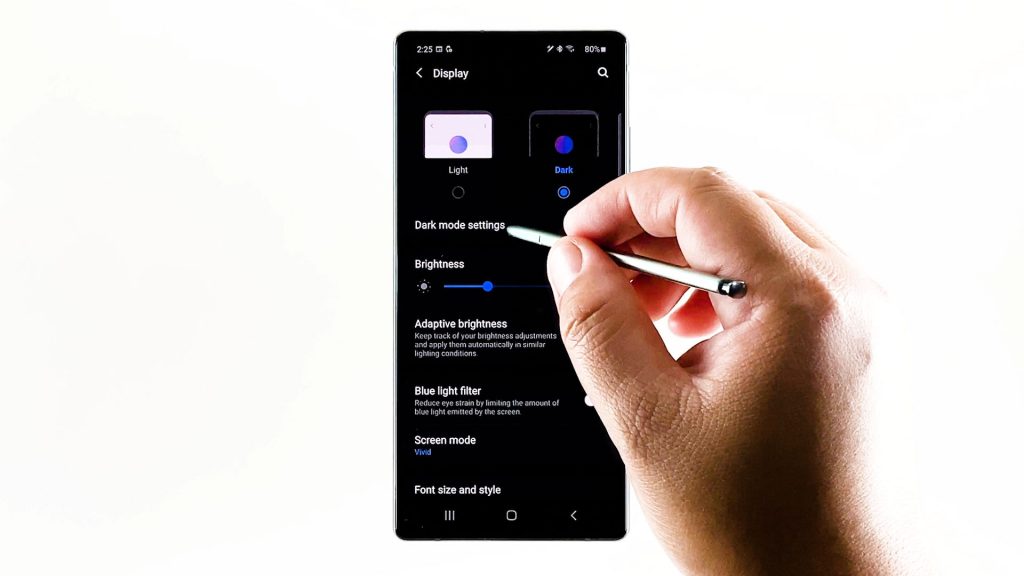
6. If you wish to enable dark mode only on a specific time of the day, tap to enable the Turn on as scheduled switch.
With this feature enabled, your device will automatically switch to dark mode from sunset to sunrise.
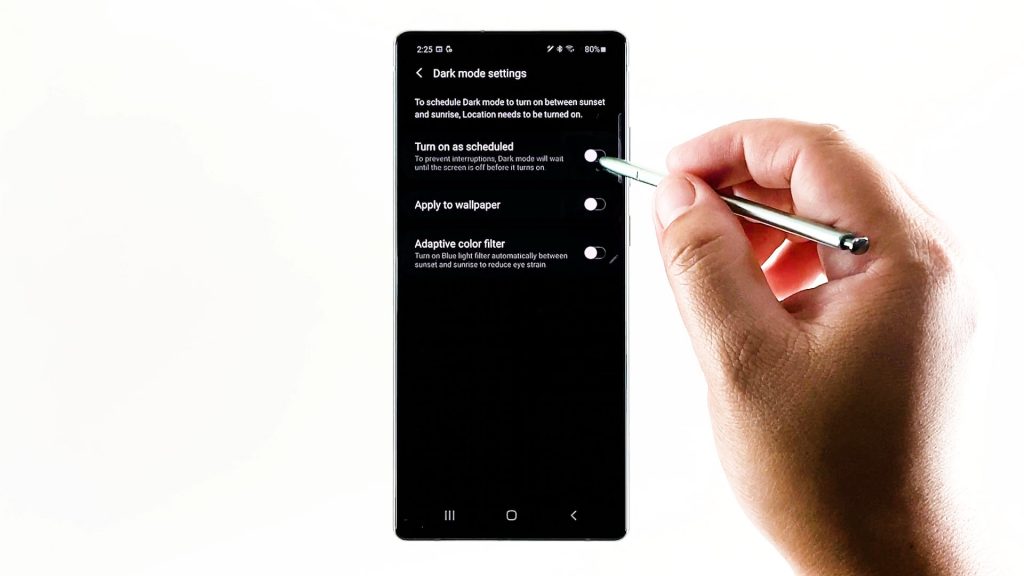
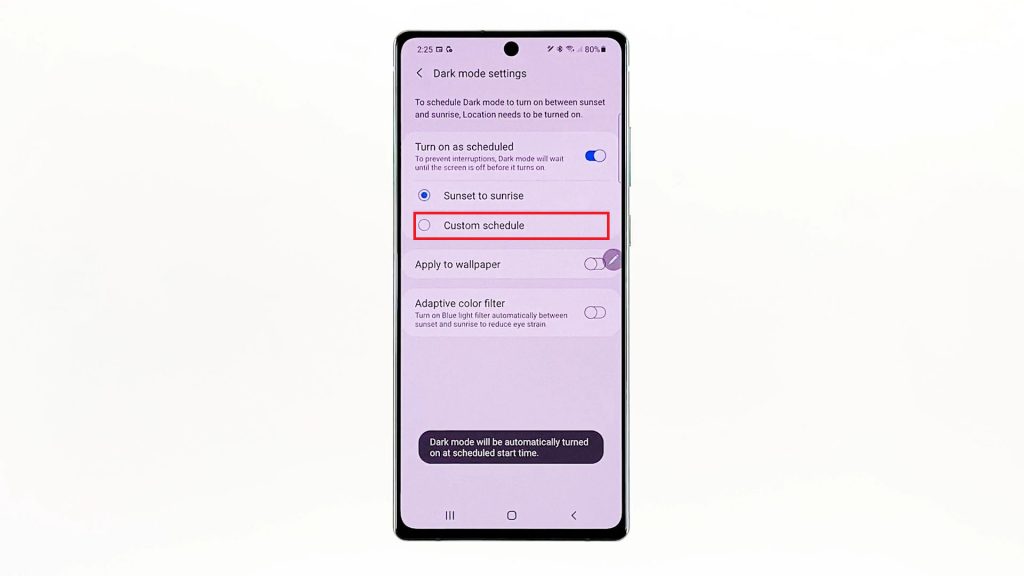
7. If you don’t prefer automatic switching to dark mode, tap Custom schedule and then specify the start time and end time accordingly.
8. To apply the recent dark mode settings to your current wallpaper, tap to turn on the Apply to wallpaper switch.
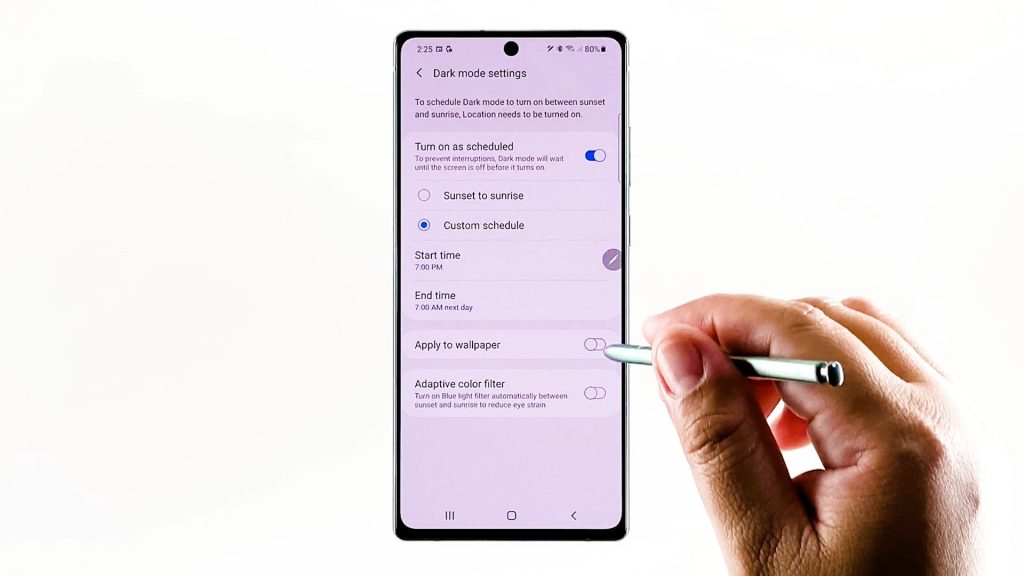
9. You may also opt to enable Adaptive color filter if you want to turn on blue light filter automatically between sunset and sunrise. Doing so will help reduce eye strain especially from prolonged usage.
10. If prompted, tap to allow Blue light filter to access the device’s location. You may opt to allow all the time or allow only while using the app.
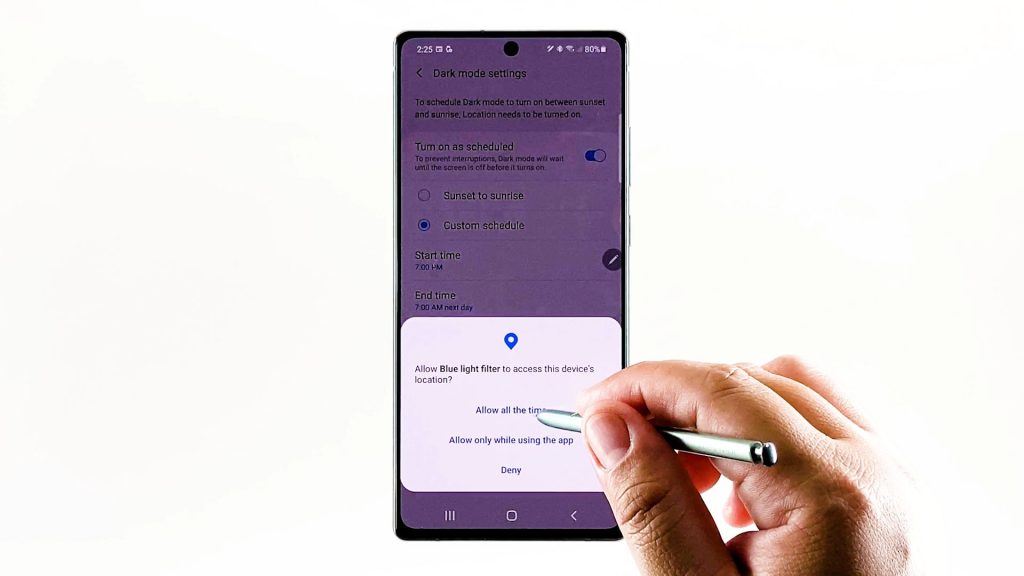
To view how dark theme looks on your device’s interface right away, select Sunset to sunrise and then try loading any app.
You can always switch back to light theme if you don’t feel like using the device in dark theme. Just head back to the display settings and then toggle to turn on the Light button instead of Dark.
The screen will then change back to light mode.
And that’s it!
Dark Mode Not Working on Apps
In Android 10, enabling the dark mode switch should likewise enable dark mode on all supported apps simultaneously. If that did not work on some of your apps, then you may have to consider verifying if dark mode is supported on those apps. It is also possible that you will need to manually enable dark mode on those particular applications.
In the case where some apps tend to flicker while on dark mode, verify and ensure that these apps are up to date. Oftentimes, such problems are attributed to some minor software glitches that can easily get rectified by an update that contains the fix patch.
Video Tutorials
To view more comprehensive tutorials and troubleshooting videos on different mobile phones and tablets, feel free to visit The Droid Guy channel on YouTube anytime.
You Might Also Want to Read: