How To Fix Sony Earbuds Won’t Charge
Charging Sony earbuds is very simple and easy but there are times when you encounter not charging issues. Fortunately there are potential fixes that you can do if your Sony headphones won’t charge. Check it out below.
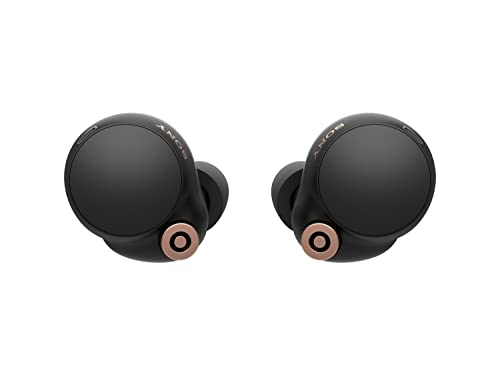
| Product | Brand | Name | Price |
|---|---|---|---|
 | Sony | Sony WF-1000XM4 | Check Price on Amazon |
* If you buy through links on our site, we may earn an affiliate commission. For more details, please visit our Privacy policy page.
Buy it now on Amazon
Fix Sony Earbuds Won’t Charge
There are several reasons why Sony headphones is not charging such as issues with the USB adapter or the USB port. When there is not enough supply of power to the headset from the USB adapter or USB port, the headphone will not charge. Another possible reason is an outdated firmware or outdate software of your computer. Then, when Sony earbuds batter is faulty or needs replacement, the headphone will not charge. Lucky for you we have gathered troubleshooting steps that you can do to fix the problem.
Before going through the solutions, make sure to consider the following options why earbuds won’t charge.
- If you have been using the earbuds for a long time, there’s a possibility that the charging indicator lights will not illuminate when you try to charge the device. If that happens, try to plug the earbuds and then wait for the charging indicator lights. It usually takes some time.
- If Sony headphones was exposed to extreme heat or cold temperatures, charging issues can occur.
Solution 1: Check power supply
The very first thing that you need to when you are experiencing charging issues is to check if there is an incoming power from the USB port if charging on a computer or check the power outlet.
As mentioned, when Sony earbuds is not charging it may be caused by insufficient power supply to your earbuds from power source.
Here’s how to fix this, perform the following checks below:
- Check the same ac adapter: make sure adapter is not damaged or faulty. A faulty adapter will not supply power to your earbuds. Replace a faulty adapter and then check if issue is resolved.
- Check wall socket: making sure wall socket or wall outlet is working.
- Check USB port: When charging Sony earbuds to a computer, make sure USB port on the computer is working properly. If not, try using another USB port from your computer to confirm.
Solution 2: Determine charging source
If you use a wireless charging pad to charge your Sony earbuds, make sure that charging case is placed on the wireless charging pad properly. Incorrect positioning of the charging case to the charging pad slow charging process or often not charging at all issue can occur.
If after correctly placing the charging case to the charging pad and charging begins, then the positioning is most likely causing the not charging issue. However, if issue is not resolved proceed with the next solution.
Solution 3: Use a Genuine USB charging cable
In order for your Sony earbuds to not experience charging issues, always make it a habit to always use the supplied usb charging cable when you are charging the headphone. Most of the time, third party charging cables are not designed to supply the power that the headphone needs or will not charge your earbuds.
Place Sony earbuds to its charging case. Connect a supplied usb type c cable (supplied usb cable) to its charging case and then check if charging is completed.
Solution 4: Clean headphones charging port
Presence of dirt on the headphones charging ports can cause charging issues. Make sure to clean the charging ports.
Here’s how to clean the headphones:
- Use a dry soft cloth then wipe off any water or moisture present on your Sony headphones. To prevent moisture, make sure not to leave headphones in a cold environment.
- If you want to clean the noise isolation earbud tips, make sure to wipe it dry with a soft cloth. Never wash tip of earbuds with water.
To clean the charging ports of Sony headphones charging case and charging ports of headphones:
Simply wipe that charging ports on both the charging case and headphones using a soft dry cloth. Carefully wipe the charging ports using the cloth. Never use compressed air to clean the charging ports in an attempt to remove dust from the port as it might cause dust to dislodged further into the inside of the headphones and charging case.
Solution 5: Check Indicator lights on the headphone
The indicator lights will determine if the headphone is indeed not charging and fixes can are done based on the indicator lights.
If indicator repeatedly flashes red 2x when the earbuds are placed in the charging case, make sure to leave it charging for some time with an ambient temperature between 15 °C and 35 °C.
Solution 6: Charge a different mobile device using the same AC adapter
To determine if the ac adapter is faulty or damaged, try charging a different mobile device using the same ac adapter or usb port.
If the device charges using the same ac adapter, clean the charging port of the charging case of your earbuds and check if charging process can be completed.
However, if using the same ac adapter or usb type c cable on another device and it is still not charging, the ac adapter may be damaged or faulty. Try replacing it with a new ac adapter and then try charging the device again.
Solution 7: Update Software or Firmware
An outdated software or firmware can cause issues with your device, in this case charging issues. To prevent issues with your earbuds, make sure software and firmware are updated. Updating fixes bugs that may have caused the issue to occur.
Solution 8: Reset the headphones
If after checking headphones and performing the solutions mentioned, try resetting the headphones.
Here’s how to do it:
- Place headset to its charging case then close the lid of the charging case.
- Connect the charging case to an ac outlet using the supplied usb type c cable and the USB ac adapter.
- Open and close the lid of the charging case up to 5 times. Do this within 20 seconds. A red indicator repeatedly flashes.
- If green indicator light flashes 4 times, this means the reset process is complete.
Solution 9: Restore to Factory settings
If none of the solutions mentioned did not resolved the issue, you may need to restore headset to its factory settings.
To do this:
- Place headset to its charging case then close the lid of the charging case. Do not close the lid of the charging case.
- Press and the touch sensors of both the earbuds (left and right) for 10 seconds or until indicator flashes red on the charging case.
- Release pressing the touch sensors when the indicator starts flashing green 4x.
Restoring to factory settings means deleting all saved settings, deletes all paired devices and you may need to set up and pair headphones again.