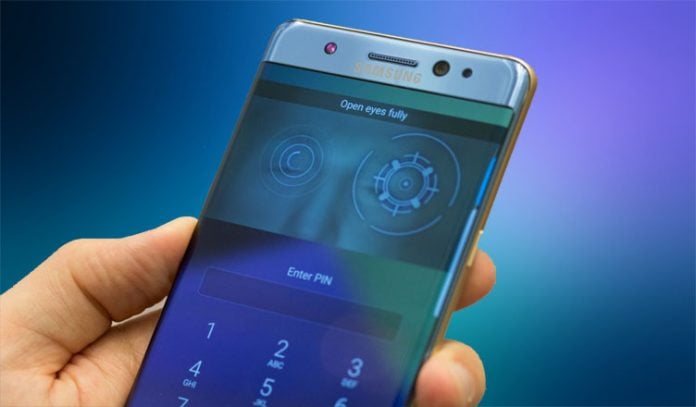
How to Set Up and Manage Accounts and Profiles on your Samsung Galaxy Note 7 [Tutorials]
This post will help you set up your accounts and profiles including a #Samsung account, Google account, and other Email accounts on the new Samsung Galaxy Note 7 (#Note7) smartphone. Samsung’s latest Note flagship device the Galaxy Note 7 is by far deemed the most powerful Galaxy Note variant that comes with an impressive aesthetic design. It is packed with a number of new and more enhanced features and services for a promising smartphone user experience. Should you just have your own share of such a hefty handset, then this content will help you get the most from it.
But before anything else, if you have an issue with it, make sure you visit our Note7 troubleshooting page for we have already started supporting this device. We may have already provided solutions to problems that are similar with yours so take time to browse through it and see if there are helpful posts for you. You can also contact us by completing our Android issues questionnaire. Provide us with sufficient information about the problem so that we can give you more accurate solutions.
- Adding a Samsung Account on your Galaxy Note 7
- Updating Samsung Account Information on your Galaxy Note 7
- Adding a Google Account on your Galaxy Note 7
- Setting Up Email Account on your Galaxy Note 7
- Removing an Account from your Galaxy Note 7
Adding a Samsung Account on your Galaxy Note 7
Setting up or adding a Samsung account enables you to access Samsung exclusive apps and services as well as exclusive offers and perks. If you haven’t done this yet and you need help doing so, then follow these steps:
- Tap Apps from the Home screen.
- Next, tap Settings.
- From the Settings screen, scroll to and tap Cloud and accounts from the given options.
- Tap Accounts to continue.
- Tap Add account under the Accounts menu options.
- You will see a list of different types of accounts to create. Tap Samsung account to proceed with your Samsung account setup.
- If prompted, enter your Samsung account email ID and password. Be sure to enter the correct information to avoid errors.
- Tap the Sign In button to continue.
Follow the onscreen instructions to complete the process.
Updating Samsung Account Information on your Galaxy Note 7
If you’ve already set up a Samsung account on your new phone and need to make some changes to any of your personal information, the following steps will help you do it. Just follow these procedures in case you need to update your Samsung account contact information or password from your new device:
- Tap Apps from the Home screen to get started.
- Next, tap Settings.
- From the Settings screen, tap to select Cloud and accounts.
- Tap Accounts to continue.
- From the Accounts menu options, tap Samsung account. You will then see your Samsung account details.
- Tap Profile under General section.
- On the next screen, you can edit your Samsung account password if you want. After you make necessary changes, tap Confirm to continue.
- From the Samsung Account screen, you will see two tabs namely the Info and Security tabs.
The Info tab contains your basic information. To make changes to any of the available
items, just tap the Edit (pencil) icon located next to the item or information to be updated.
For example, to edit your Name, tap the Edit icon next to Name and then make the changes. Do the same thing to other attributes.
Once you’re done making changes to your basic information, tap the Security tab. On this section, you can see the password settings for your device as well as the device information. You can change your Samsung account password and view other devices associated with your Samsung account.
If you wish to change the password, simply tap the Change button and follow the onscreen instructions to complete the process.
- After making changes to your phone’s password settings, tap the Info tab.
10 Review your edited information. Again, tap the Edit icon next to the information you need to modify, if needed.
- Confirm your changes and then tap Close once you’re done updating your Samsung account details.
Adding a Google Account on your Galaxy Note 7
The following steps will help you set up or add a Google account to your new Galaxy Note smartphone and have access to your Gmail emails on the go. Setting up a Google account on your device will also keep Google apps including Gmail and Play Store in sync for use across multiple devices. Here’s how to get started:
- Tap Apps from the Home screen.
- Next, tap on Settings.
- Scroll to and tap to select Cloud and accounts from the Settings screen.
- Tap Accounts to proceed.
- Tap Add accounts to view all available account types to set up.
- Tap to select Google from the list.
- Enter your Google email or Gmail email address. Be sure to include the @gmail.com and then tap Next to continue.
Note: In case you still haven’t created a Gmail account and want to have one, tap the ‘Or create a new account’ option and then follow the onscreen instructions to complete the process.
- Enter the correct password for your Gmail email account and then tap Next.
- If prompted with the terms of service and privacy policy, read and review the information and then tap Accept to agree and proceed.
- Read and Review the Google services information and then tap Next to complete the Gmail account setup process on your device.
Setting Up Email Account on your Galaxy Note 7
Just like the other prior Galaxy devices, you can also set up or add your personal email account to the Galaxy Note 7. The following steps will help you set up personal email accounts such as POP3, IMAP, and Microsoft Exchange ActiveSync and start checking personal emails on the go.
- Tap Apps from the Home screen to get started.
- Next, tap Samsung.
- Tap to select Email from the Samsung menu options.
- Continue by tapping on Add New Account.
Note: Alternatively, you can just go to Apps-> Settings-> Cloud and Accounts-> Accounts and then follow the onscreen prompts to complete the process.
- Enter your email address and password on the given entry fields.
- To proceed with automatic setup, tap Sign In. Selecting this method will allow your device to try to complete the setup process by searching your email server settings.
If you opt to setup the account manually, then tap Manual Setup. In this case, you will need to enter the required server settings for your email account.
To continue with this guide, tap Manual Setup.
- Tap to select the type of email you want to setup. To proceed with this guide, tap POP3 Account.
- You may use the default settings or modify them if needed.
- Once you’re done with the server settings, tap Sign In to continue.
Note: If the server settings are incorrect, you will see a screen asking you to confirm your settings and try again. In this case, enter the correct server settings. You may need to contact your email provider for the correct server information if necessary.
- Wait for your device to attempt to connect to the server using the settings you have entered. If the connection is successful, you will be prompted with the Sync schedule screen.
- Specify or select your preferred sync options or how you want your phone to sync with that account.
- Once you’re done making selections, tap Sign In.
- From the Edit Names screen, you can give the account a name and enter the name you want to appear on your outgoing messages.
- Tap ‘Done’ to complete the process.
Note: Follow the same instructions with POP3 account setup, when setting up an IMAP account.
Removing an Account from your Galaxy Note 7
If you’ve mistakenly added an account and want to remove it from your device, these steps will help you get this done. Again, it is recommended to remove an account from your device if it is no longer in use, or you no longer want it to be synced with your device. It’s one way of freeing up some space of your phone’s internal storage. Once the account has been deleted, you will no longer have access to any of its data. Here’s how you do it:
- Tap Apps from the Home screen.
- Tap Settings.
- Scroll to and tap Cloud and accounts.
- Tap Accounts to continue.
- Tap to select the account you want to remove. To proceed with this guide, tap Google from the Accounts section.
- On the Google screen, tap the Menu icon represented by three-vertical dots located on the upper-right of side of the screen.
- Tap Remove account from the menu options.
- If prompted with a warning, tap the Remove Account option to confirm action. Wait for the device to complete the Gmail account deletion process.
And that would be all for this tutorial. Keep posted for more tutorials and how-to articles to populate our dedicated Note 7 page on this site.
CONNECT WITH US
We are always open to your problems, questions and suggestions, so feel free to contact us by filling up this form. This is a free service we offer and we won’t charge you a penny for it. But please note that we receive hundreds of emails every day and it’s impossible for us to respond to every single one of them. But rest assured we read every message we receive. For those whom we’ve helped, please spread the word by sharing our posts to your friends or by simply liking our Facebook and Google+ page or follow us on Twitter.