How to Send SOS Messages on Samsung Galaxy Note 20
This post will help you enable and set up Send SOS Messages on your Galaxy Note 20. Read on if you need help configuring your new Samsung smartphone to make it all set to send an emergency alert to your primary contacts whenever an emergency situation arises.
Samsung SOS Messages
One of the key features that you should first enable on your new Samsung smartphone is the Send SOS Messages. By doing so, you can be assured that your device is ready for emergency situations. With Samsung’s emergency feature, you can post a quick alert to your emergency contacts by pressing the power key 2 to 3 times. Aside from the alert, your emergency contacts will also get a 5-second audio recording and pictures from both the rear and front cameras.
These photos and audio files can be viewed via MMS messages. Using this information, your emergency contacts will be able to determine your exact location and get there at the soonest time possible.
To achieve all these, you will need to do one thing and that is to enable the SOS feature on your device.
If you’re wondering how to get this done on your new Galaxy Note 20, then this video will help you get started.
Steps to Set Up the Note 20 Send SOS Messages Feature
Be sure to keep your primary contacts’ information ready before you proceed.
1. When ready, go to the Home screen and then swipe up from the bottom of the display. Doing so will launch the Apps viewer.
Here, different icons or shortcuts to built-in and downloaded apps are lined up.
2. Locate and then tap the Settings icon.

Another menu opens, highlighting the basic and advanced features you can use and customize.
3. Scroll down or up to view more items. Then, tap to select Advanced features.
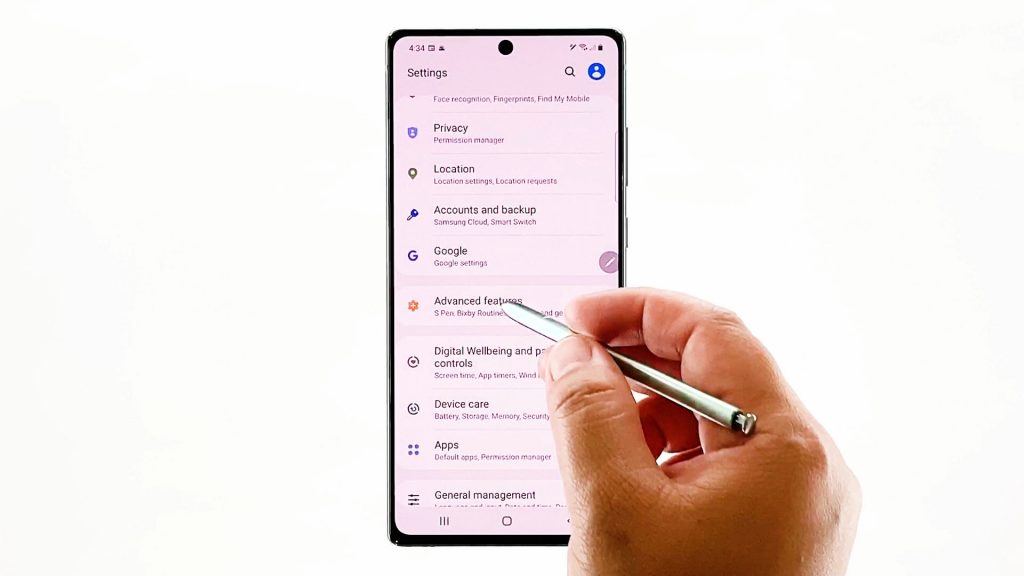
Another screen will launch. On this screen, you will see a list of all the advanced features of your device including S Pen, Side key, Link to Windows, Direct share and more.
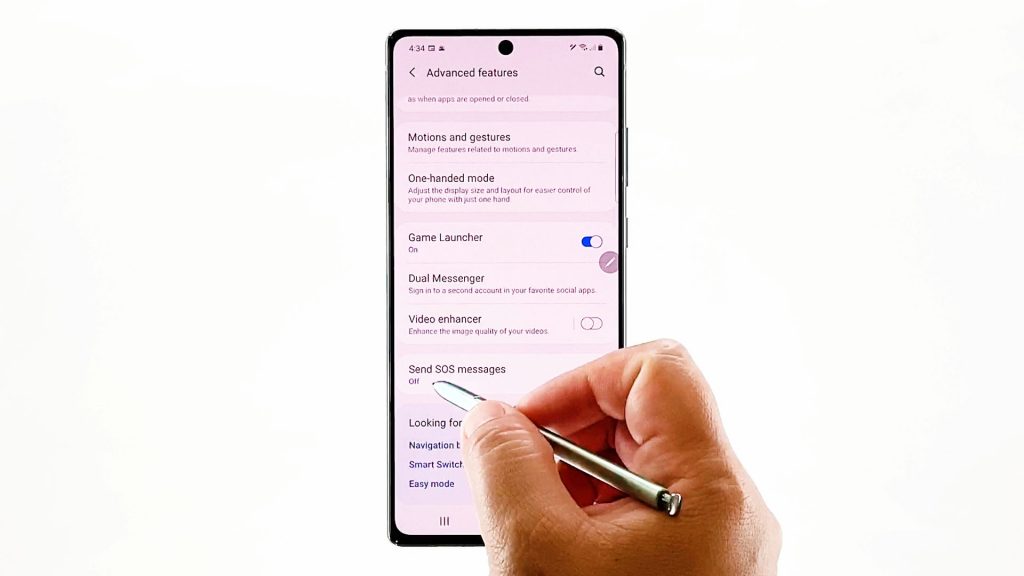
4. Scroll down again to view additional information. At the bottom of the list is the Send SOS messages. As you can see, the status beneath it still says OFF and this means that it is still disabled. Tap on it to proceed.
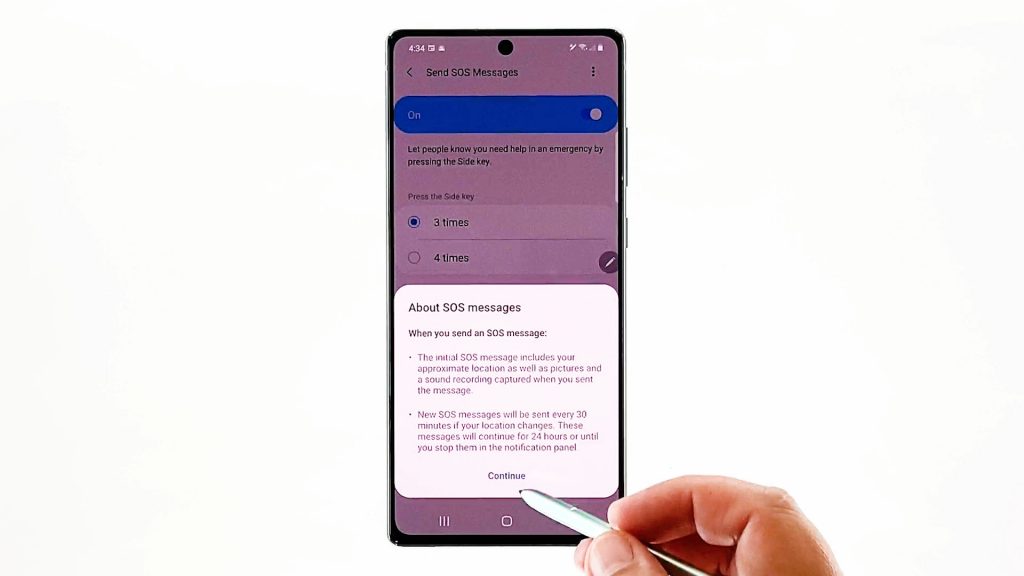
On the next screen, you will see relevant attributes. You can use any of these features to customize your SOS messages. But first, toggle the Off switch to turn on the emergency Messages feature.
5. A pop-up window opens, prompting a quick overview of the emergency feature and when to use it. Read and review the message and then tap Continue.
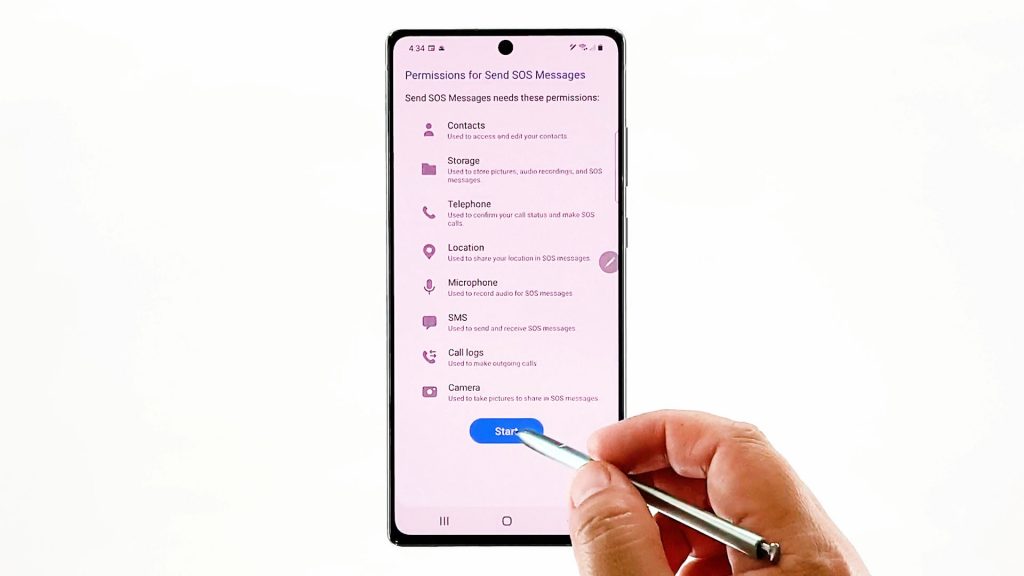
6. On the next screen, you see permissions for this emergency feature to work as intended. Review the details and then tap Start to proceed.
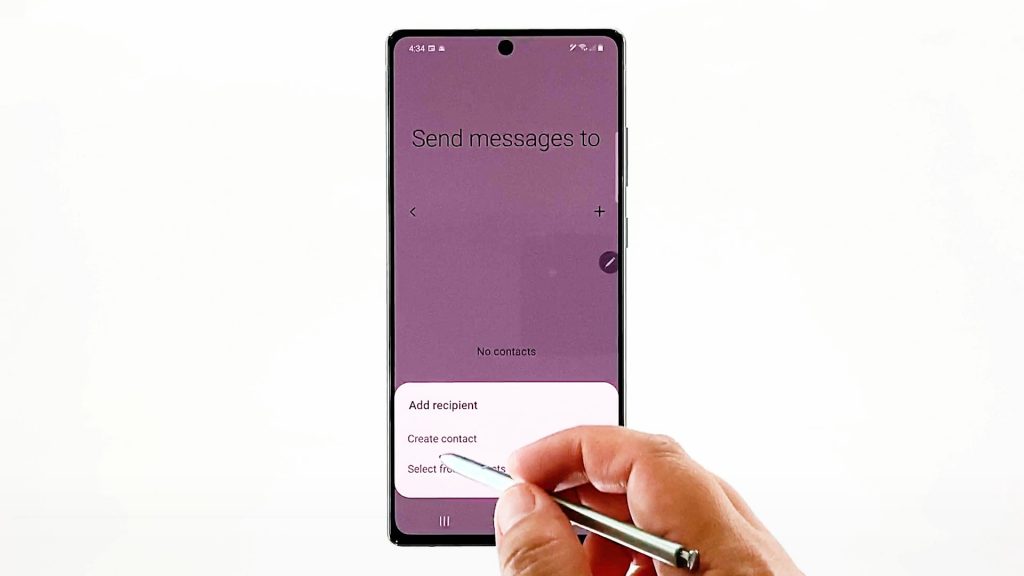
Another pop-up menu appears beneath the display. Here, you’re given three main choices as to how you’d like to indicate emergency contacts. You can choose to add a recipient, create contact or select from contacts.
7. To proceed with this demo, let’s just create a new one so tap Create a contact. Enter the contact details including the name and phone number and then tap Save when done.
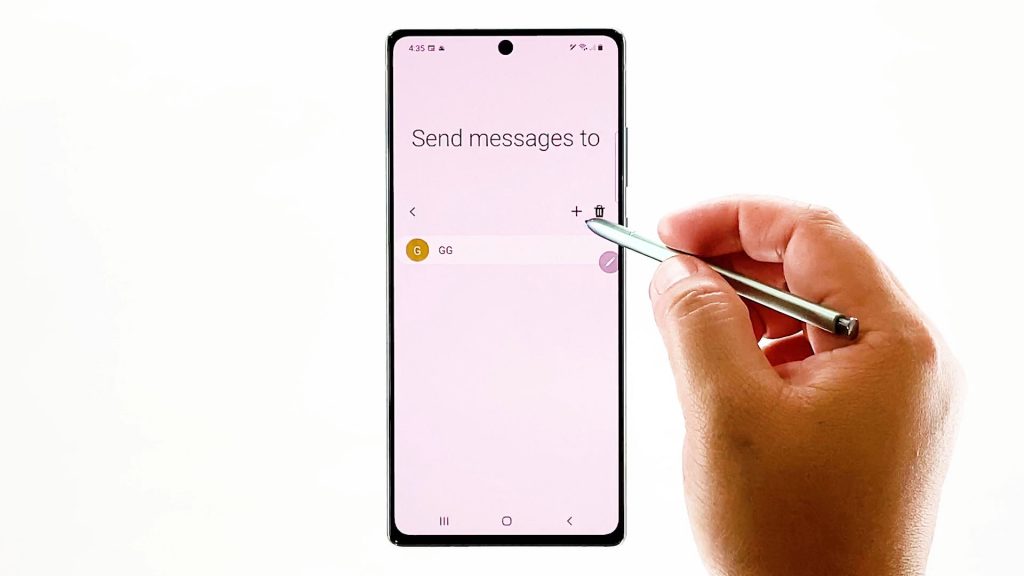
The new contact will appear on the Send messages to menu.
8. To add another emergency alert recipient, simply tap the Plus (+) sign on the upper-right side of the screen, before the trash icon. Then, follow the rest of the onscreen instructions to finish adding the details.
Once you’re done specifying primary or emergency contacts, tap the back key to return to the main menu.
Here, you can alter the default settings and re-configure them to make the feature work according to your own preferences.
You can set your device to trigger the SOS feature by pressing the Side key 3 or 4 times.
Also make sure that the switches next to attach pictures and attach audio recording are turned on.
Important reminder:
Please bear in mind that the message being sent out may not be free of charge. To avoid incurring extra charges for SOS messages, talk to your carrier and verify if charges do apply to this kind of service.
How does it work
To check and see how it actually works, try to create and forward a sample SOS message to your emergency contacts by quickly pressing the Side key 3 or 4 times. If you’ve enabled the SOS messages options, pictures and audio messages should also be included in the SOS message.
To view the status of the SOS message, simply swipe down to access your notification panel. You should see the Send SOS messages with the actual status beneath it.
One the SOS message has been sent, a link straight to Google Maps will be provided to the receiving emergency contact. They can use this link to locate your exact location. The photos and audio files that came with the SOS message will also be viewable via MMS.
Common Issues with SOS Messages
Normally, your phone should post an SOS message whenever the power key is triggered unless the feature is disabled in settings. If you are certain that it is turned on but for some reason it doesn’t work as intended, then it’s more likely just a random system glitch. To deal with random errors like this, carrying out a soft reset or restarting the device can help.
That said, turn the phone off for at least 30 seconds and then turn it back on.
Allow it to finish loading up everything and then retry forwarding the SOS message. If that doesn’t help, try to change the activation trigger of the feature from 3 clicks to 4 clicks of the power key or vice versa.
Also remember that for the SOS Message to work properly, your device must have a stable network connectivity, GPS or Wi-Fi information, and sufficient battery. Furthermore, the accuracy of the location information and timely delivery of the services may likewise be affected by some environmental factors like your surroundings.
Hope this helps!
More Video Tutorials
To view more comprehensive tutorials and troubleshooting clips on different mobile phones and tablets, feel free to visit The Droid Guy channel on YouTube anytime.
You might also want to read: