Samsung Galaxy S7 Email Account Set Up and Management [Comprehensive Guide]
Welcome to our first tutorial series of the latest flagship device from #Samsung, the Galaxy S7 (#GalaxyS7)! In this post, I have delineated one of the most important things usually done first by owners of new #smartphones that is, setting up an email account on the phone. Feel free to refer to this content should you need help in the process.
To give you a hint of what exactly this post is all about, here’s an outline of the topics it covers.
- How to set up email account on the Galaxy S7
- How to add a personal (POP3/IMAP) account on the Galaxy S7
- How to add a corporate/work (Exchange ActiveSync) account on the Galaxy S7
- How to access and configure more Exchange ActiveSync settings on the Galaxy S7
There are several types of email accounts supported by the Galaxy S7. This denotes you can set up multiple email accounts at one time. In order to successfully set up your email, be sure to have all key information such as username or User ID, password, and server settings all set.
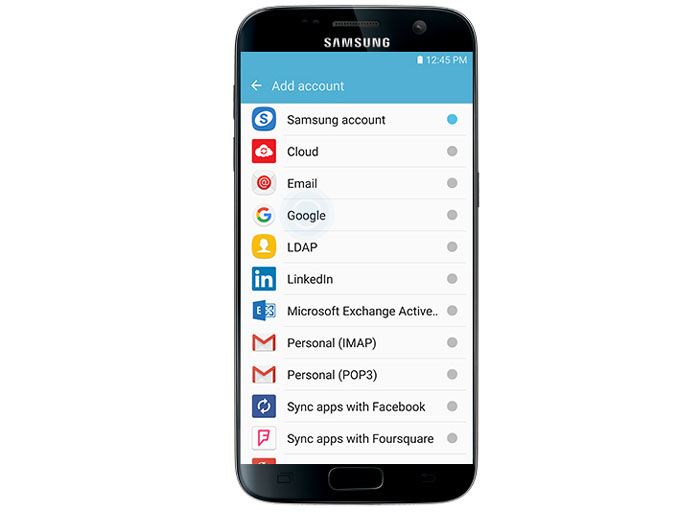
You may contact your email service provider or carrier to ensure you have the correct information before setting up email account(s) on your new device. So let’s get started.
Setting up Email Account on your Galaxy S7
Before you start, ready all necessary information including your username, password, incoming, and outgoing server settings, port numbers, and other required settings for a POP3, IMAP, or Microsoft Exchange ActiveSync account.
- To get started, tap Apps from the Home screen.
- Tap Email.
Note: If you can’t find the Email app shortcut from the Apps screen, open the Samsung folder. On some GS7 variants, the Email app is located in the Samsung folder.
- On the next screen, tap Add New Account.
Note: If there is already an account registered on your phone, just tap an email address in the above-given list.
- Type in your email address and password.
- Tap MANUAL SETUP to proceed with manual account setup. Or, if you want your phone to complete the setup process by automatically searching for your email server settings, tap SIGN IN.
- Select MANUAL SETUP to proceed with this guide.
- Tap to select the type of email account you want to set up. You may choose any from POP3 account, IMAP account, and Microsoft Exchange ActiveSync.
- Enter the required server settings for your email account.
- Tap SIGN IN to continue.
- Wait for your device to verify if the server settings you enter are all correct. If your device successfully connects to the server using the settings you entered, you will be prompted with the Sync schedule screen.
- Configure sync options according to your preference.
- Tap SIGN IN.
- Enter a name for the account. If you want to create a signature to all your outgoing messages, you can enter your name or any signature you want to indicate on the appropriate field.
- Tap DONE to complete the process. After that, you should see email messages populating your inbox.
Adding Personal (POP3 and IMAP) Email Account on your Galaxy S7
There are two ways for you to add personal email account(s), either POP3 or IMAP on your Galaxy S7. One is directly from the stock email application and the other is through the Settings menu.
- Through the stock Email App
- Tap Apps from Home.
- Tap Email to launch the app. If necessary, tap to open the Samsung folder and then tap Email to launch it.
- From the Inbox screen, tap Menu.
- Select Settings.
- Tap Add account.
- Follow the onscreen instructions to complete setting up your new personal email account. After the setup, you should start getting emails for that account.
- Through the Settings Menu
- Tap Apps from Home.
- Tap Settings.
- Select Accounts.
- Tap Add account.
- Tap Email.
- Enter the email address and password for the email account on the designated fields.
- Tap Sign In to proceed with automatic setup and prompt your device to test the incoming and outgoing servers and attempt a regular email setup. Otherwise, tap Manual setup and enter your settings such as email type, username, password, security type, and server settings.
- Configure Sync settings as you prefer.
- Tap Next to continue.
- Specify an account name for the account and a display name (signature) for your outgoing mails.
- To complete the setup, tap Done.
Adding Exchange ActiveSync or Work Email Account on your Galaxy S7
The Galaxy S7 embeds some powerful Exchange features, allowing you to set up an Exchange ActiveSync, sync your phone with your work email, then read, manage, and send emails in the same easy manner as with your personal email account. Itemized below are the steps on how to set up a work email on your new Galaxy device.
Note: Before you begin, secure all required account settings information such as username, password, exchange server, and the like. Please contact the Exchange Server administrator or network administrator of your company to ensure you have the correct information. If you have everything ready, then you may start right away with these steps:
- Tap Apps from Home.
- Tap Settings.
- Tap Accounts.
- Tap Add account.
- Select Microsoft Exchange ActiveSync.
- Enter the email address and password for your work email on their designated fields.
- Tap Manual setup.
- Enter all necessary information for your email account settings such as the domain name\username, password, exchange servers, and the like.
- Follow the onscreen instructions to configure more options for the account.
- Specify an account name as well as a display name (signature) for your outgoing mails.
- Tap Done to complete the setup process.
Configure more Exchange ActiveSync Email settings on your Galaxy S7
Access more Exchange ActiveSync settings and customize your corporate emails according to your preference. Among the available options include sync options, flagging messages, out-of-office messages, meeting requests, and message priority. Here’s a quick guide on how to access and configure these settings on your S7.
- Tap Apps from Home.
- Open the Email app.
- From the Inbox screen, tap MORE to view additional options.
- Select Settings.
- To view available options for your Exchange ActiveSync account, tap the account name.
- To configure an option or setting, tap to select an option/setting you want to manage or change.
More tutorial topics on Samsung Galaxy S7 will soon populate in this page, so keep posted.
Connect with us
We will be glad to offer further assistance! For more queries or concerns about the Galaxy S7, you can reach us through this form. When you do, please indicate the details of your inquiries or pertinent topics you need help with and we’ll do our best to give you the answers you need.
Useless boilerplate balderdash waste of time.
I was able to solve the hotmail problem that I had by not following any of these settings but installing the Android for Outlook app.
hello i have got my Samsung S7 sending and receiving emails via pop3 configuration. you need to disable “Authentication required before sending emails” when configuring outgoing Server.
Trying to add Outlook email to my S7 Edge, but continue to get an error stating unable to connect to server. I had no problems setting it up on my last S7 Edge, so what’s the deal???
I’m seeing a lot of questions here but no replies……..hhhuuuuummmmmmmm…..
Authentication failed???? How do I fix this??
I followed the directions above and get the same response “unable to set up account, authentication failed”, what next??
i have been trying to set up my emails for over a week and keeping errors – an error has ocurred, cannot connect to server. This is the most user unfriendly phone I have ever had. Would definitely not recommend it!
This phone has way to many issues. Errors received. ‘Unable to set up account’ and ‘Unable to connect to server’. Now what? I was getting all my emails and calendar meetings, but stopped abruptly and is requiring me to install a Company Portal App. No way! Everyone else here is getting all of their emails and calendar events without the app. Time to move on to IPhone.
None of this has helped and I’m unsure of the security types and ports. I still keep getting the “Unable to connect to server etc” message.
Ive had the phone for over 3 months and I can receive e-mails but not send them out