How to Wipe Cache on Samsung Galaxy A10
Do you wonder why your Galaxy A10 runs slower than before? Does it keep on lagging or crashing unexpectedly? Are the apps not working or do they keep closing on their own? Bits of information called cache might be the reason why these issues occur and you may need to wipe cache on Samsung Galaxy A10.
As we use our smartphones, it stores bits of data for future use. These bits of information are called cache. They are being pulled up by the phone’s system whenever you perform tasks, like browsing the web. It helps the device to be served faster by the data it needs.
Clearing cache on the device should help it run smoother, fix some issues caused by erratic files and incompatibilities. Since most of the cache files are not really needed, storing them on the device may result in several problems. It is important to remove these files at certain times.
Wiping cache regularly will provide a lot of benefits on the device. If you wipe cache on your Samsung Galaxy A10 smartphone, it also clears a little bit of the storage space. If you are experiencing issues, especially during app loading or website browsing, that could be an indication that your device is already running into rogue cache-related problems.
This article should help those Samsung Galaxy A10 users who need help in performing a wipe cache procedure, also known as wipe cache partition on their devices. If you are one of them, feel free to follow the procedures provided below.
Steps:
- Turn off your Galaxy A10. This step is essential as we need to access the recovery options.
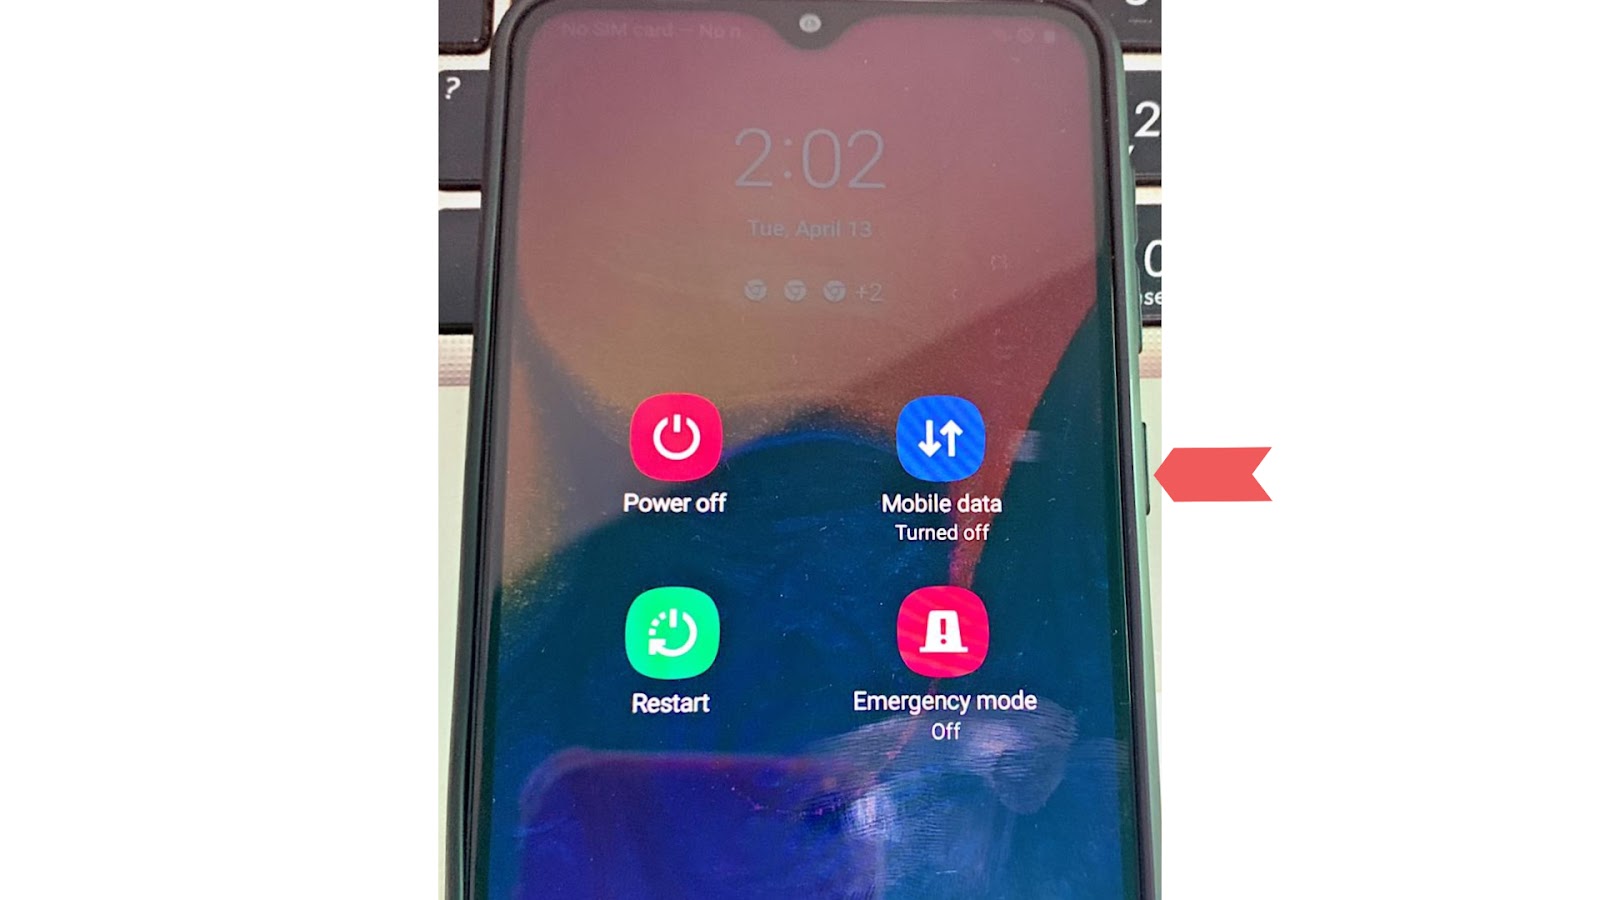
- Once it is turned off, press and hold the Volume Up key and the Power key until the Samsung logo appears.

- If the Samsung logo appears on the screen, release both keys..
- Wait for the Recovery Mode menu to appear before pressing any buttons or doing anything. Doing so will null the procedure. Repeat prior steps if you do so.
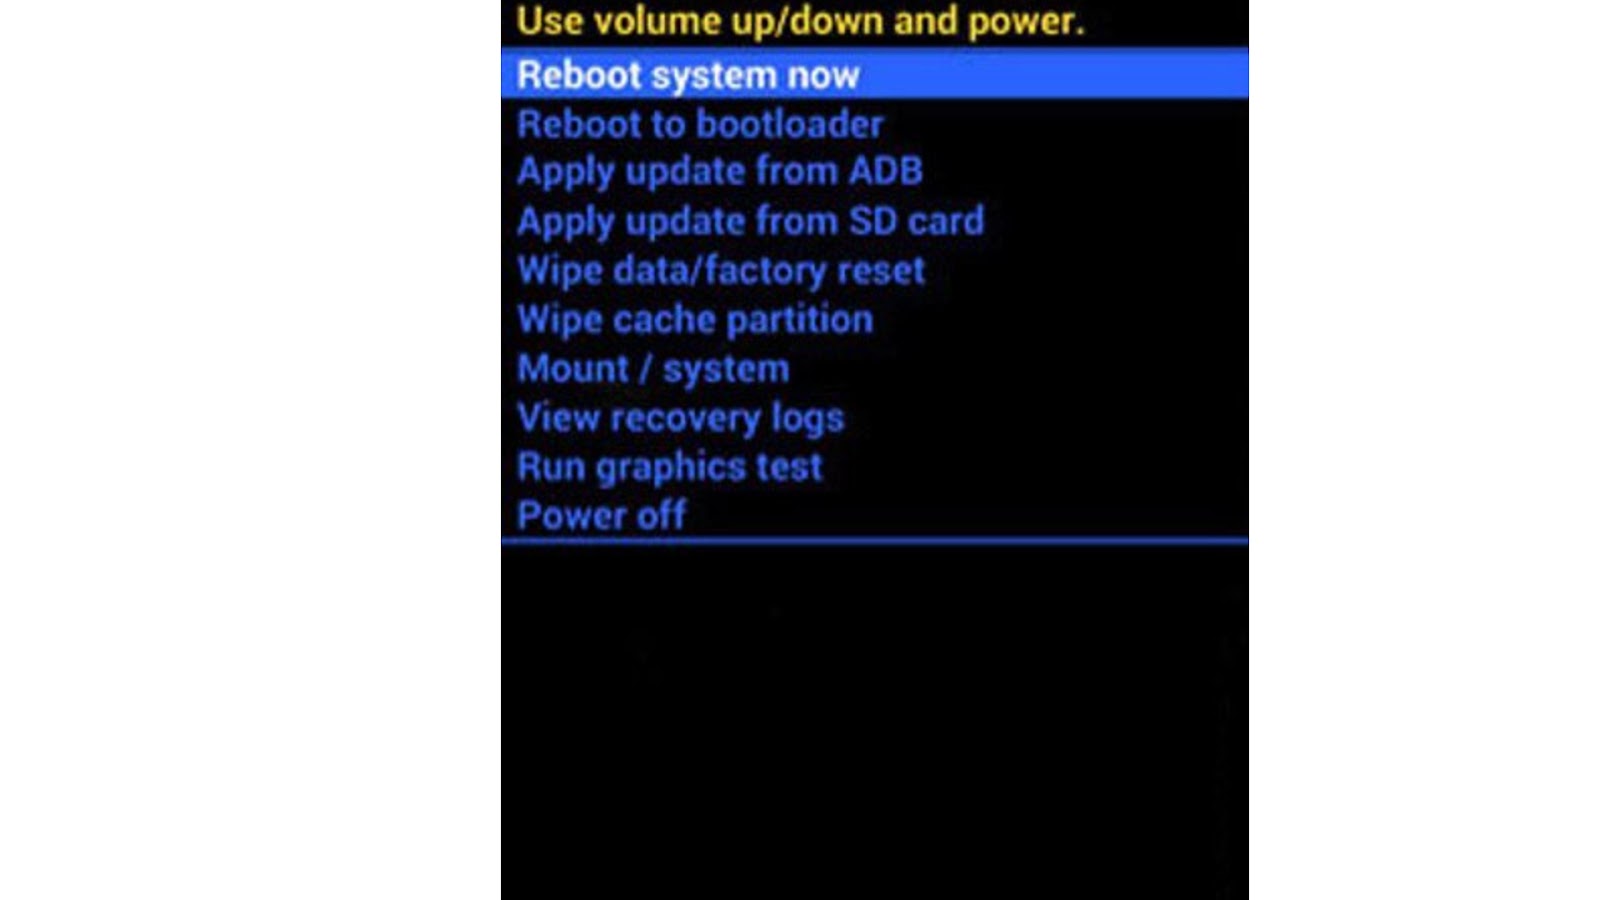
- On the recovery options, scroll to the Wipe Cache Partition option. Use the Volume down key to highlight it.
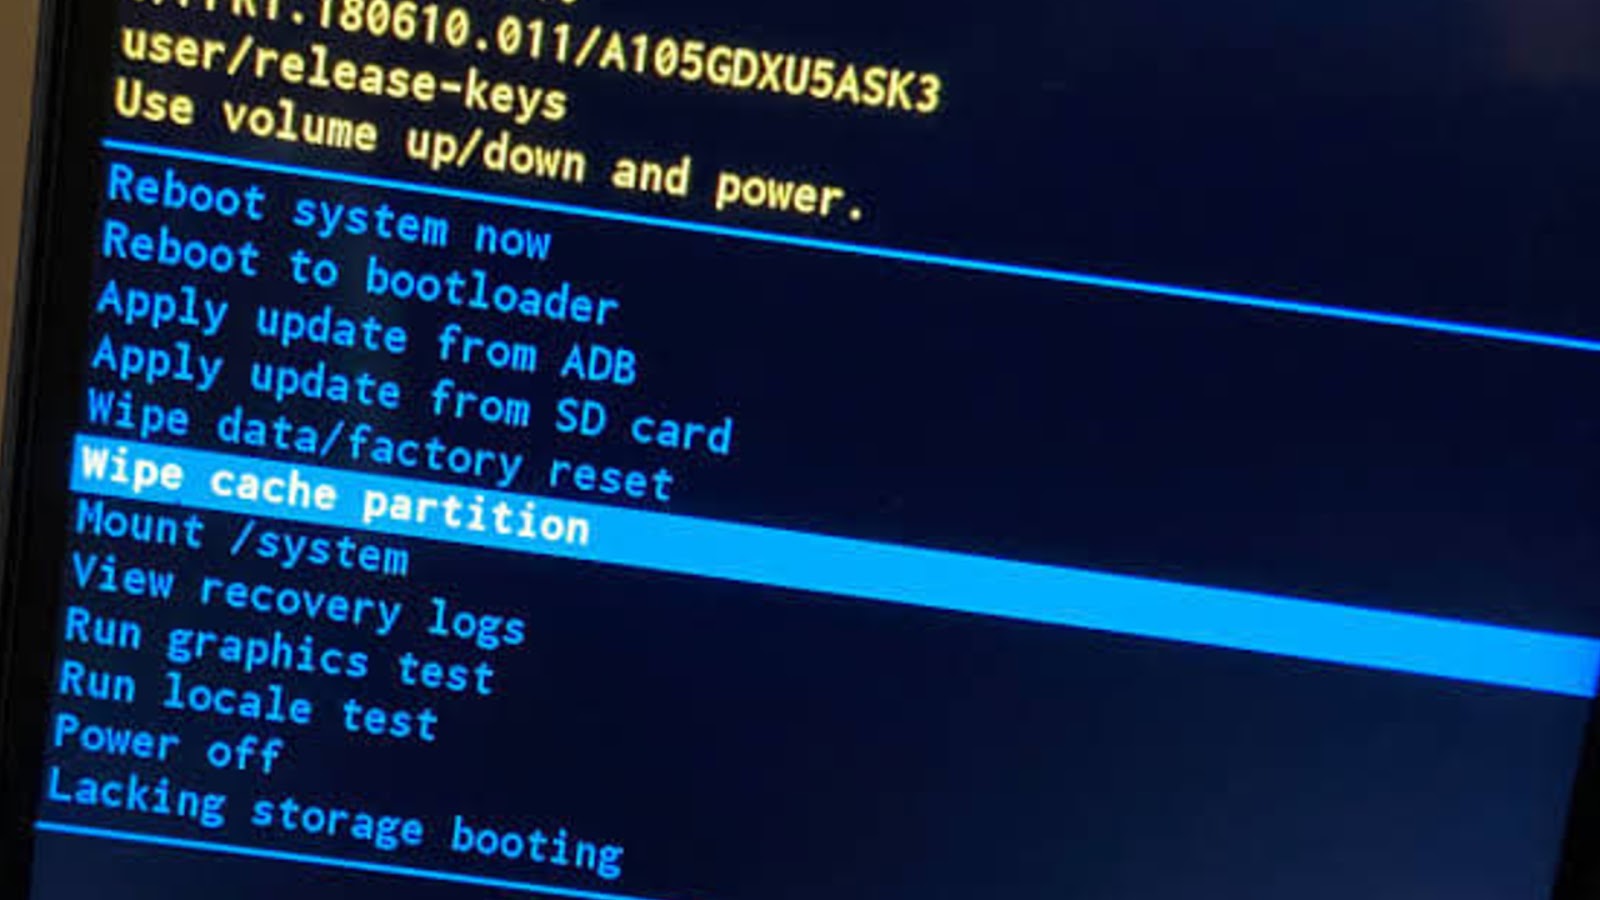
- Once it is highlighted, press the Power key to make a selection.
- Highlight Yes and press the Power key to confirm. This will initiate the wipe cache procedure.

- Wait for the process to complete. A notification at the bottom part would indicate that it is done.
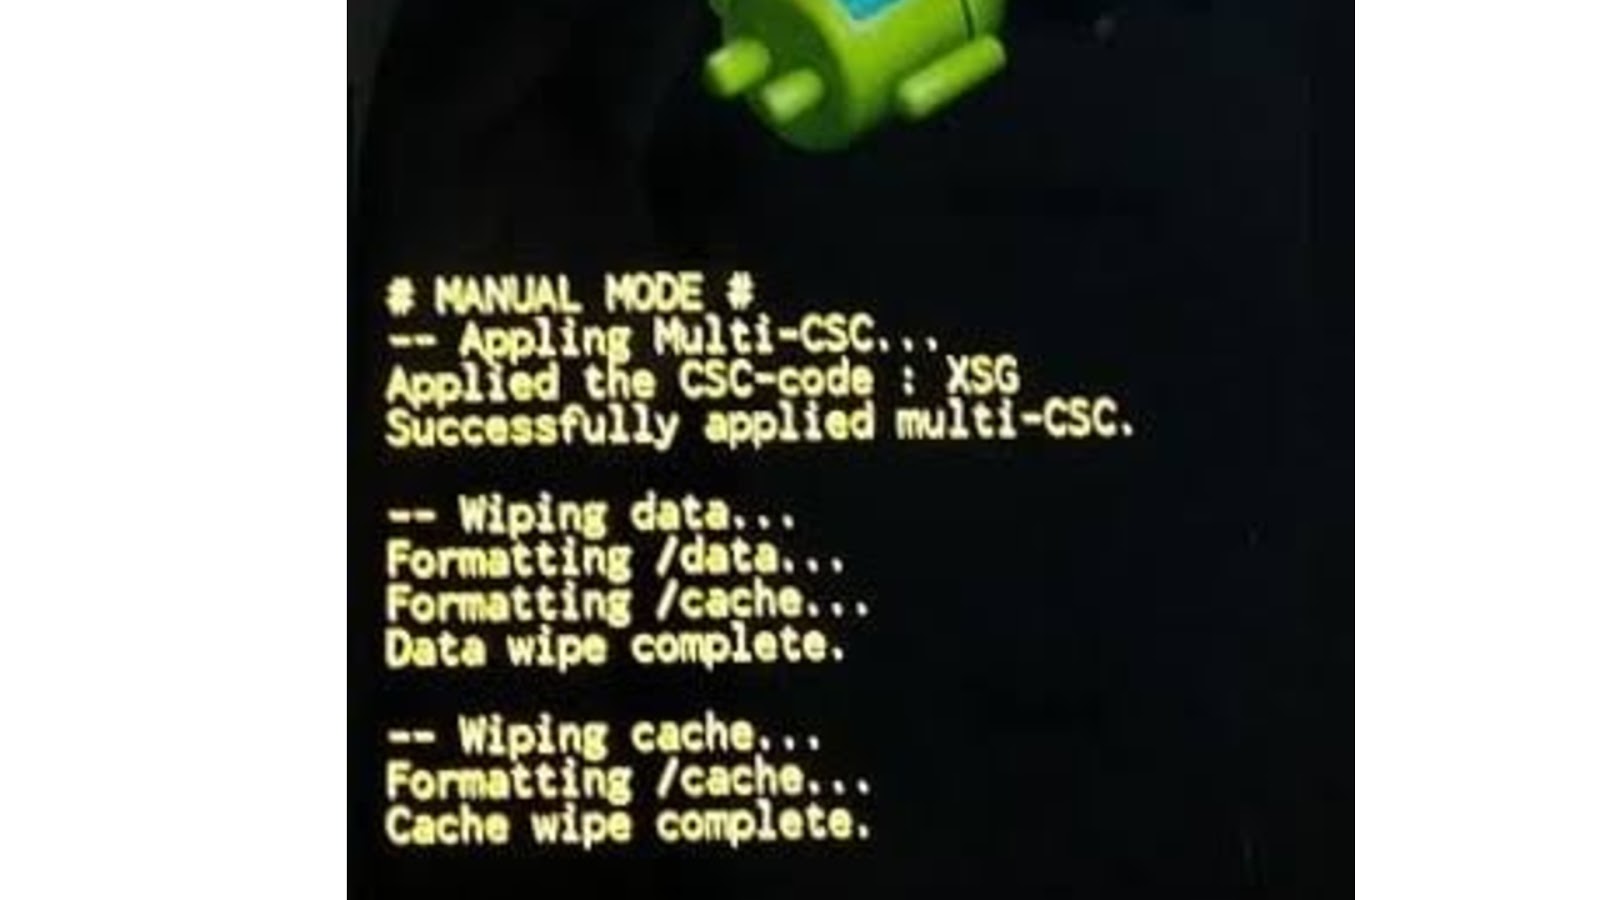
- After a successful wiping of cache, highlight Reboot System Now and press the Power key to restart your device.

Now that you know how to wipe cache on Samsung Galaxy A10, check out our tutorial about wiping data on your Galaxy A10 here. Want to watch tutorials and troubleshooting videos? Our Youtube channel is up for that. Kindly visit it and don’t forget to like and subscribe. Thank you.
Stuck with wiping cache….been 5 min and still says wiping. Seems a long time…help?