How To Fix Sonos Move Not Charging Problem
The Sonos Move not charging issue can be caused by different factors. It could be due to corrupted speaker settings, a faulty charger, or defective battery. To fix this you will need to perform a series of troubleshooting steps on the device.
The Sonos Move is a smart speaker that is able to stream music over Bluetooth and wi-Fi. It has Amazon Alexa and Google Assistant built-in making it a great companion for people wanting a hands-free experience. Some of its features include voice control, streaming over Wi-Fi and Bluetooth, weather resistance, and an 11 hour battery life just to name a few.
Technical Specification of Sonos Move:
- Two Class-D digital amplifiers perfectly tuned to match the speaker drivers and acoustic architecture.
- Far-field microphone array uses advanced beamforming and multi-channel echo cancellation so your voice assistant can be readily activated.
- One downward-firing tweeter creates a crisp, clear high-frequency response that disperses evenly for an ultra-wide soundstage.
- Weather resistant
- Voice Control
- Capacitive Touch Controls
- Automatic Software Updates
What to do when your Sonos Move won’t charge
One problem that you might encounter with your Move smart speaker is when you can’t charge it. This can be an annoying issue especially if the speaker is running low on power as you won’t be able to use it. Here are the troubleshooting steps you need to do to fix the problem.
Solution 1: Perform a factory reset on Sonos Move to fix not charging issue
The first troubleshooting step you have to do is a factory reset or hard reset. This will wipe out data on this speaker and bring it back to its default settings. This is usually done whenever a software glitch is preventing the speaker from being charged. Make sure that the speaker is not plugged to its charger when performing these steps.
Time needed: 2 minutes.
Reset speaker
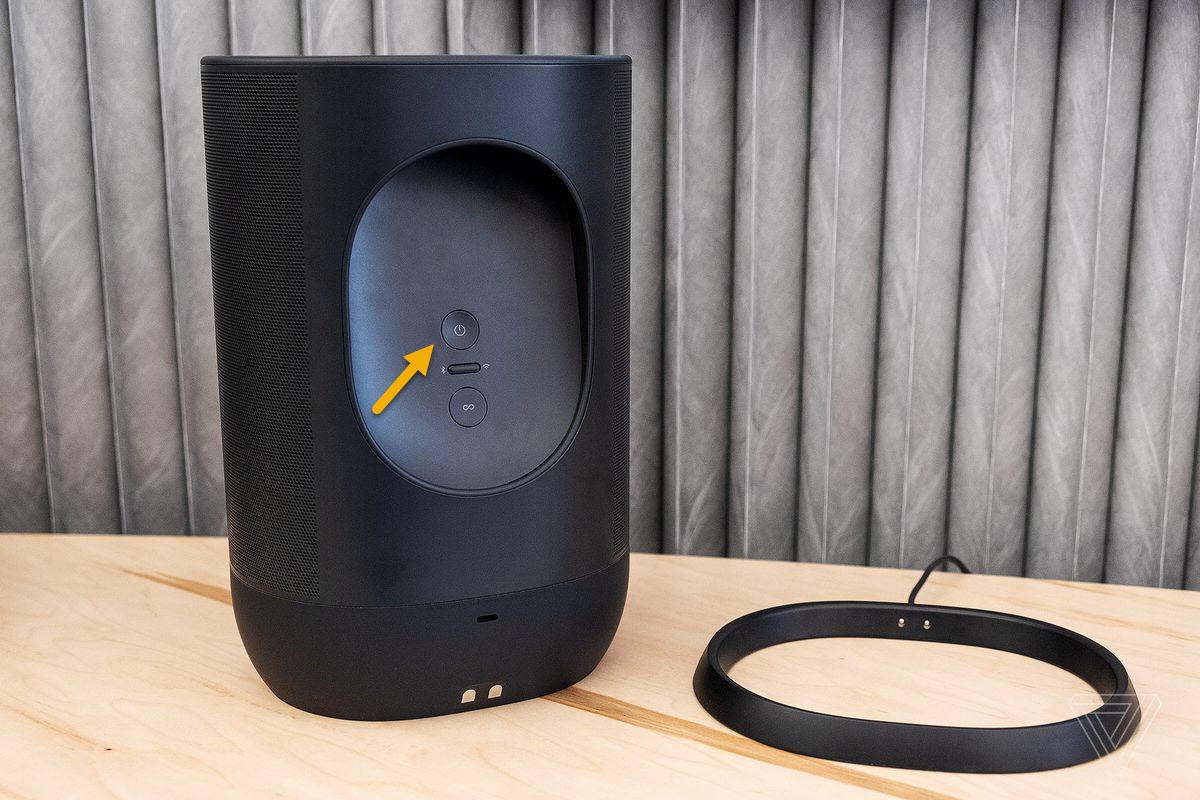
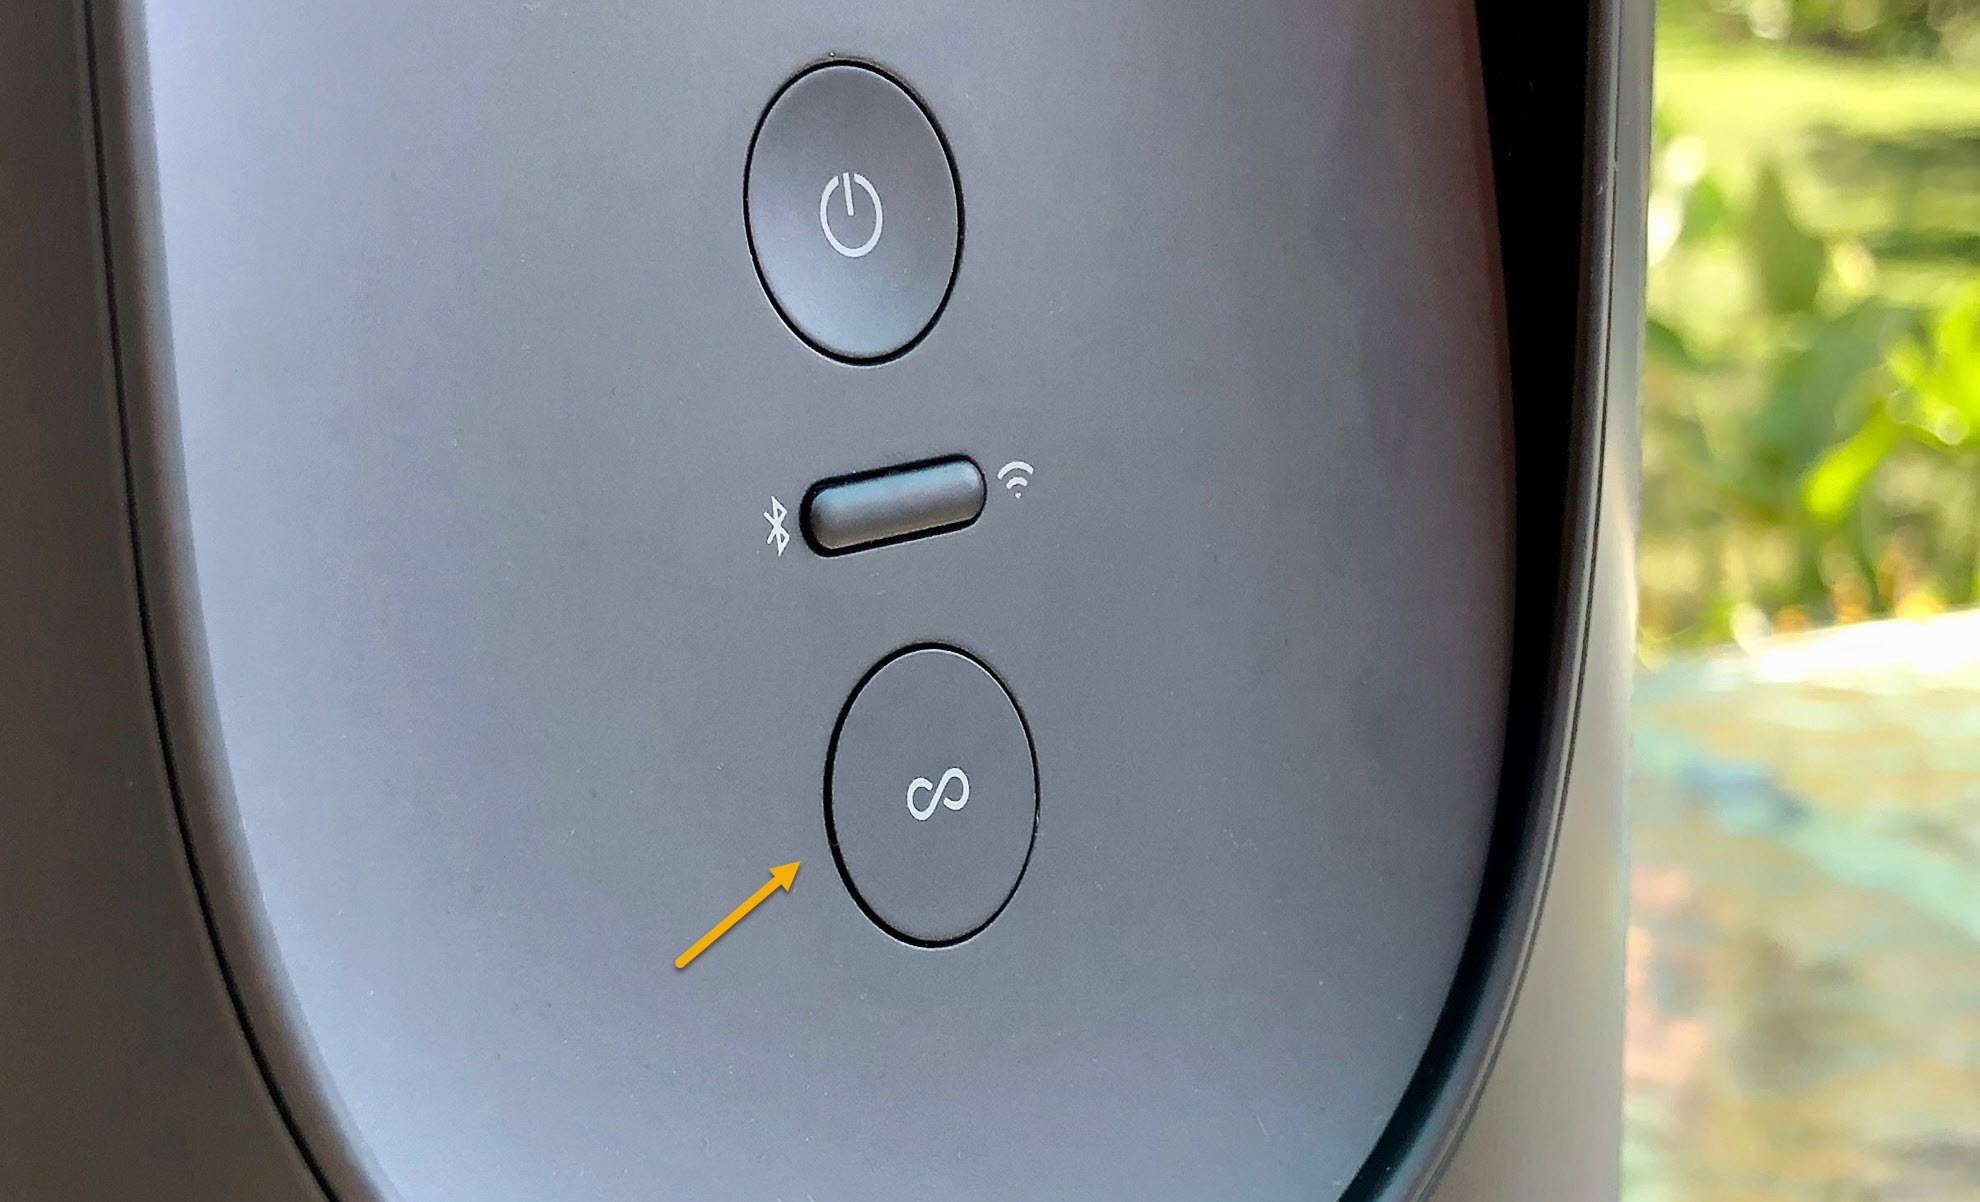
- Press and hold the power button on the back of your Move.
Do this for at least 5 seconds to power it off.

- Press and hold the Join button and place Move back on the charging base.
This initializes the reset process.

- Continue holding the Join button until the light on top flashes orange and white.
The reset process is now starting.


The reset process will complete when the light will flash green. After performing these steps try checking if you can charge the Move speaker.
Solution 2: Dirt present in the charging port
There’s a possibility that the charging port of the speaker has dirt or debris in it. If there are any present then it will prevent the speaker from being charged. Try to inspect the charging port of this Bluetooth speaker for any signs of dirt or debris then clean this off using a toothpick or you can try blowing into it until it gets removed. Once done, check if you can charge the Bluetooth by placing it in its charging base.
Solution 3: Replace the charger to fix not charging issue
Sometimes the problem can be caused by a defective charger. It’s cord might be damaged or the wall charger itself might not be working. Since this is a proprietary piece of hardware you will have to order a replacement charger from the company if this is indeed what’s causing the problem.
Solution 4: Defective Sonos Move battery
If the battery of the speaker is not working then you won’t be able to charge it. If this is the cause of the problem then replacing the battery will fix this. It’s recommended that you have this done at a service center.
Some reasons as to why a battery will get damaged is repeated overcharging or constant exposure to heat such as when you leave the speaker under the sun.
Solution 5: Defective circuit board
If the speaker gets wet then there’s a possibility that the internal circuit will get damaged. You will need to have this speaker fixed at a service center if it is water damaged.
Having the Sonos Move not charging issue can be a frustrating experience. Hopefully, this solution will help you fix the problem.
Visit our TheDroidGuy Youtube Channel for more troubleshooting videos.