How to Enable QR code Scanner on Note 20 Samsung Internet
This post will show you how to enable QR code scanner on the Galaxy Note 20 Samsung Internet browser.
Read on if you need help activating the built-in QR code scanner on your new Note and get your device all set to scan QR codes from different websites and URLs with the integrated Samsung Internet browser.
QR Code Scanner in Samsung Internet
Quick Response codes or QR codes are a type of barcodes that comprise a matrix of dots. To read these unique codes, a QR code scanner is needed. QR scanners are typically embedded in modern smartphones particularly within the built-in camera app. In recent smart devices like the Galaxy Note 20, a QR code scanner is also embedded in the built-in Samsung Internet browser.
If you’re wondering how to activate this feature on your new Note, I’ve laid out a step by step walkthrough for your reference.
Here’s how to activate the Samsung Internet browser app’s integrated QR code scanner feature.
Easy Steps to enable QR Code Scanner on the Note 20 Samsung Internet Browser App
The following steps depict the standard process of activating the built-in QR code scanner on the Note 20’s integrated Samsung Internet browser. The same steps can also be applied when enabling QR scanner on other Galaxy devices that run on the same Android version with that of the new Note. Actual screens and menu items however may vary depending on the device model and service provider.
1. To get started, tap the Samsung Internet browser icon at the bottom of the Home screen. Doing so will load up the browser app.
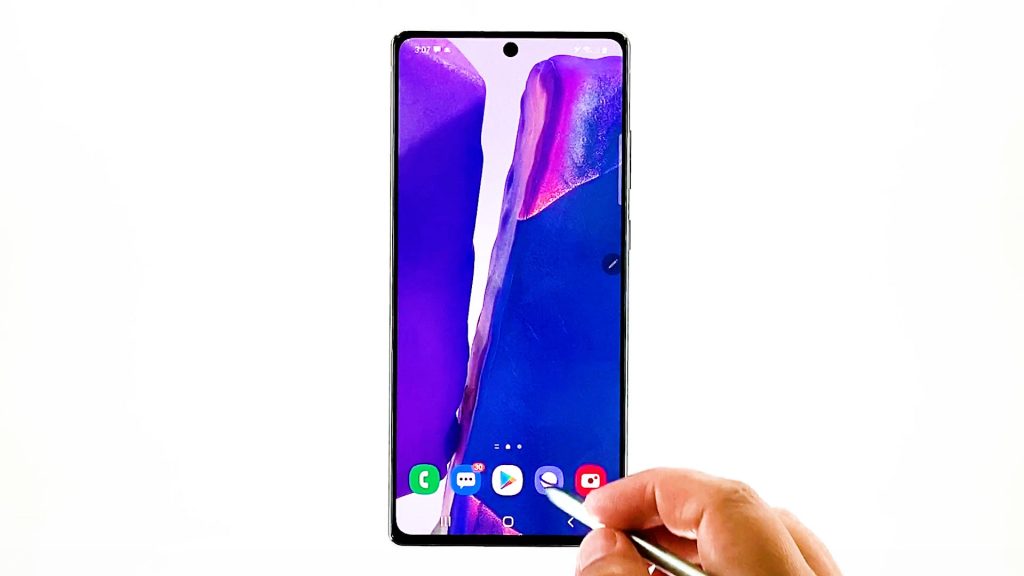
If you don’t see this icon on your Home screen, then you will need to access it from the Apps viewer or Apps screen. Just scroll up from the bottom of the Home screen to launch the Apps viewer then find the Samsung browser app icon.
2. While on the Samsung browser app’s main screen, tap the menu icon represented by three short horizontal lines located at the bottom-rightmost corner.
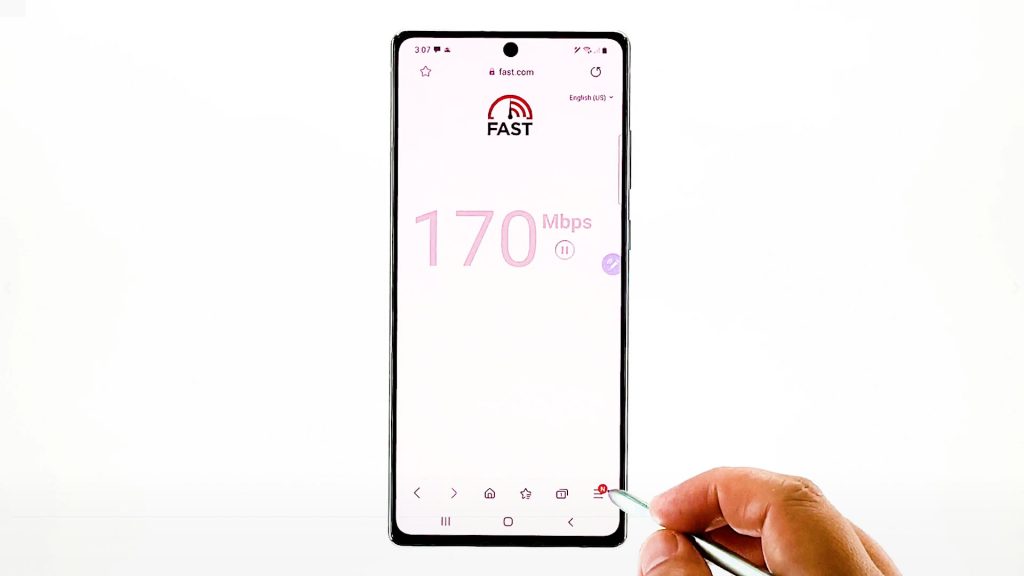
A pop-up menu with the main browsing controls will appear.
3. Locate and then tap the Settings icon to proceed.
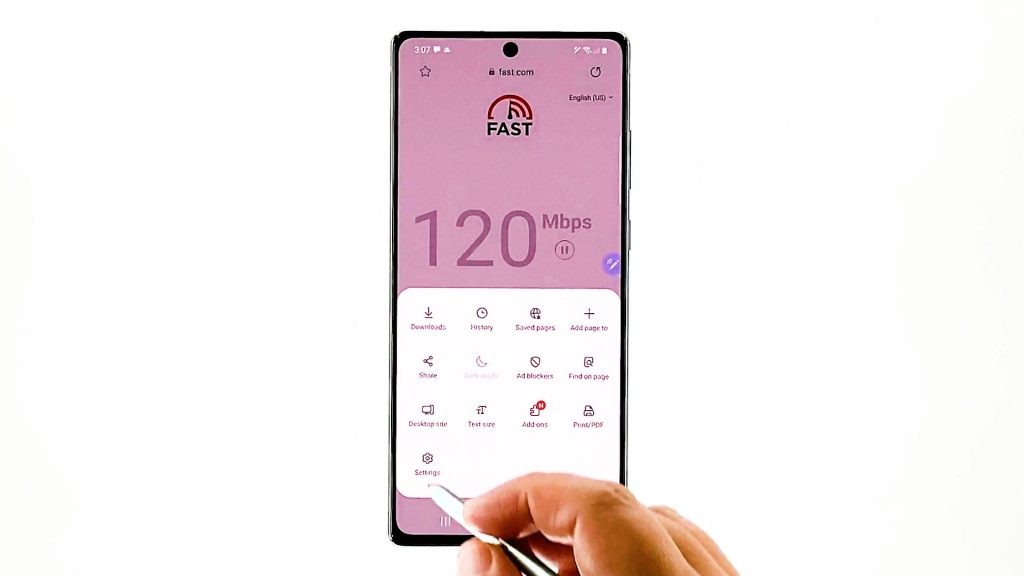
Another window opens, highlighting the basic and advanced internet settings you can use and manage.
4. Scroll down to the Advanced section and then tap Useful features.
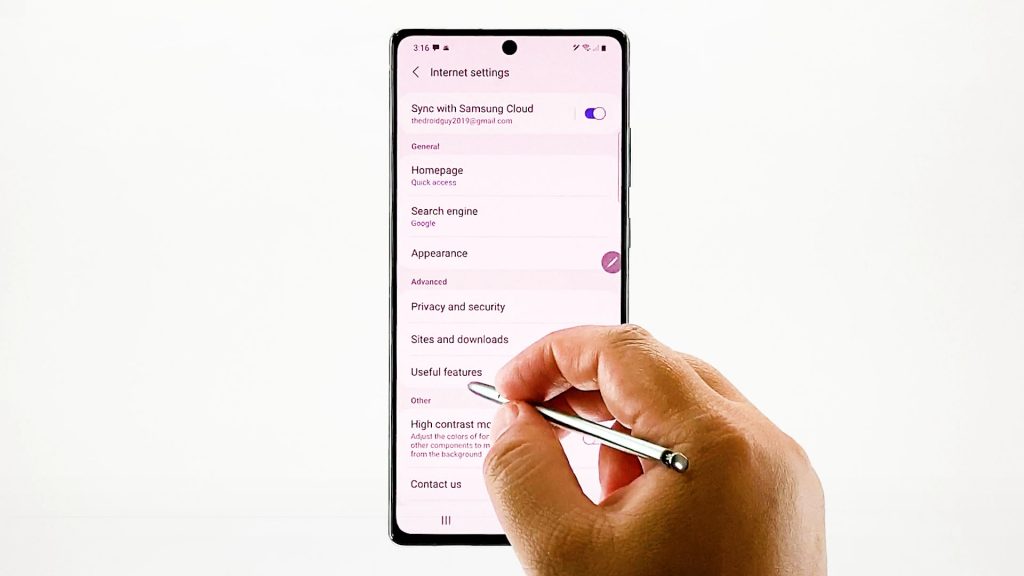
Another menu opens with a list of all useful features and settings for you to manage or customize.
5. Find QR code scanner in the list and then toggle the switch next to it to turn the feature ON.
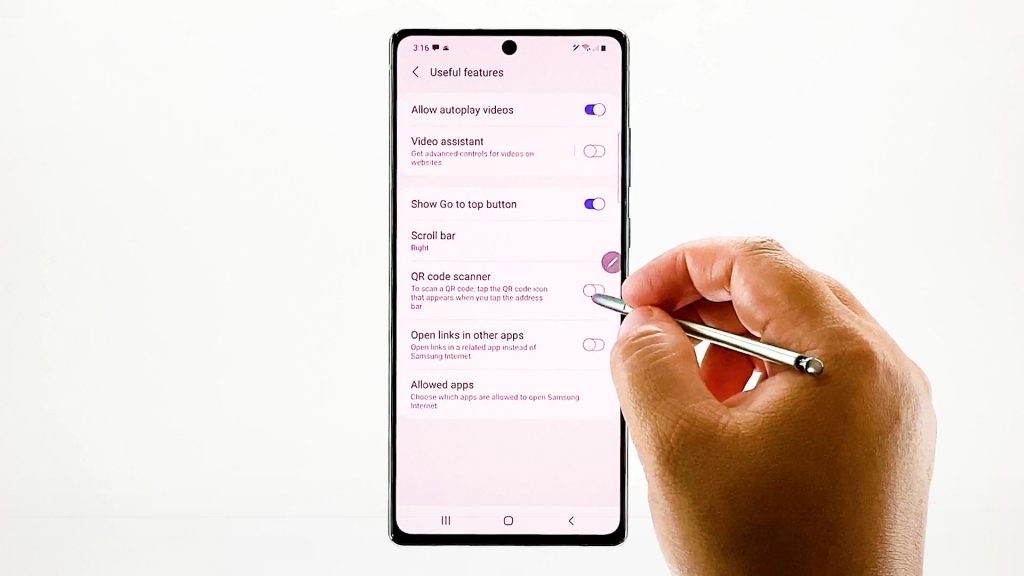
When enabled, you can start using the built-in scanner to scan a QR code for a website or page.
Start Scanning Website Barcodes
To see if it works, search for QR codes from legit sites and URLs and then try scanning it with your phone.
To scan a QR code, simply tap the QR code icon that shows up when you tap the address bar.
Having Trouble Scanning Codes?
In case you’re having trouble using the QR code scanner on Samsung Internet like you couldn’t get it to work as intended, verify and ensure that the QR code reader is enabled in the browser’s Extensions settings that’s typically located under the Scan QR code menu.
If you’re trying to scan a QR code that represents a URL, that URL should open up directly in the browser upon scanning.
Aside from URLs, the QR code scanner on Samsung Internet can also be used for scanning barcodes by automatically searching the scanned number in the default search engine.
Hope this helps!
More Video Tutorials
To view more comprehensive tutorials and troubleshooting clips on different mobile phones and tablets, feel free to visit The Droid Guy channel on YouTube anytime.
You might also want to read: