How To Disable Windows 11 Firewall Temporarily and Permanently
- Learn how to change the Firewall settings and disable firewall in Windows 11 both temporarily and permanently.
- Learn how to allow an application to bypass Windows firewall.
This article will show you how to turn off Windows 11 firewall temporarily and disable it permanently until such time you want to re-enable it. You may also learn how to allow a specific application through the firewall.
How To Turn Off Windows 11 Firewall Temporarily?
Windows Defender firewall is the built-in firewall for your Windows 11 computer. It is very important that it’s enabled all the time to prevent unauthorized access to your PC.
However, there are times when you need to temporarily disable Microsoft Defender firewall to allow some applications to continue to install and not be disrupted during the process.
Doing so will turn off network protection for a few minutes but once you’ve finished what you need to do, you should re-enable Windows firewall so that your machine will be protected.
You can disable the firewall through Windows Settings, and it’s actually not that hard to do. Here’s how it’s done on Windows 11:
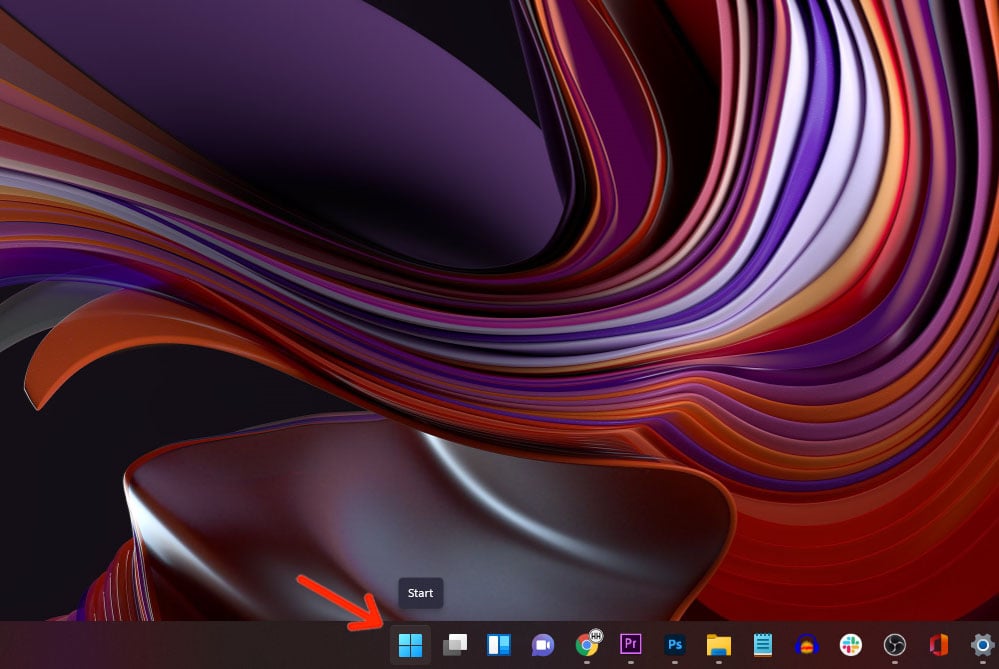
Step 1: Right-click on the Windows icon on the taskbar to pull up the options menu.
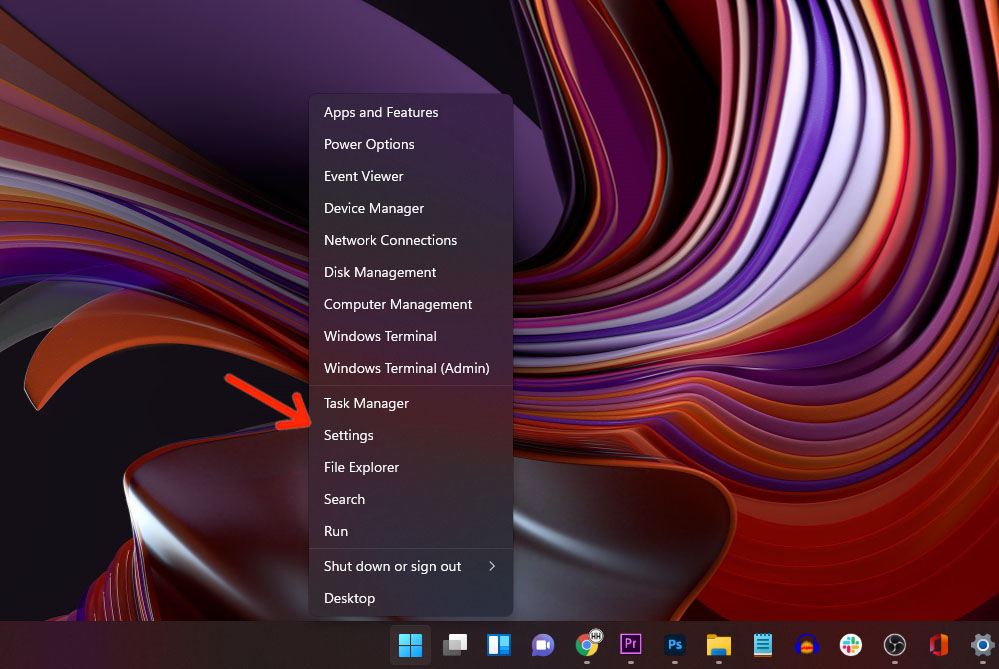
Step 2. Look for and click Settings.
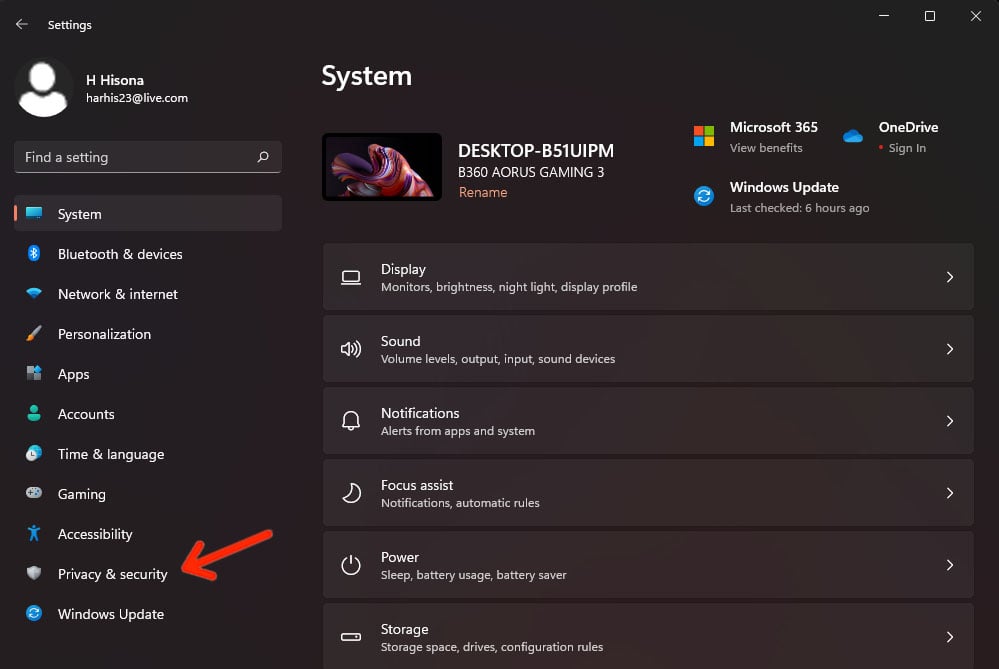
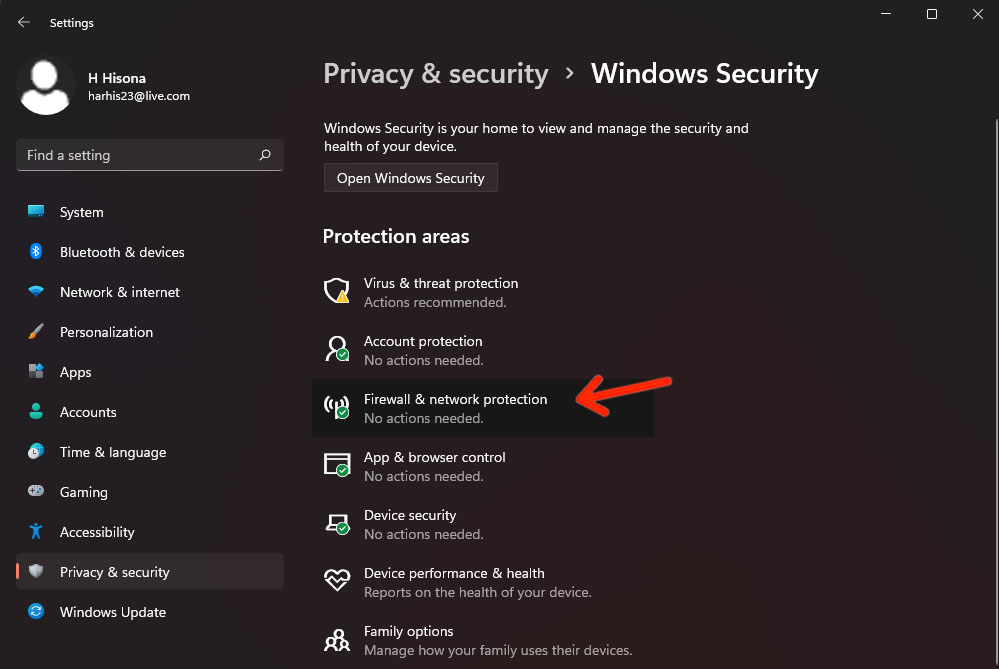
Step 3. On the left panel, look for Privacy & security and click on it.
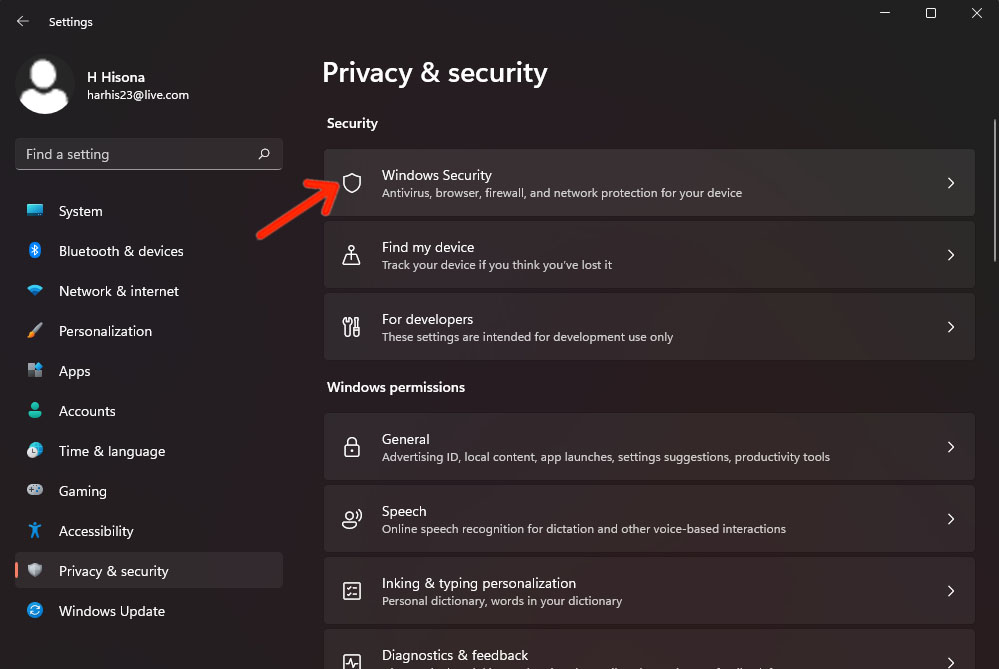
Step 4. Under the Security section, click Windows Security.
Step 5. Look for Firewall & network protection and then click on it.
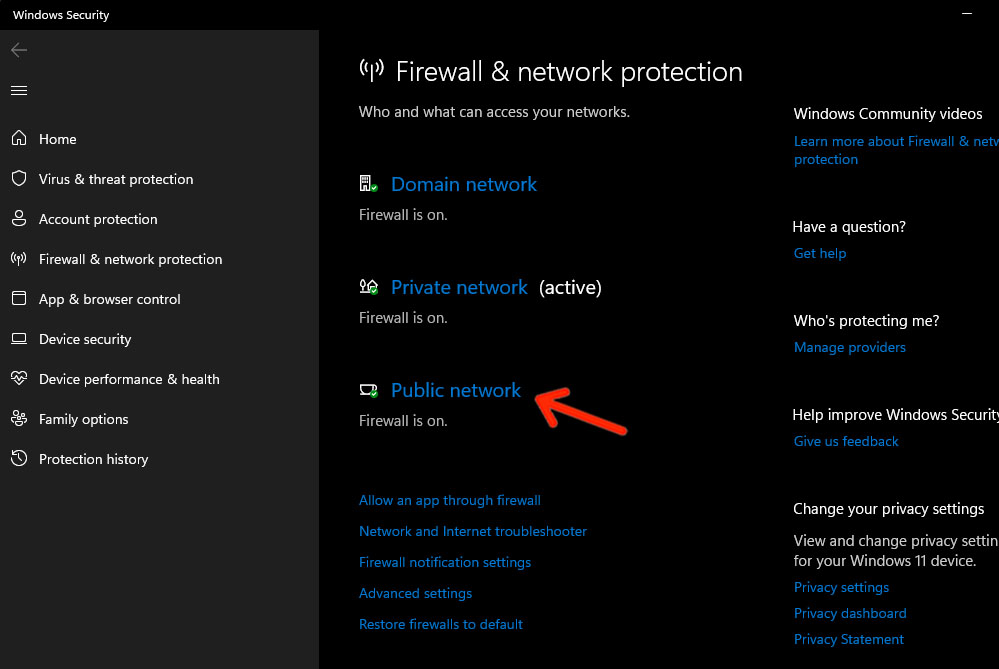
Step 6. When a new window pops up, click Public network to open your computer’s network protection settings.
Step 7. Now click the toggle switch just below Microsoft Defender Firewall to turn it off.
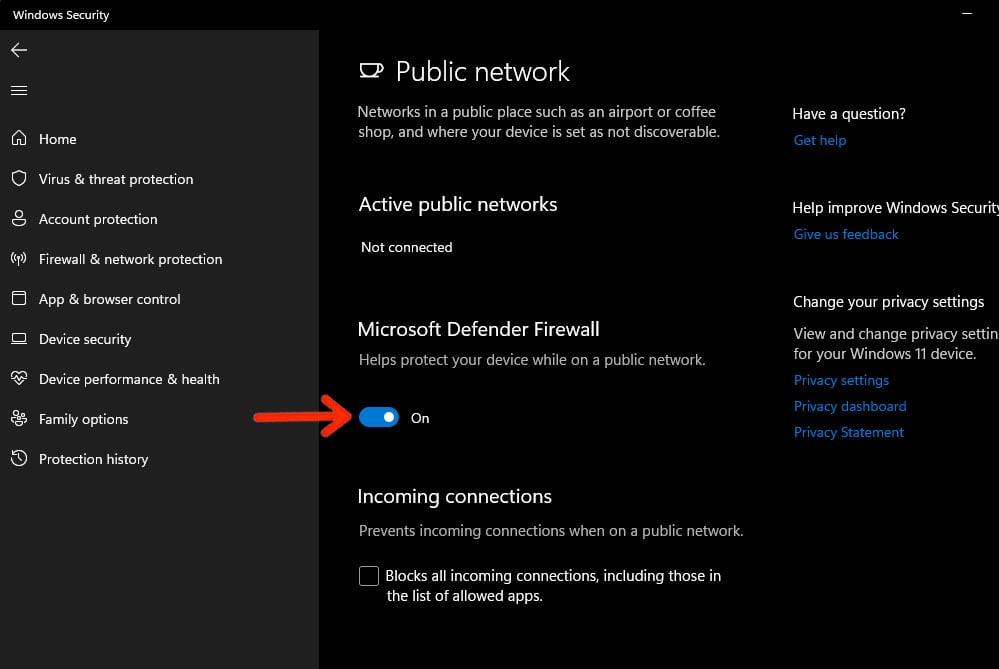
Immediately after that, Windows firewall will be disabled and your machine is vulnerable to network attacks. So do whatever you need to do that requires you to disable firewall and then re-enable it.
To enable it back, you simply have to toggle the switch back and it will turn blue, which means your PC is protected.
It is important that you’re acquainted with the Firewall settings of your computer so that it will be easier for you to find it.
How To Disable Windows 11 Firewall Permanently?
While it’s good to have a stricter Windows firewall settings, especially if you have several information or files saved on your computer and that need to be protected at all times, there are times when the Windows Defender firewall may interrupt your work.
So it’s understandable that some users would want to disable the firewall in Windows 11 to be free from several connectivity problems you may be dealing every day. If you’re one of them, then here’s how you disable the firewall network protection on your PC:
Step 1. Launch Settings and then click Privacy & security.
Step 2. Click Windows Security and then click Firewall & network protection.
Step 3. A new window will pop-up, and on that window, click Public network.
Step 4. Click the toggle switch just below Microsoft Defender Firewall to turn it off.
Basically, it’s the same as the previous procedure and it works regardless of whether or your public or private network. But then again, it’s all up to you to deal with malicious software and attack should continue having a very open Windows security.
How To Allow An App Through Windows Firewall?
You can actually choose any application that you want to bypass the firewall protection on Windows 11, regardless of whether you’re connected to a public or private network.
Basically, if there’s only a few apps that you want to allow to access the Internet without any limitation, then it’s better to give them a pass through the Windows Defender firewall instead of permanently disabling the network protection on your computer.
As long as you leave other Windows security features enabled, there will be little to no potential threats from apps that can bypass the firewall settings on your Windows 11.
On the other hand, you can also change settings to revoke the privileges of allowed programs on the same Windows settings screen. Here’s how it’s done:
Step 1. Launch Settings and then click Privacy & security.
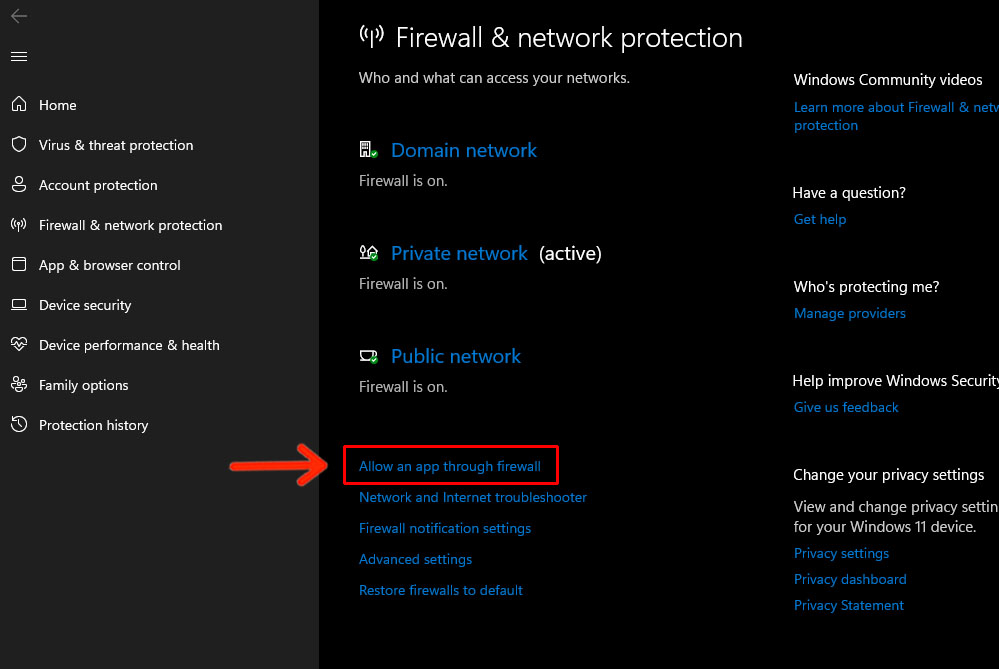
Step 2. Click Windows Security and then click Firewall & network protection.
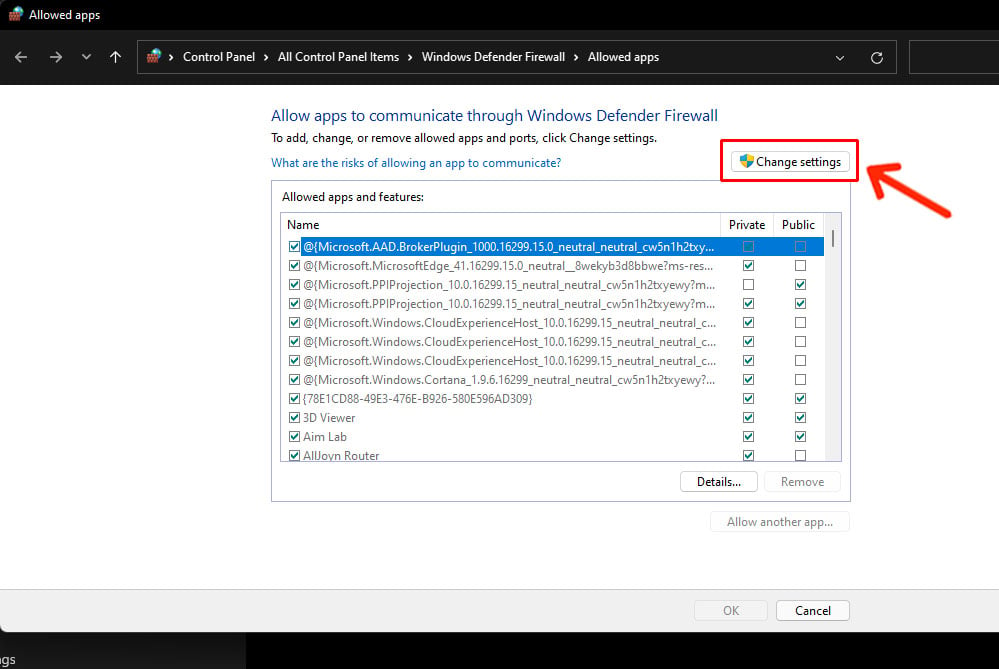
Step 3. A new window will pop-up, and on that window, click the link Allow an app through firewall.
Step 4. Click the Change settings button.
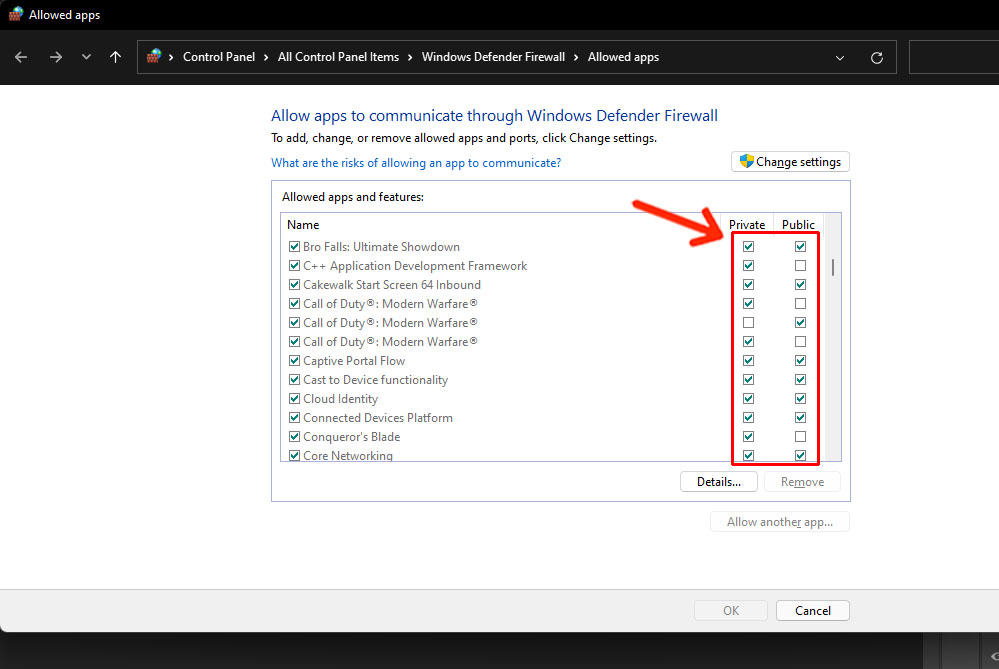
Step 5. You may now check the boxes of the apps you want to through Windows firewall in either public network or private.
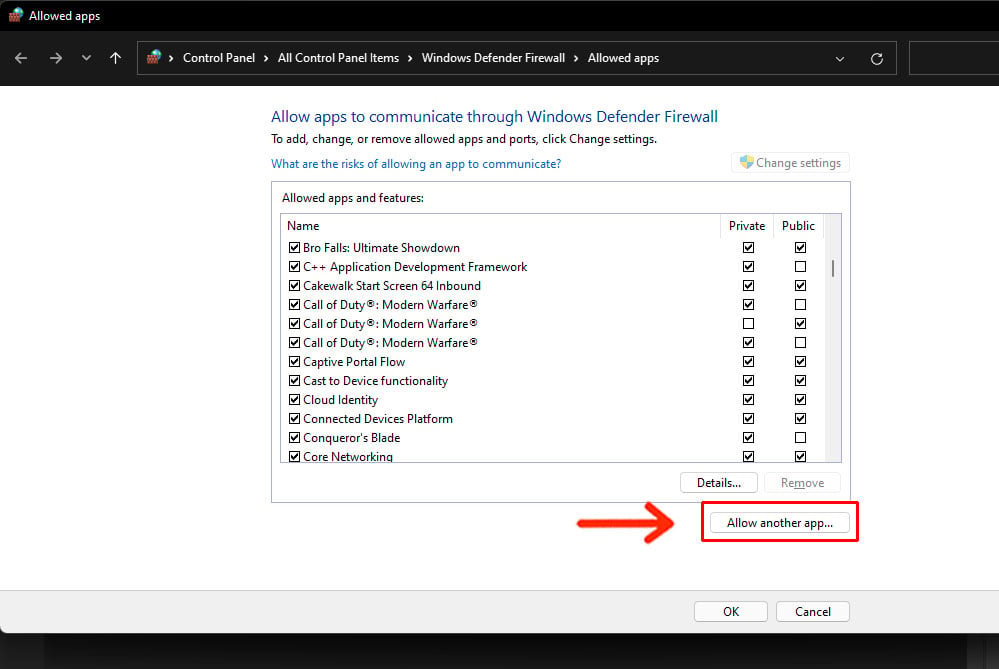
Step 6. If the app isn’t listed, click Allow another app and then locate it on your computer.
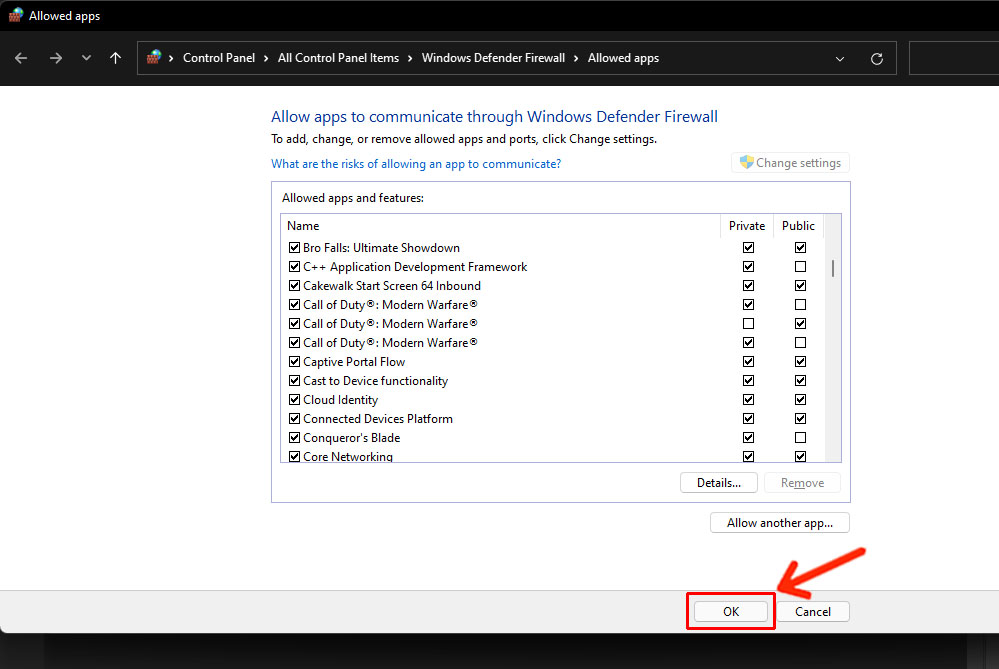
Step 7. Once you’re finished, click OK and then close the windows.
The app you added is now allowed to bypass the Windows Defender firewall, unless you’ll revoke or change the firewall settings in the future.