How To Fix COD Warzone 2.0 Won’t Launch
Do you experience Call of Duty Warzone 2.0 not launching on your PC? Several factors can cause this issue such as compatibility issues, corrupted files, or outdated graphics drivers. To fix the won’t launch issue, you will need to perform several troubleshooting steps.
Call of Duty Warzone 2.0 is a free to play Battle Royale game that was published by Activision and was recently released for the PC, Xbox console and PlayStation console. It is available for free to download on all platforms. Call of Duty Warzone 2.0 features a new map Al Mazrah. When playing Call of Duty Warzone 2.0, you will need to build your armament and must get a an advantage than the other players by finding supply boxes and completing contracts in the game. Call of Duty Warzone 2 is a brand-new objective-based sandbox mode that many players will enjoy to play.
Fix Call of Duty Warzone 2.0 Game Launching Issues
When playing Call of Duty Warzone 2.0, one of the issues you could run into is that the game won’t start or launch. Nothing will happen if you launch the game on Steam or with the Battlenet client. This can be frustrating situation for Steam users if you want to play and enjoy the game.
Here’s how to fix the Call of Duty Warzone 2.0 launching issues.
Fix #1 Check System Requirements
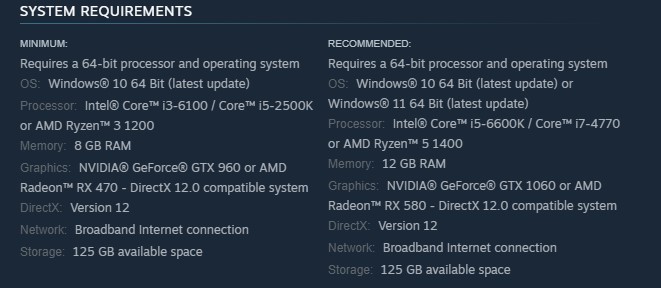
The first thing you must do is to check if Call of Duty Warzone 2.0 is able to run on your PC. The minimum and recommended system requirements needed to run is listed below by the game’s developer. For a good gaming experience, we recommend that your PC meets at least the minimum system requirements.
Minimum System Requirements
Operating System: Windows 10 64 Bit (latest update)
Processor: Intel Core i3-6100 / Core i5-2500K or AMD Ryzen 3 1200
Memory: 8 GB RAM
Graphics: NVIDIA GeForce GTX 960 or AMD Radeon RX 470 – DirectX 12.0 compatible system
DirectX: Version 12
Network: Broadband Internet connection
Storage: 125 GB available space
Recommended System Requirements
Operating System: Windows 10 64 Bit (latest update) or Windows 11 64 Bit (latest update)
Processor: Intel Core i5-6600K / Core i7-4770 or AMD Ryzen 5 1400
Memory: 12 GB RAM
Graphics: NVIDIA GeForce GTX 1060 or AMD Radeon RX 580 – DirectX 12.0 compatible
DirectX: Version 12
Network: Broadband Internet
Storage: 125 GB available space
Fix #2 Update Graphics Drivers
Outdated graphics driver are one of the main causes that will prevent you from launching Call of Duty Warzone 2.0. You must ensure that you have the latest drivers installed on your graphics card. These drivers will often include performance and bug fixes for Call of Duty Warzone 2.0 since it is a newly released game.
For NVIDIA users you can also download game ready driver for your GPU on GeForce Experience and for AMD users, you can also download it on the Radeon software. You can also manually download the driver on your graphics card manufacturer website.
Try to check if Call of Duty Warzone 2.0 will now launch.
Fix #3 Update Windows PC
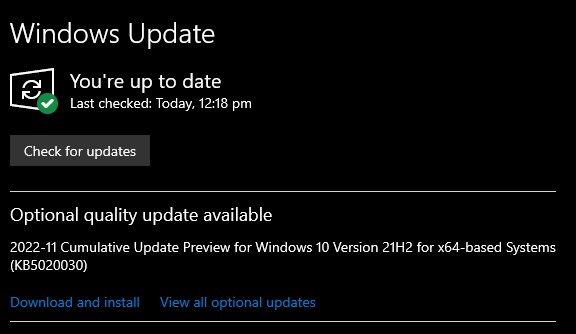
Make sure that your Windows operating system is up to date. The latest versions usually feature a number of performance related issues fix, bug fixes, DirectX updates and security measures that will improve the performance of your computer. It is recommended to maker your computer up to date.
Updating Windows
Step 1: Right click the Start button.
Step 2: Select Settings. This will open settings.
Step 3: Select Windows Update found on the bottom left menu of the new window that appears which will take you to the Update section.
Step 4: Select Check for updates.
Try to check if the launching issue is now fixed.
Fix #5 Temporarily Disable Anti-Virus Software and allow in Windows Firewall
Sometimes the launching issue is caused by your antivirus program blocking the game or a firewall that keeps blocking online games communication with the server. Try turning off your antivirus software and firewall to see if that solves the issue. After you have turn off the antivirus and allow the game to communicate with the server try to check if you can launch the game. If you can launch the game, then you need to add it to your antivirus program’s exemption list.
Turning off antivirus software
Step 1: Press Start menu key.
Step 2: Click Windows Settings.
Step 3: Click update & security.
Step 4: Click Windows Security.
Step 5: Click Virus and Threat protection.
Step 6: Click Manage settings.
Step 7: Turn off real-time protection. This will now turn off real time protection.
Adding the game to the antivirus exclusion list
Step 1: Press the Start Menu button.
Step 2: Click Settings.
Step 3: Click Update & Security.
Step 4: Click Window Security.
Step 5: Click Virus & threat protection.
Step 6: Click setting.
Step 7: Click Add or remove exclusions.
Step 8: Click Add an exclusion.
Step 9: Click Folder.
Step 10: Locate and select the game folder.
Adding as an Exception through Windows Firewall
Step 1: Type Firewall in the search bar on your desktop and then click the icon that appears in the results.
Step 2: Choose Allow an app or feature through Defender Firewall.
Step 3: Scroll down until you find the game, then check all boxes.
Step 4: Click the OK button.
Try to check if you can now launch COD Warzone 2 and run properly the game.
Fix #6 Close Background Programs
If there are too many running programs that are unused are running and your system resources is low then this may be the cause of the won’t launch issue of COD Warzone 2. You need to close these programs so that you run the game properly.
Step 1: Press CTRL + Shift + Esc Keys to open task manager.
Step 2: On the task manager, Click on More details found at the bottom left part.
Step 3: Click on the Processes tab.
Step 4: Right click on the app running and select End task on task manager. This will end task the app.
Fix #7 Repair Game Files
If any one of the Warzone 2.0 game files in the installation folder is corrupted or has missing files. You can use the repair tool from the Steam client to verify integrity of game files and see if any files need to be fixed. Steam will immediately download, install, and replace the corrupted and missing files found in Warzone 2. If your Warzone 2 is from the BattleNet app then you can also repair it using the launcher of BattleNet.
Verifying Files Using Steam
Step 1: Open Steam client.
Step 2: In your Steam launcher, click Steam Library.
Step 3: Find Warzone 2 then right-click and select Properties.
Step 4: Browse Local Files tab
Step 5: In the local files tab, click Verify integrity of game files.
Repairing Corrupted Files On Battle Net
Step 1: Open Battle.net application.
Step 2: Go to Warzone 2.0.
Step 3: Click the Settings or Gear icon next to the play button.
Step 4: Click Scan and Repair. This will begin scan repair.
Try to check if the game launcher can now launched.
Fix #8 Reinstall the game
If at this point none of the troubleshooting guide mention earlier work then you need to reinstall the COD games. To resolve the won’t launch problem you will need to uninstall then reinstall the game. Reinstalling the game will give you a fresh installation and resolve any issues you are encountering with the game.
Reinstalling the game
Step 1: Open the launcher.
Step 2: Go to the libraries tab.
Step 3: Right-click on games you want to uninstall then click on manages then uninstall.
Step 4: Select uninstall.
Step 5: Right-click on the games you want to install then click on install.
Step 6: Click next to proceed with the installation.