How to Clear Galaxy Note 20 App Cache and Data
This post will show you how to clear all saved temporary files and data from an app on the new Galaxy Note smartphone.Here’s a step by step guide on how to clear the Galaxy Note 20 app cache and data.
Android devices including Samsung Galaxy smartphones do embed a dedicated tool to manage built-in and downloaded applications. Such a tool is called application manager, which can be accessed through the settings menu.
Figuring out where and how to access the phone’s app manager is imperative given that any of the phone apps can become glitchy at some point. This is often the case if some corrupted cached files are stored in an app. To prevent such problems from transpiring, clearing an app’s cache and data regularly is recommended.
And here’s how it’s done on the recently rolled out Samsung phablet.
Steps to Clear Note 20 App Cache and Data
Access your device’s advanced memory information to wipe all temporary files and information from a certain application.
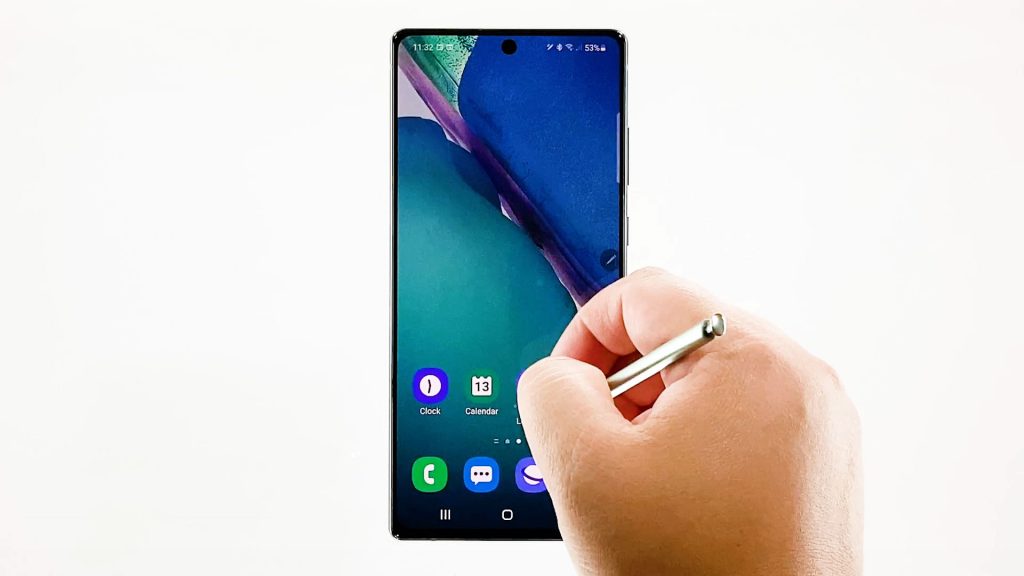
1. To get started, access the Apps viewer by swiping up from the bottom of the Home screen.
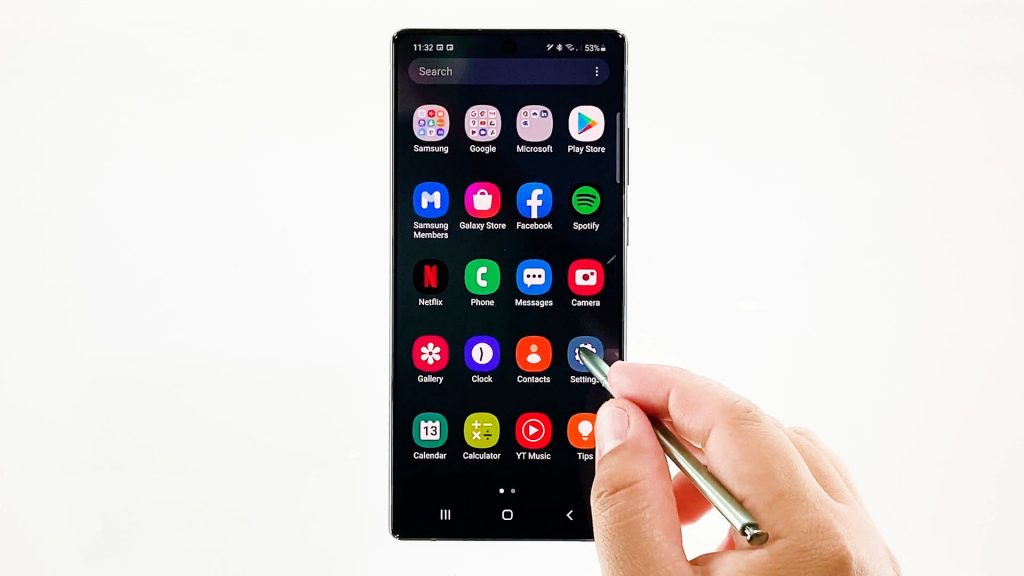
The next screen showing different app icons is called the Apps viewer. The icons you see here served as shortcut controls to access a certain app on your device.
2. Tap the Settings icon to proceed.
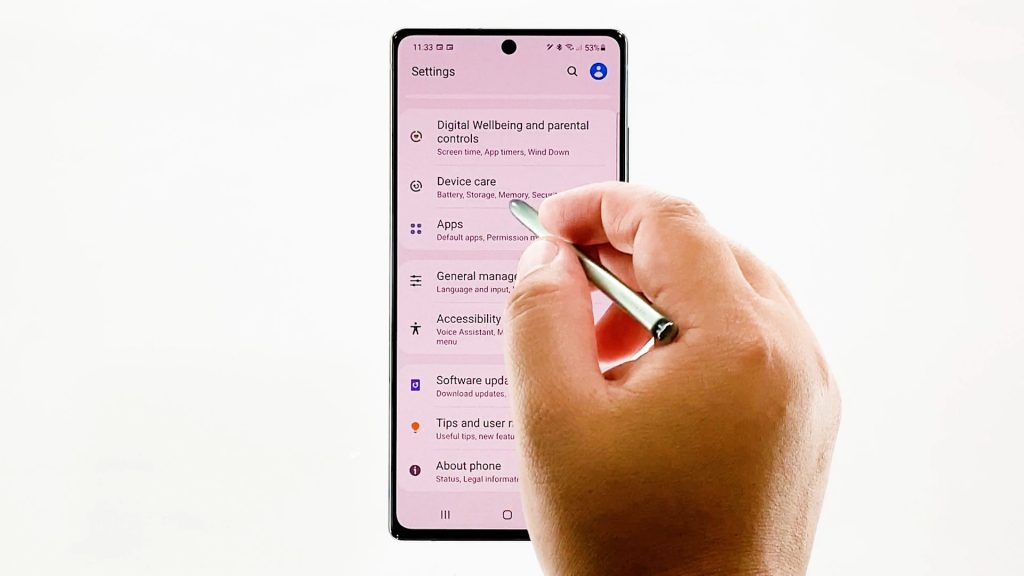
The settings menu will load up on the next display.
Here, you will see a list of basic and advanced features and settings to manage.
3. Scroll down to view more items. Then, tap Device Care.
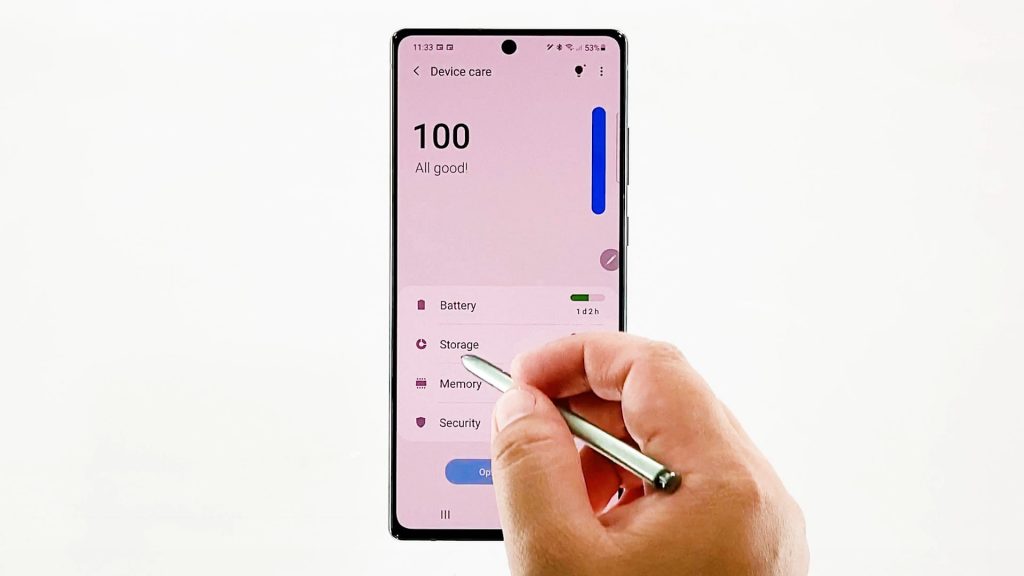
Another screen will launch with four main directories namely the Battery, Storage, Memory and Security.
4. Tap Storage to continue.
The Storage menu opens next. On this menu, you will see the amount of used and available memory on your device.
Different folders or directories are also lined up at the lower section.
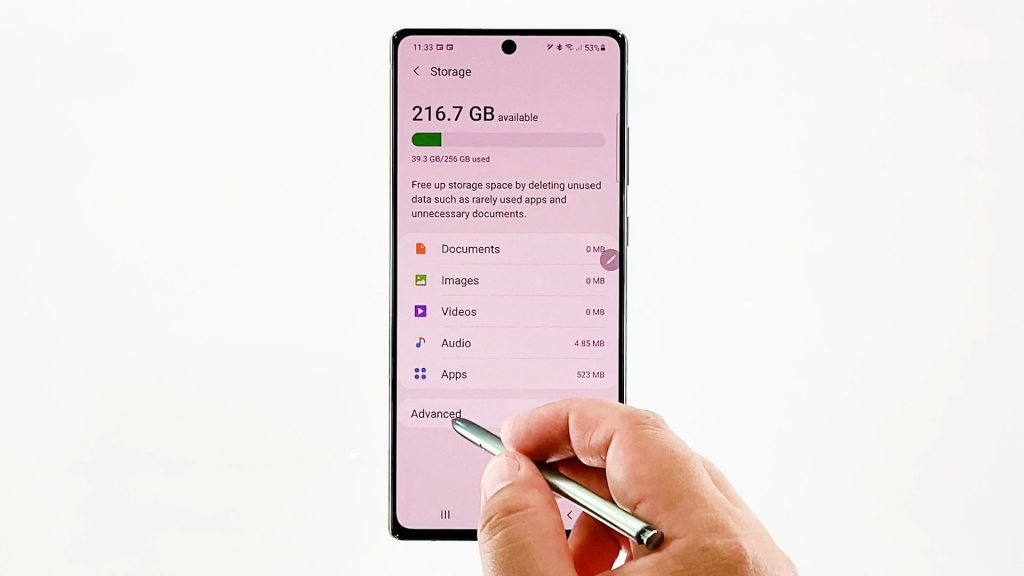
5. Tap Advanced to view more advanced memory components.
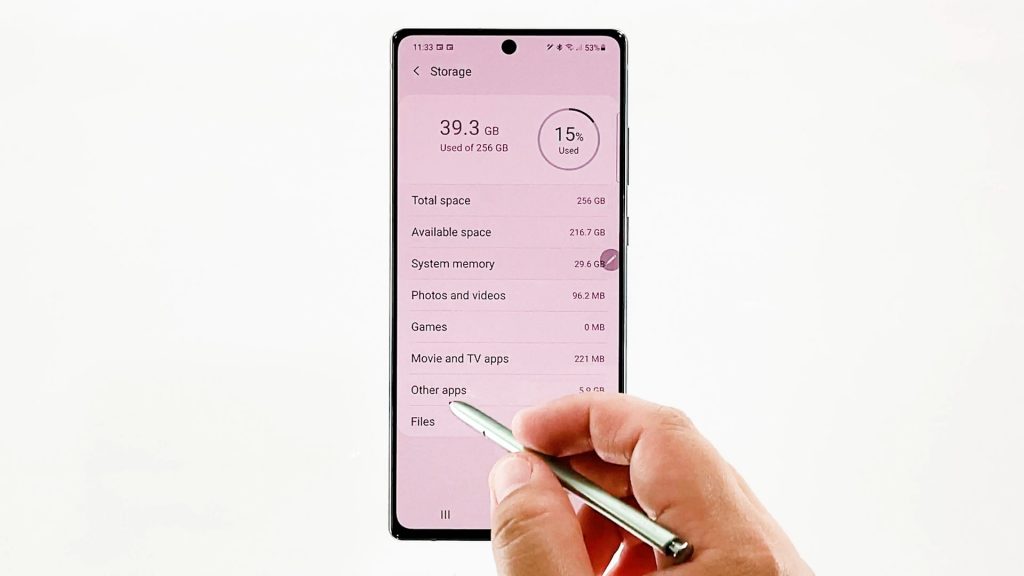
Another window opens with more memory details. Here, you will get a full grasp on how much memory space is used up by the system memory, photos and videos, games, movies, other apps and files.
6. To proceed with this demo, tap Other Apps.
A list of different apps will populate the next display.
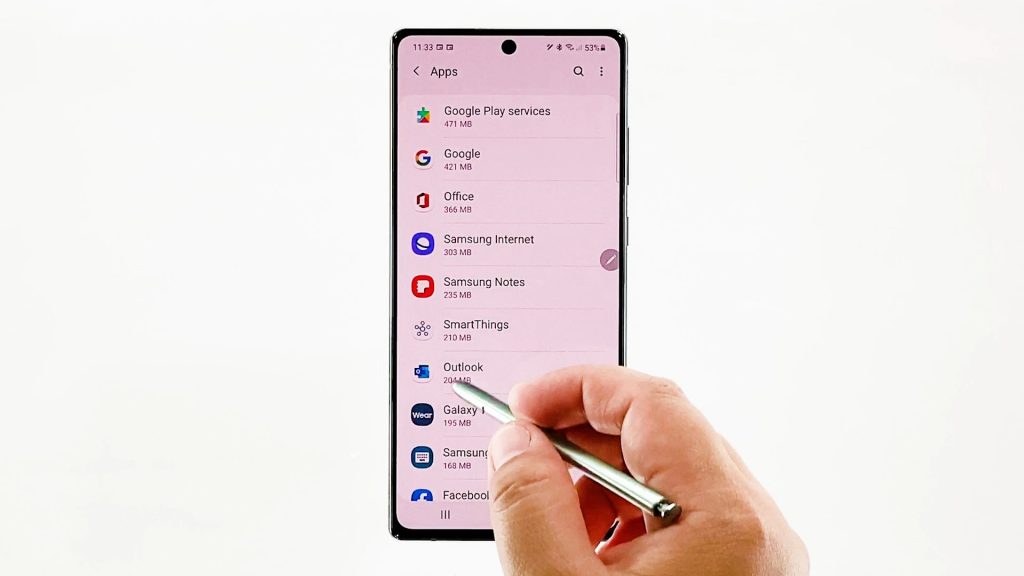
7. Scroll down or up to view the app that you’d like to clear temporary files on.
In this demo, we’ll select Outlook as an example so just tap the selected application to view more details of its memory consumption.
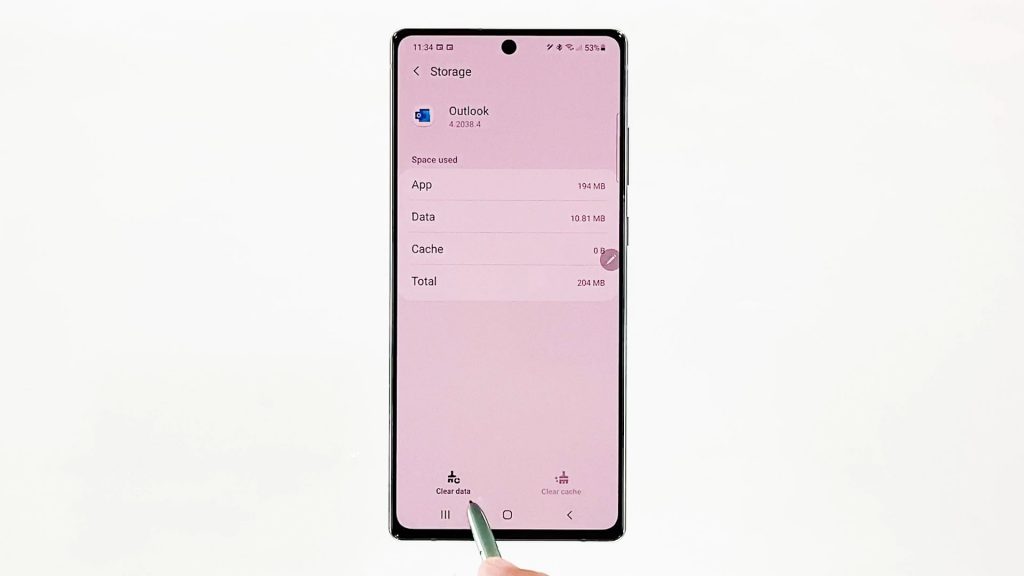
On the next screen, memory information will be displayed. At the bottom section, you’ll see the clear data and clear cache commands.
8. Tap Clear cache to instigate wiping of all stored temp files from the Outlook. All temporary files stored on the application including any corrupt information will then be erased except all saved information.
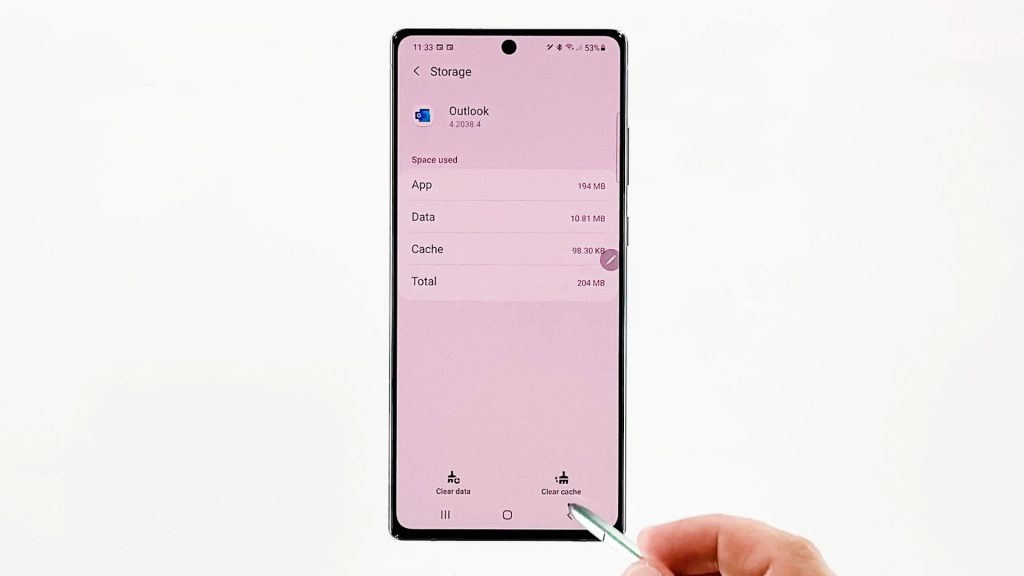
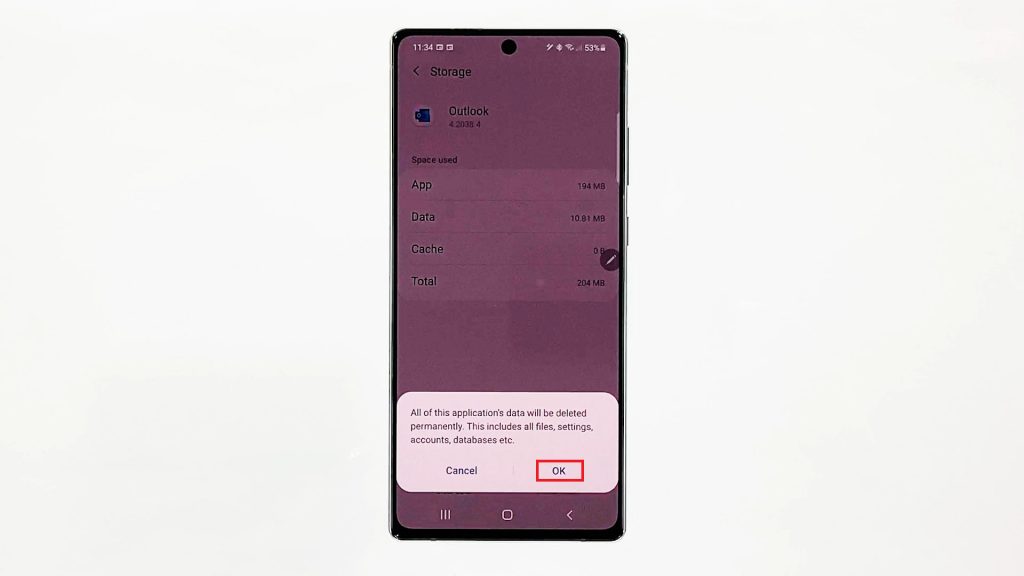
9. Tap Clear Data to permanently delete all stored information from the app including files, settings, accounts, logins, and others.
10. If prompted, read and review the information and then tap OK to confirm.
After the clearing process, the app will download every bit of information it needs like what it did the first time you used it.
Any app problems attributed to some erratic files or bugs in the app will then be rectified. To clear cache and data from other apps, just repeat the same steps.
Clearing all saved temporary files does not uninstall the app, so there’s no need to worry of having to re-download or reinstall the application.
And that covers everything in this quick demo.
More Video Tutorials
To view more comprehensive tutorials and troubleshooting videos on different mobile phones and tablets, feel free to visit The Droid Guy channel on YouTube anytime.
You might also want to read: