How To Reset Galaxy Buds 2 Pro
The Galaxy Buds 2 Pro can develop pairing glitches, audio dropouts, or charging inconsistencies over time. A reset — either a soft restart or a full factory reset — fixes the majority of these issues in under two minutes. This guide covers every reset method available as of 2026, including with and without a phone, plus troubleshooting steps if the reset itself doesn’t work.
When You Should Reset Your Galaxy Buds 2 Pro
Not every problem requires a reset. Here’s a quick reference so you don’t wipe your settings unnecessarily:
| Symptom | Try First | Reset Needed? |
|---|---|---|
| One earbud won’t connect | Re-seat in case, check battery levels | Soft restart first |
| Audio cutting in and out | Move away from Wi-Fi routers, check Bluetooth | Soft restart first |
| Both buds refuse to pair | Toggle Bluetooth off/on, forget device | Factory reset |
| Buds stuck on old phone after switching | Unpair from old device | Factory reset |
| ANC or Ambient Sound not working | Check Galaxy Wearable app settings | Factory reset if settings look correct |
| Firmware update failed or stuck | Close/reopen Galaxy Wearable app | Factory reset |
| Persistent static or distortion | Clean earbud speaker grilles with dry brush | Factory reset if cleaning doesn’t help |
Method 1: Soft Restart (No Data Lost)
A soft restart power-cycles the earbuds without erasing any settings, paired devices, or EQ customizations. This is the first thing to try for minor glitches like intermittent audio drops or a temporary pairing failure.
Before you start: Make sure both earbuds have at least 20% battery. You can check battery levels in the Galaxy Wearable app or by looking at the LED indicator on the charging case (green = good, red = low).
Steps
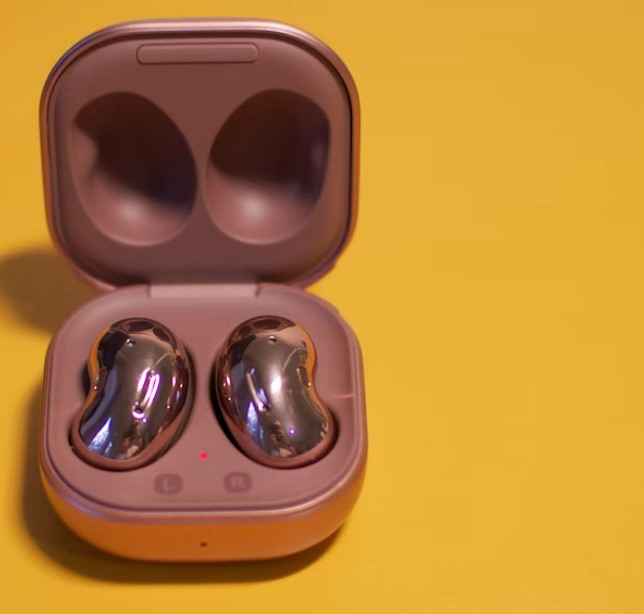
- Place both Galaxy Buds 2 Pro into the charging case.
- Close the lid completely.
- Wait at least 7 seconds — this lets the earbuds fully power down.
- Open the lid and remove the earbuds.
The buds will automatically restart and reconnect to the last paired device. Put them in your ears and test whether the issue is resolved.
What a soft restart does NOT do: It won’t erase your paired device list, EQ settings, noise cancellation preferences, or touch control customizations. It simply power-cycles the hardware, which clears temporary software glitches stored in RAM.
Method 2: Factory Reset via Galaxy Wearable App
A factory reset erases all settings and returns the buds to their out-of-box state. This is the most thorough reset option and the one Samsung officially recommends for persistent problems. You’ll need to re-pair and reconfigure everything afterward.
What gets erased: Paired device list, EQ settings, noise cancellation/Ambient Sound preferences, touch control assignments, 360 Audio configuration, and any firmware-level customizations.
What is NOT erased: Firmware updates. Your Galaxy Buds 2 Pro will keep whatever firmware version they’re currently running. You won’t need to re-download updates after the reset.
Requirements
- Android: Galaxy Wearable app (free on Google Play Store). Works on any Android phone running Android 8.0 or later.
- iOS (iPhone/iPad): Samsung Galaxy Buds app (free on App Store).
- The earbuds must be connected to the app when you initiate the reset. If they won’t connect, skip to Method 3 below.
Steps (Android — Galaxy Wearable App)
- Place both earbuds in the charging case and keep the lid open.
- Open the Galaxy Wearable app on your Android phone.
- Make sure the Galaxy Buds 2 Pro are connected (you’ll see them listed on the home screen).
- Tap Earbuds settings (scroll down if needed).
- Tap Reset.
- Tap Reset again to confirm.
- Wait for the process to complete — the earbuds will beep and the LED indicator will flash.
Steps (iOS — Galaxy Buds App)
- Place both earbuds in the charging case with the lid open.
- Open the Samsung Galaxy Buds app on your iPhone or iPad.
- Tap About Earbuds.
- Tap Reset.
- Tap Reset to confirm.
After the reset completes, close the case lid, wait 5 seconds, then open it again near your phone. The Galaxy Wearable app should detect the buds and prompt you to set them up as new.
Method 3: Hardware Reset Without a Phone
If your Galaxy Buds 2 Pro won’t connect to the Galaxy Wearable app — or if you don’t have access to your phone — you can reset them using just the touch sensors on the earbuds themselves.
Important note: Samsung’s official documentation states that a full factory reset requires the Galaxy Wearable app. The touch-sensor method below performs a hard restart that clears the connection state and can fix most pairing issues, but it may not wipe all settings the way an app-based factory reset does.
Steps
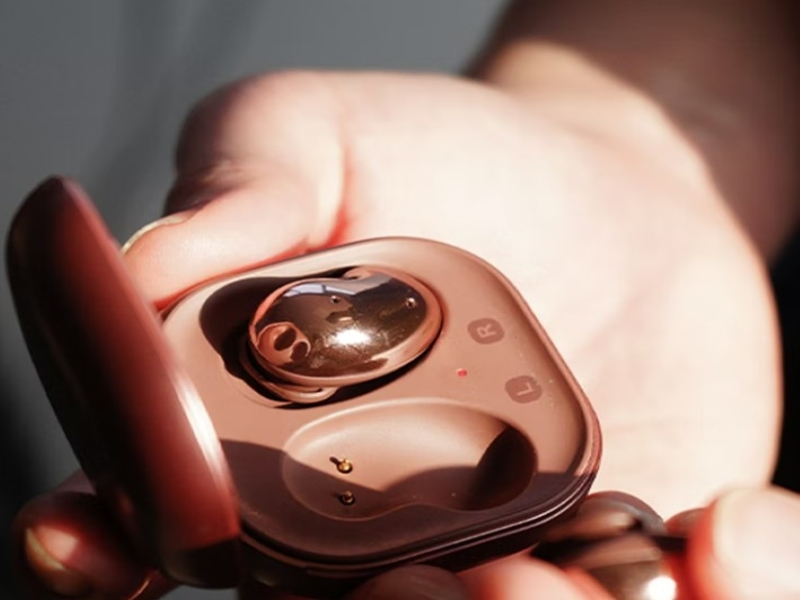
- Remove the earbuds from the charging case and put them in your ears.
- Press and hold the touch sensors on both earbuds simultaneously for at least 10 seconds, or until you hear a chime.
- Place the earbuds back in the charging case.
- Close the lid and wait at least 30 seconds.
- Open the lid near your phone or tablet and attempt to pair again.
If the earbuds don’t respond to touch (for example, if touch controls were previously disabled), place them in the case with the lid open and press and hold the touchpads on both earbuds for 15 seconds. The LED indicator should blink red and then turn white/green, indicating the reset was successful.
Re-Pairing a Single Earbud
Sometimes only one earbud acts up — it won’t sync, plays no audio, or shows a red battery indicator light while the other works fine. Before assuming the earbud is defective, try re-pairing.
Steps
- Open the Galaxy Wearable app and check the battery level of each earbud individually. If one is significantly lower, charge both buds fully before proceeding.
- If touch controls are disabled on your Galaxy Buds 2 Pro, re-enable them first: open Galaxy Wearable → Touch controls → toggle on.
- Place both earbuds in the charging case. If they’re already in the case, remove them and place them back.
- With the lid open, touch and hold both earbuds’ touchpads with two fingers.
- Wait for the indicator light to flash green for about 7 seconds. This confirms successful re-pairing between the two earbuds.
- Remove the buds and test them.
If the problem earbud still doesn’t work after re-pairing, check the charging contacts on both the earbud and inside the case for debris. Clean them gently with a dry, lint-free cloth or a soft brush. Moisture or earwax buildup on the contacts is one of the most common reasons a single earbud stops charging or connecting.
What to Do If Resetting Doesn’t Fix the Problem
Update the firmware first. Open Galaxy Wearable → Earbuds settings → Earbuds software update. Samsung released a stability-focused firmware update for the Galaxy Buds 2 Pro in 2025, so make sure you’re running the latest version.
Check for water damage. The Galaxy Buds 2 Pro are IPX7-rated (submersible in up to 1 meter of water for 30 minutes), but the charging case is not water-resistant. If the case got wet, the charging contacts may have corroded.
Try pairing with a different device. If the buds work fine with another phone or tablet, the issue is with your primary device’s Bluetooth stack, not the earbuds. On your primary device, go to Settings → Connections → Bluetooth, find the Galaxy Buds 2 Pro, tap the gear icon, and select Unpair. Then re-pair from scratch.
Contact Samsung Support. The Galaxy Buds 2 Pro come with a 1-year manufacturer warranty from the original purchase date. If your buds are still under warranty:
- Phone: 1-800-SAMSUNG (1-800-726-7864), available 24/7
- Online: Samsung Support — live chat and service request options
- In person: Schedule a walk-in appointment at a Samsung Experience Store or uBreakiFix by Asurion location
If you’re out of warranty and the buds are no longer worth repairing, the Samsung Galaxy Buds 3 Pro are the current-generation upgrade with improved ANC, Galaxy AI features like real-time language translation, and Bluetooth 5.4. For a budget-friendly replacement, you can still find the Galaxy Buds 2 Pro (refurbished) at a significant discount.